How to Draw a Skull Heart: Easy Step-by-Step Guide
Ready to create some spooky-cool art? This tutorial is perfect for artists ages 7 and up who want to combine edgy skull features with a classic heart shape. Grab your favorite pencil, an eraser, and a piece of paper, and let's bring this unique character to life together.
🎯 Final Result

Step-by-Step Instructions
Step 1: Sketching the Heart Base

Start by drawing a large heart shape in the center of your page. Instead of closing the bottom point, leave it open and draw a wavy, hook-like line. Teacher's Tip: Keep your pencil pressure light so you can easily adjust the shape if it looks a bit lopsided.
Step 2: Defining the Eye Sockets
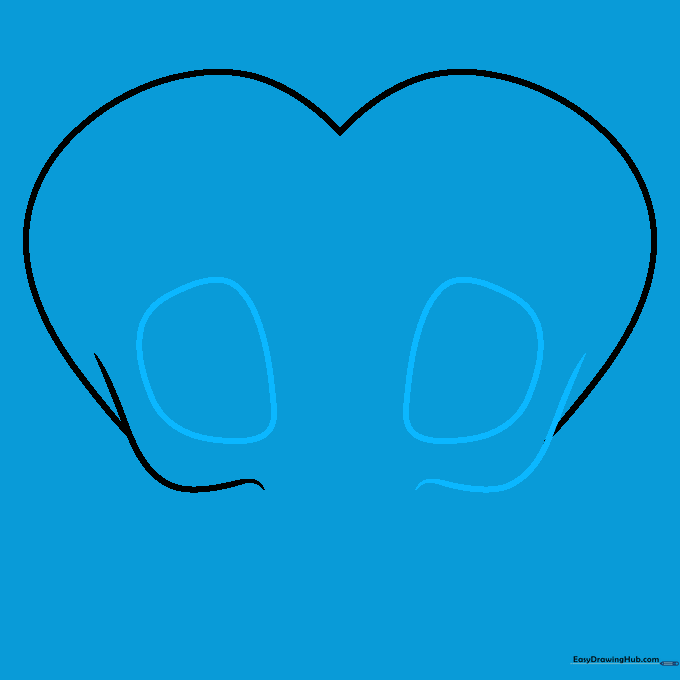
Mirror that wavy line on the right side to balance the skull's structure. Next, sketch two oblong shapes with rounded corners for the eye sockets. Teacher's Tip: Try to keep the eyes symmetrical so the skull looks balanced and intentional.
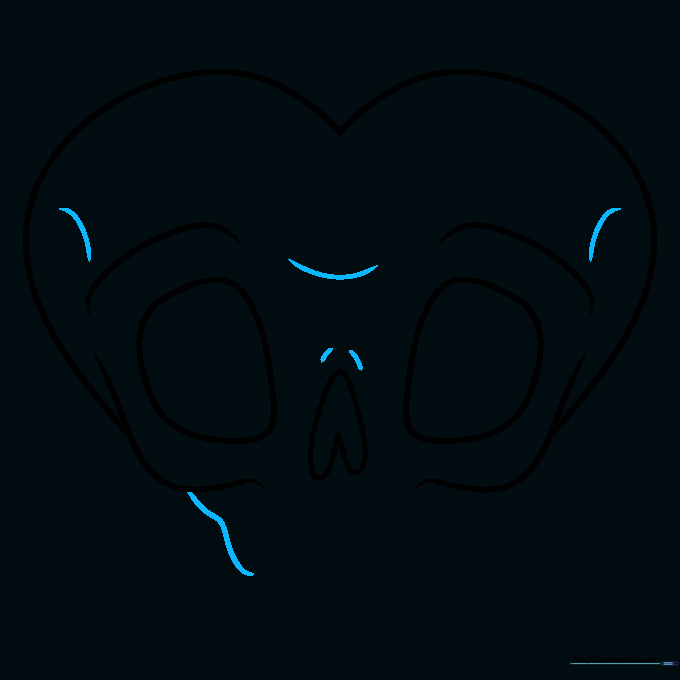
Step 3: Adding the Nose and Depth
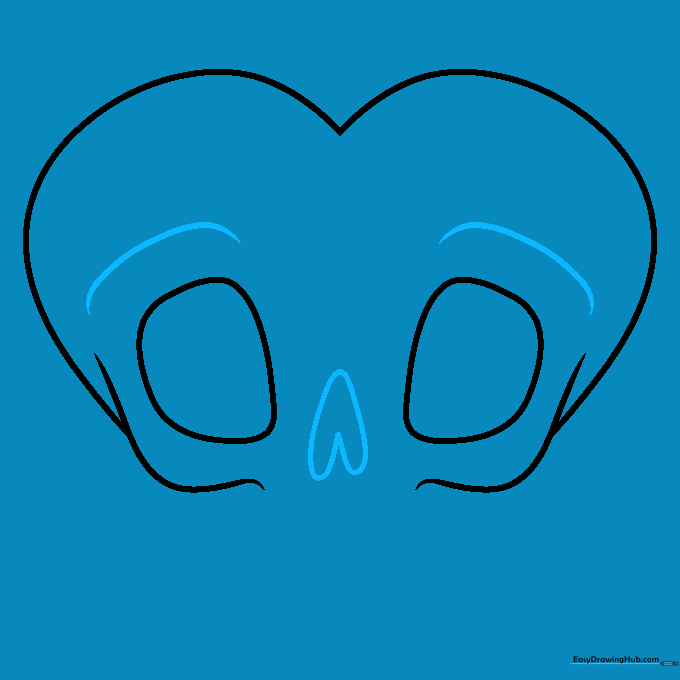
Draw an upside-down heart shape in the center for the nose. Add parallel lines above the eye sockets to create the appearance of a brow ridge. Teacher's Tip: Adding these small lines creates a 3D effect, making your drawing look much more professional.
Step 4: Sketching the Jawline
Add subtle contour lines throughout the skull to define its shape. On the bottom left, draw an uneven, jagged line to begin the jaw. Teacher's Tip: Don't worry about making the lines perfectly straight; skulls have natural, organic textures.
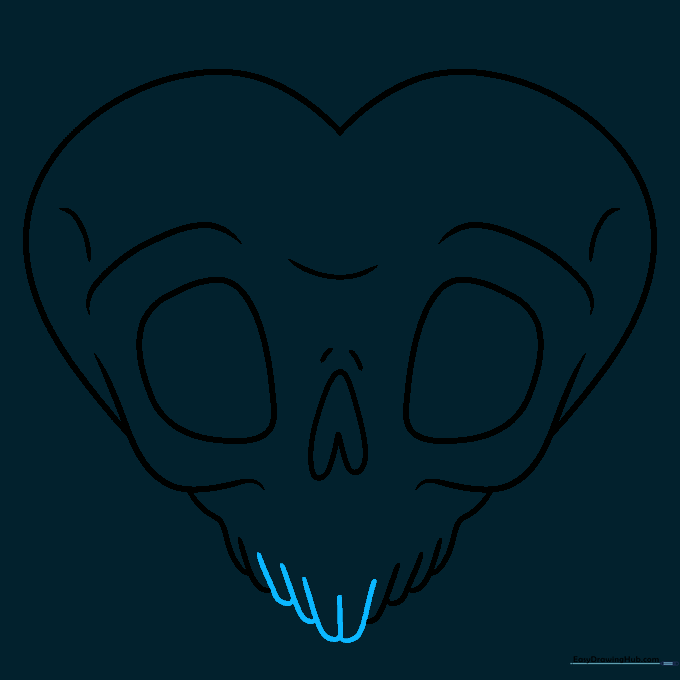
Step 5: Building the Teeth

Add a curve to the left side and mirror the jawline on the right. Now, draw loose, overlapping shapes that look like fingers—these will become the teeth! Teacher's Tip: Keep these shapes rounded to maintain a friendly, cartoon style.
Step 6: Completing the Jaw
Finish the jaw structure by adding more of those finger-like shapes on the left side. Teacher's Tip: Ensure the teeth shapes are roughly the same size so the jaw looks consistent.
Step 7: Enclosing the Teeth

Draw small 'hills' or arches above the finger shapes to enclose the teeth. This separates the teeth from the jawbone. Teacher's Tip: Use a steady hand to make these arches smooth.
Step 8: Balancing the Teeth

Repeat the process from Step 7 on the right side to finish the teeth. Teacher's Tip: Check your spacing—if one side looks crowded, you can erase and adjust before moving to the final outline.
Step 9: Adding Final Details

Add short, vertical lines between the teeth to give them depth and separation. Teacher's Tip: Keep these lines short so they don't overpower the drawing.
Step 10: Coloring Your Masterpiece

Go over your lines with a black pen. Color the skull in light gray, leaving the teeth white. Use dark gray for the eye sockets and nose to create a high-contrast, spooky effect. Teacher's Tip: Leave a tiny white space at the top of the skull to act as a highlight, making it look shiny!
More Tutorials


