How to Draw a Simple Monster: Easy 9-Step Guide for Kids
Ready to bring a friendly creature to life? This tutorial is perfect for young artists ages 5 and up. All you need is a pencil, an eraser, and a piece of paper to start building your own unique monster character.
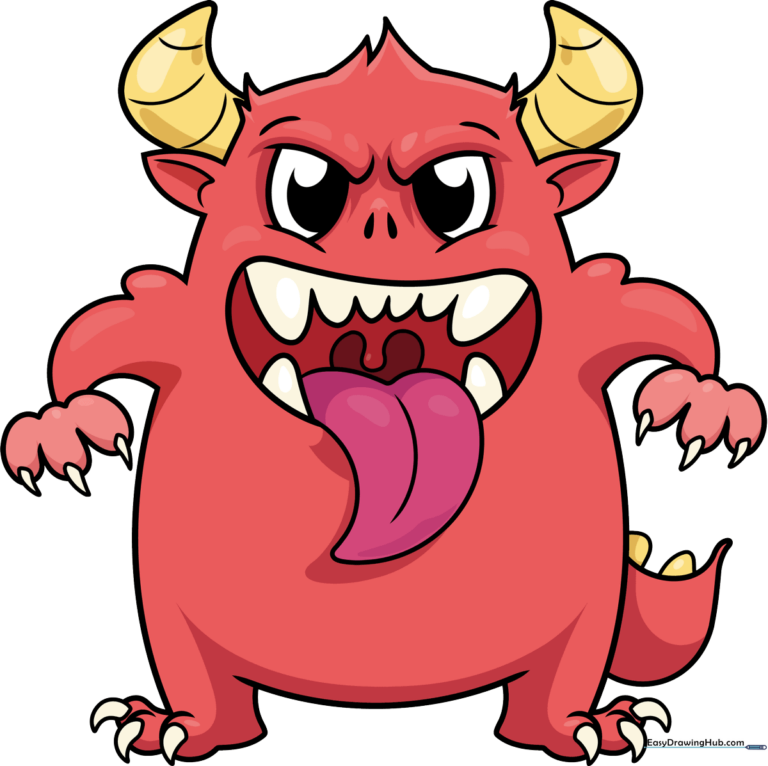
🎯 Final Result
Step-by-Step Instructions
Step 1: Sketching the Head Base
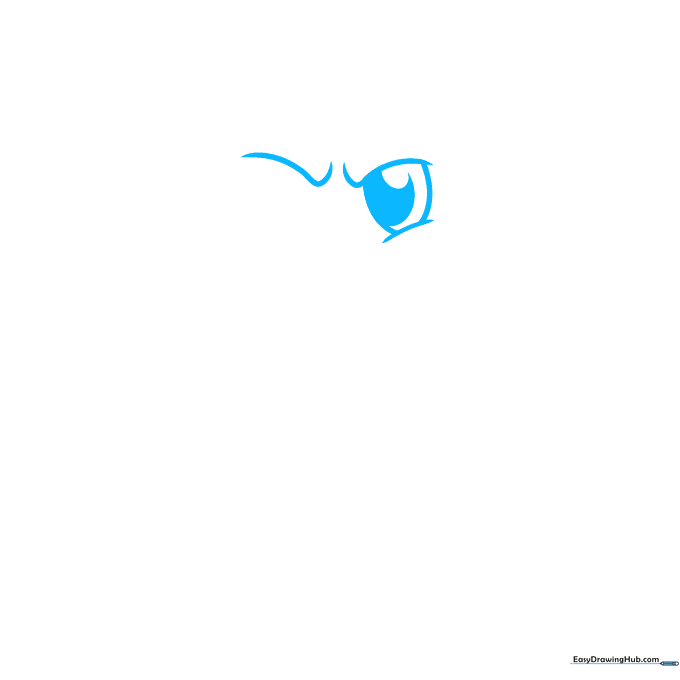
Draw a soft oval in the center of your paper. Tip: Keep it light! Add a small dash below it for the chin and two hook shapes on top for the eye sockets. Sketch a smaller oval inside each eye area to define the pupils.
Step 2: Defining the Face

Add two teardrop shapes for nostrils and a wide, curved line for the mouth. Tip: Leave a small gap at the bottom of the mouth line; this is where we will add the tongue later!
Step 3: Adding Teeth and Tongue
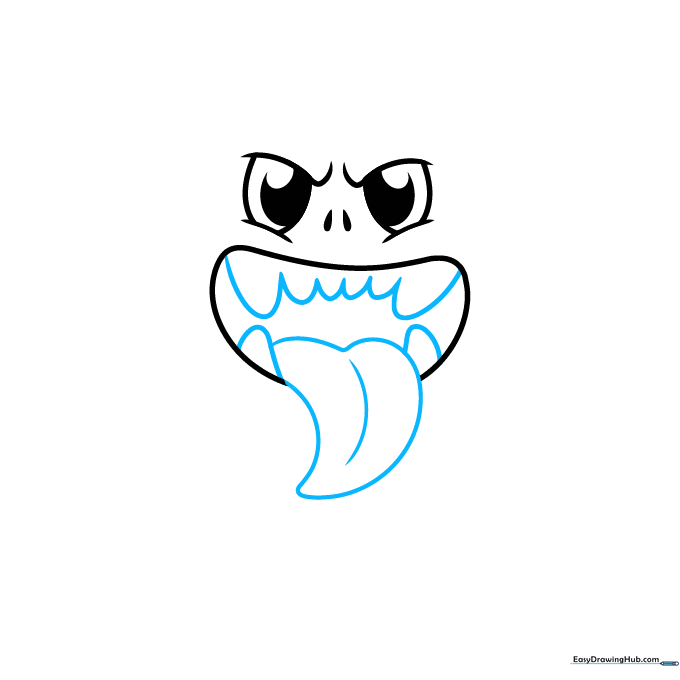
Draw a heart shape inside the mouth for the tongue. Add rounded triangles along the top and bottom for teeth. Tip: Make one tooth overlap the tongue to give your drawing a 3D, layered look.
Step 4: Ears and Head Details
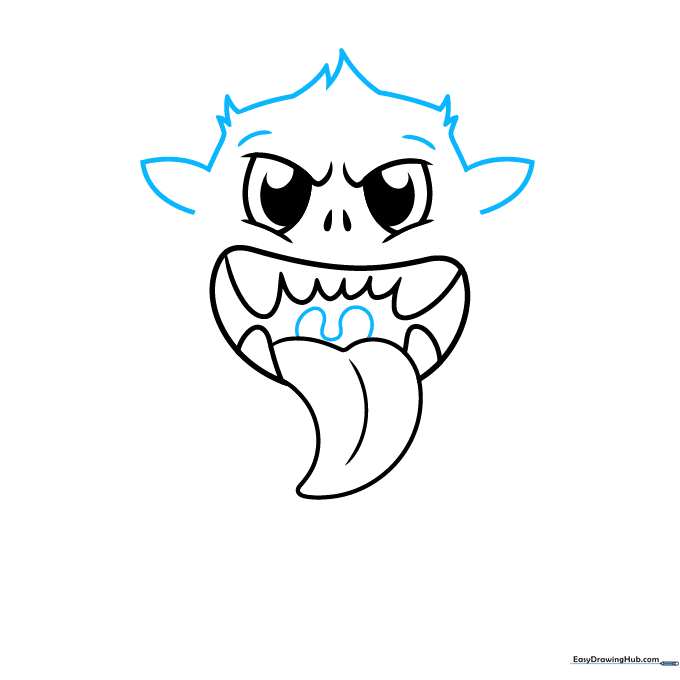
Sketch two triangles on the sides of the head for ears. Add small dashes above the eyes for eyebrows. Tip: Use straight lines to connect the triangles to the head for a clean, sharp look.
Step 5: Horns and Arms
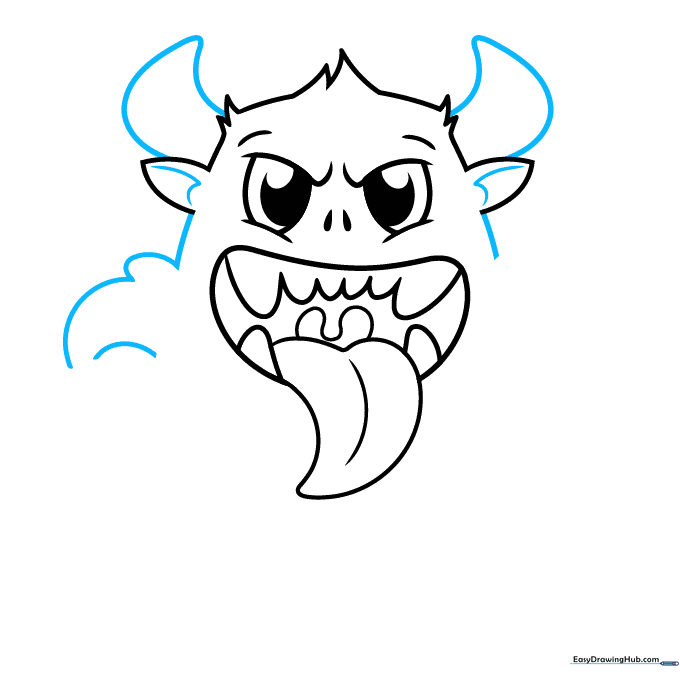
Draw curved triangles on top of the head for horns. Add hooks inside the ears. For the arms, sketch a small curve followed by a larger one on the side of the body. Tip: Keep your arm curves fluid to make the monster look friendly, not stiff.
Step 6: Fingers and Claws
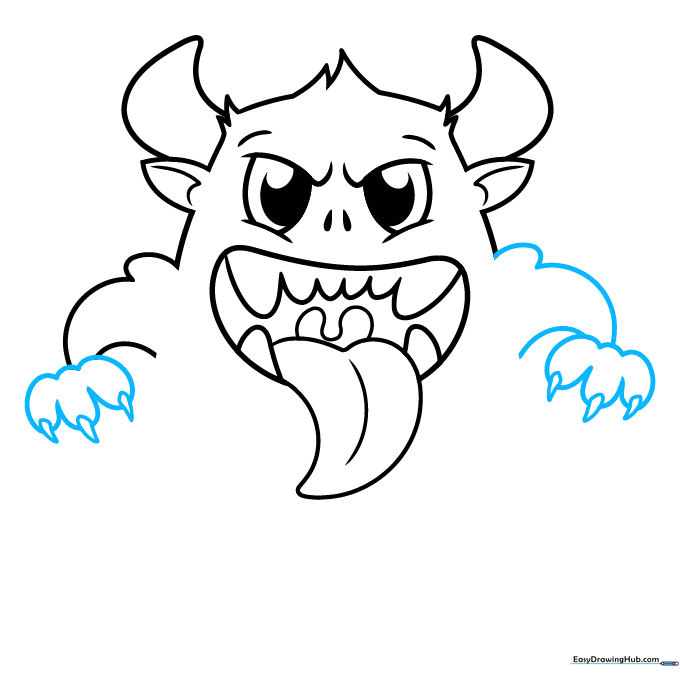
Draw small ovals at the end of the arms for fingers. Add tiny triangles to the tips for claws. Tip: Don't worry if the fingers aren't perfectly even; monsters have all sorts of hand shapes!
Step 7: The Body and Feet
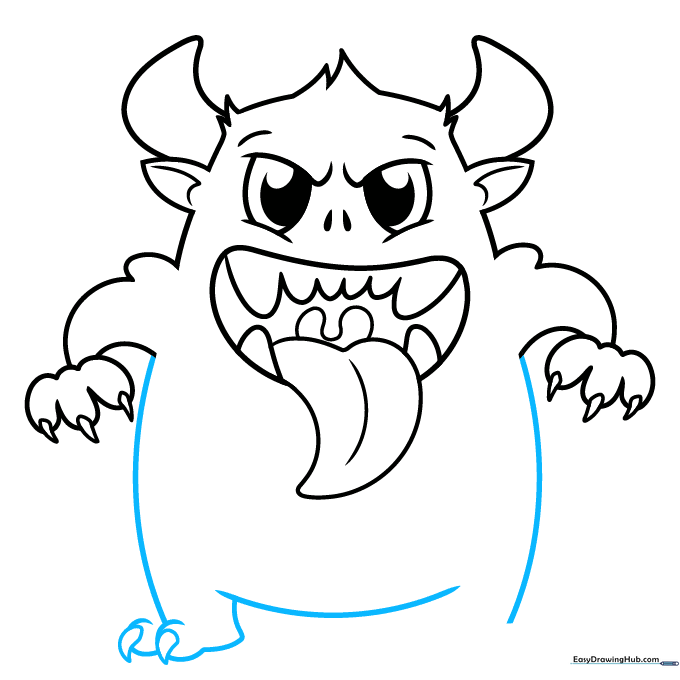
Outline the body with two long, sweeping curves. Add feet at the bottom using overlapping circles and triangles. Tip: Connect the right foot to the body with a backward L-shape to show the leg position.
Step 8: Finishing the Feet
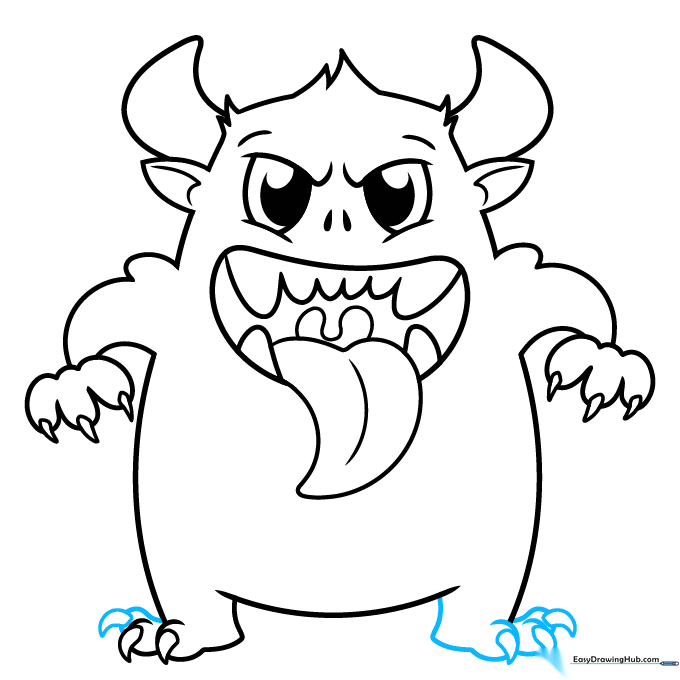
Add a third toe to each foot using an oval and a triangle. Ensure the toes overlap slightly to create depth. Tip: Check that your monster's feet look balanced so it doesn't look like it's going to tip over!
Step 9: Tail and Final Outline
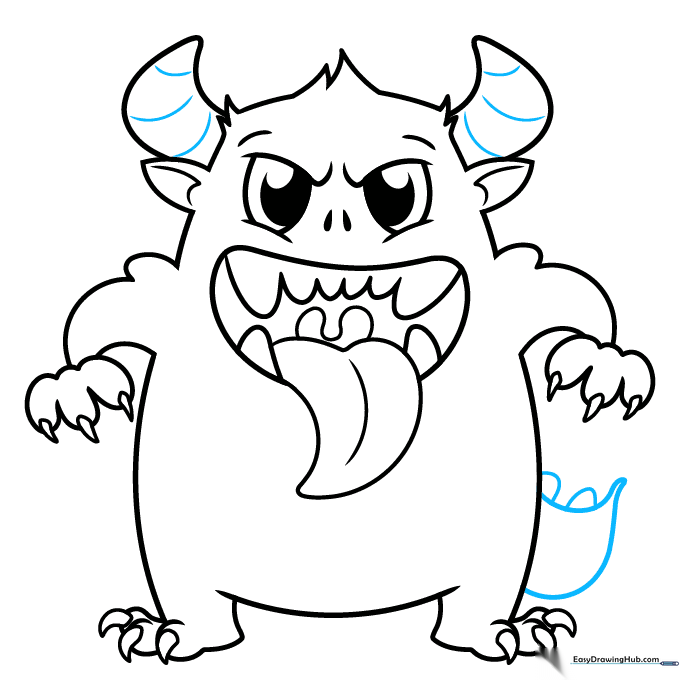
Draw a triangular tail with small spikes. Go over your final lines with a black marker. Tip: Fill in the pupils and nostrils with solid black to make the monster's face pop.
Step 10: Adding Color
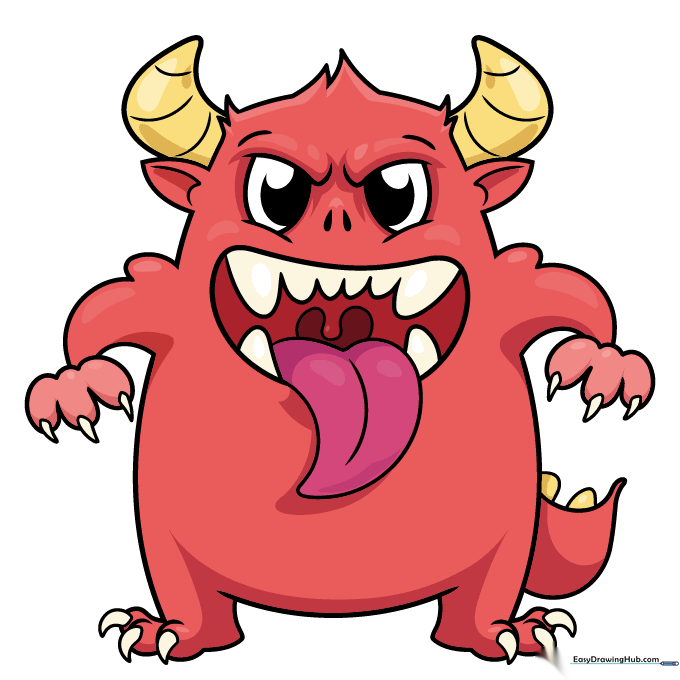
Bring your monster to life! Use bright red for the body, yellow for the horns, and pink for the tongue. Tip: Use lighter shades for the fingers to create contrast against the body.
More Tutorials


