How to Draw a Simple Flower: Easy 10-Step Guide
This simple flower tutorial is designed for young artists and beginners looking to build confidence with basic shapes. You only need a pencil, an eraser, and a piece of paper to get started. Follow these steps to master the art of drawing organic, curved lines while creating a cheerful floral masterpiece.
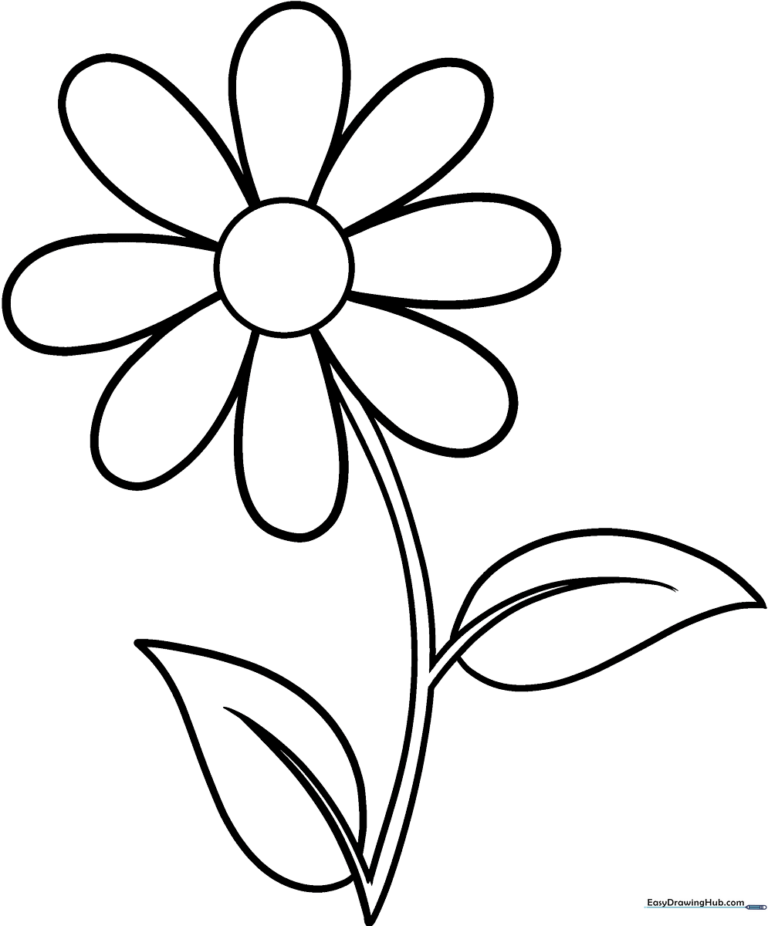
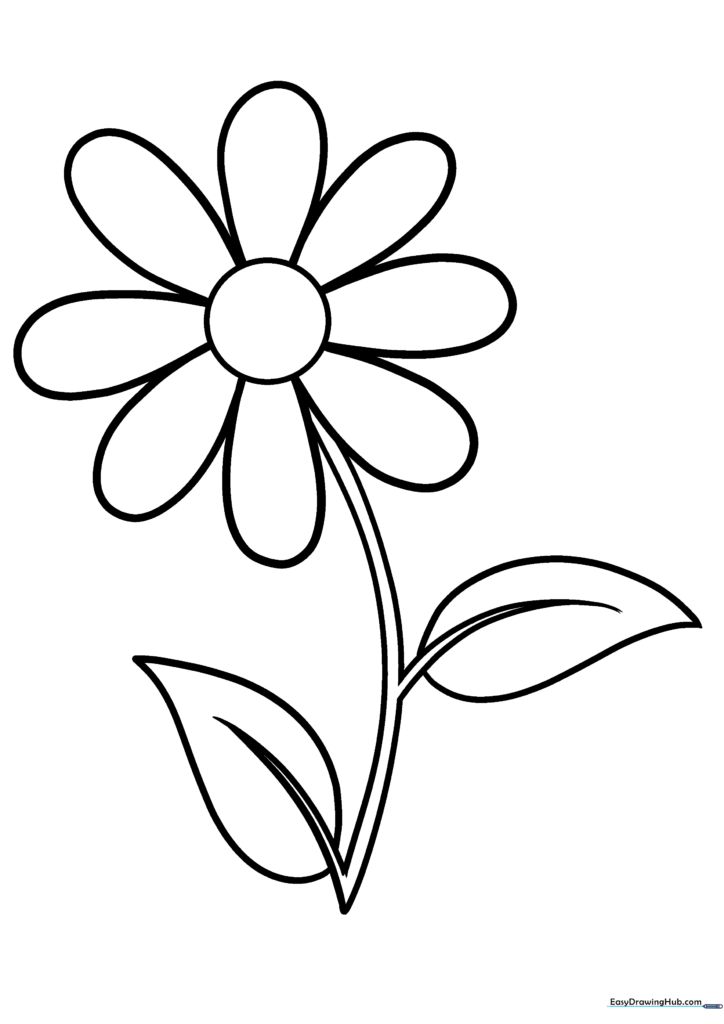
🎯 Final Result
Step-by-Step Instructions
Step 1: Sketching the Center

Draw a small, neat circle in the middle of your paper. Teacher's Tip: Keep this circle about the size of a quarter; it acts as the anchor for all your petals.
Step 2: Starting the First Petals

Add your first few petals by drawing curved 'U' shapes attached to the center circle. Teacher's Tip: Try to space them out evenly to keep the flower balanced.
Step 3: Filling the Bloom
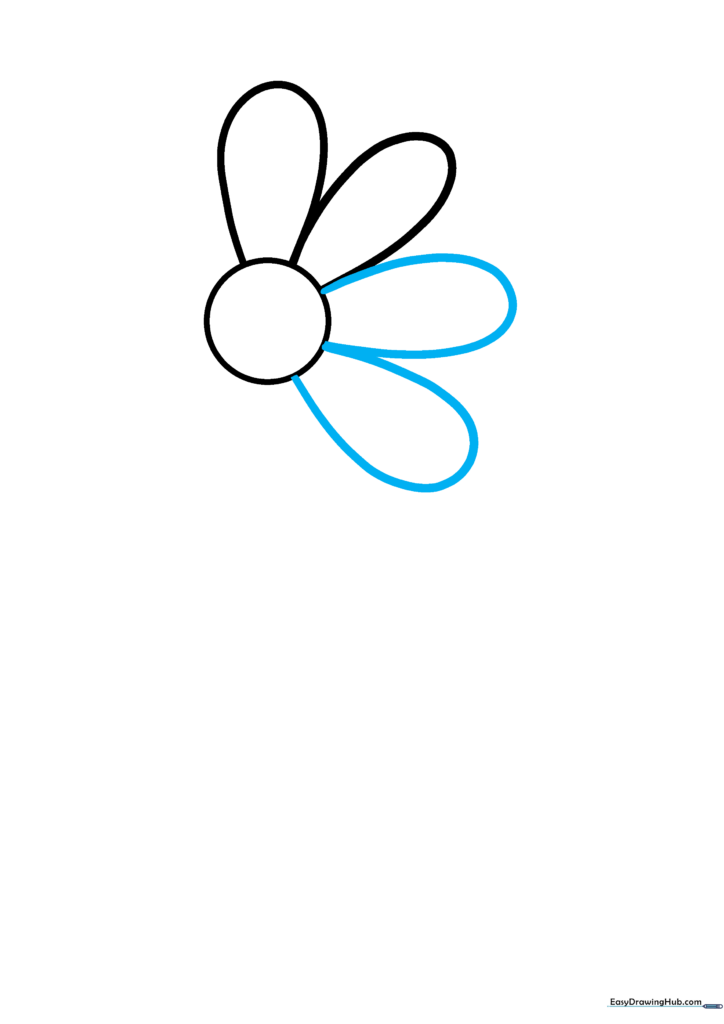
Continue adding more 'U' shaped petals around the center. Teacher's Tip: Don't worry if they overlap slightly; that makes the flower look more natural and full.
Step 4: Expanding the Petals
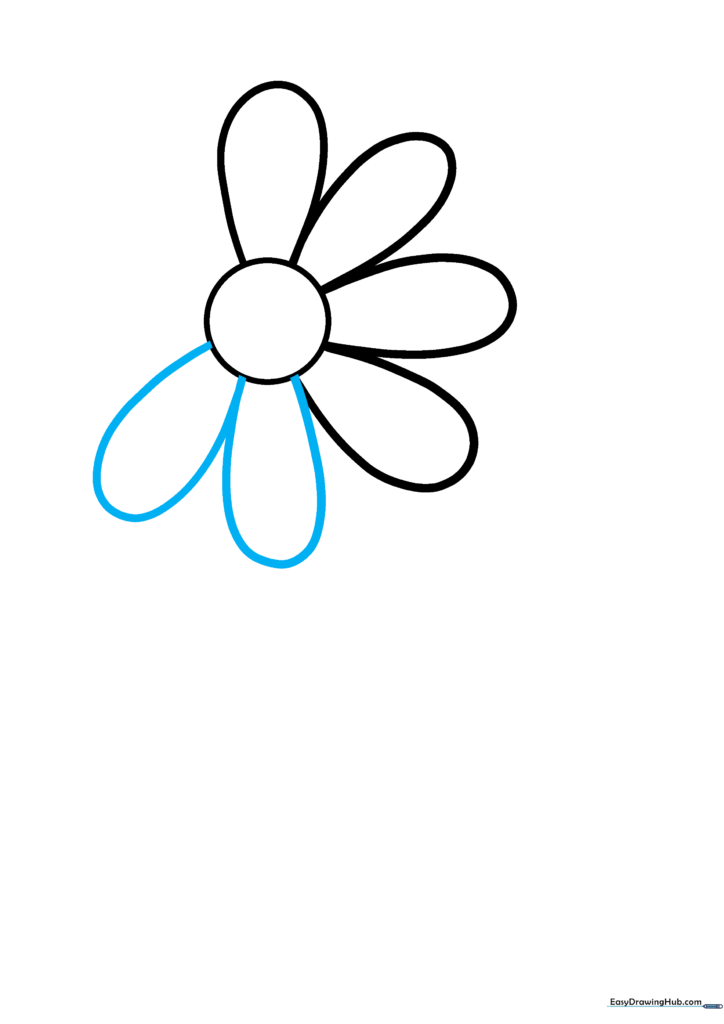
Add two more petals to the sides. Teacher's Tip: Use a fluid motion with your wrist to get that nice, smooth curve on the 'U' shape.
Step 5: Finishing the Flower Head
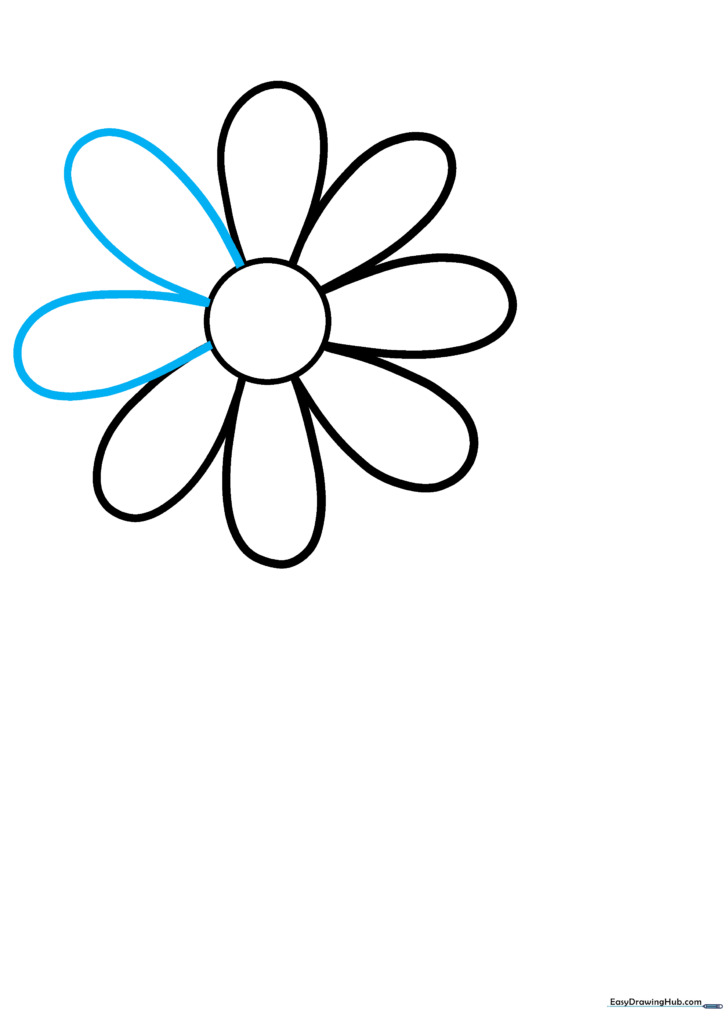
Draw the final two petals to complete the circle of the flower head. Teacher's Tip: Check that your flower head looks round before moving on to the stem.
Step 6: Drawing the Stem
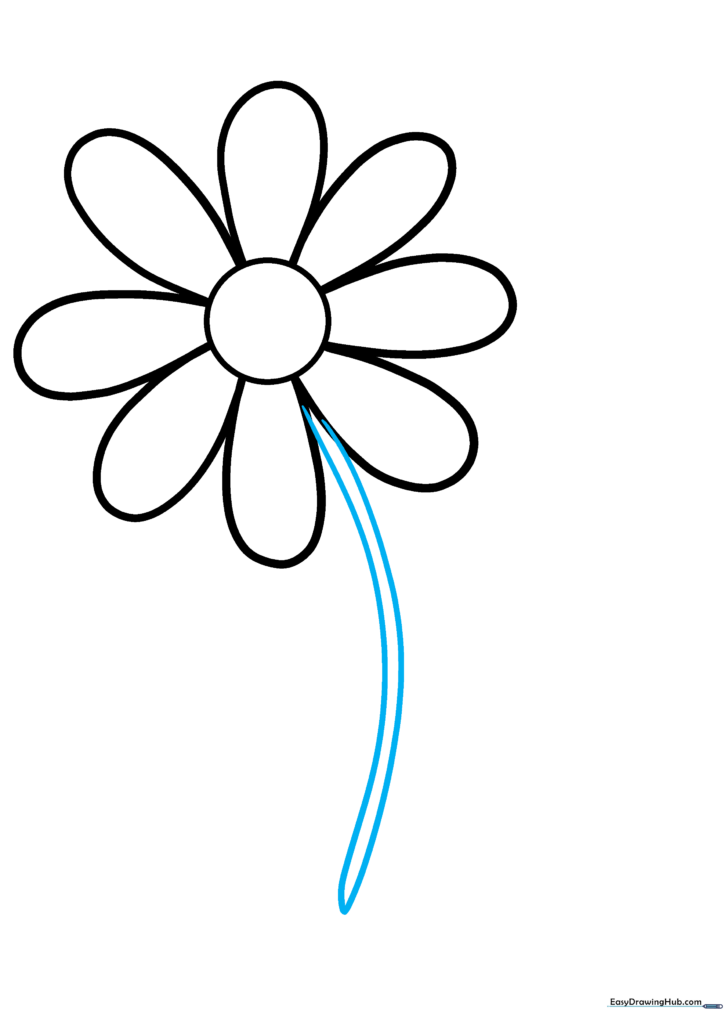
Draw two long, parallel curved lines extending downward from the flower head. Teacher's Tip: Keep the lines close together so the stem looks sturdy.
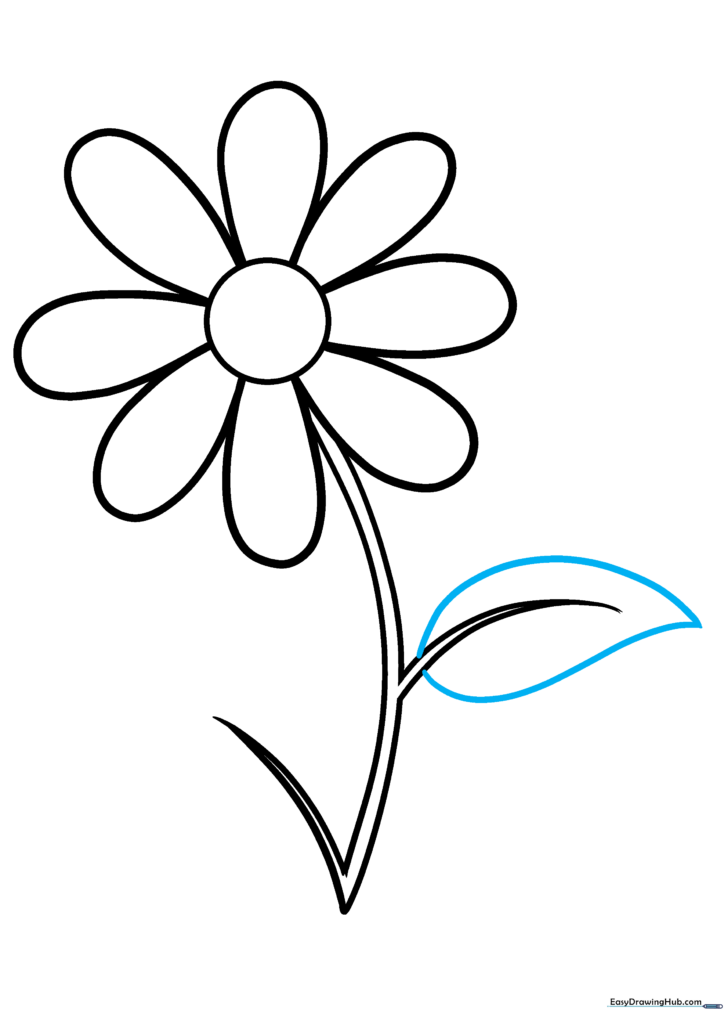
Step 7: Adding Leaf Veins

Sketch two curved lines on the side of the stem, meeting at a sharp point. Teacher's Tip: This creates the 'skeleton' of your leaf.
Step 8: Shaping the First Leaf
Draw a teardrop shape around the first leaf vein. Teacher's Tip: Ensure the leaf connects smoothly to the stem.
Step 9: Completing the Foliage
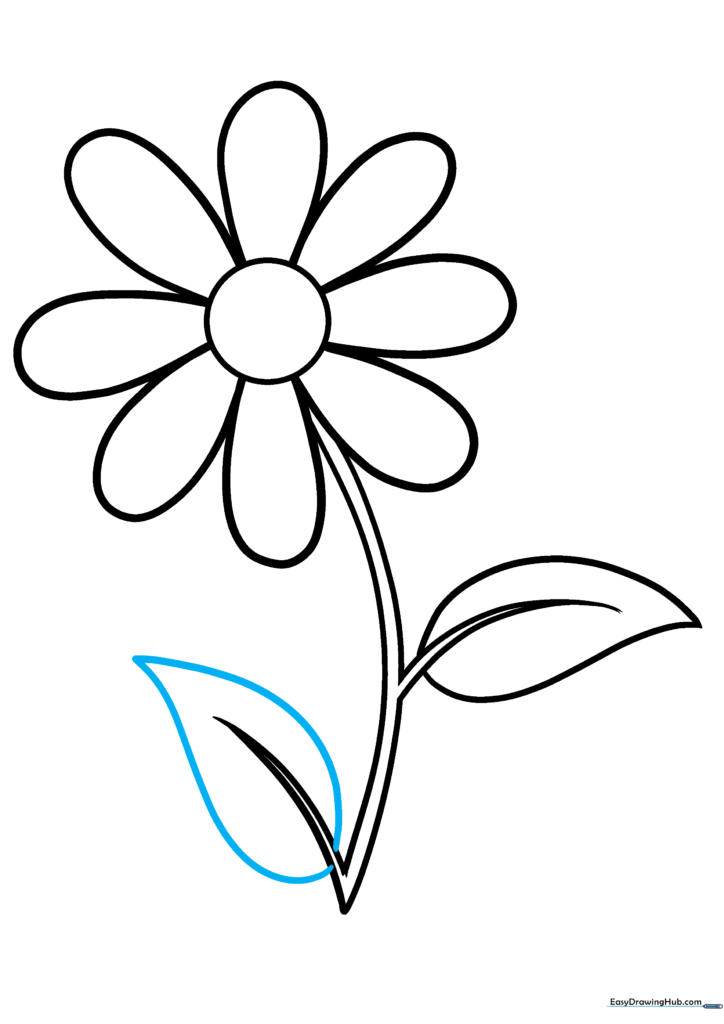
Repeat the process for the second leaf. Teacher's Tip: Try to make this leaf look symmetrical to the first one for a balanced look.
Step 10: Adding Color
Bring your flower to life with color! Use bright yellows for the center and your favorite colors for the petals. Teacher's Tip: Use light green for the stem and leaves to make the blossom pop.
More Tutorials


