How to Draw a Superhero Shadow: Easy Step-by-Step Guide
Ready to bring a superhero to life? This tutorial is perfect for young artists ages 7+ looking to master character proportions and the concept of light and shadow. All you need is a pencil, an eraser, and a piece of paper to get started on this fun, screen-free creative project.
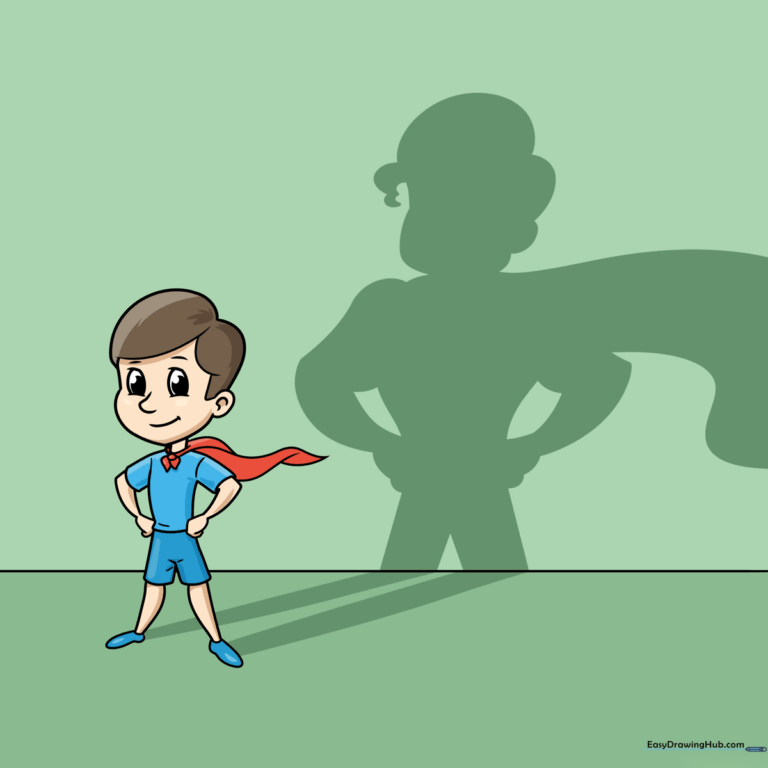
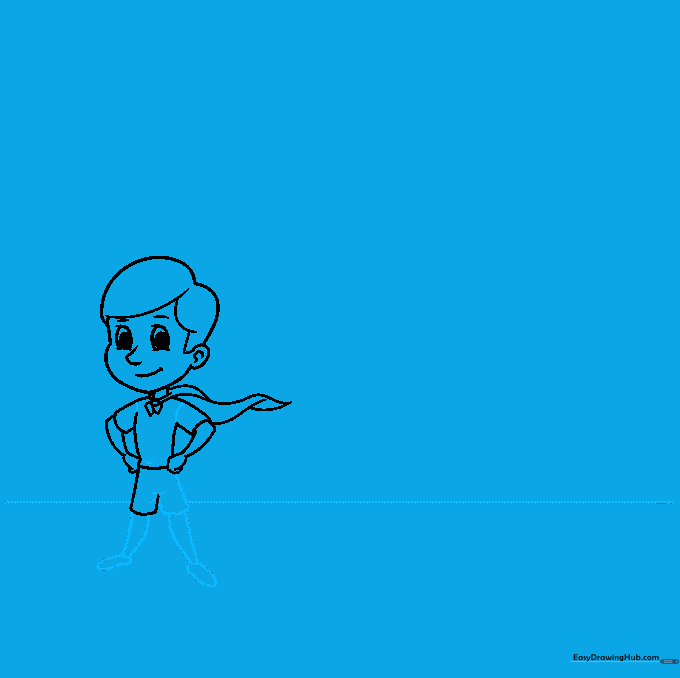
🎯 Final Result
Step-by-Step Instructions
Step 1: Sketching the Head

Draw a light circle for the head, then add curved lines for the hair, ears, and chin. Teacher's Tip: Keep your pencil pressure light so you can easily erase the overlapping hair lines later!
Step 2: Defining Facial Features
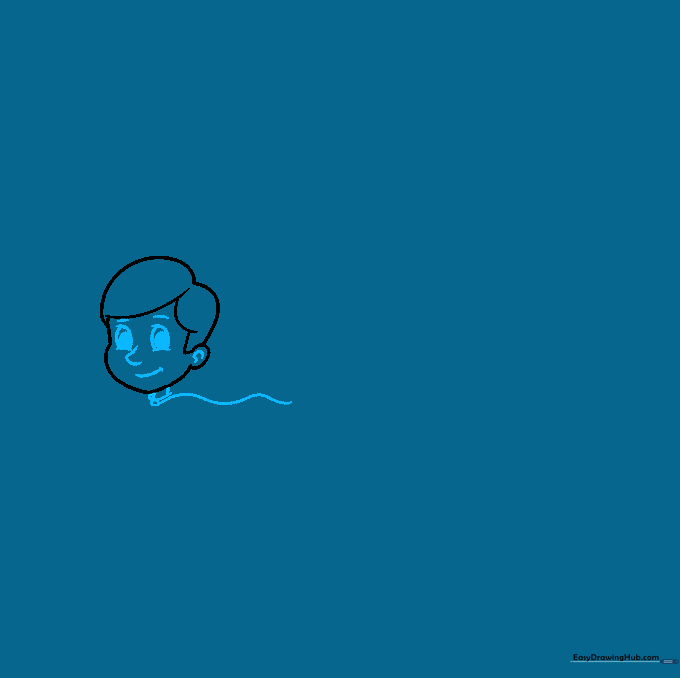
Add the eyes, eyebrows, nose, and mouth using simple curved lines. Shade the pupils to give your character expression. Then, draw the neck and the start of the cape. Tip: Use a mirror to look at your own facial proportions for reference!
Step 3: Torso and Cape Details
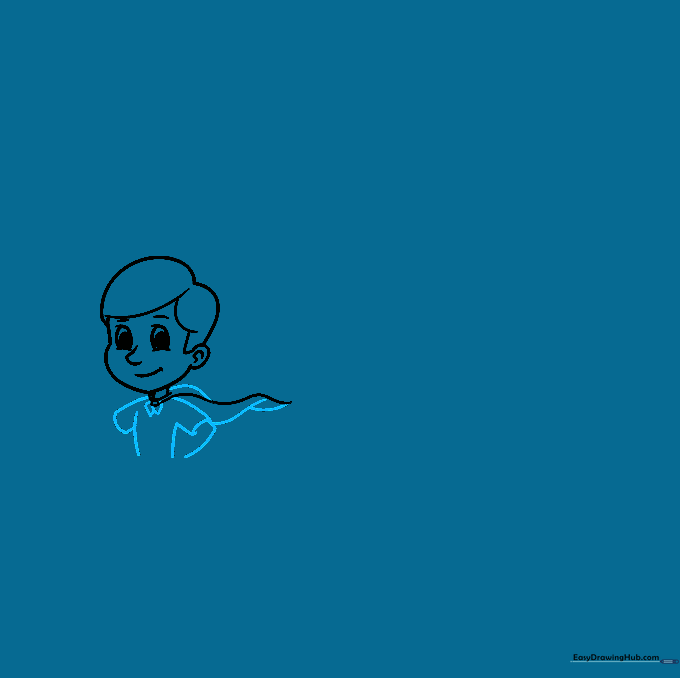
Outline the 'T' shape of the shirt and the arms. Add inverted triangles at the neck to show where the cape is knotted. Tip: Focus on making the cape look like it's flowing by using overlapping, wavy lines.
Step 4: Arms and Shorts
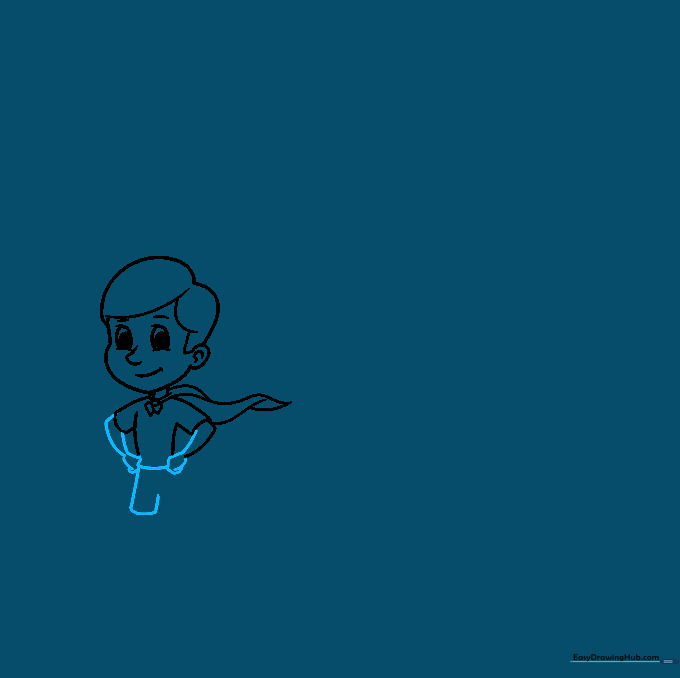
Complete the arms and hands, then draw the rectangular shape for the shorts. Tip: Keep your lines smooth; if you make a mistake, just gently dab it with your eraser.
Step 5: Legs and Ground Line
Draw the legs and shoes. Add a straight horizontal line behind the character to represent the ground. Tip: This horizon line is essential for placing your shadow correctly in the next steps!
Step 6: Starting the Shadow Head
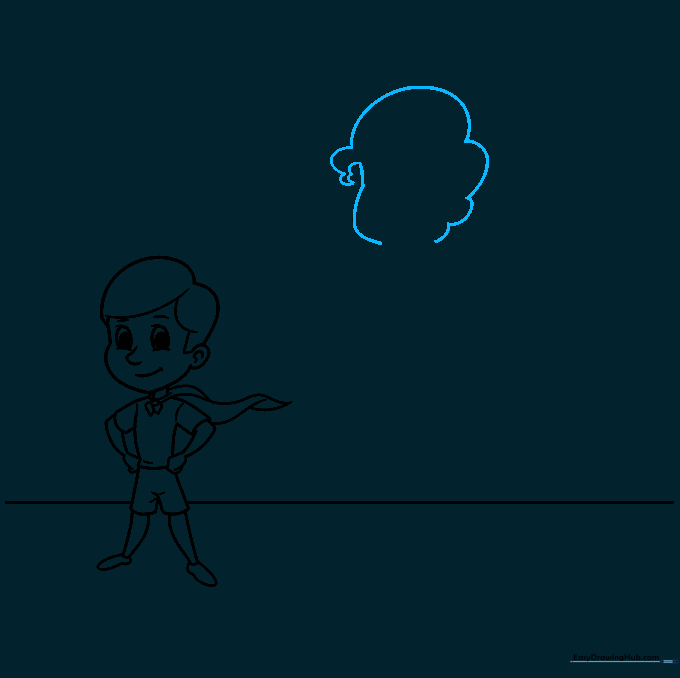
Begin the shadow by drawing a silhouette of the head. Don't forget the classic superhero curl on the forehead! Tip: Think of this as a solid shape rather than a detailed face.
Step 7: Shadow Arms and Torso
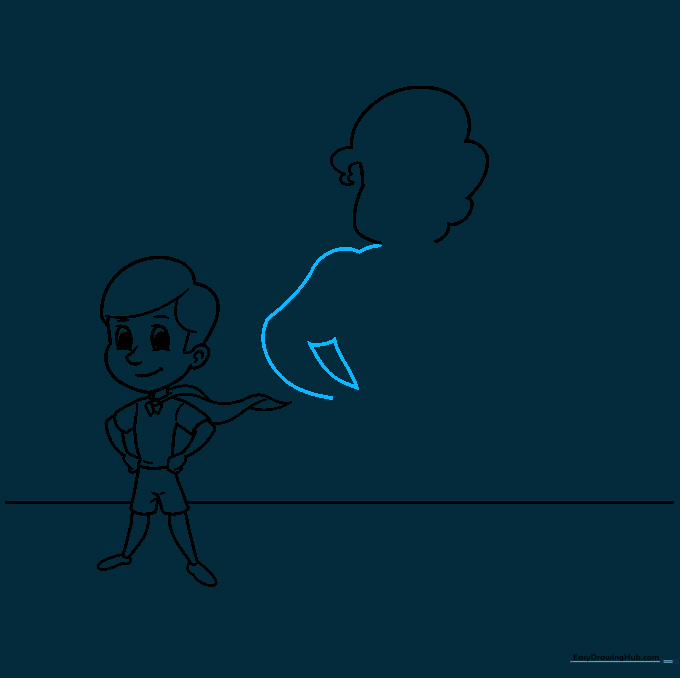
Outline the shadow's arm and shoulder using curved lines. Add an inverted triangle to define the torso. Tip: Keep the shadow shape slightly simplified compared to the main character.
Step 8: Shadow Cape Details
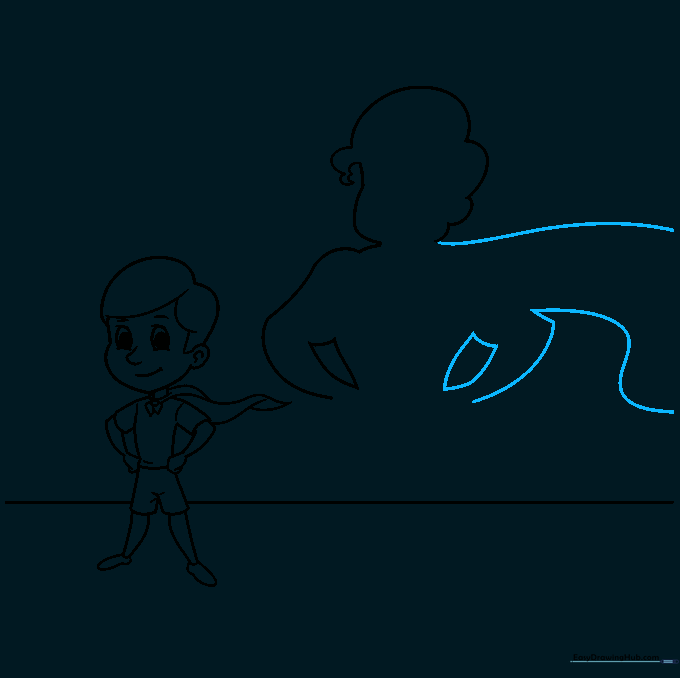
Draw the flowing cape for the shadow using long, curved lines. Add wave-like shapes to show movement. Tip: Imagine the wind is blowing the cape to give it a dynamic look.
Step 9: Completing the Shadow
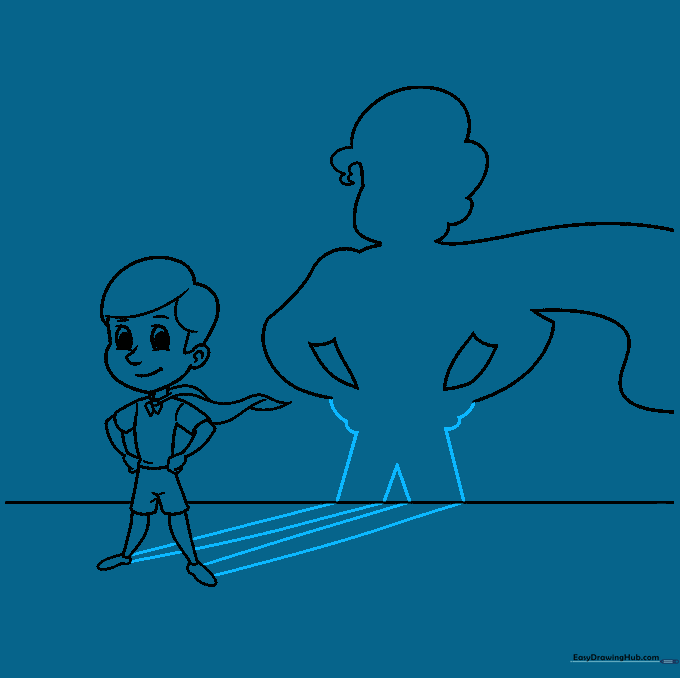
Draw the fists at the hips and the legs extending to the horizon line. Connect everything to finish the silhouette. Tip: Ensure the shadow's feet touch the ground line to make it look grounded.
Step 10: Adding Color
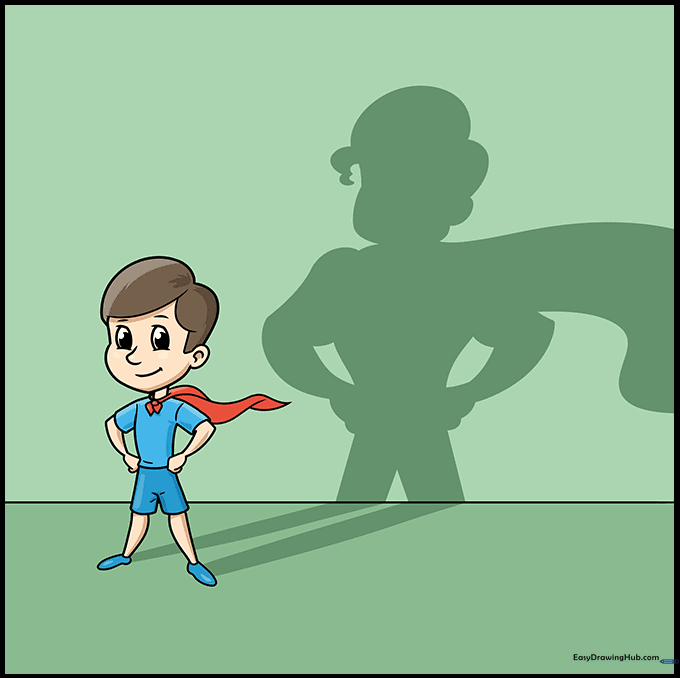
Bring your drawing to life with color! Use bold colors for the superhero and dark grey or black for the shadow. Tip: Try coloring the shadow with a light grey pencil first, then layer a darker grey over it for depth.
More Tutorials


