How to Draw a Scarlet Macaw: Easy 9-Step Guide
Bring the rainforest to your sketchbook with this friendly Scarlet Macaw tutorial. Designed for young artists ages 5 and up, this screen-free activity requires only a pencil, paper, and your favorite markers. Follow along to master basic shapes and feather textures while creating a colorful tropical masterpiece.
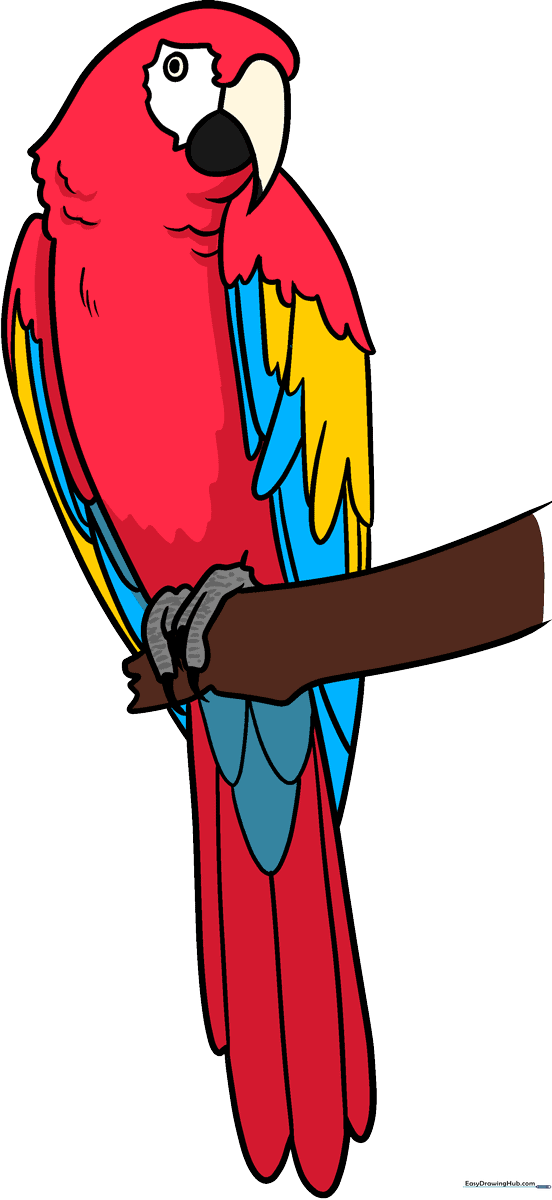
🎯 Final Result
Step-by-Step Instructions
Step 1: Sketching the Beak and Eye
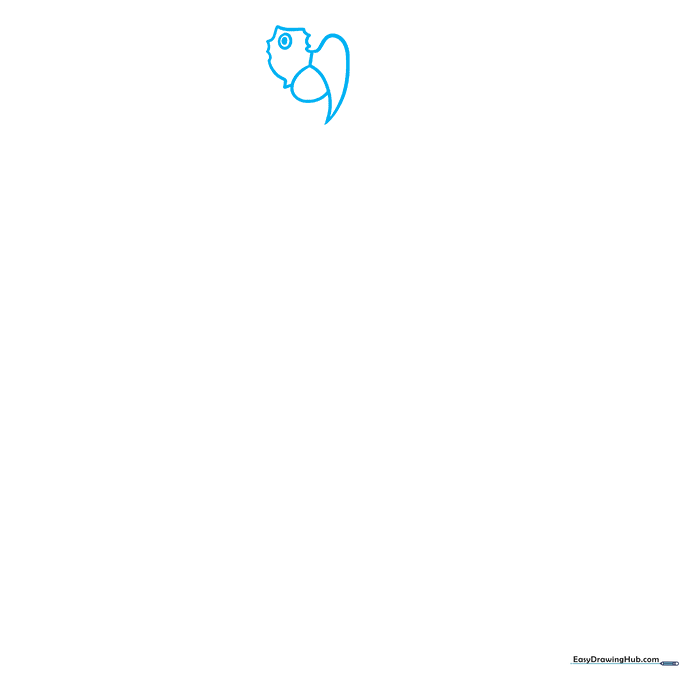
Start by drawing the macaw's powerful beak using two curved lines that meet at a sharp point. Next, outline the eye area with a jagged, irregular shape. Tip: Keep your pencil lines light here so you can easily refine the beak shape later.
Step 2: Defining the Head and Neck
Draw the top and back of the head using smooth, rounded lines. At the base of the neck, add short, wavy lines to suggest soft feathers. Tip: Vary the length of your wavy lines to make the feathers look more natural and fluffy.
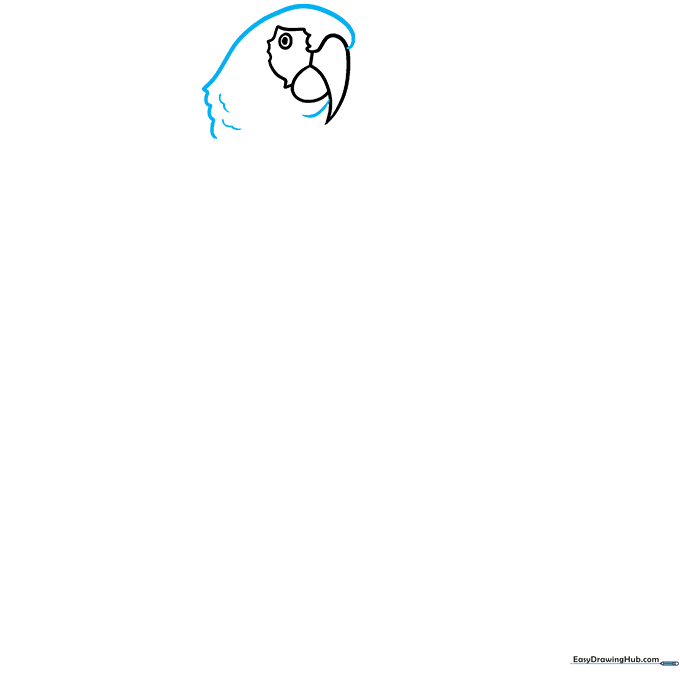
Step 3: Sketching the Body and Feet
Extend a long, graceful curve to form the bird's belly. Add the legs and feet using overlapping curved lines, finishing each toe with a small, sharp claw. Tip: Draw the claws as tiny triangles to give them that realistic, hooked look.
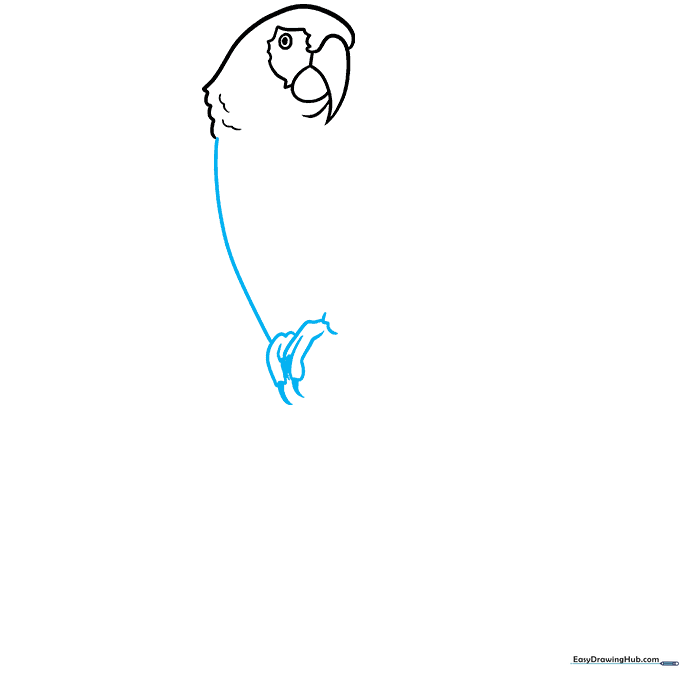
Step 4: Creating the Wing Structure
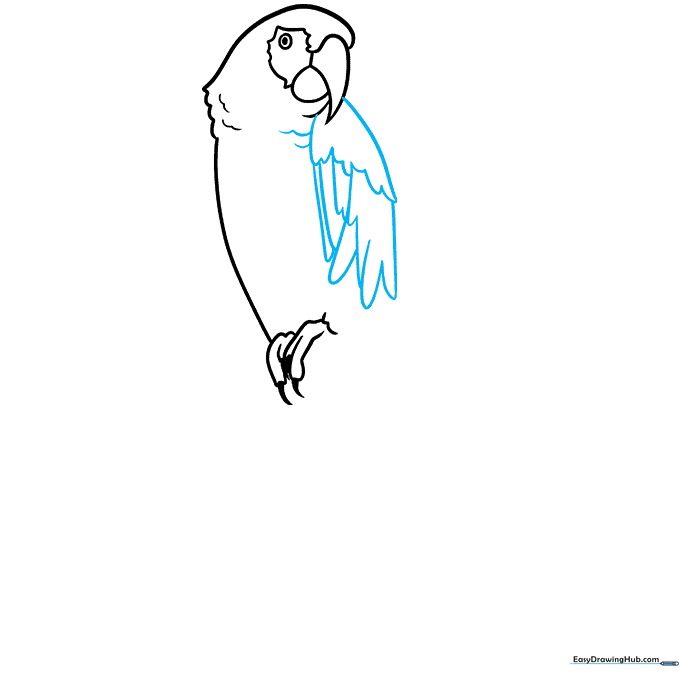
Draw the wing by layering short, curved lines at the top and longer, sweeping lines for the flight feathers at the edge. Tip: Think of the wing as a fan; keep the lines radiating outward from the shoulder.
Step 5: Adding the Perch and Tail Base
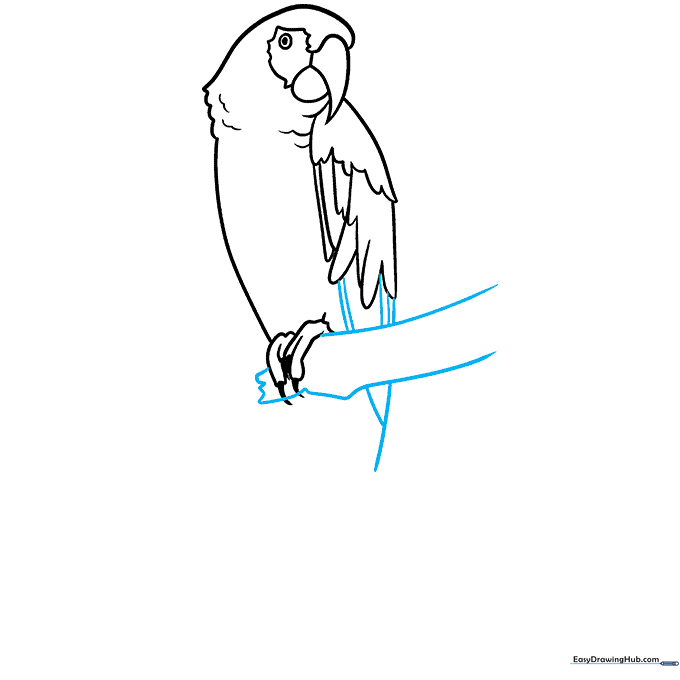
Draw two long, parallel lines beneath the feet to create a sturdy branch. Then, continue the wing and start the base of the tail with long, flowing curves. Tip: Make the branch look natural by adding a few jagged, uneven edges.
Step 6: Closing the Wing Shape
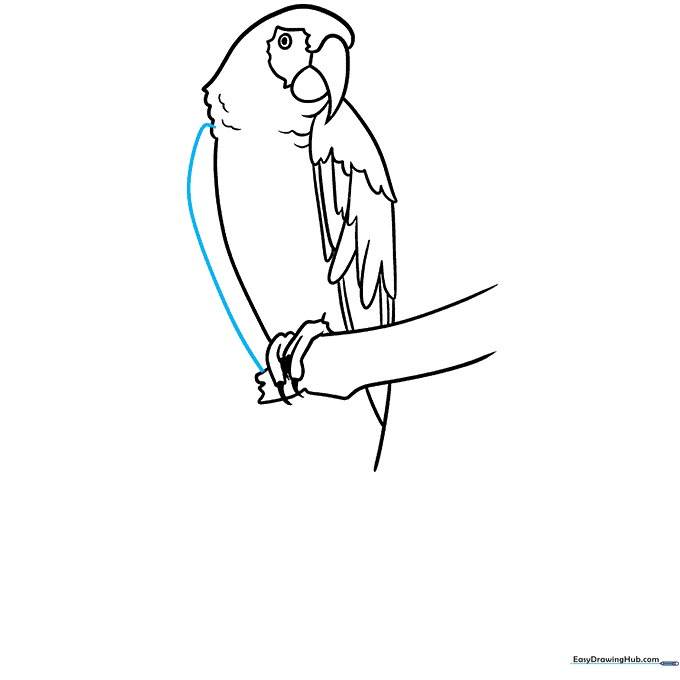
Use one long, continuous curved line to enclose the remaining part of the wing. This helps define the macaw's silhouette. Tip: Ensure the line connects smoothly to the body to maintain the bird's graceful shape.
Step 7: Adding Feather Detail
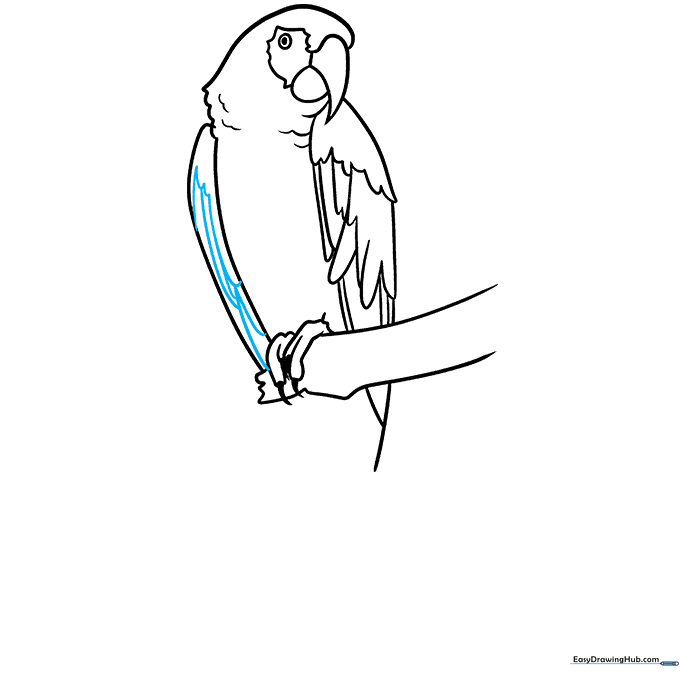
Add depth to the wing by drawing a series of overlapping 'U' shapes or curved lines. This creates the look of individual feathers. Tip: Keep the feathers smaller near the top and larger toward the bottom for a realistic effect.
Step 8: Drawing the Long Tail
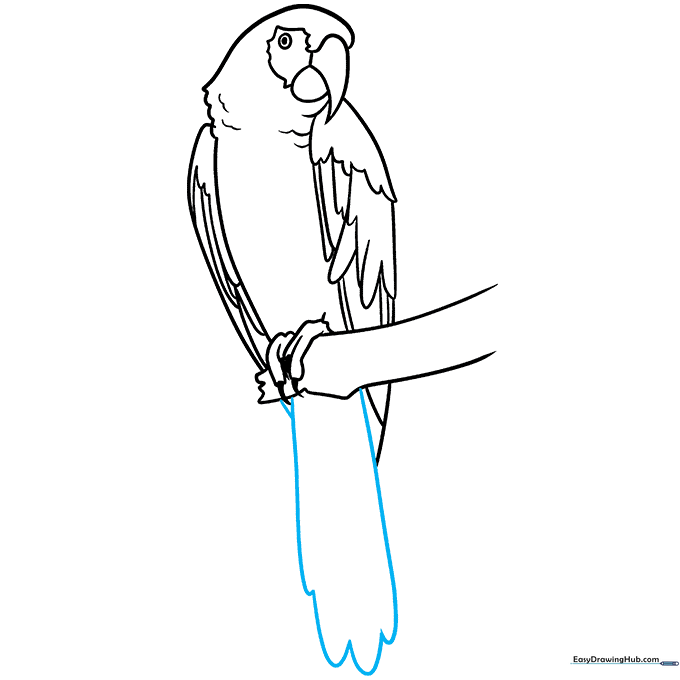
Extend two long, parallel curved lines to form the sides of the tail. Connect the bottom with a series of scalloped 'U' shapes. Tip: Make the tail nice and long, as Scarlet Macaws are famous for their impressive, colorful tail feathers!
Step 9: Final Touches
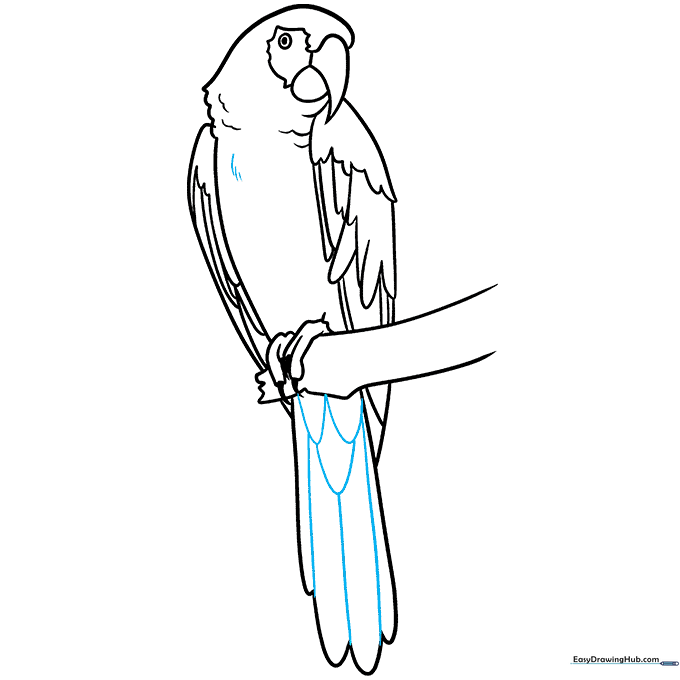
Add final details by drawing 'U' shapes near the top of the tail and connecting them to the scalloped edges. Add a few short, quick lines on the chest to suggest texture. Tip: You're done with the outline! Erase any stray guidelines before you start coloring.
Step 10: Coloring Your Macaw
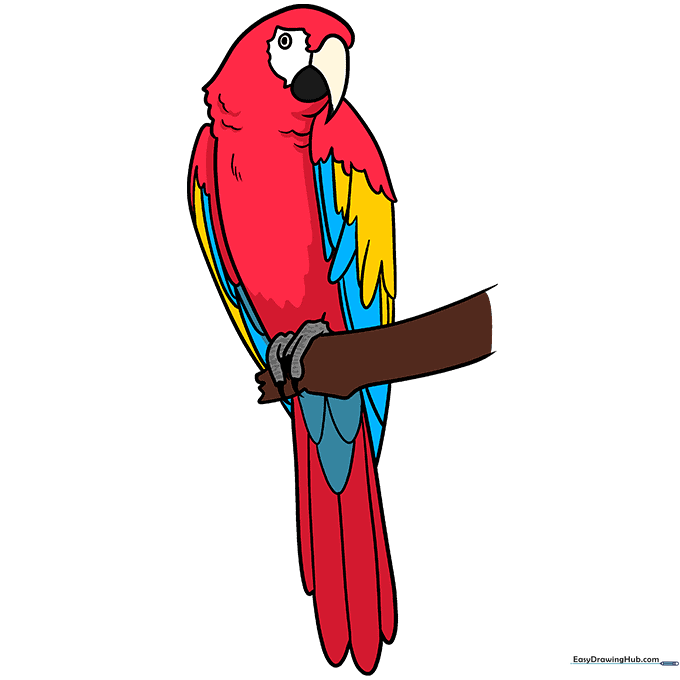
Bring your macaw to life! Use vibrant reds for the body, with bright yellow and blue accents on the wings. Keep the skin patch around the eye white. Tip: Use light, circular motions with your colored pencils to blend the colors smoothly.
More Tutorials


