How to Draw a Scared Face: Easy 10-Step Guide
Capture big emotions on paper! This tutorial is perfect for young artists ages 5+ looking to master expressive cartoon faces. All you need is a pencil, an eraser, and a piece of paper to bring this startled character to life.
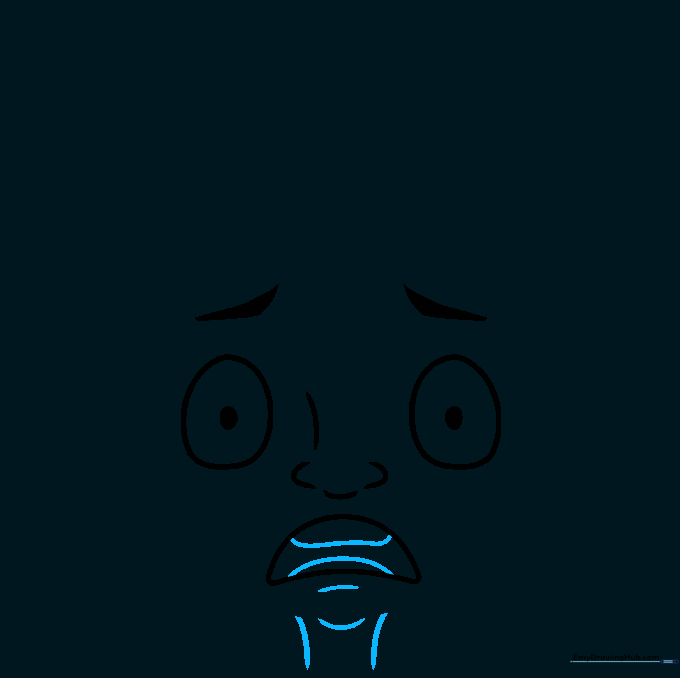
🎯 Final Result

Step-by-Step Instructions
Step 1: Sketching the Eyes

Draw two slightly uneven ovals for the eyes. Add small circles inside for pupils, then place a triangle above each eye to represent wide, startled eyebrows. Teacher's Tip: Keep the ovals slightly tilted to give the character a more dynamic, worried look.
Step 2: Adding the Nose and Mouth

Sketch a small curved line for the nose. Below it, draw a large, open mouth shaped like an upside-down orange slice. Teacher's Tip: Make the mouth nice and big to emphasize the feeling of shock.
Step 3: Defining Teeth and Chin
Use wavy lines inside the mouth to suggest teeth. Underneath the mouth, add four small dashed lines to show the chin area. Teacher's Tip: Don't worry about making the teeth perfect; slightly irregular shapes look more natural in cartoons.
Step 4: Drawing the Ears and Neck
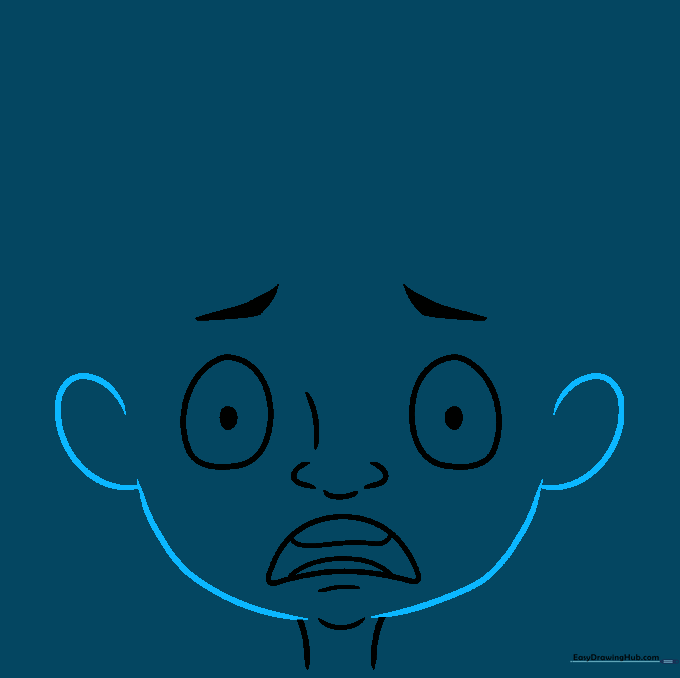
Draw two loops on the sides of the face for ears, then use curved lines to connect the head to the neck. Teacher's Tip: Keep your lines smooth to ensure the head looks rounded.
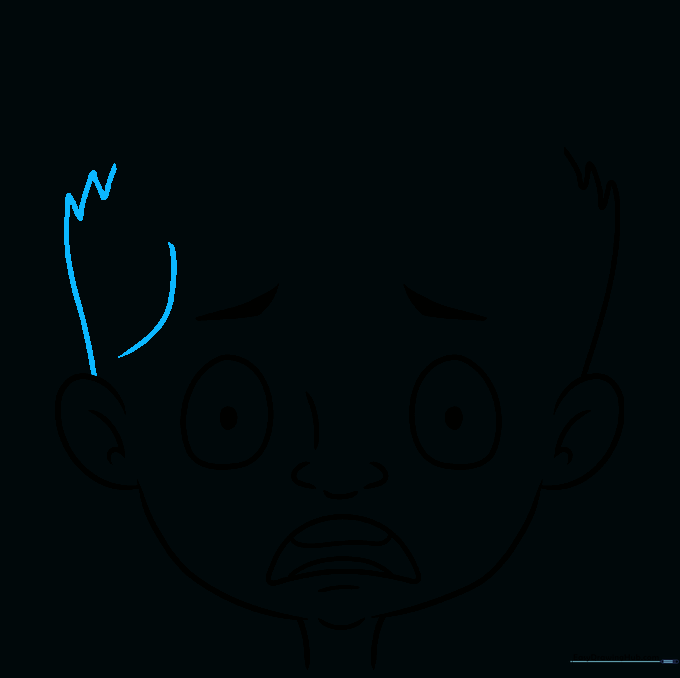
Step 5: Adding Ear Detail and Hairline

Sketch broad V-shapes inside the ears. On the right side, draw a straight line and add pointy, grass-like shapes for the hair. Teacher's Tip: Vary the length of the 'grass' shapes to make the hair look messy and frantic.
Step 6: Balancing the Hair
Repeat the process on the left side of the head, adding a curved line to frame the face. Teacher's Tip: Symmetry helps, but don't stress if the sides don't match perfectly—it adds character!
Step 7: Refining the Outline
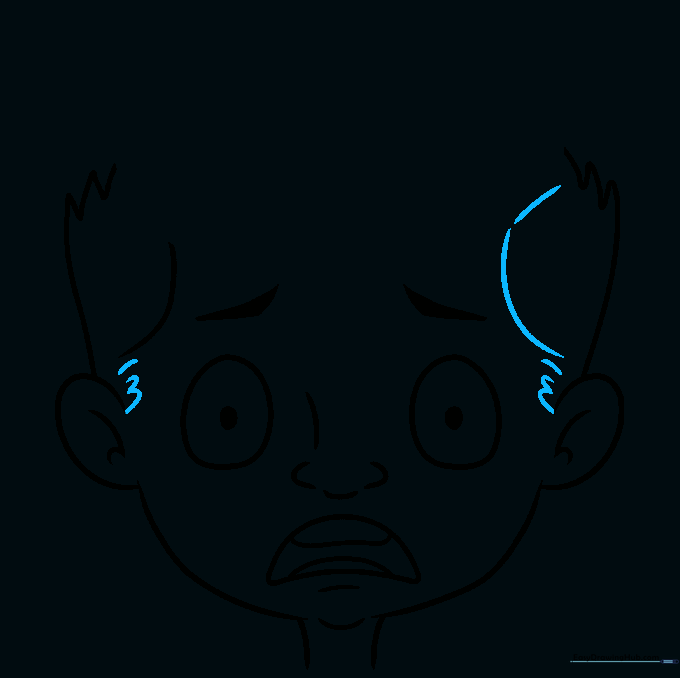
Add a curved line on the right and small dashes near the ears to create texture. Teacher's Tip: These small dashes act as shading, giving your drawing more depth.
Step 8: Styling the Hair
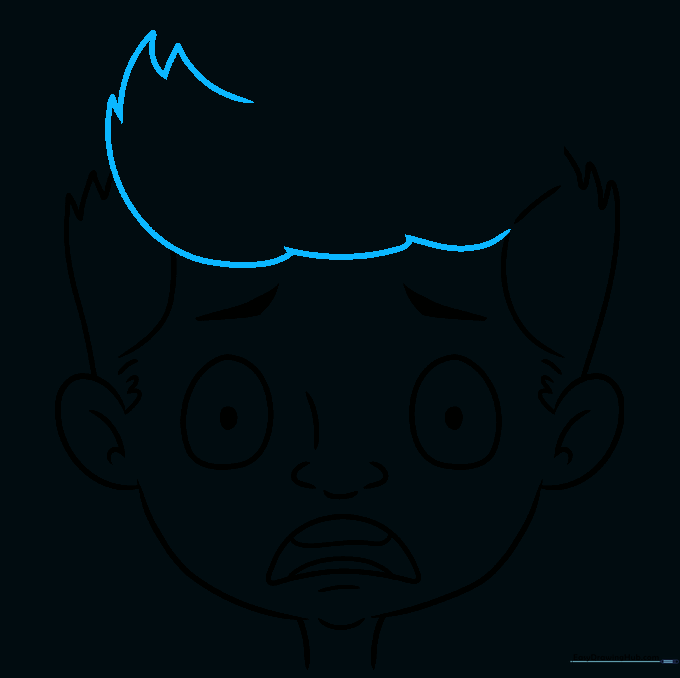
Draw three broad, swooping lines like ocean waves for the hair. Add a curve upward and three pointed, flame-like shapes. Teacher's Tip: Think of the hair as moving in the wind to show the character's panic.
Step 9: Finalizing the Hair
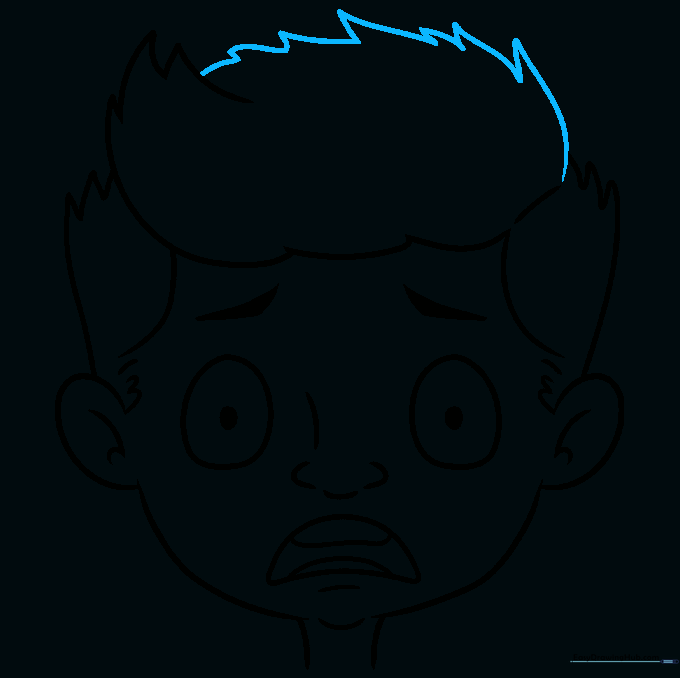
Continue adding uneven, pointed lines to complete the hair. Teacher's Tip: Keep the lines jagged and inconsistent to maintain that 'scared' energy.
Step 10: Coloring Your Masterpiece

Go over your lines with a black pen. Color the hair brown using different shades for depth, use dark-reddish brown for the mouth, and fill in the face with your favorite skin tone. Teacher's Tip: Use light pressure with your colored pencils to blend colors smoothly.
More Tutorials


