How to Draw a Scarecrow Face: Easy 9-Step Guide
Bring a touch of autumn charm to your sketchbook with this friendly scarecrow face tutorial. Designed for ages 5 and up, this screen-free activity requires only a pencil, eraser, and paper to help young artists master basic facial proportions and expressive shapes.
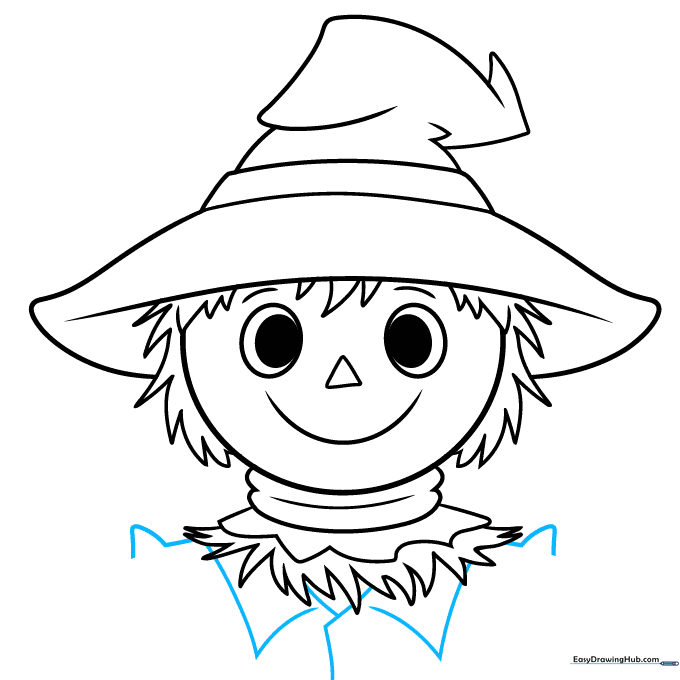
🎯 Final Result

Step-by-Step Instructions
Step 1: Sketching the Eyes

Draw two ovals for the eyes with smaller ovals inside for pupils. Add short dashes above each eye to suggest eyelids. Teacher's Tip: Keep the eyes centered on your page to leave room for the hat later.
Step 2: Defining the Face Shape
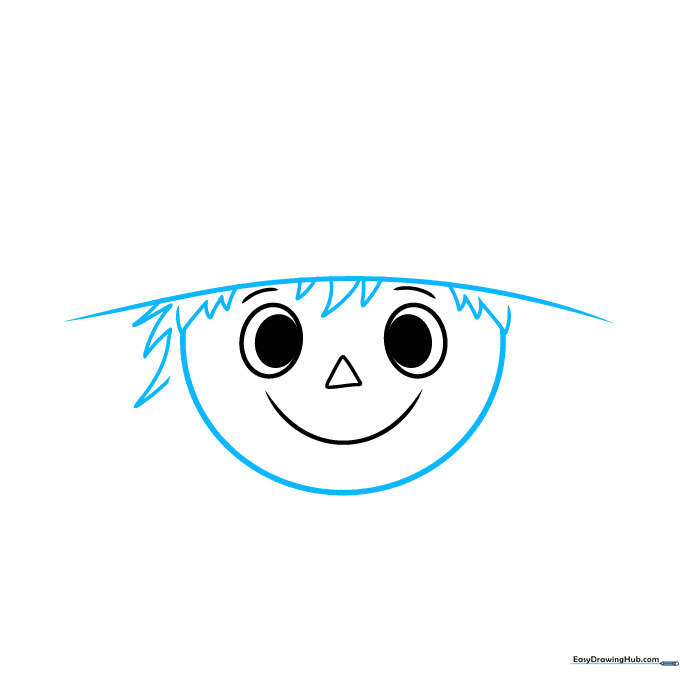
Draw a horizontal curve for the brim of the hat, then outline the face with a large semi-circle. Add small triangles beneath the eyes for a stitched-on look. Tip: Use a light touch; these are your guide lines.
Step 3: Adding Straw Details
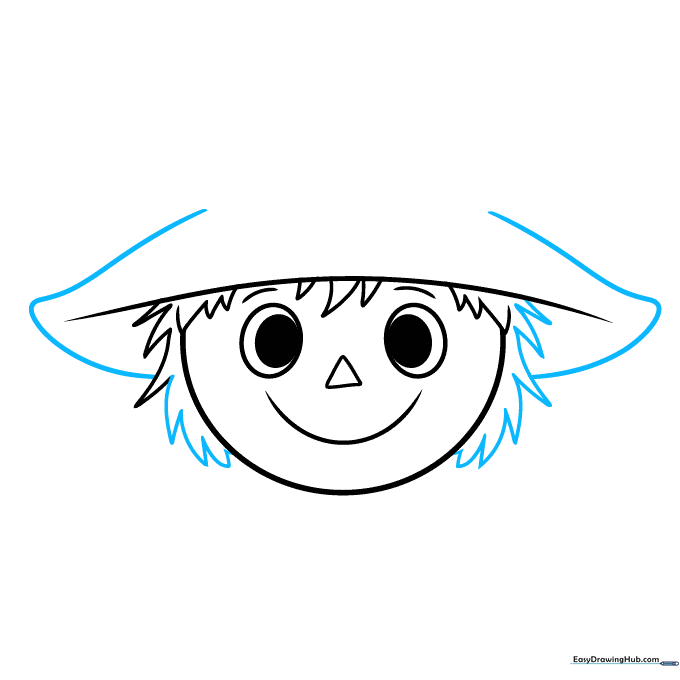
Surround the head with loose, sketchy triangles to represent straw poking out from under the hat. Add a rounded triangle on each side of the head. Tip: Vary the size of the triangles to make the straw look natural and messy.
Step 4: Constructing the Hat
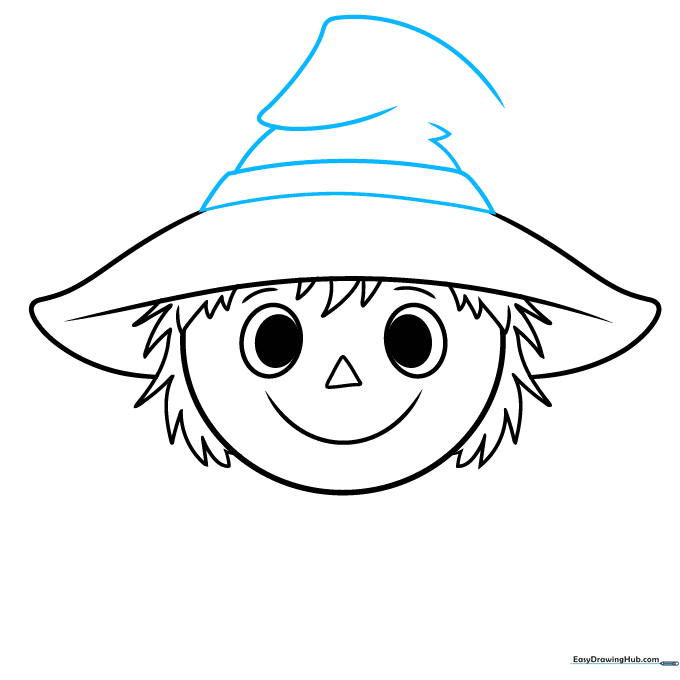
Sketch a curved rectangle on top of the head for the hat base. Add a vertical curve and two small triangles, then draw a large, folded-over triangle for the top of the hat. Tip: Think of the hat as a soft, floppy fabric.
Step 5: Drawing the Neck and Collar
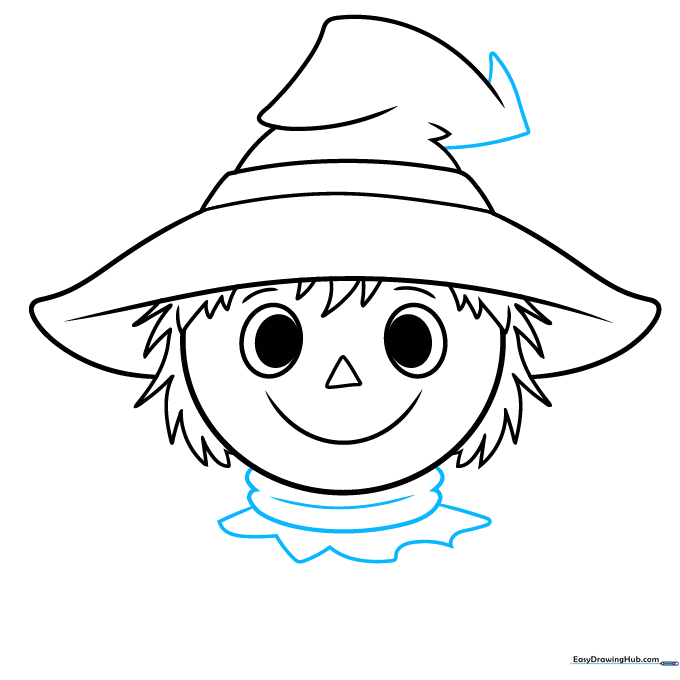
Complete the hat shape. Below the head, draw two vertical curves for the neck and connect them with a horizontal curve. Add a wavy line for the collar. Tip: The wavy line adds texture to the fabric of the shirt.
Step 6: Adding More Straw

Draw more loose triangles beneath the neck area. Vary the size and shape to keep it looking natural. Tip: Don't make these too uniform; real straw is chaotic!
Step 7: Adding Clothing Details
Sketch two large V-shapes with a smaller one in between for the shirt detail. Add an L-shape for a patch and draw straight lines for the shoulders. Tip: Patches are a great way to practice drawing simple geometric shapes.
Step 8: Finalizing Features
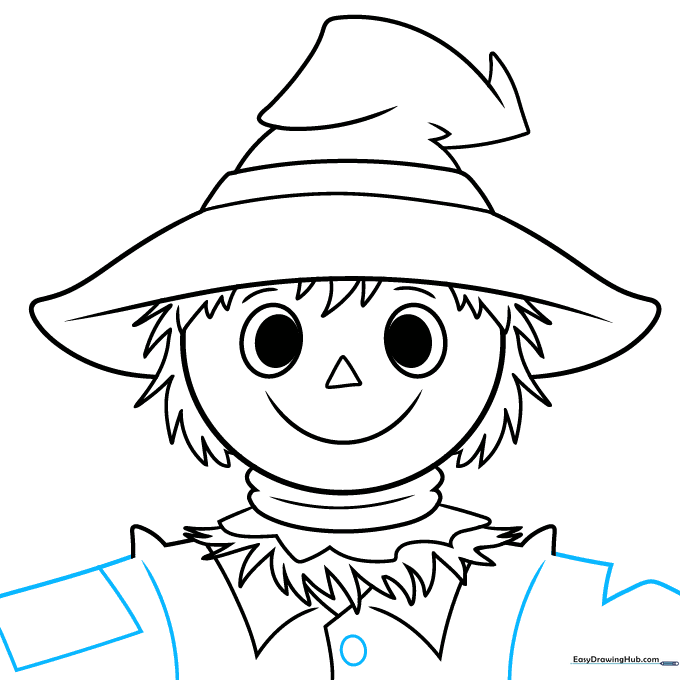
Add more patches and an oval in the center of the shirt. Refine the lines on the left and right sides. Tip: Use a steady hand to make these final outlines crisp.
Step 9: Outlining and Erasing
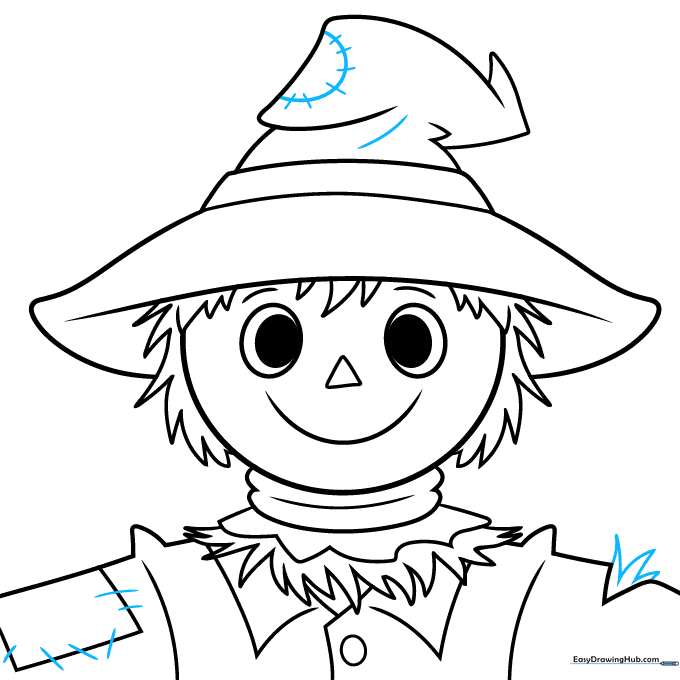
Go over your sketch with a black marker. Once the ink is dry, gently erase your pencil marks. Tip: Always wait for the ink to dry completely to avoid smudging your hard work!
Step 10: Adding Color
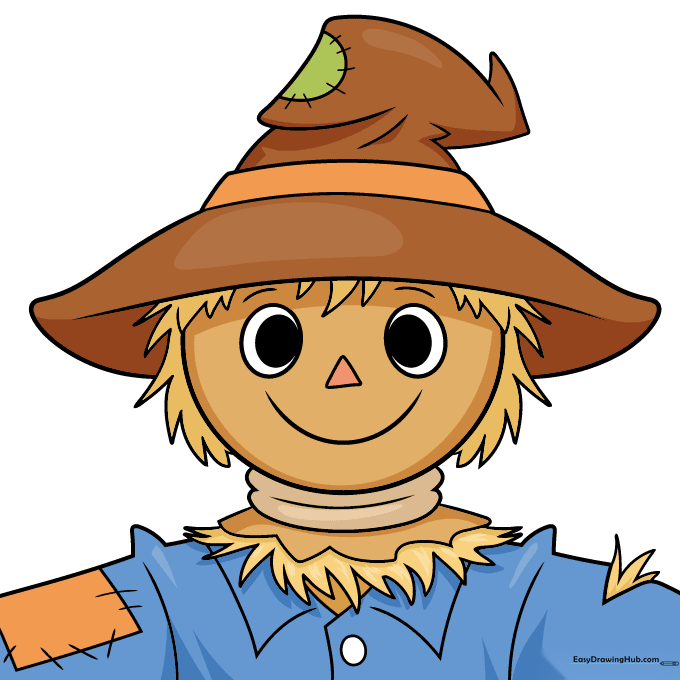
Bring your scarecrow to life! Use brown for the face, tan for the straw, and bright colors for the patches. Tip: Use light pressure with your colored pencils to create soft shading on the burlap.
More Tutorials


