How to Draw a Saurolophus: Easy 9-Step Dinosaur Guide
Ready to bring a prehistoric herbivore to life? This tutorial is perfect for young dinosaur enthusiasts ages 7+ looking to practice their sketching skills. You’ll only need a pencil, an eraser, and some paper to master this iconic crested dinosaur.
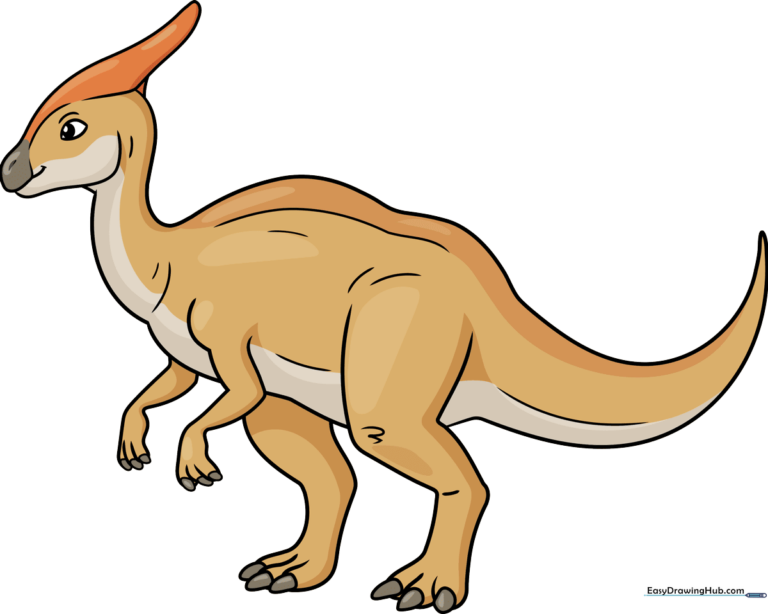
🎯 Final Result
Step-by-Step Instructions
Step 1: Sketching the Head and Eye
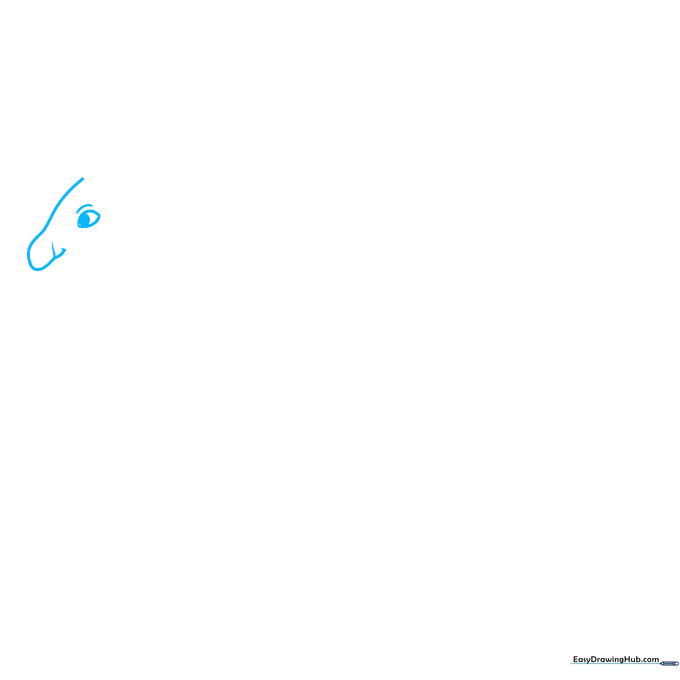
Start by sketching the dinosaur’s snout with a curved line that loops back on itself. Add a small oval for the eye and shade in the pupil. Tip: Keep the eye near the top of the snout to give your dinosaur a friendly, alert expression.
Step 2: Defining the Crest and Jaw
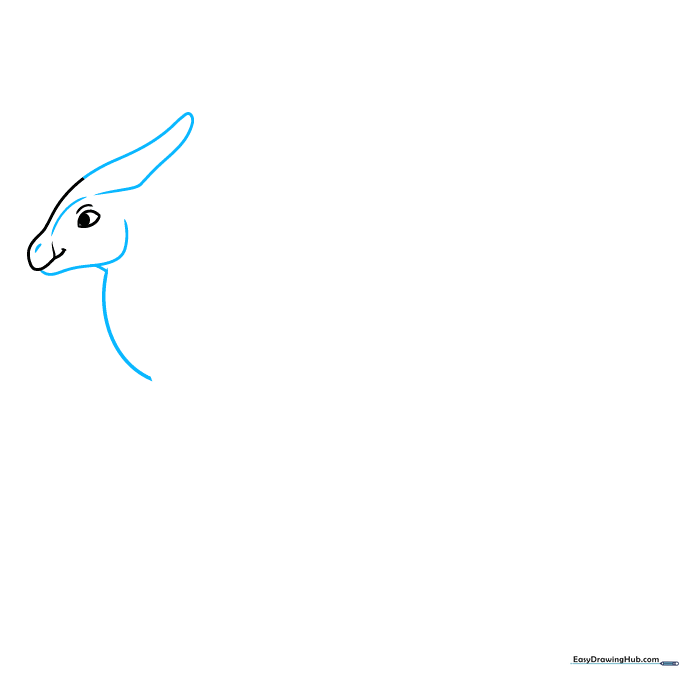
Draw the signature triangular crest on top of the head using a curved, folded line. Add the nostril and the lower jaw line. Tip: The crest is the most recognizable part of the Saurolophus, so make sure it stands out clearly against the head shape.
Step 3: Neck and Front Arm
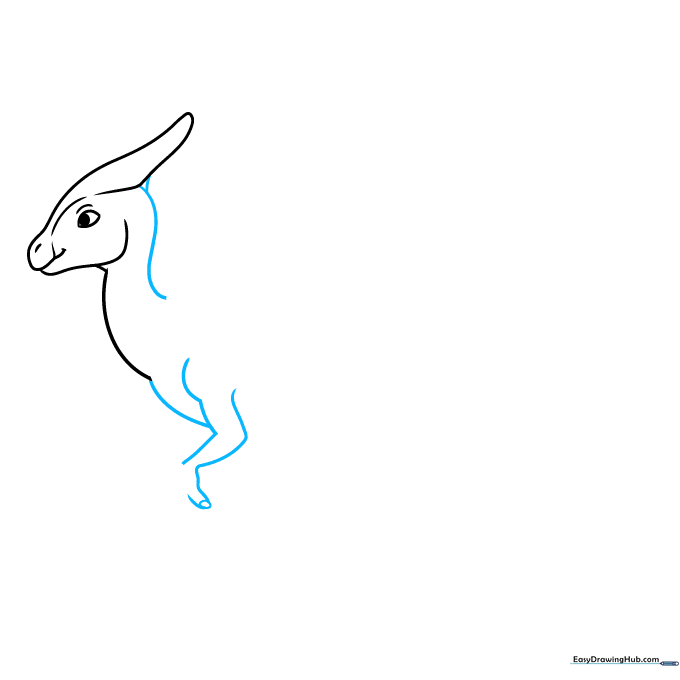
Sketch the back of the head, the neck, and the chest. Add the first forearm with an oval-shaped claw. Tip: Use smooth, flowing lines for the neck to make the dinosaur look natural and graceful.
Step 4: Fingers and Rear Leg
Complete the fingers on the front arm with small oval claws. Then, sketch the belly and the start of the rear leg. Tip: When drawing claws, keep them rounded rather than sharp to maintain a friendly, cartoon-style aesthetic.
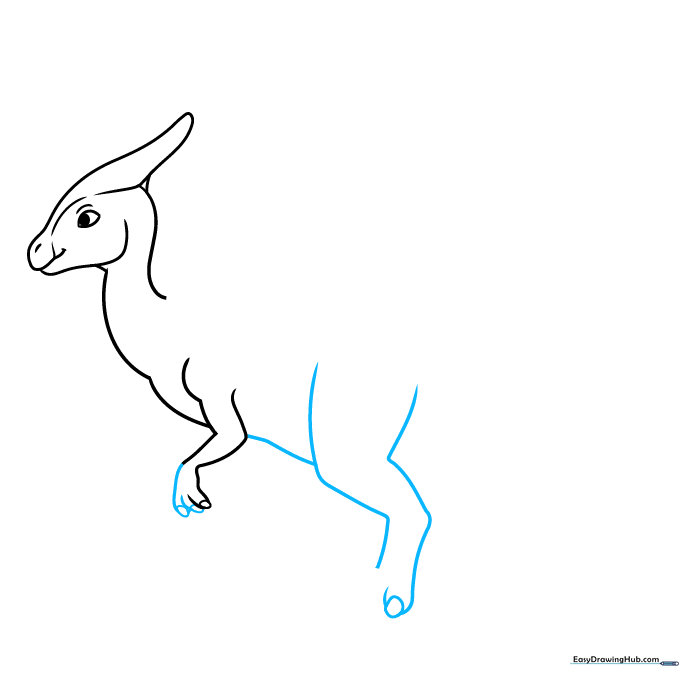
Step 5: Rear Foot and Second Arm

Finish the rear foot using rounded triangles for the toes. Start sketching the second forearm extending from the chest. Tip: Ensure the foot looks sturdy, as Saurolophus was a large animal that walked on its hind legs.
Step 6: Finishing the Limbs

Draw the hand of the second arm and complete the second rear leg. Tip: Use overlapping lines to show depth, making the legs look like they are positioned one behind the other.
Step 7: Finalizing the Feet
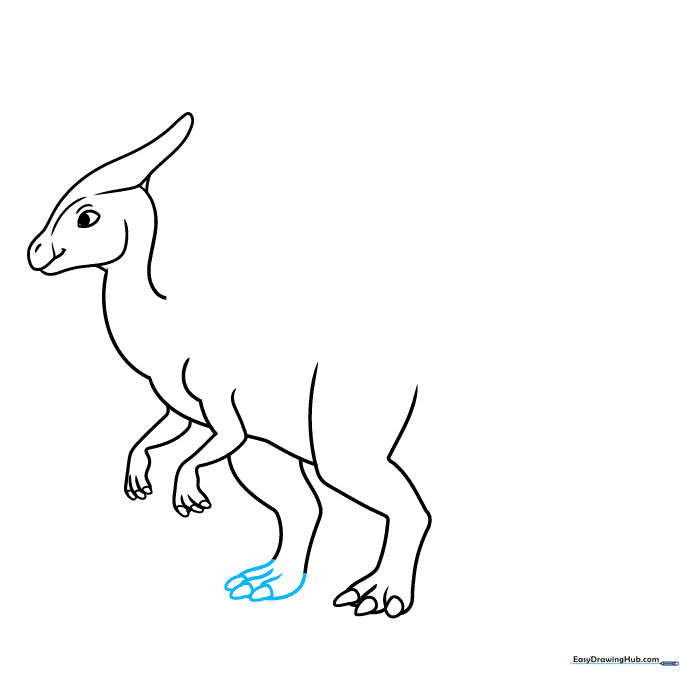
Add the remaining claws to the second rear foot. Tip: Check that your claws are consistent in size across all four limbs for a balanced look.
Step 8: The Back and Tail

Connect the neck line to the back and draw the long, tapering tail. Tip: Make the tail thick at the base and thin at the tip to give the dinosaur a sense of movement.
Step 9: Adding Muscle Contours
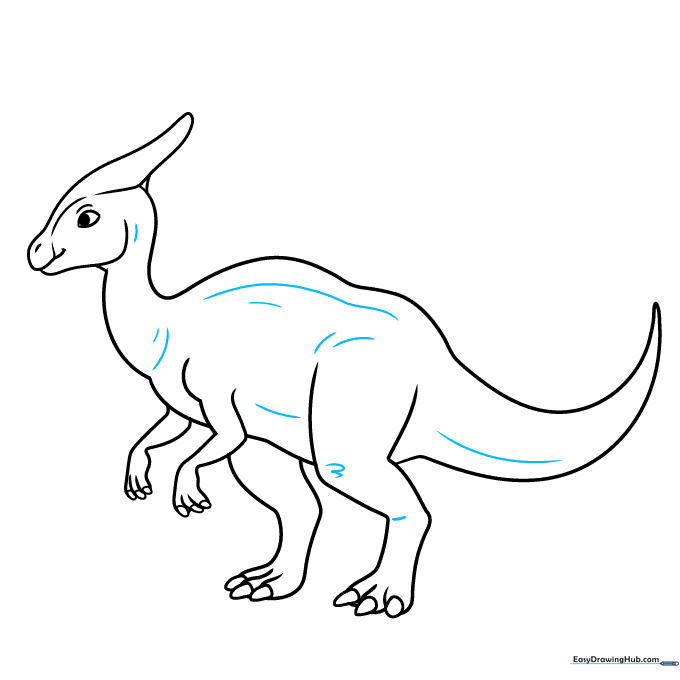
Add subtle curved lines along the body to show muscle definition and skin folds. Tip: Don't overdo it—a few well-placed lines are enough to give your dinosaur a realistic, three-dimensional feel.
Step 10: Bring Your Dinosaur to Life with Color
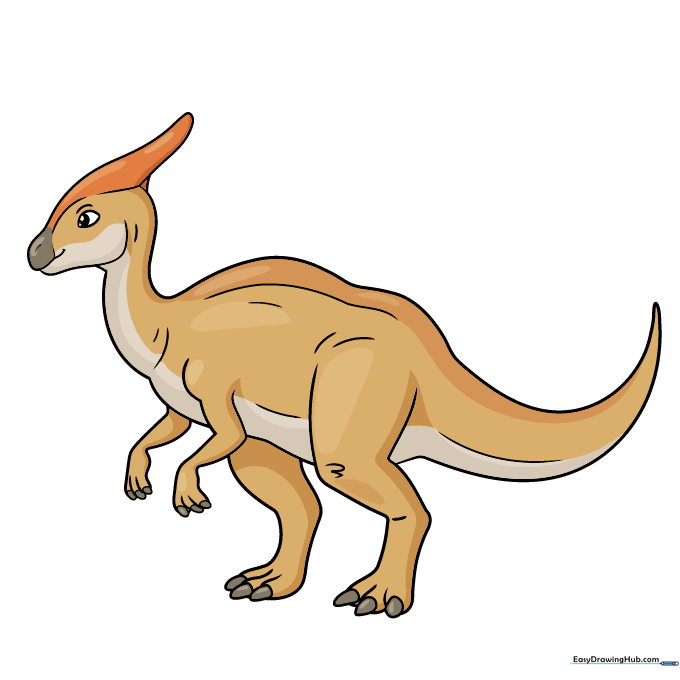
Now for the fun part! Use your favorite colors to fill in your Saurolophus. We chose earthy browns, but you can get creative—maybe your dinosaur has green spots or stripes! Tip: Use light pressure for a soft look or heavy pressure for bold, vibrant colors.
More Tutorials


