How to Draw a Running Dog: Simple 9-Step Guide
Capture the energy of a playful pup in motion with this simple drawing guide. Designed for artists ages 5 and up, this activity requires only a pencil, paper, and an eraser. Follow these steps to master the proportions of a dog mid-stride and bring your character to life.
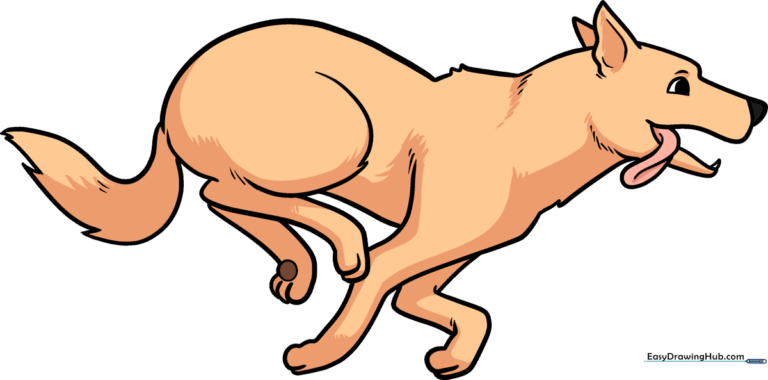
🎯 Final Result
Step-by-Step Instructions
Step 1: Sketching the Face and Snout
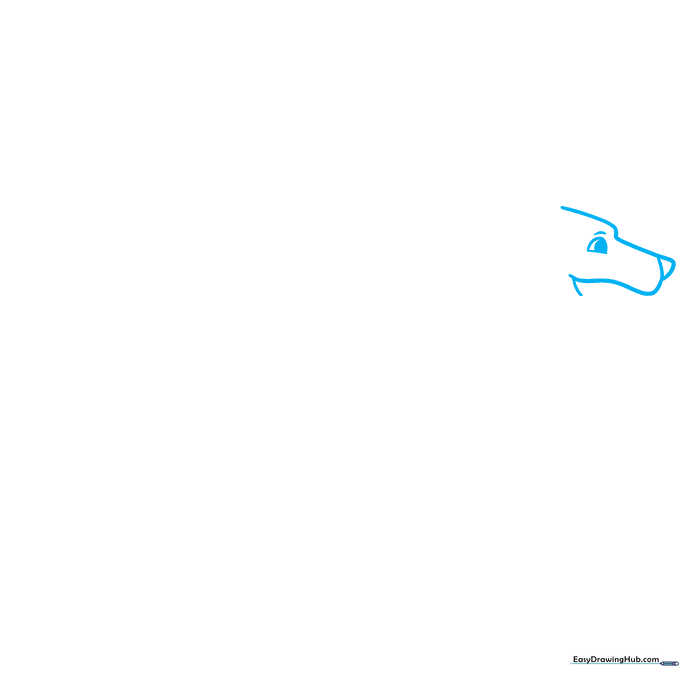
Start by drawing the dog's profile. Use a long, curved line to create the brow and snout. Add a smaller curve for the eye and eyebrow. Teacher's Tip: Keep your pencil pressure light here so you can easily adjust the snout shape if needed.
Step 2: Adding the Ear and Tongue
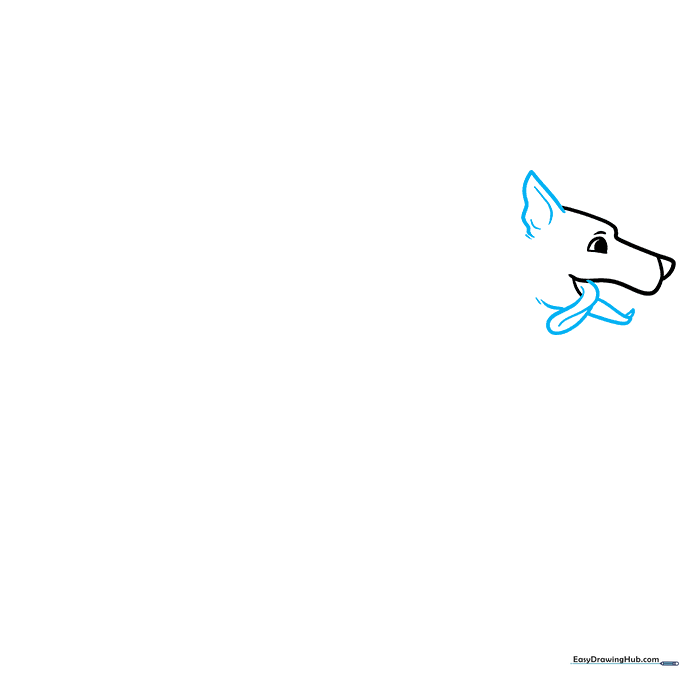
Sketch the triangular ear and a lolling tongue to give your dog a happy, active expression. Add a tiny triangle at the lower jaw to represent a tooth. Teacher's Tip: Use short, quick strokes to make the tongue look rounded and soft.
Step 3: Defining the Neck
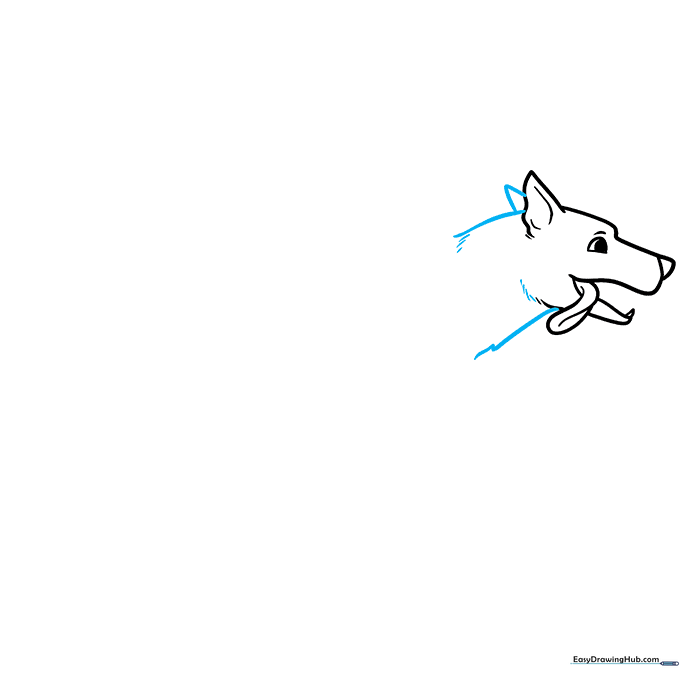
Connect the head to the body using long, curved lines for the neck. Add a 'V' shape for the second ear. Teacher's Tip: Use small, jagged lines along the neck to suggest the texture of fur.
Step 4: Sketching the First Foreleg
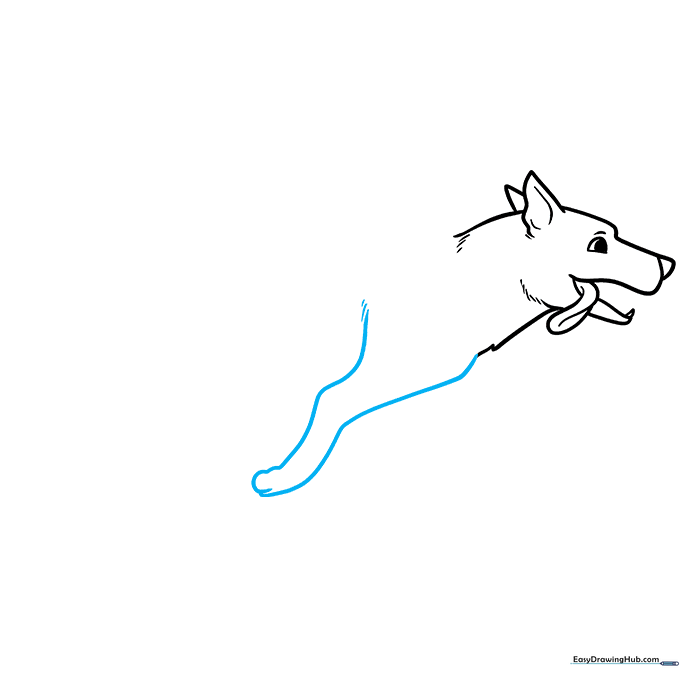
Draw the front leg using long, overlapping curved lines that end in a paw. Teacher's Tip: Ensure the leg looks slightly bent to show the dog is in mid-run.
Step 5: Adding the Second Foreleg
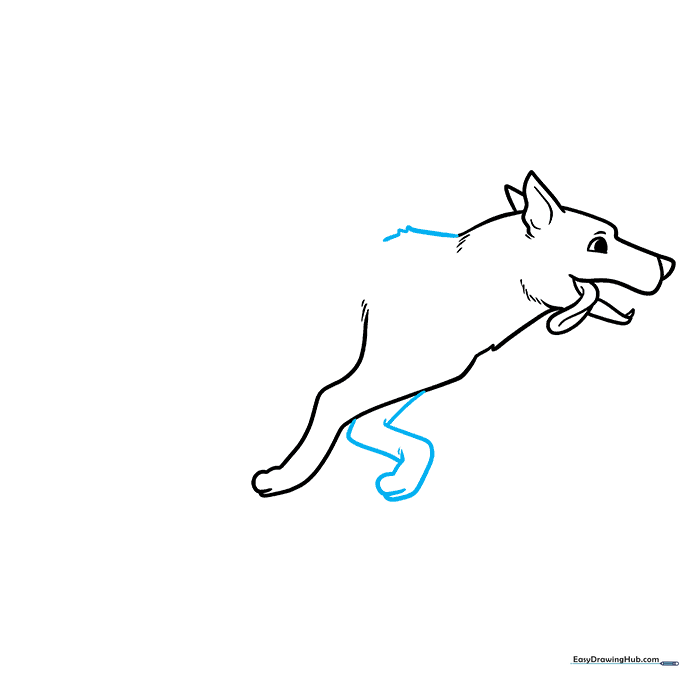
Draw the second foreleg, bending it at the knee to show movement. Use jagged lines at the shoulder to add a furry look. Teacher's Tip: Overlapping lines create depth, making the legs look like they are moving past each other.
Step 6: Drawing the Back and Belly
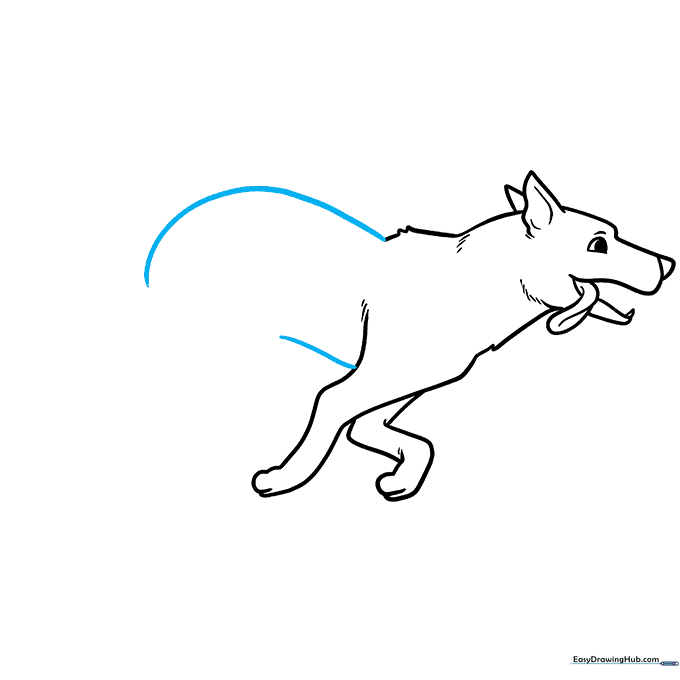
Connect the neck to the rear using long, smooth curves for the back and a slightly tucked-in line for the belly. Teacher's Tip: A smooth back line helps emphasize the dog's speed.
Step 7: Sketching the Rear Leg
Use a 'C' shape to form the thigh of the rear leg, then extend it downward. Teacher's Tip: The rear leg is usually thicker than the front, which helps ground the drawing.
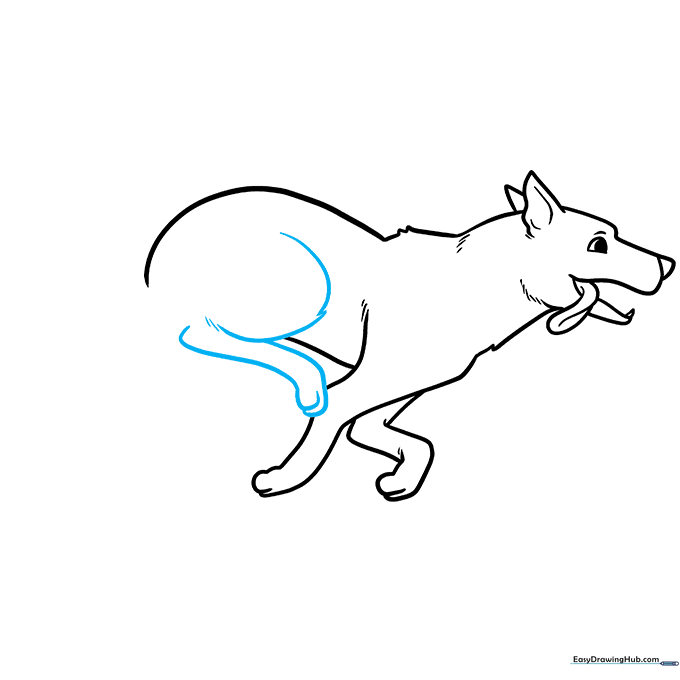
Step 8: Finalizing the Legs and Paws
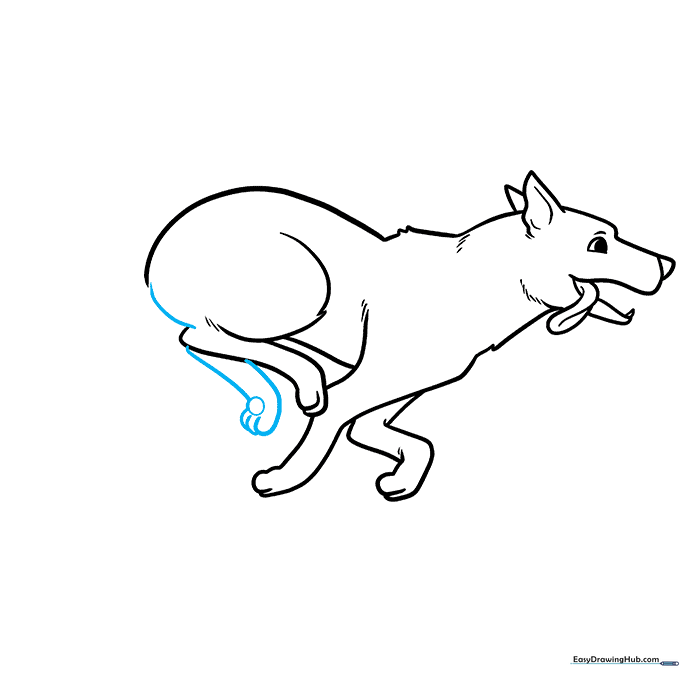
Close the body shape and add the final rear leg. Add small circles for the paw pads and lines for the toes. Teacher's Tip: Adding paw pads makes the drawing look much more professional and realistic.
Step 9: Adding the Tail
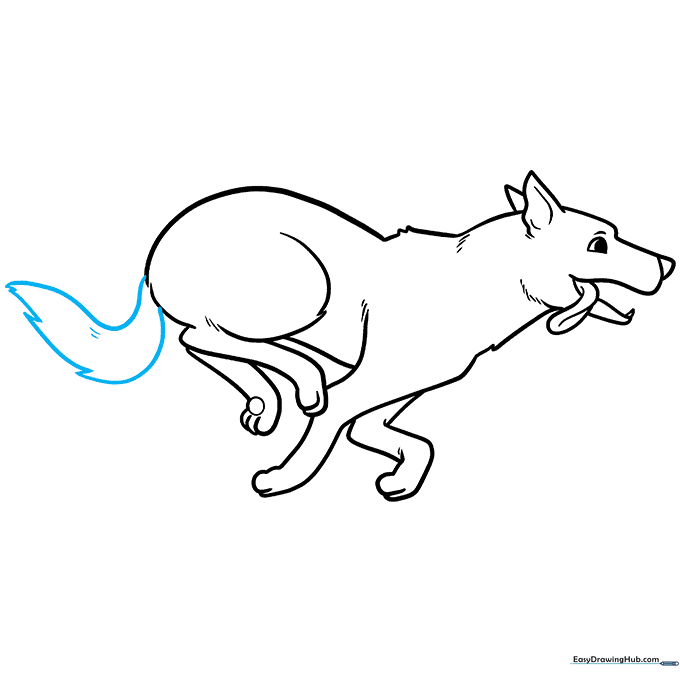
Finish your dog with a bushy tail using jagged, overlapping lines. Teacher's Tip: Vary the length of your lines to make the tail look fluffy and full of movement.
Step 10: Bring Your Dog to Life with Color
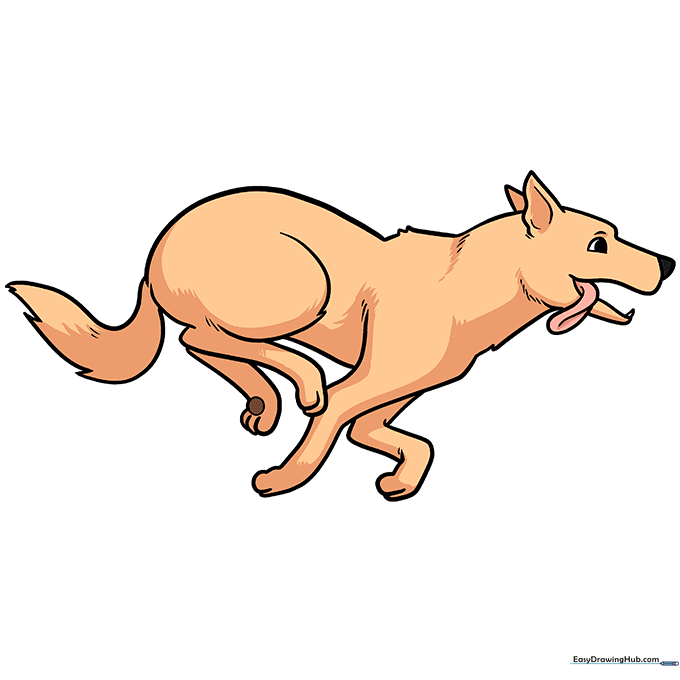
Your outline is complete! Now, choose your colors. Use browns and blacks for a German Shepherd look, or greys for a wolf-like appearance. Teacher's Tip: Use light pressure with your colored pencils to create soft fur gradients.
More Tutorials


