How to Draw a Rose Doodle: Easy 9-Step Guide
Perfect for ages 5 and up, this rose doodle tutorial is a fantastic way to practice fluid line work and floral shapes. All you need is a pencil, an eraser, and a piece of paper to get started. Follow these steps to build your own charming rose garden on the page.
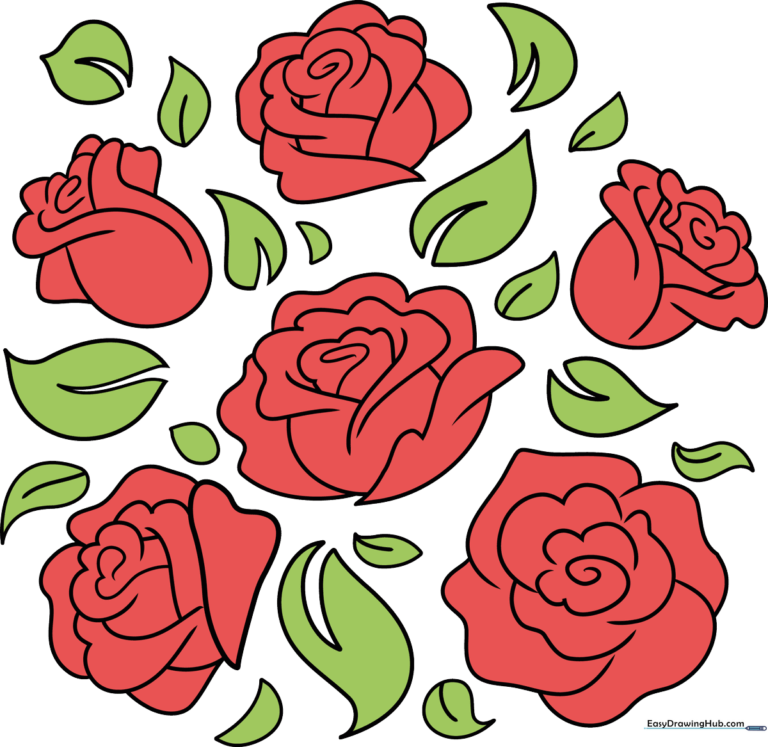
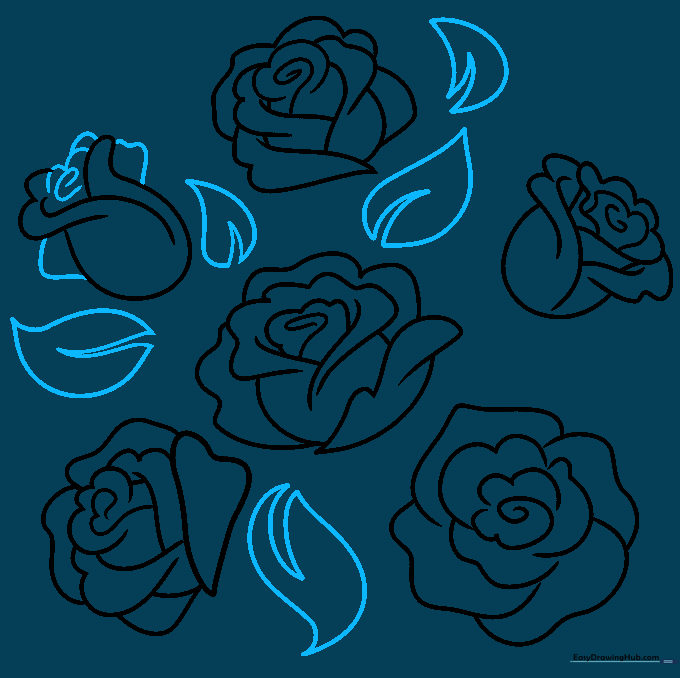
🎯 Final Result
Step-by-Step Instructions
Step 1: Sketching the First Petal

Start by drawing a curved 'Y' shape to form the center of your first rose. Teacher's Tip: Keep your pencil pressure light here; these are just structural guidelines that we will refine later.
Step 2: Adding Petal Layers
Draw a small spiral in the center of your first rose, then surround it with wavy, overlapping lines. Teacher's Tip: Think of these as soft, rounded 'C' shapes that hug the center.
Step 3: Expanding the Bloom

Add larger outer petals using long, sweeping curved lines. Teacher's Tip: Notice how one petal looks like a heart? Try to mimic that shape to give your rose a more organic, realistic feel.
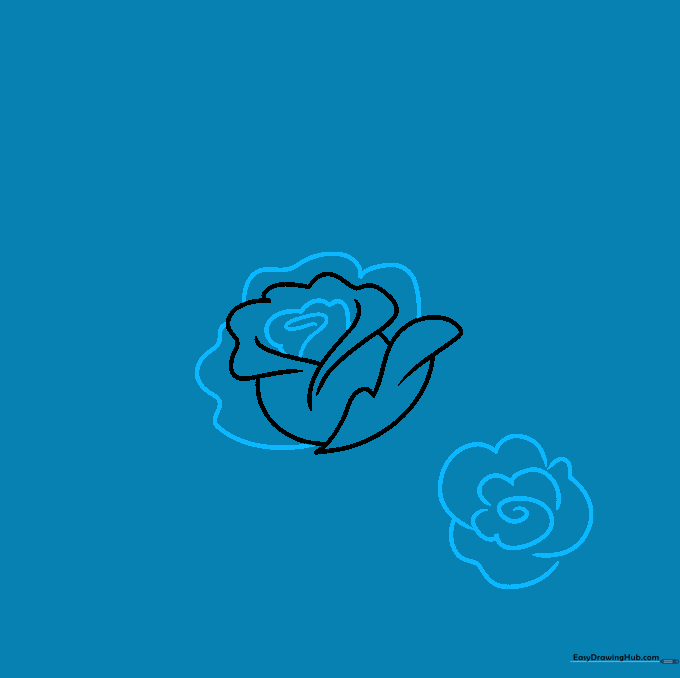
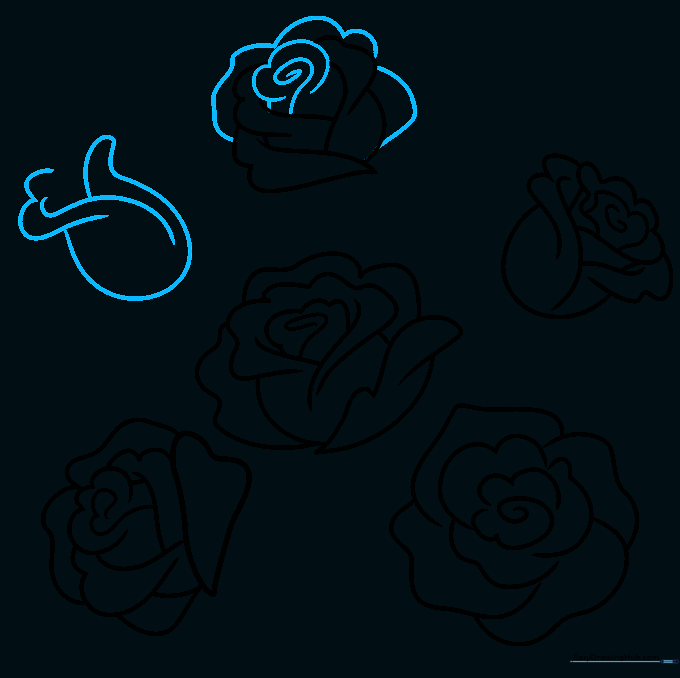
Step 4: Drawing the Rosebud
Create a new rose with a tight spiral center, then sketch a 'U' shape above it to form a bud. Teacher's Tip: Keep the bud smaller than the open flowers to show variety in your garden.
Step 5: Refining the Bud

Add detail to your bud by drawing small, overlapping curved lines at the top. Teacher's Tip: Imagine the petals are tightly wrapped and just starting to peek out.
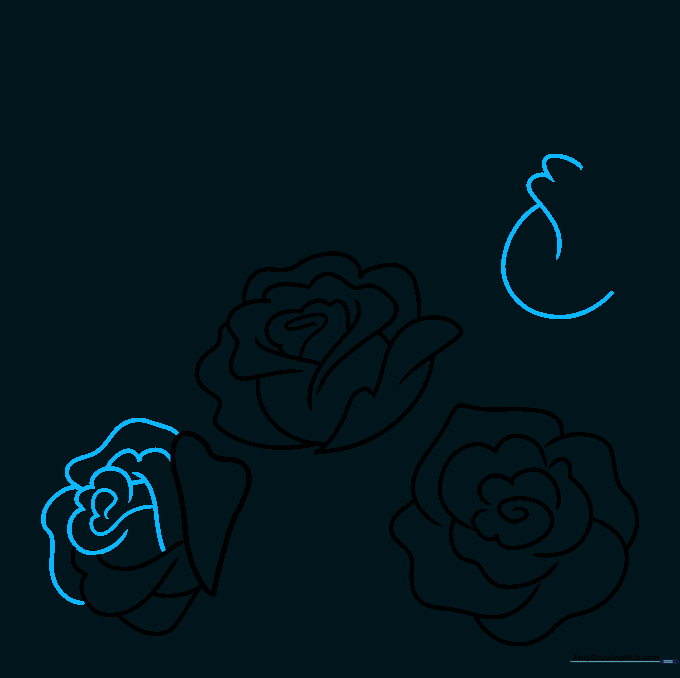
Step 6: Adding Another Bloom

Draw a fifth flower by repeating the 'Y' shape technique from Step 1. Teacher's Tip: Place this one slightly lower to create a balanced composition.
Step 7: Finalizing the Flowers
Complete your final rose and add one more small bud nearby. Teacher's Tip: Don't worry if the lines overlap; that's what makes it look like a lush, full bush!
Step 8: Drawing Leaves
Draw leaves around your flowers using a 'V' shape for the vein and curved lines for the edges. Teacher's Tip: Vary the direction of the leaves to make the drawing look more natural.
Step 9: Final Touches
Fill in any empty spaces with small leaves or simple lines. Teacher's Tip: Now is the time to go over your pencil lines with a pen if you want a bold, finished look.
Step 10: Adding Color
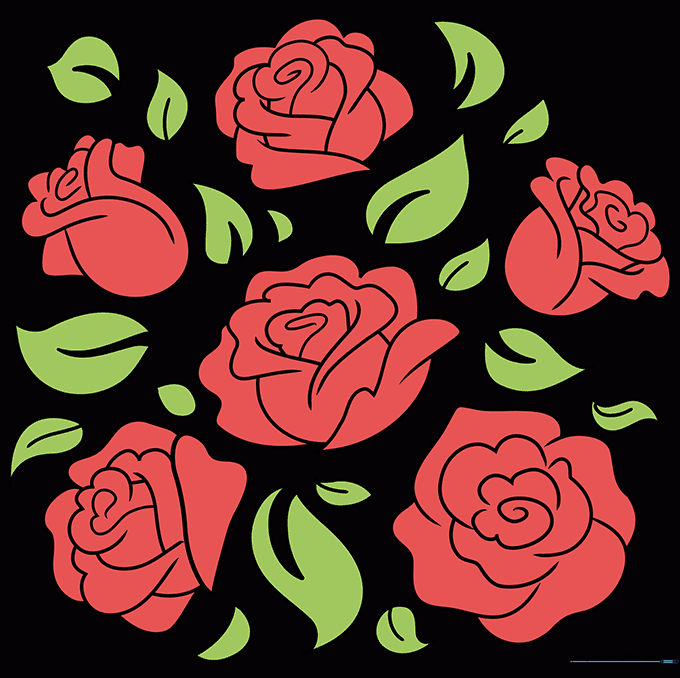
Bring your roses to life with color! We used red, but feel free to experiment with pink, yellow, or even rainbow petals. Teacher's Tip: Use a darker shade of your color near the center of the rose to create a simple shadow effect.
More Tutorials


