How to Draw a Realistic Rose: Easy 10-Step Guide
Ready to capture the beauty of a rose on paper? This tutorial is perfect for artists ages 8+ looking to practice organic shapes and layering. Grab a pencil, an eraser, and a piece of paper to start building your floral masterpiece.
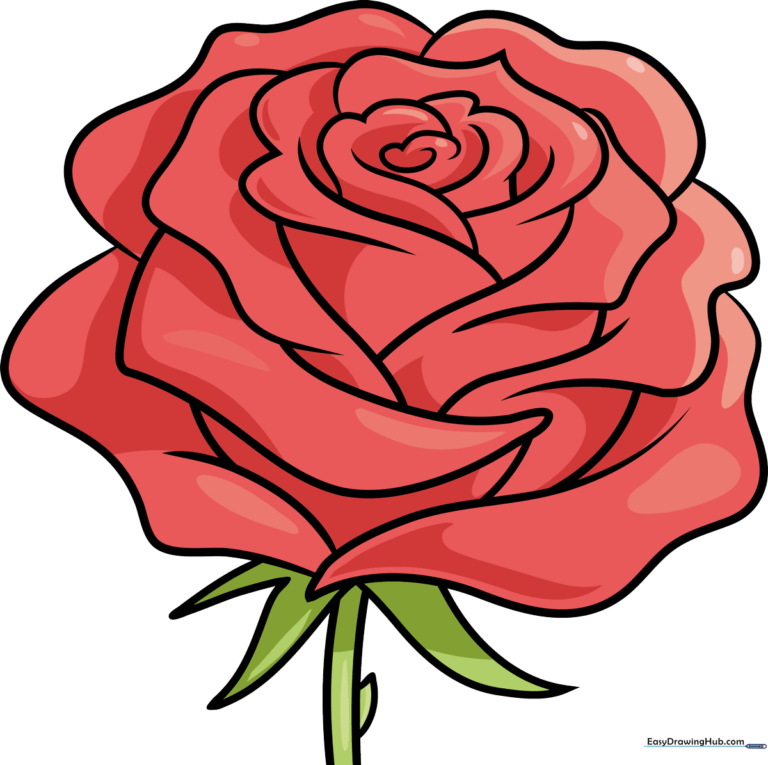
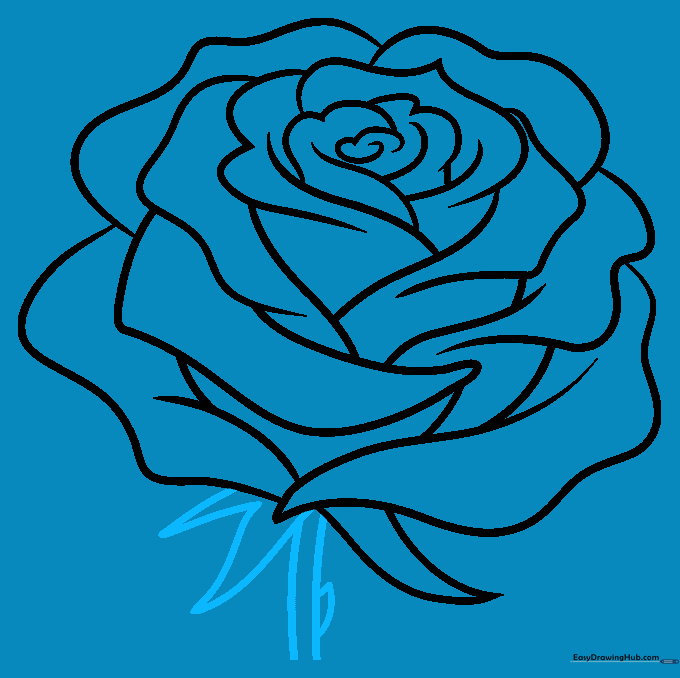
🎯 Final Result
Step-by-Step Instructions
Step 1: Sketching the Rosebud Center

Start by drawing a small, irregular spiral in the center of your page. Teacher's Tip: Keep your pencil pressure light; this spiral is the heart of your rose and will be surrounded by many layers.
Step 2: Defining Inner Petals

Draw a soft 'Y' shape just below your spiral, then add curved lines branching outward. Tip: Think of these as the 'folded' parts of the petals tucked inside the bloom.
Step 3: Building Petal Height

Add curved lines that meet in gentle points above your center. Tip: Vary the height of these points to make the rose look more natural and less symmetrical.
Step 4: Expanding the Bloom

Draw a wider 'Y' shape beneath your existing petals, connecting them to the sides. Tip: Imagine the petals wrapping around the center like a blanket.
Step 5: Adding Outer Petal Structure

Add long, wavy lines on the sides. Tip: Wavy lines create the illusion of soft, delicate fabric-like petals.
Step 6: Drawing Downturned Petals
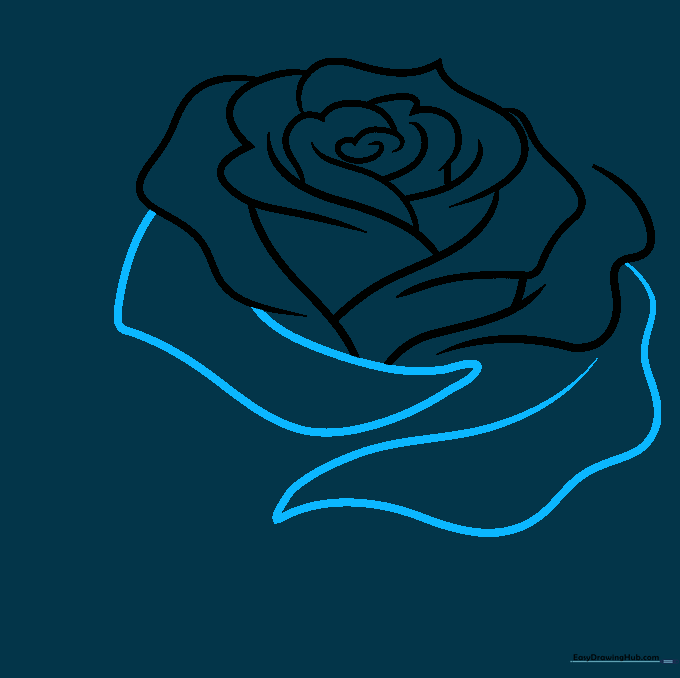
Draw the tips of the outer petals curling downward. Tip: Double back your lines to show the thickness of the petal edge.
Step 7: Filling the Bloom
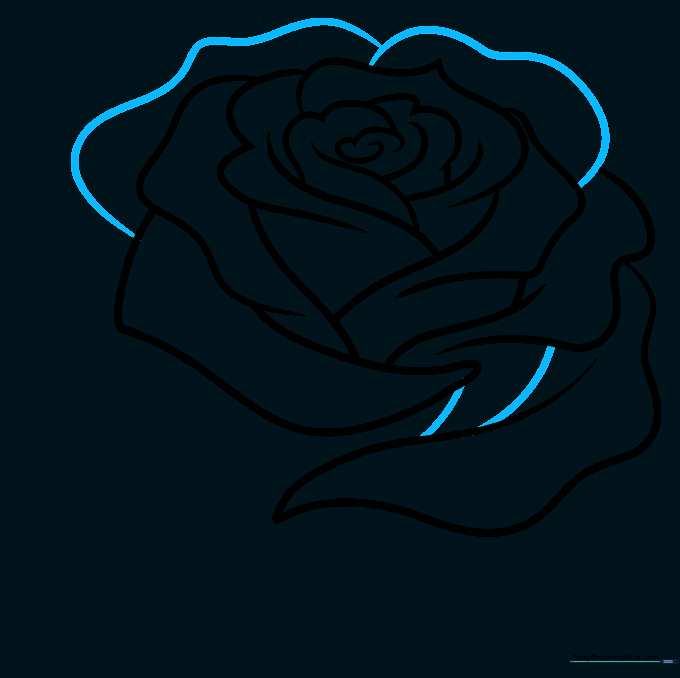
Add more curved lines to the top and sides to fill out the flower. Tip: Ensure these lines overlap slightly to create a sense of depth.
Step 8: Adding Sepals
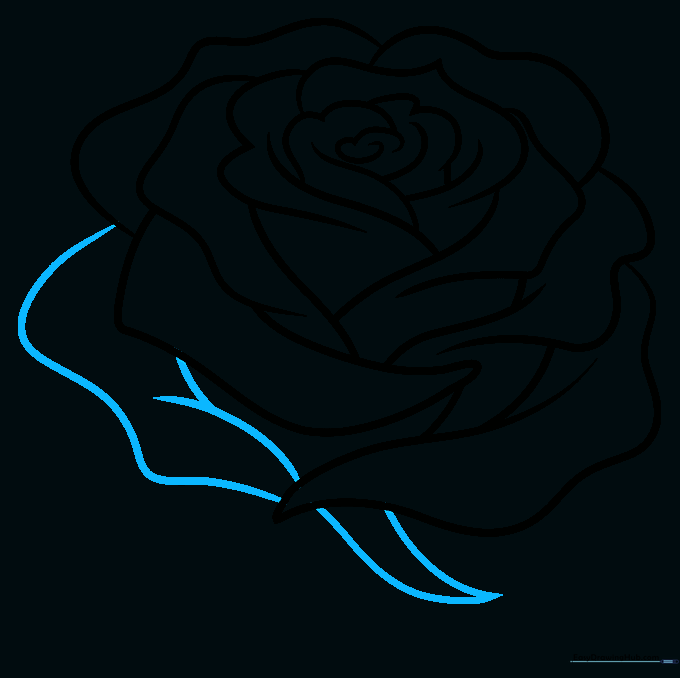
Add one final outer petal and draw sharp, leaf-like sepals at the base. Tip: Sepals are the small green leaves that protect the bud; keep them pointy!
Step 9: Stem and Thorns
Draw the stem with two parallel lines and add a small, sharp triangle for a thorn. Tip: A single thorn makes the drawing look much more authentic.
Step 10: Adding Color

Bring your rose to life with color! Use deep reds for the shadows and lighter pinks or whites for the petal highlights. Tip: Coloring in circular motions helps blend the colors smoothly.
More Tutorials


