How to Draw a Realistic Owl Face: Easy 9-Step Guide
Capture the wise expression of an owl with this step-by-step drawing guide designed for young artists and beginners. You will need a pencil, an eraser, and a sheet of paper to bring this nocturnal bird to life. By focusing on simple shapes and layered textures, you'll learn how to build a realistic face from the ground up.
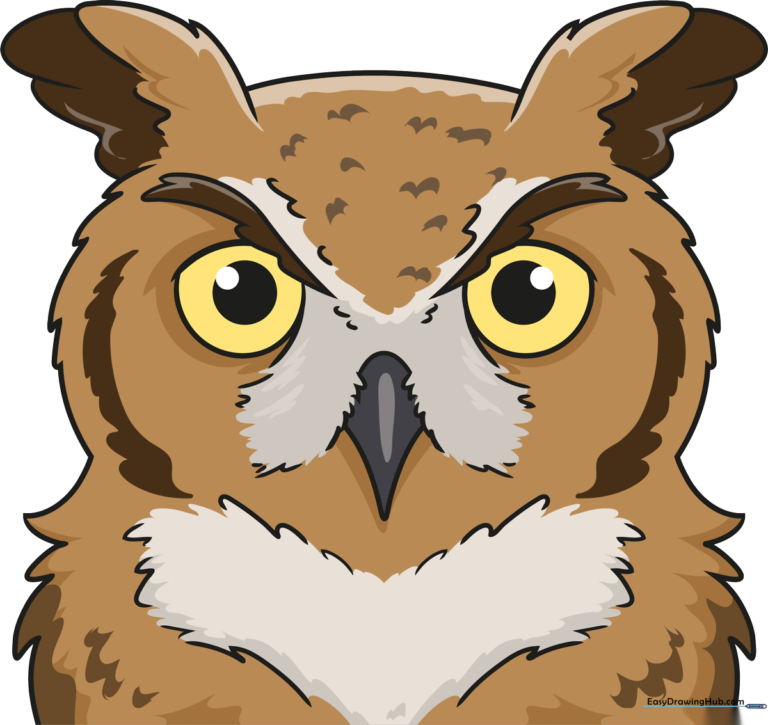
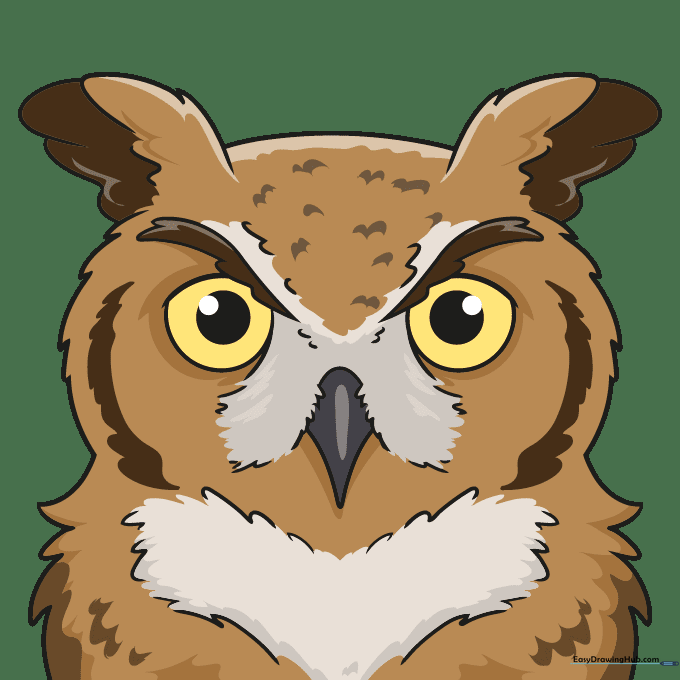
🎯 Final Result
Step-by-Step Instructions
Step 1: Establishing the Eyes

Draw two horizontal, egg-shaped ovals for the eyes. Add a smaller circle inside each to represent the pupils. Teacher's Tip: Keep these shapes light; they serve as the anchor for the rest of the face's proportions.
Step 2: Defining the Brow Line
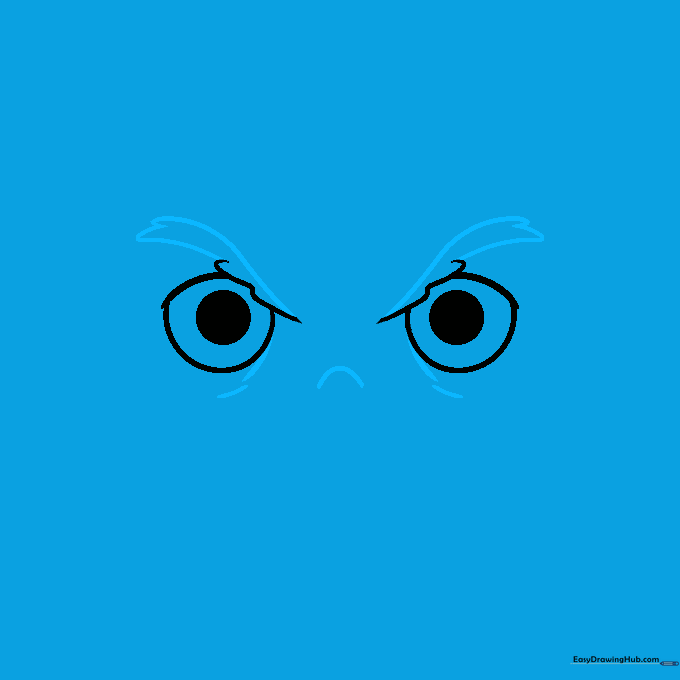
Connect the eyes with a soft, central loop and sketch narrow, triangular shapes above each eye to form the eyebrows. Tip: Use short, quick strokes to mimic the look of individual feathers.
Step 3: Sketching the Beak

Draw a sharp, deep 'V' shape between the eyes for the beak. Surround it with loose, sketchy lines to suggest the feathery area around the mouth. Tip: Keep the lines parallel to create a sense of depth.
Step 4: Framing the Face
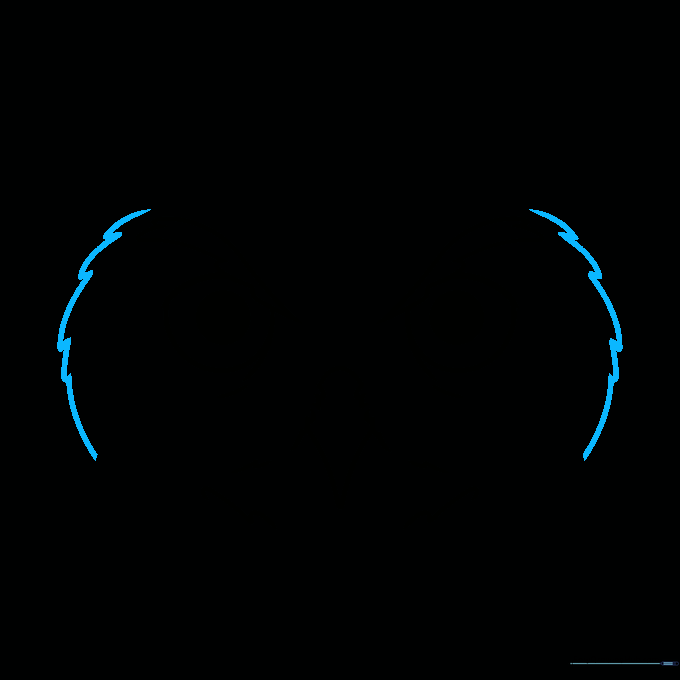
Draw two large, curved lines on either side of the face, resembling parentheses. This creates the 'facial disc' characteristic of many owl species. Tip: Ensure these curves are symmetrical to keep the owl looking balanced.
Step 5: Adding Ear Tufts
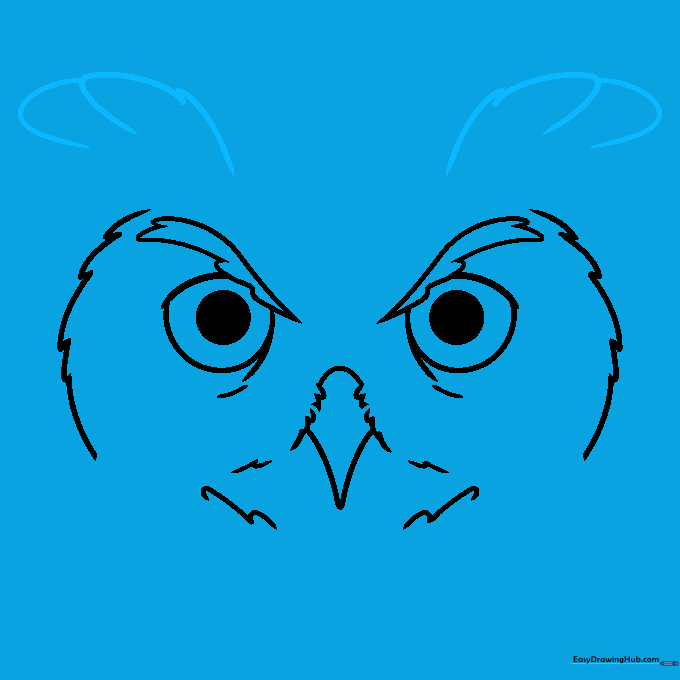
Sketch diagonal lines pointing upward on both sides of the head, forming triangles. Add overlapping oblong shapes to suggest the tufted feathers. Tip: Owls use these tufts to express emotion, so make them look slightly pointed.
Step 6: Connecting the Features
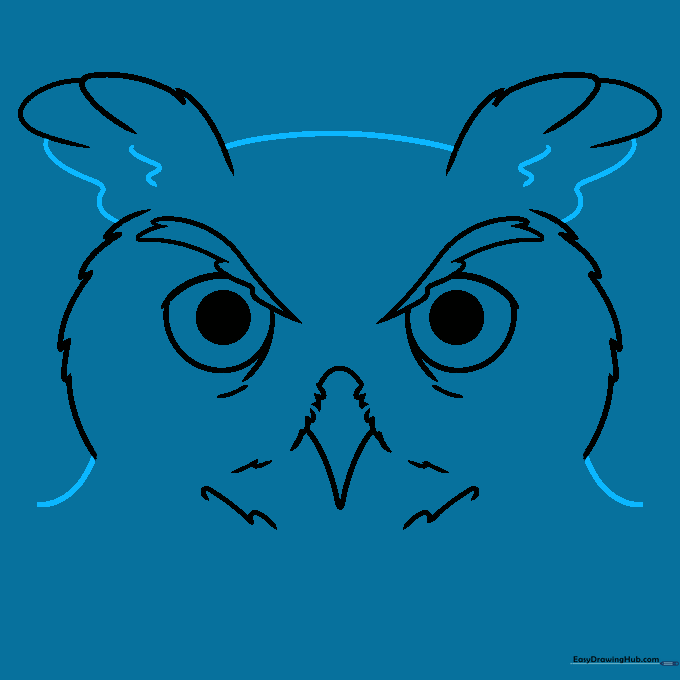
Connect the ear tufts to the facial disc with a smooth curve. Add wavy lines along the edges to represent soft, downy feathers. Tip: Vary the length of your wavy lines to make the feathers look natural.
Step 7: Outlining the Body
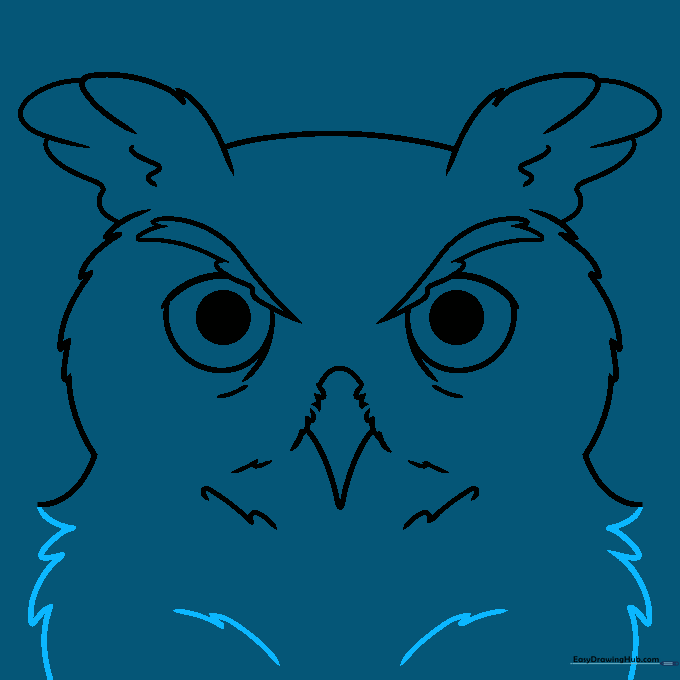
Draw two curved triangles extending downward from the head to form the neck and shoulders. Add parallel lines beneath the chin to suggest the chest area. Tip: Keep these lines loose to maintain the 'fluffy' look.
Step 8: Adding Texture
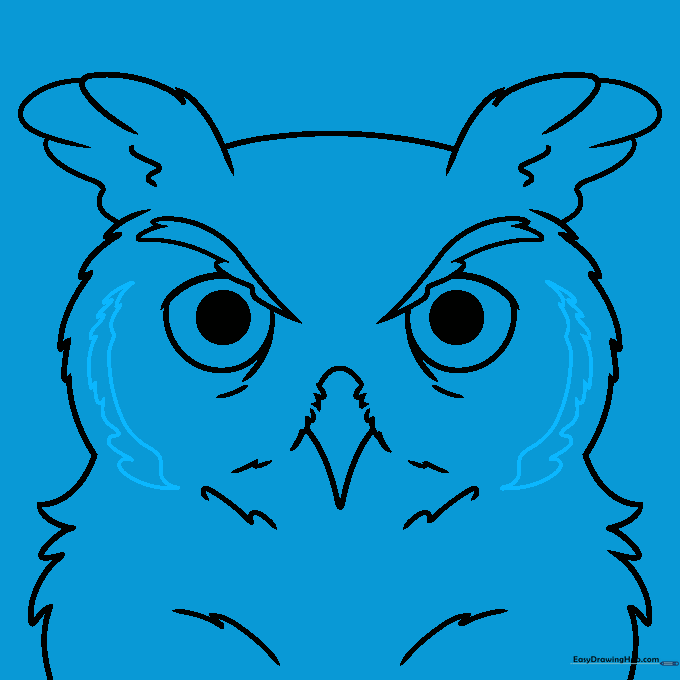
Go over the outline of the face and body with short, scraggly lines. This adds the texture of real feathers. Tip: Don't worry about perfection; nature is rarely perfectly symmetrical or smooth!
Step 9: Final Details
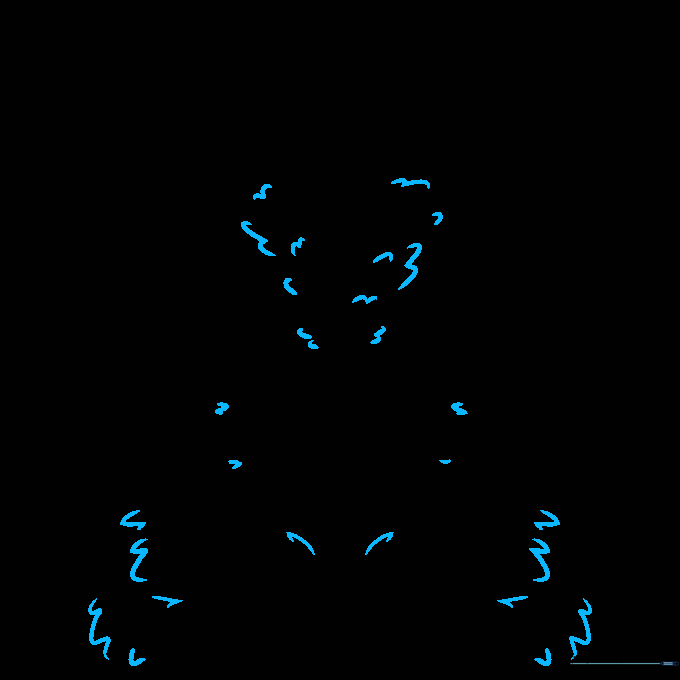
Add small, scattered marks throughout the body to represent individual feather patterns. Tip: If you're feeling adventurous, draw a small branch or nest in the background to complete the scene.
Step 10: Coloring Your Owl
Use warm browns and creams for the feathers, and a bright yellow for the eyes. Use a dark grey for the beak. Tip: Use a blending stump or your finger to soften the colors for a more realistic, soft-feathered appearance.
More Tutorials


