How to Draw a Ranunculus: Easy 9-Step Flower Guide
Capture the lush, layered beauty of a ranunculus with this beginner-friendly drawing tutorial. Designed for ages 6 and up, this activity requires only a pencil, eraser, and paper to create a stunning floral masterpiece. Follow along to master the art of drawing overlapping petals and natural stems.
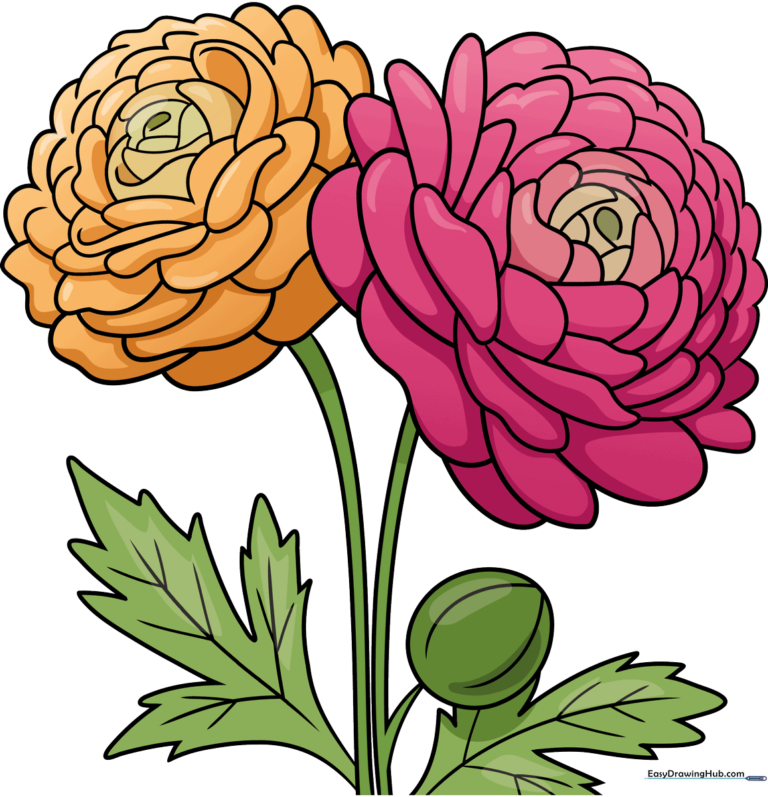
🎯 Final Result
Step-by-Step Instructions
Step 1: Sketching the Center Petals
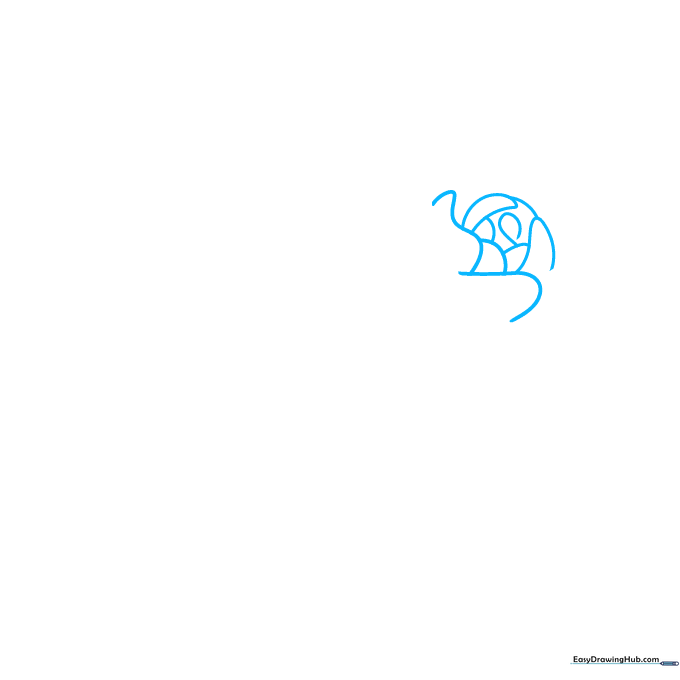
Start by drawing a small, rounded shape in the center of your page. Use gentle, wavy 'U' lines to create the tight, overlapping petals at the heart of the bloom. Teacher's Tip: Keep these lines soft and light; they are the foundation for the rest of the flower.
Step 2: Building the Inner Layers
Add more overlapping petals around your center shape using curved lines. Keep the petals compact near the middle, but start making them slightly wider as you move outward. Tip: Imagine the petals are hugging the center of the flower.
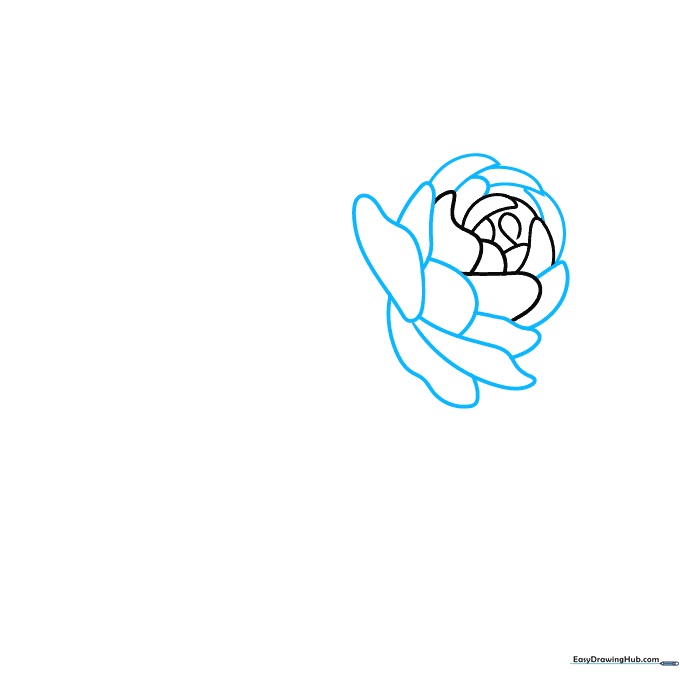
Step 3: Expanding the Bloom
Continue adding layers of petals. As you work outward, make the petals larger and more open to show the flower blooming. Tip: Vary the curves of your lines so no two petals look exactly the same.
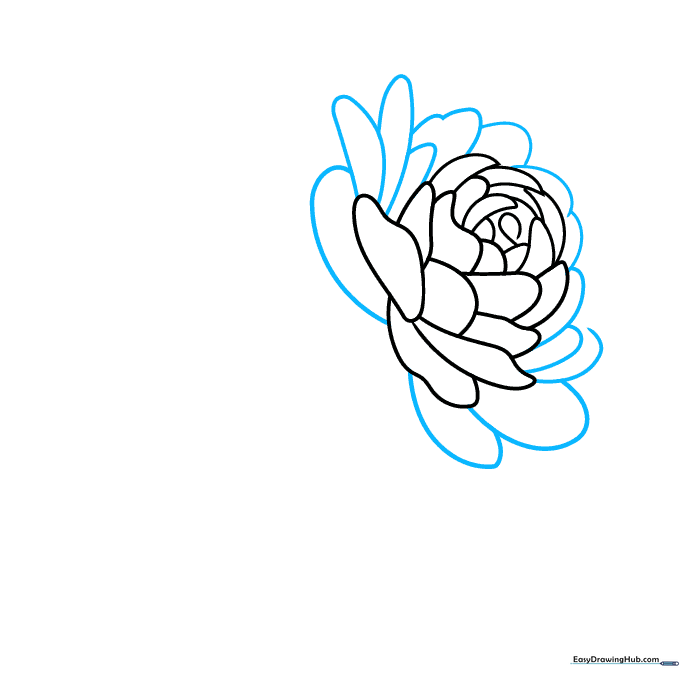
Step 4: Defining the Petal Shape
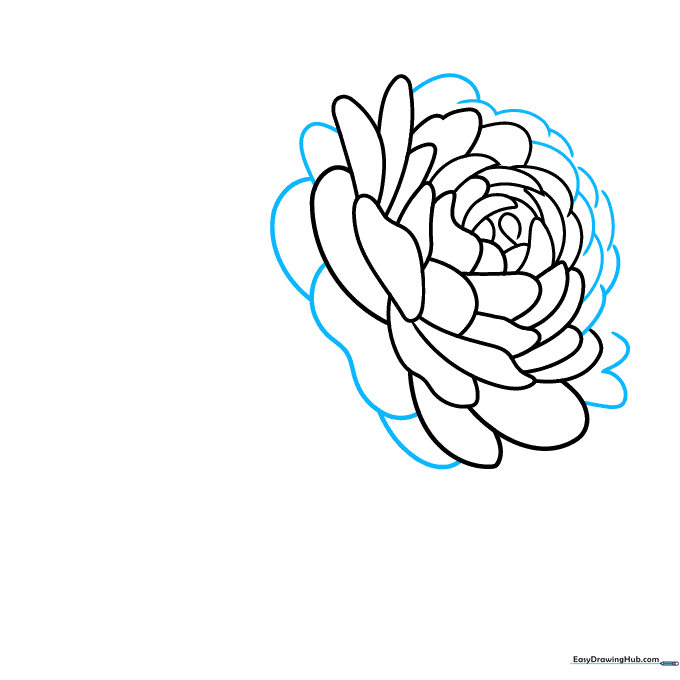
Add larger, more defined petals on the side facing you. On the opposite side, keep the petals smaller and more numerous to create a sense of perspective. Tip: Use a smooth, fluid motion with your pencil for these larger curves.
Step 5: Adding Stems and New Buds
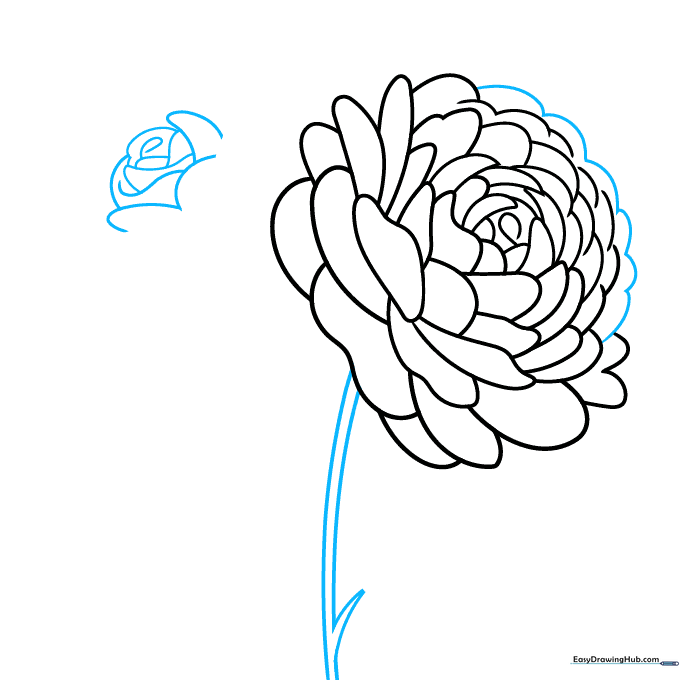
Finish the first bloom by adding a few final outer petals. Draw two parallel curved lines beneath the flower to form a stem. Near the base, add two small lines meeting at a point for a bud, then start a new circle for a second flower. Tip: Keep your stem lines parallel to make them look sturdy.
Step 6: Developing the Second Flower
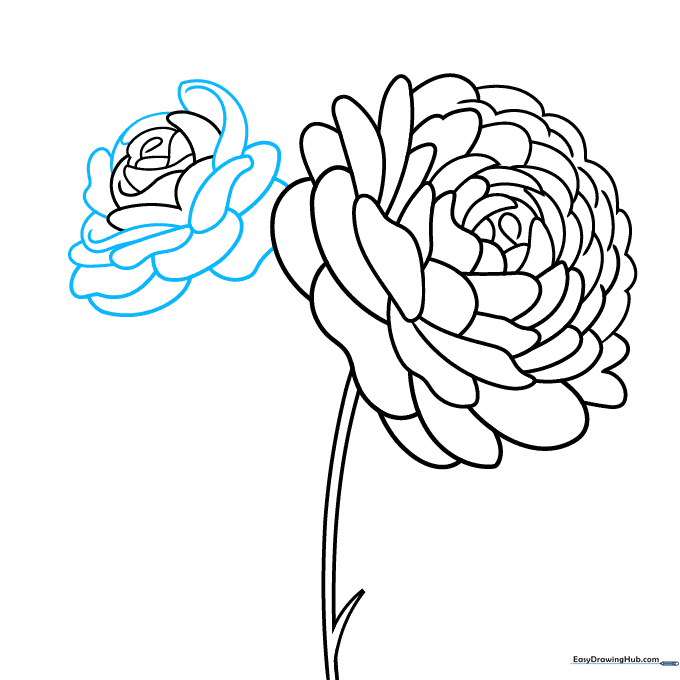
Repeat the process for your second flower by adding layers of petals around the center. Tip: Try to make this flower look slightly different from the first to add variety to your drawing.
Step 7: Filling Out the Second Bloom
Continue adding petals to the second flower. Remember to keep the far-side petals smaller and the near-side petals larger. Tip: Use quick, light strokes to create the illusion of many overlapping petals.
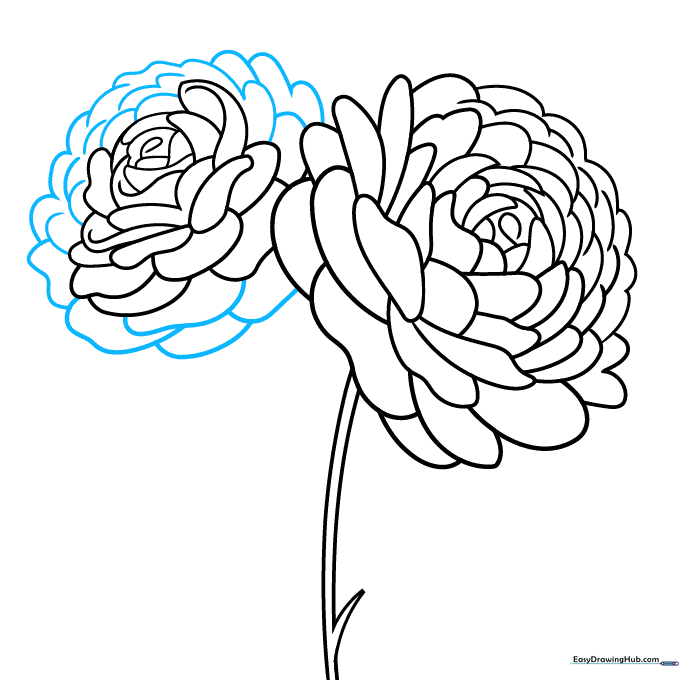
Step 8: Adding Leaves and Buds
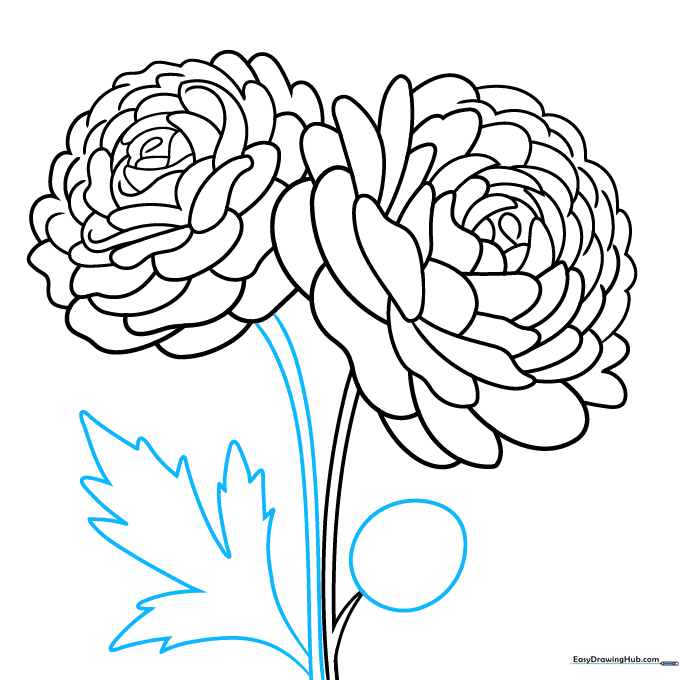
Draw a stem for the second flower. Use jagged, wavy lines to create a deeply lobed leaf. At the tip of the smaller stem, draw an egg-shaped oval for the unopened bud. Tip: Jagged lines help make the leaves look more realistic and organic.
Step 9: Final Details
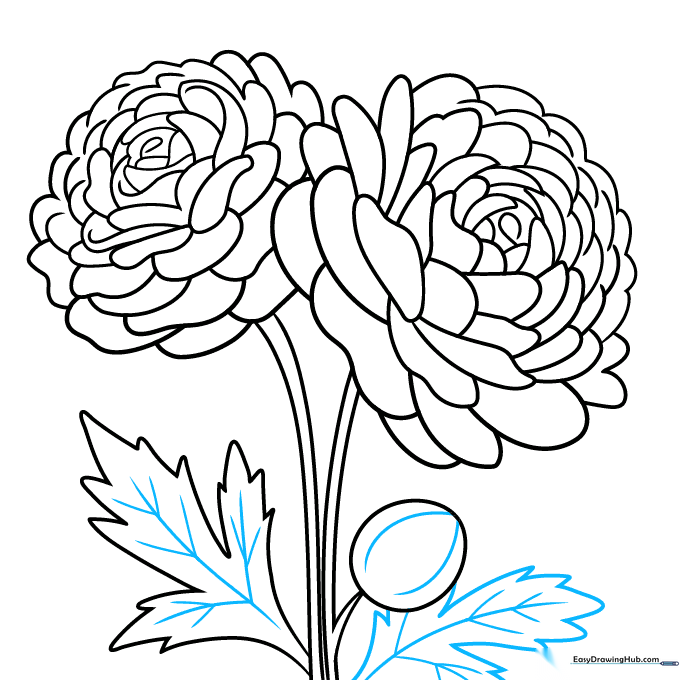
Add one more serrated leaf to your drawing. Add branching veins to the leaves and a few curved lines to the bud for texture. Tip: Use a darker pencil pressure for these final details to make them stand out.
Step 10: Bring Your Flowers to Life with Color
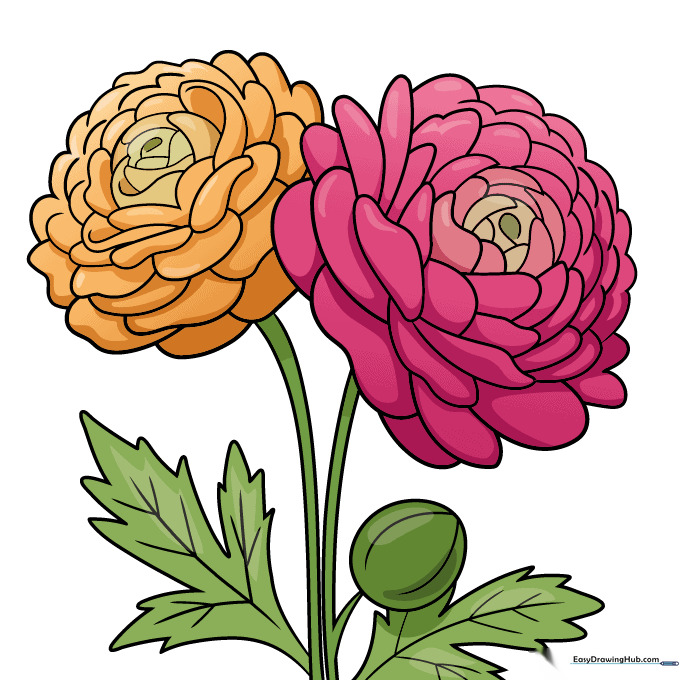
Now for the fun part! Color your flowers using vibrant shades like orange, deep pink, or yellow. Ranunculus are known for their bright, saturated colors. Tip: Use lighter colors in the center and darker shades toward the edges to create a 3D effect.
More Tutorials


