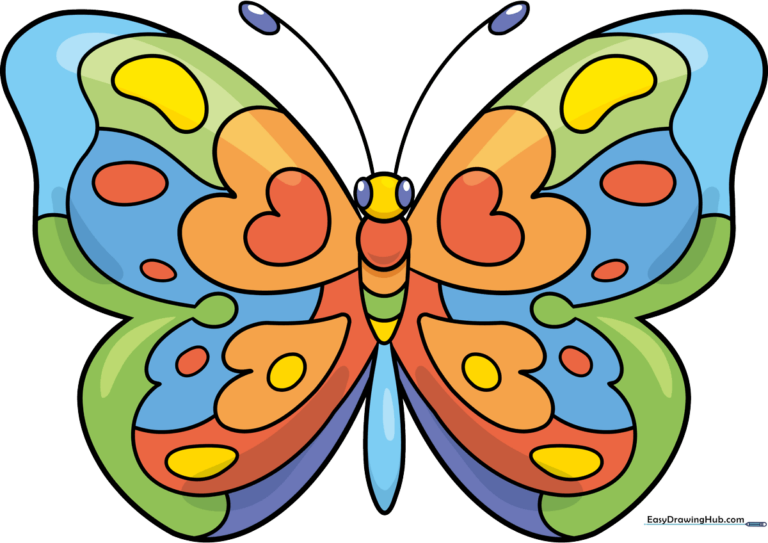
How to Draw a Rainbow Butterfly: Easy 10-Step Guide
Bring a splash of color to your sketchbook with this whimsical rainbow butterfly! This project is perfect for artists ages 5 and up, requiring only a pencil, an eraser, and your favorite set of markers or crayons. Follow along to master symmetrical wing shapes and create a beautiful, vibrant masterpiece.
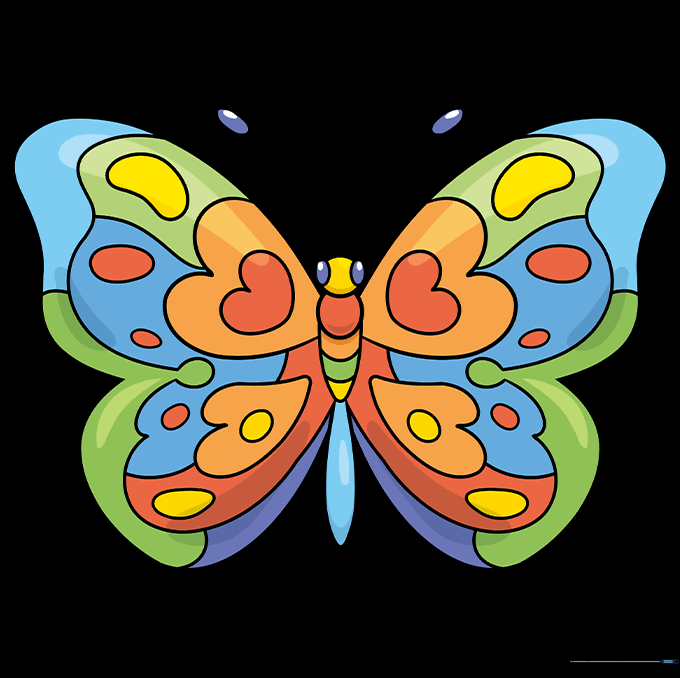
🎯 Final Result
Step-by-Step Instructions
Step 1: Sketching the Head and Thorax

Start by drawing two small ovals for the eyes, then enclose them in a circle to form the head. Below the head, draw an oval for the thorax. Teacher's Tip: Keep your pencil lines light and loose here so you can easily erase any overlapping lines later.
Step 2: Adding Antennae and Abdomen

Draw two long, curved lines from the head, ending in small ovals for the antennae. Below the thorax, draw a long, curved shape that doubles back to create the abdomen. Tip: Make the antennae look like little clubs to give your butterfly a friendly, cartoonish look.
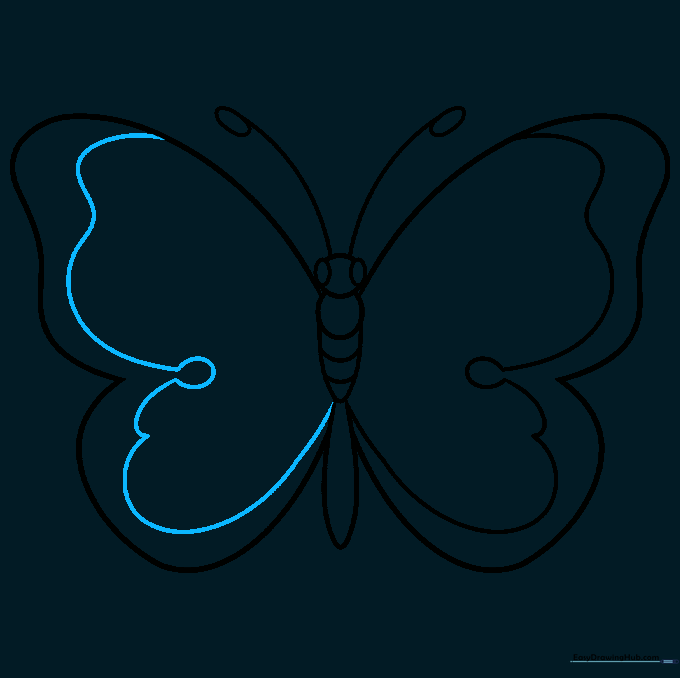
Step 3: Outlining the First Wing
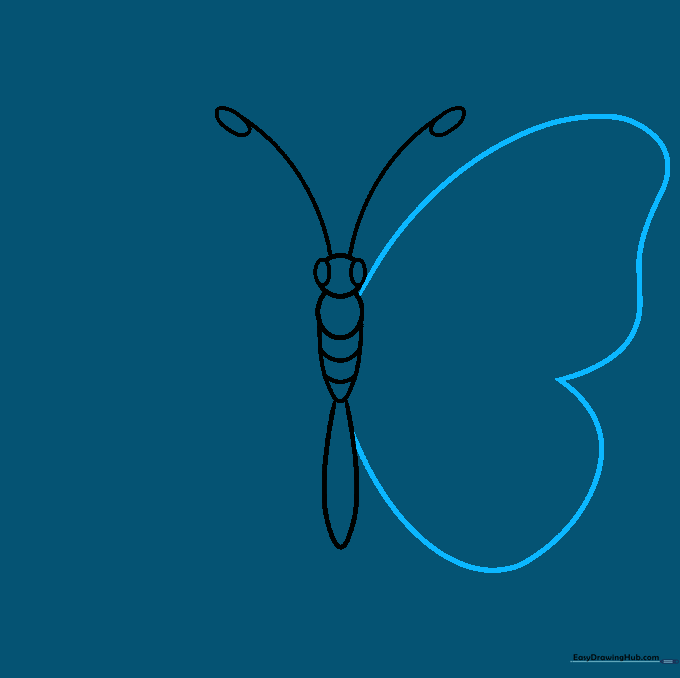
Use long, sweeping curved lines to outline the heart-like shape of the upper and lower wings on one side. Tip: Imagine you are drawing a large, soft 'B' shape attached to the body.
Step 4: Creating Symmetry
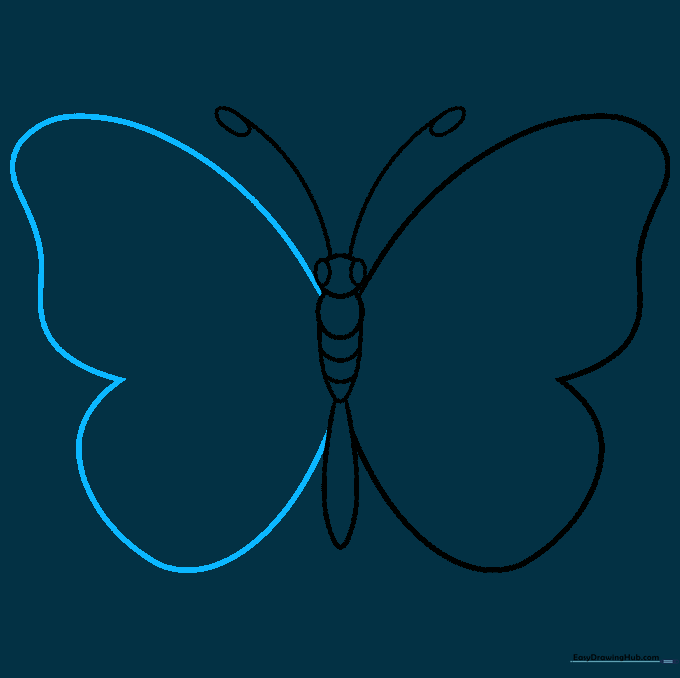
Repeat the wing shapes on the opposite side to create a mirror image. Tip: Symmetry is key for butterflies! If one side looks a bit different, don't worry—nature is rarely perfectly symmetrical.
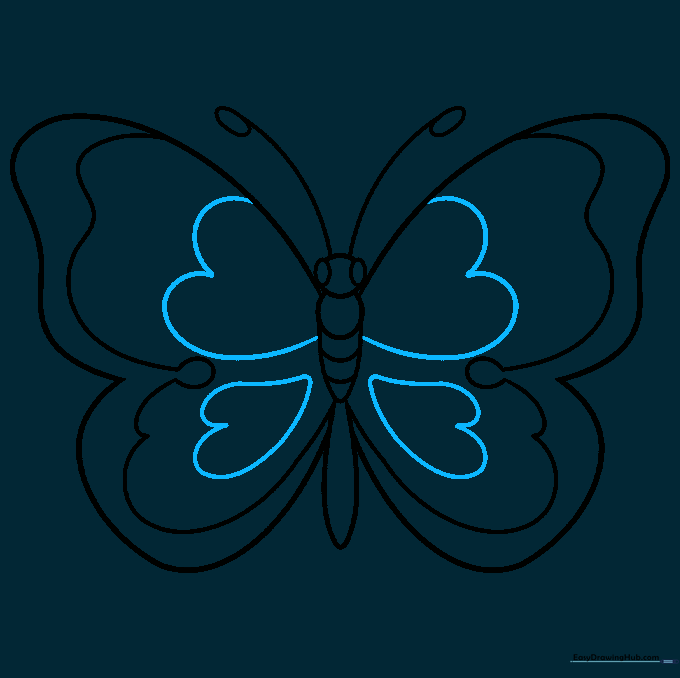
Step 5: Adding Wing Patterns
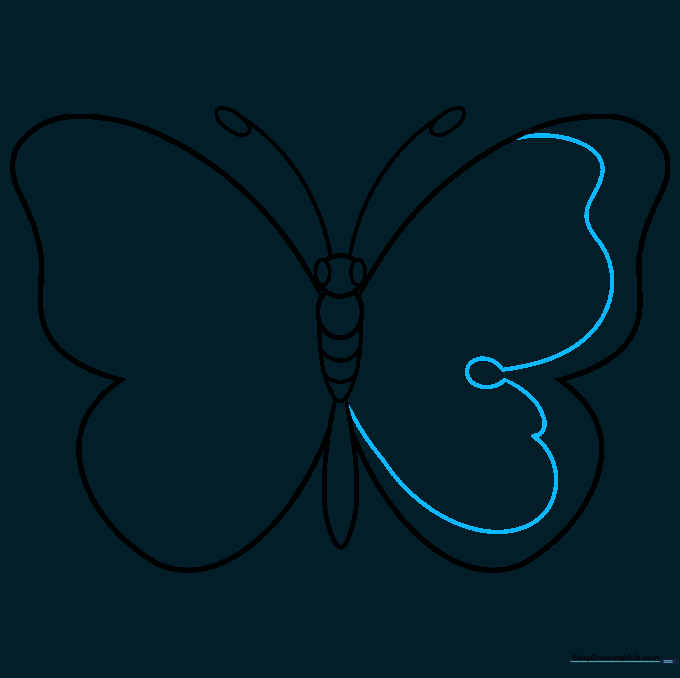
Draw wavy, heart-like shapes inside the upper and lower wings. Connect them with a partial oval. Tip: These shapes act as 'windows' for your rainbow colors later!
Step 6: Mirroring Wing Details
Mirror the patterns from the left wing onto the right wing. Tip: Take your time to ensure the patterns align, which helps the butterfly look balanced.
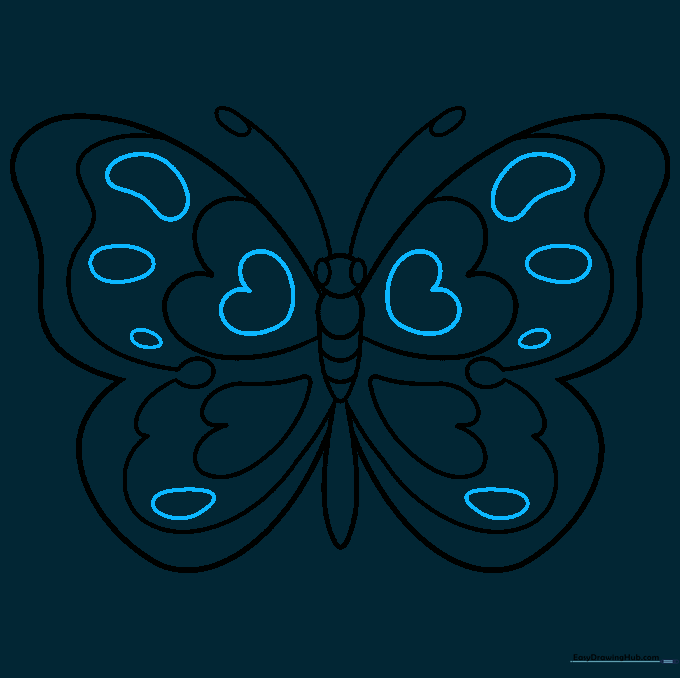
Step 7: Adding Inner Wing Details
Add smaller heart shapes inside each of the four wing sections. Tip: Varying the size of these shapes adds depth to your drawing.
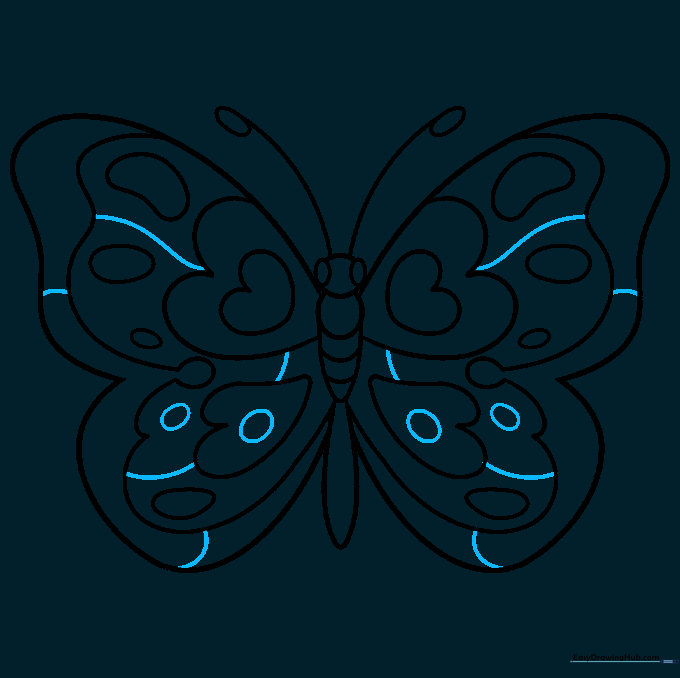
Step 8: Refining the Wings
Add a few more irregular oval shapes to fill the empty spaces on the wings. Tip: Don't worry about making these perfect; butterflies have unique, organic patterns in nature.
Step 9: Final Touches
Add final small ovals and curved lines within the wings to complete the outline. Tip: Use a fine-liner or dark marker to trace your final lines before erasing the pencil marks.
Step 10: Bringing it to Life with Color
Time to color! Use the full spectrum—red, orange, yellow, green, blue, indigo, and violet—to fill in your wing patterns. Tip: Try blending your colors where they meet to create a soft, magical rainbow effect.
More Tutorials


