How to Draw a Race Car: Easy 10-Step Guide for Kids
Ready to hit the track? This guide is perfect for young artists ages 6+ who want to draw a high-speed race car. All you need is a pencil, an eraser, and a piece of paper to get started. Follow these simple steps to build your car from the chassis up, focusing on basic geometric shapes.
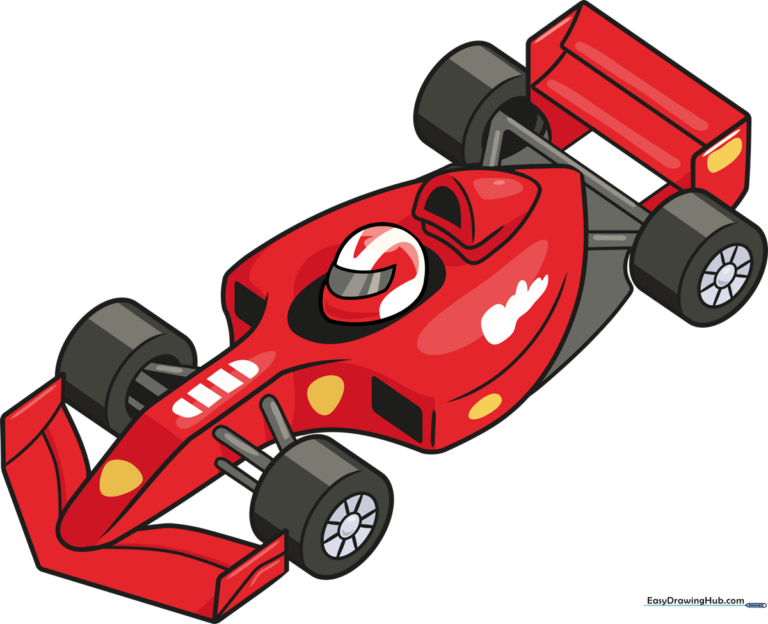
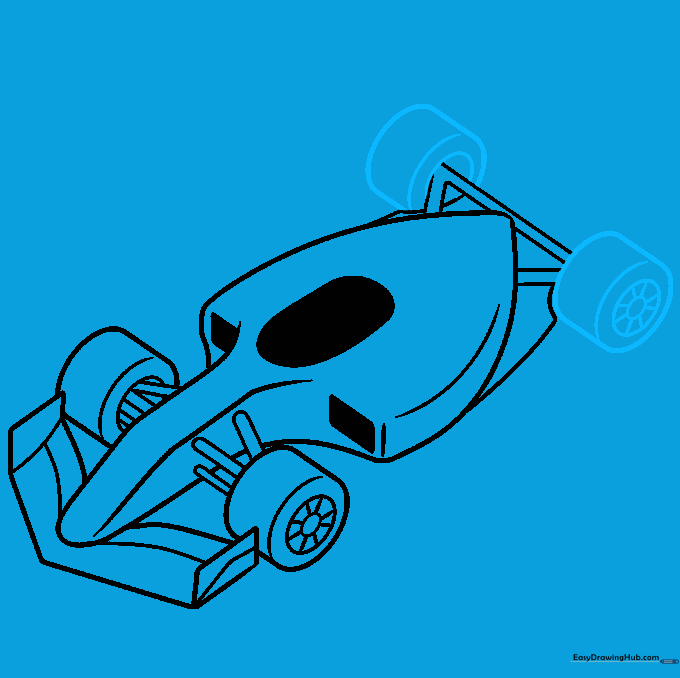
🎯 Final Result
Step-by-Step Instructions
Step 1: Sketching the Main Chassis
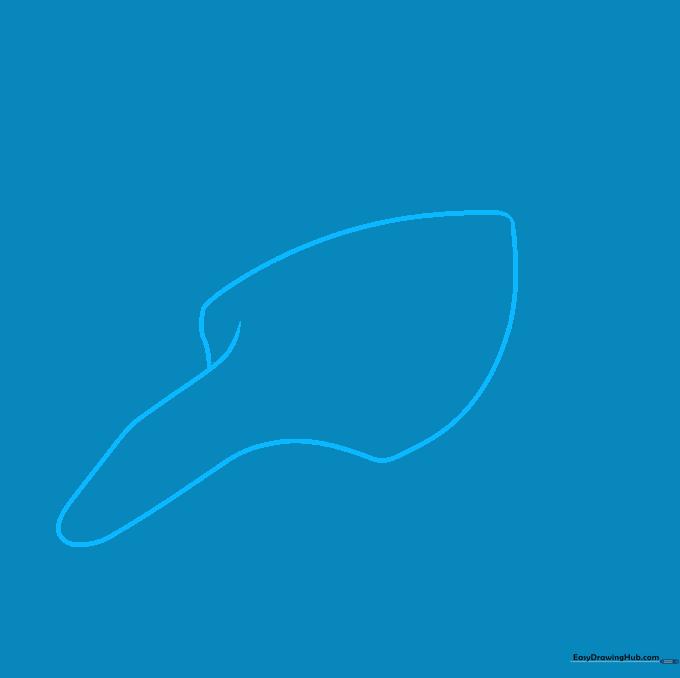
Start by sketching the arrow-like body of the car using light, overlapping lines. One side should look like a rounded triangle, while the other is an elongated shape. Teacher's Tip: Keep your pencil pressure very light here so you can easily erase the overlapping lines later!
Step 2: Adding Body Depth

Give your car a 3D look by drawing curved lines along the sides. Add a parallelogram at the base of the triangle for the side panels, and sketch a rounded shape in the center for the driver's cockpit. Teacher's Tip: Think of the cockpit as a small bubble where the driver sits.
Step 3: Constructing the Front Wing
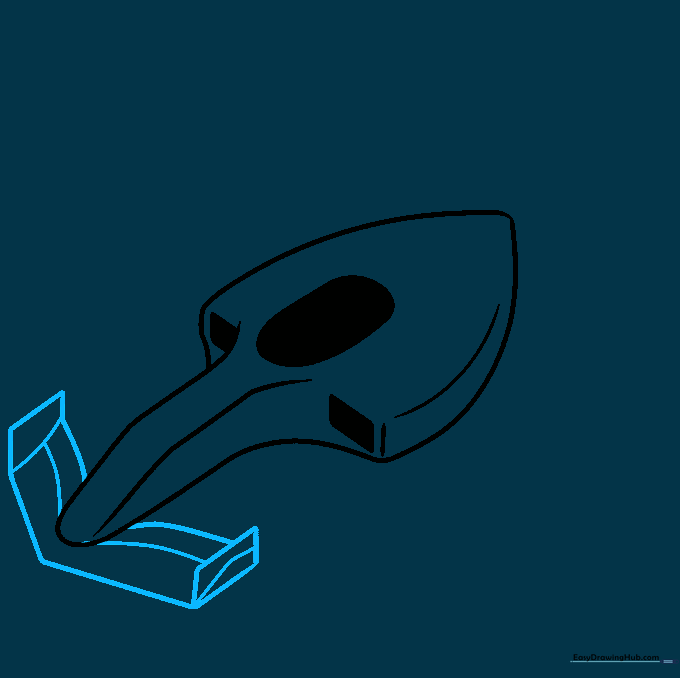
Extend curved lines from the center spine to create the front wing, adding a wide 'V' shape at the tip. Connect these with small parallelograms on each side. Teacher's Tip: The front wing helps the car stay glued to the track at high speeds—try to keep your lines symmetrical!
Step 4: Drawing the Front Wheel
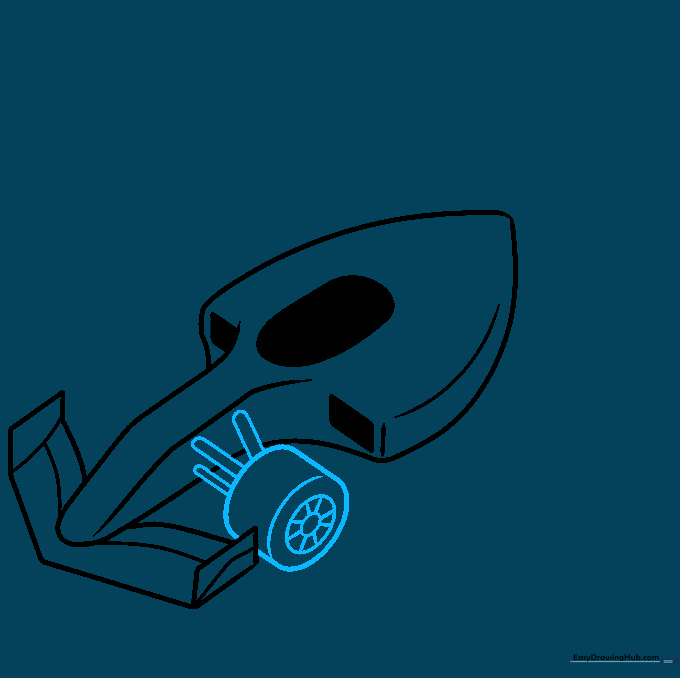
Draw two straight lines connected by curves to form the tire. Inside, draw a circle within a circle for the wheel hub, and add straight lines for spokes. Connect the tire to the body with small lines to represent the suspension. Teacher's Tip: Use a circular object like a coin if you need help getting the wheel shape perfect.
Step 5: Adding the Second Front Wheel
Repeat the process to draw the other front wheel on the opposite side. Ensure it aligns with the first wheel to keep the car looking balanced. Teacher's Tip: Only draw the parts of the wheel that would be visible from this angle.
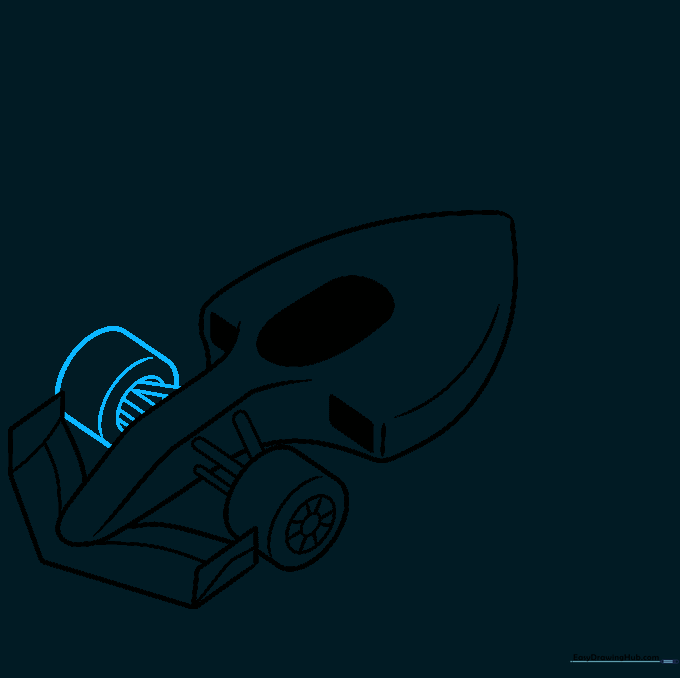
Step 6: Rear Suspension Details
Add curved lines at the back of the car to enclose the rear bodywork. Use straight lines to draw a triangle-within-a-triangle for the rear suspension. Teacher's Tip: Focus on making these lines sharp to emphasize the car's speed.
Step 7: Drawing Rear Tires
Draw the rear tires using the same technique as the front ones. Make these slightly larger than the front tires to give the car a powerful, grounded stance. Teacher's Tip: Don't forget to add the small spokes inside the wheel hubs!
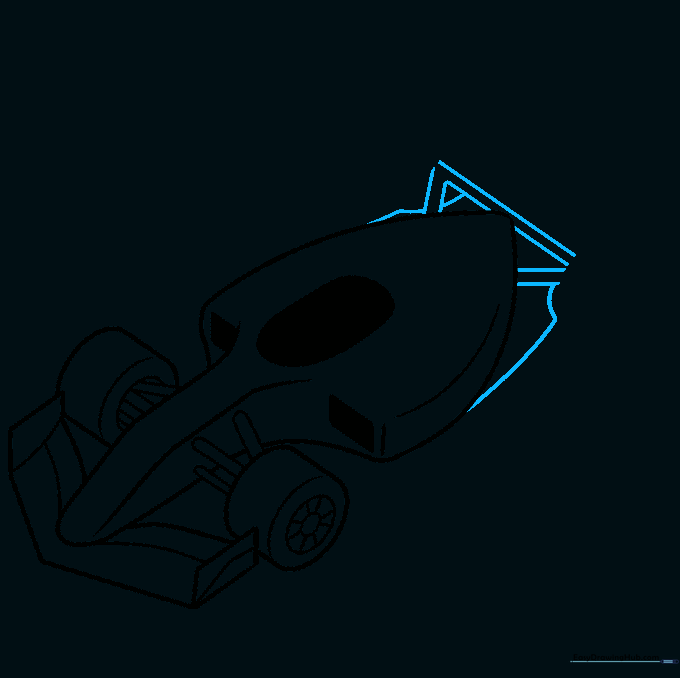
Step 8: The Rear Wing
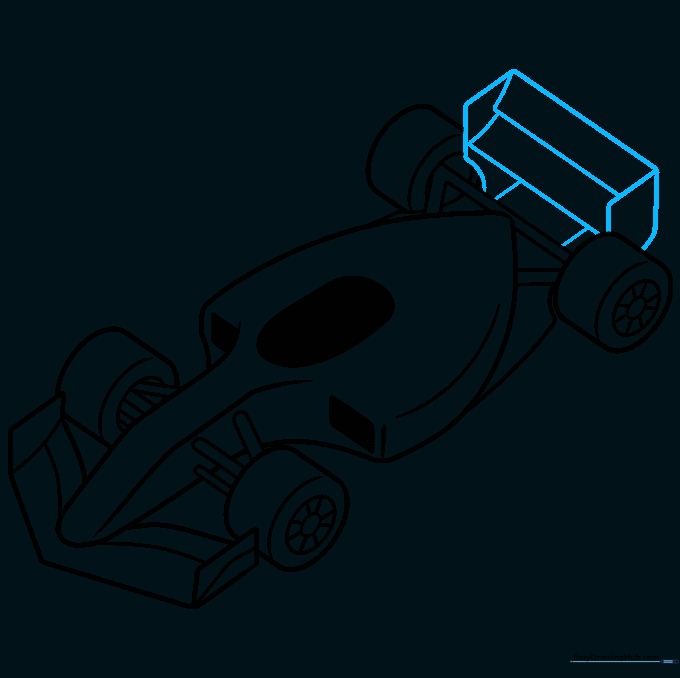
Use straight and curved lines to create the boxy rear wing. This is the 'spoiler' that keeps the car stable. Teacher's Tip: Make sure the wing is parallel to the ground for a professional look.
Step 9: Driver and Roll Hoop
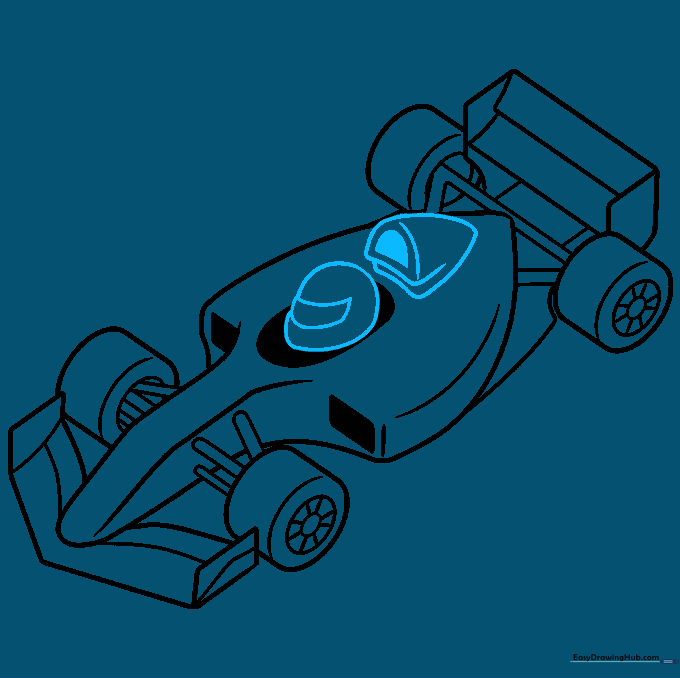
Draw an egg shape for the helmet, add a curved visor, and sketch the roll hoop above it. Teacher's Tip: The roll hoop is a safety feature, so draw it sturdy and strong.
Step 10: Bringing It to Life with Color
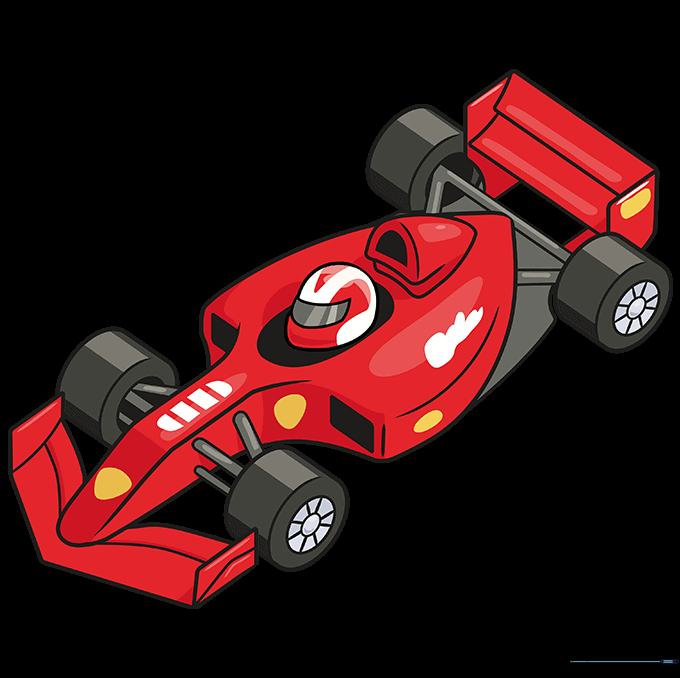
Now for the fun part! Use bright colors like racing red, electric blue, or sunshine yellow to make your car pop. Teacher's Tip: Use markers for bold lines or colored pencils to add shading and highlights for a metallic finish.
More Tutorials


