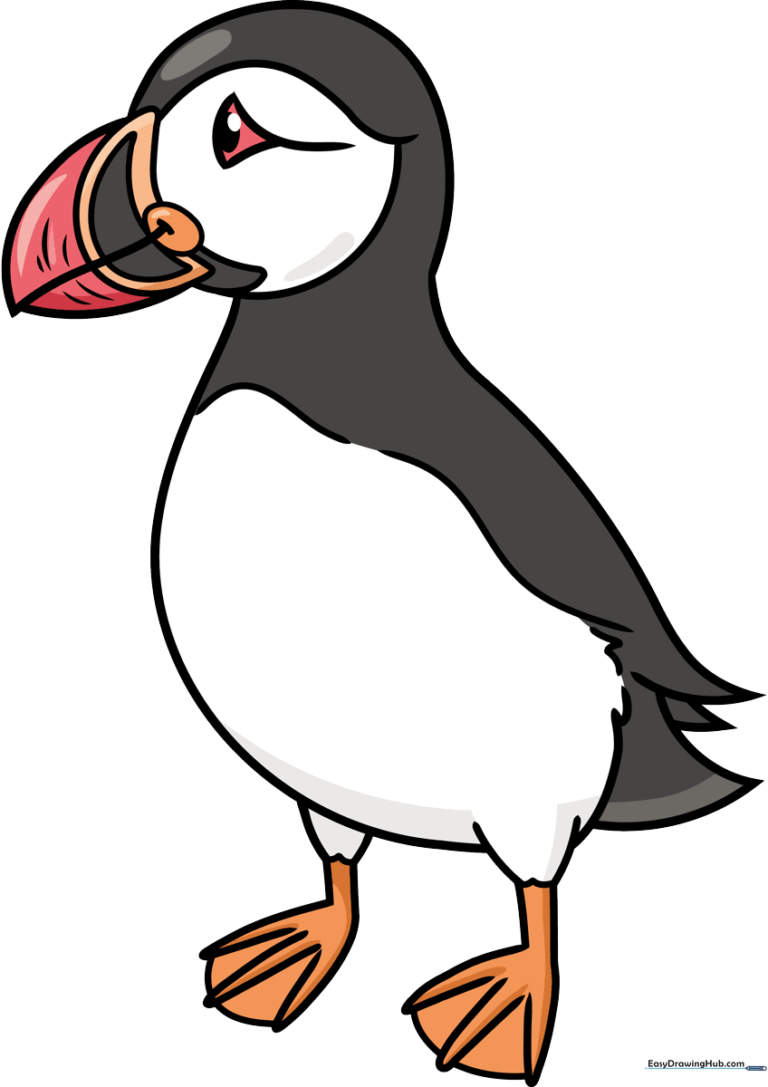
How to Draw a Puffin: Easy 9-Step Guide for Kids
Ready to bring a colorful puffin to life? This tutorial is perfect for young artists ages 5 and up. All you need is a pencil, an eraser, and some markers to create your own arctic bird masterpiece.
🎯 Final Result
Step-by-Step Instructions
Step 1: Sketching the Eye
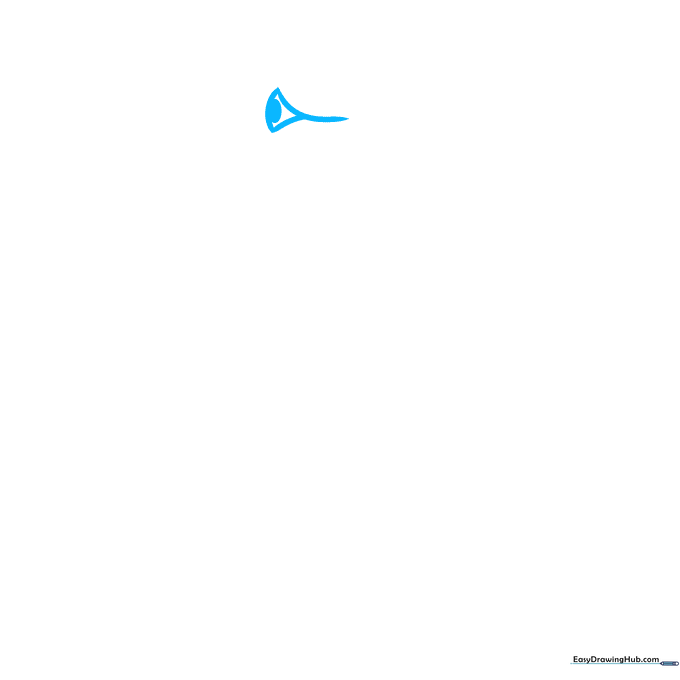
Start by drawing a triangular shape for the eye. Tip: Keep the lines soft and rounded. Add a small, dark oval inside for the pupil to give your puffin a friendly, alert expression.
Step 2: Shaping the Beak
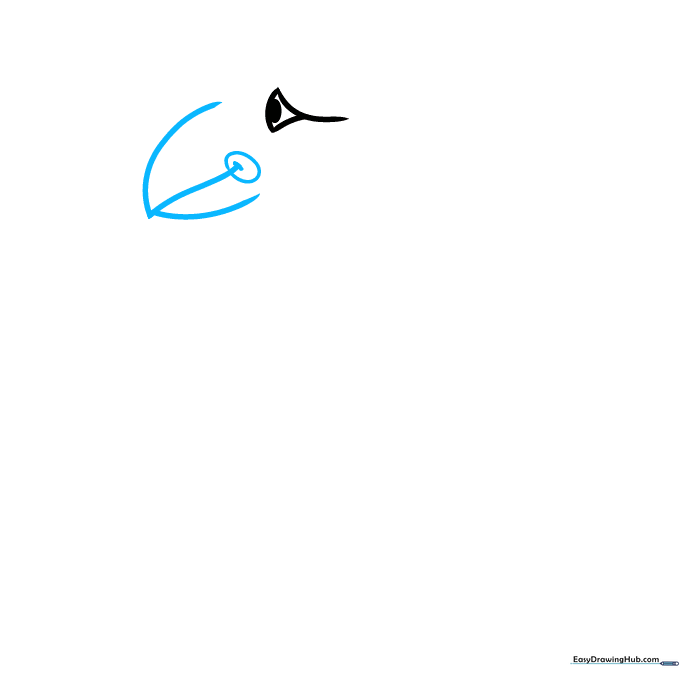
Draw the puffin's iconic, broad beak using three curved lines that meet at a point. Tip: Imagine you are drawing a rounded triangle. Add a small oval near the corner of the mouth to show the beak's texture.
Step 3: Adding Beak Details
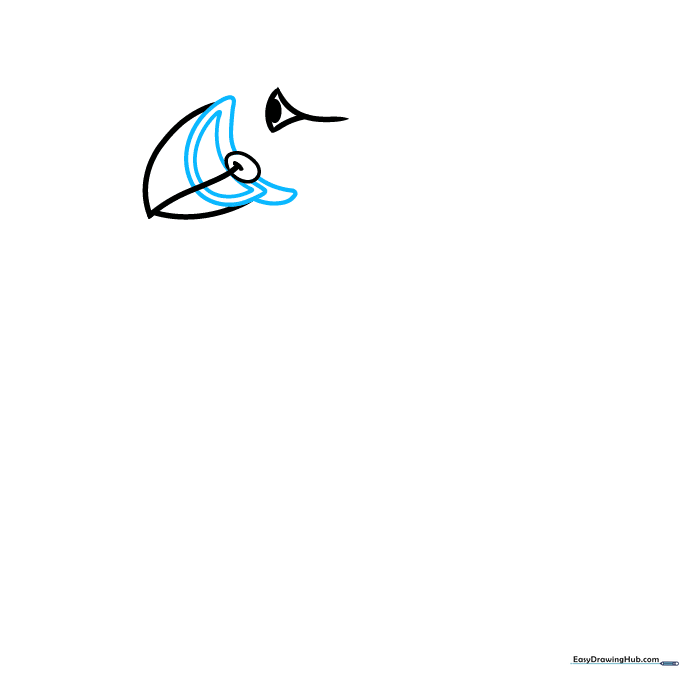
Add character by drawing two crescent moon shapes near the base of the beak. Tip: These lines define the colorful plates puffins have on their beaks in nature.
Step 4: Defining the Head and Belly
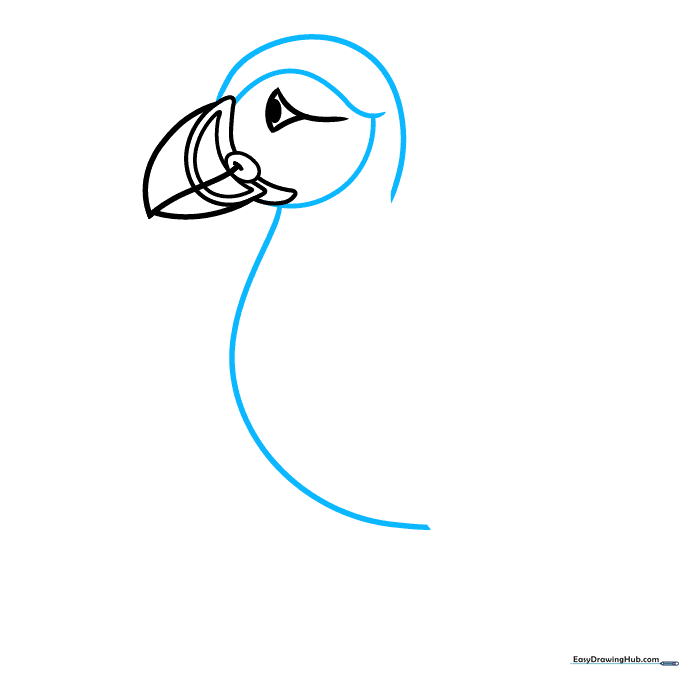
Extend a curved line from the top of the beak to form the head, and another from the bottom to create the belly. Tip: Keep your lines smooth to make the bird look soft and fluffy.
Step 5: Sketching the First Leg
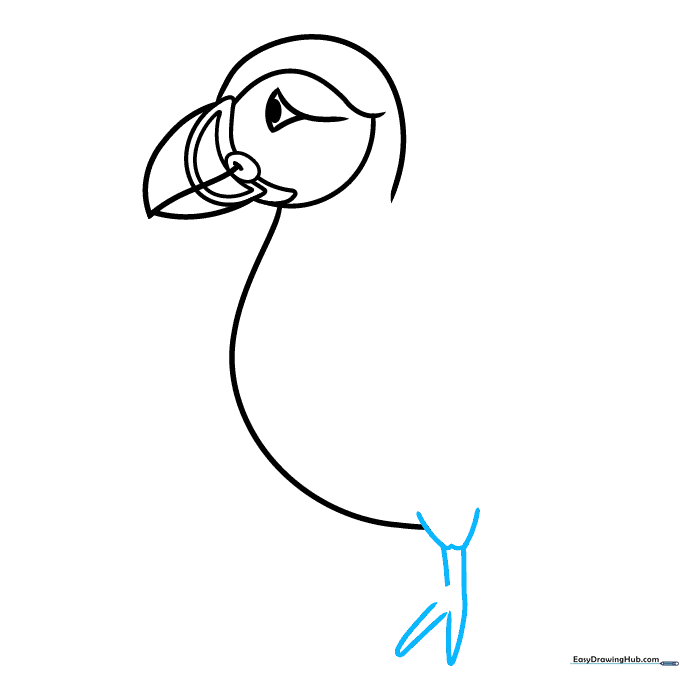
Draw a 'W' shape at the base of the belly for the top of the leg. Use straight lines to create the 'Y' shaped foot. Tip: Puffins have webbed feet, so keep the toes close together.
Step 6: Adding Webbed Toes
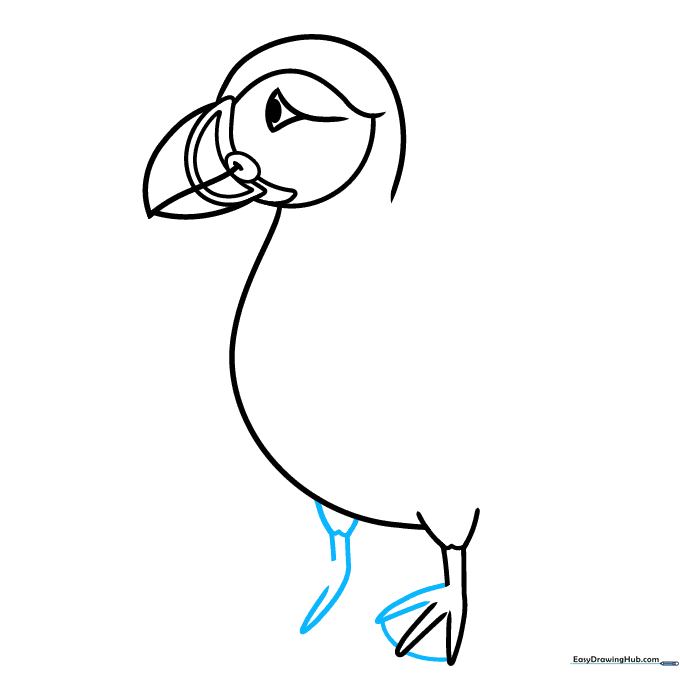
Connect the toes with small curved lines to show the webbing. Then, draw another 'W' shape nearby to start the second leg. Tip: Take your time here; webbed feet are what help puffins swim!
Step 7: Finishing the Feet
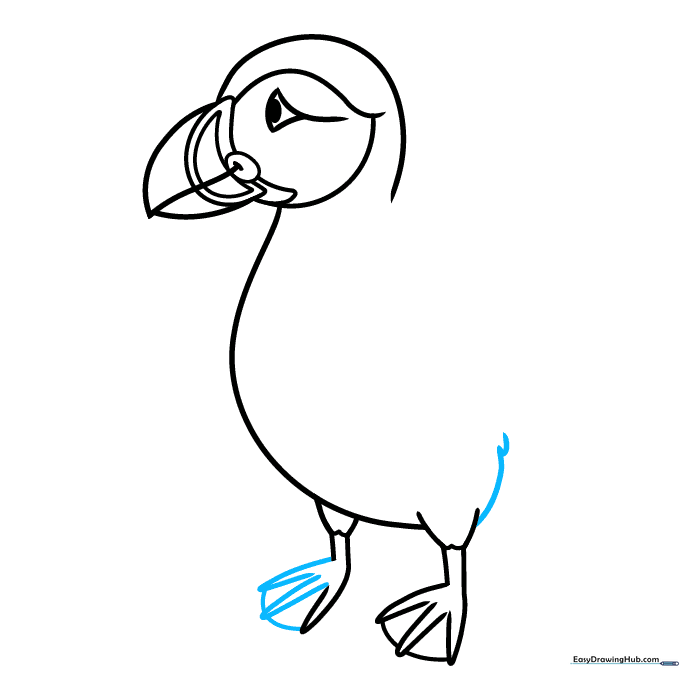
Use narrow 'V' shapes to finish the remaining toes and connect them with curves. Add a few curved lines near the hip to show the leg joint. Tip: Keep the lines light so they look natural.
Step 8: Adding the Tail
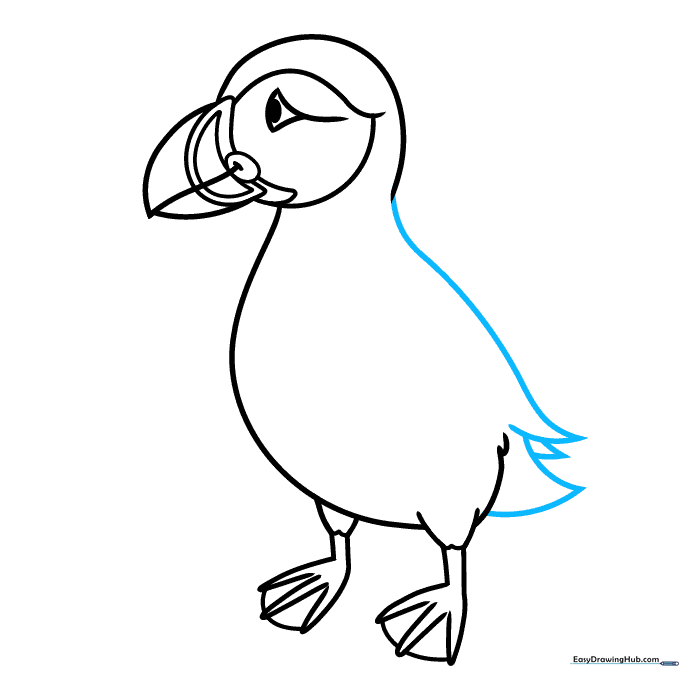
Extend a long, graceful curve from the back of the head. Use overlapping 'U' shapes to create the tail feathers. Tip: Make the tail look like a small fan for a cute cartoon effect.
Step 9: Final Touches
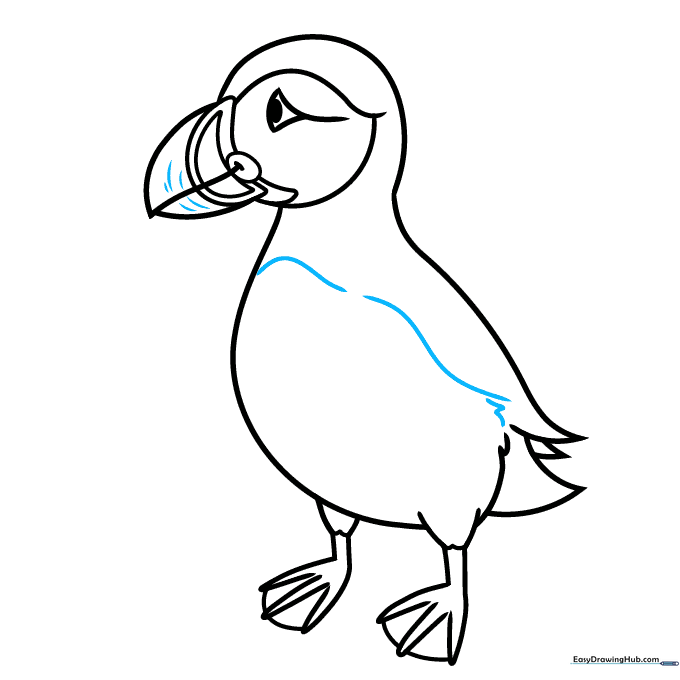
Review your drawing and add any final curved lines to the beak or belly to refine the shape. Tip: Erase any stray pencil marks to make your drawing look clean and professional.
Step 10: Bring Your Puffin to Life with Color
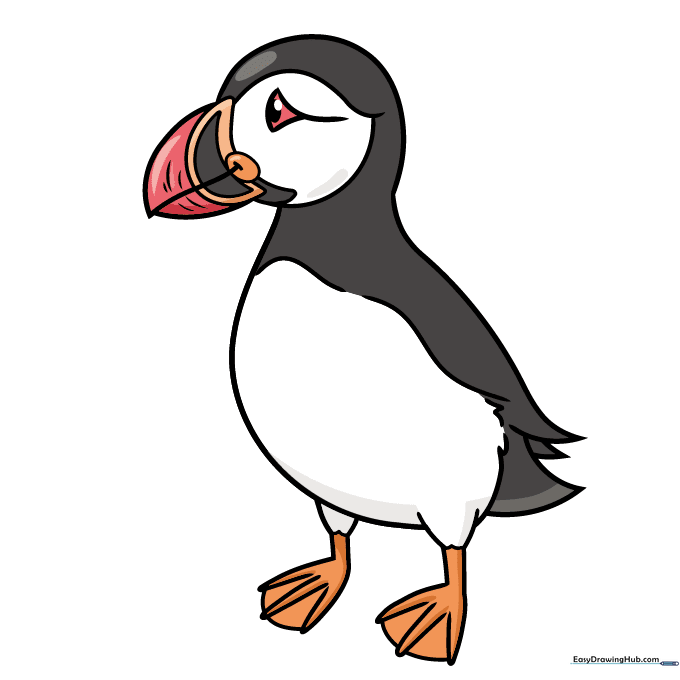
Time to color! Use black for the back, white for the belly and face, and bright orange, yellow, and red for the beak. Tip: Use light pressure with your markers to create smooth, even color.
More Tutorials


