How to Draw a Prairie Dog: Easy 9-Step Guide for Kids
Ready to bring a desert friend to life? This tutorial is perfect for young artists ages 5 and up. All you need is a pencil, an eraser, and a piece of paper to practice these simple shapes and build your confidence as an illustrator.
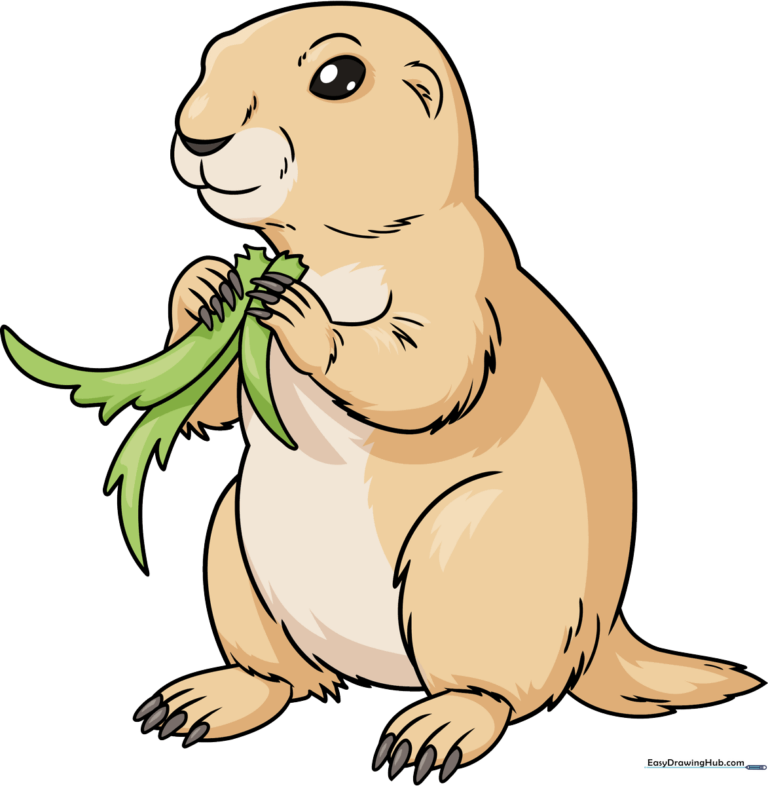
🎯 Final Result
Step-by-Step Instructions
Step 1: Sketching the Head
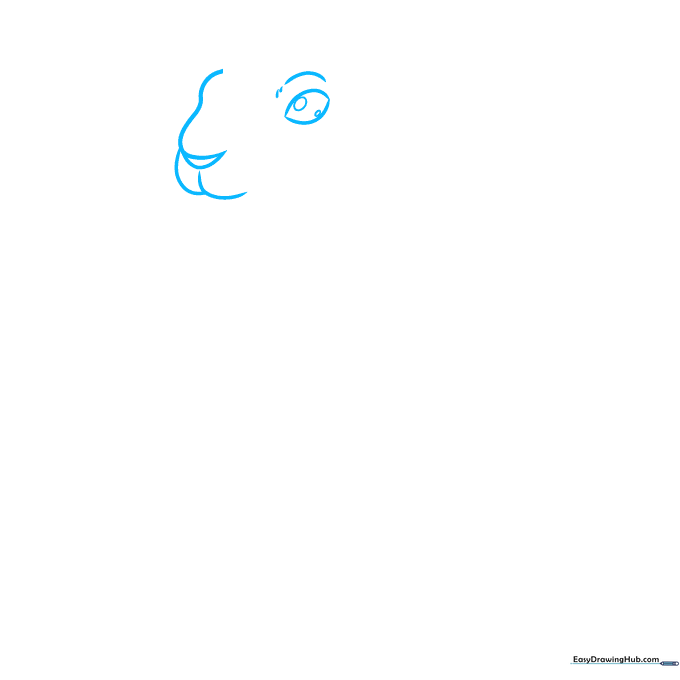
Start by sketching a light lemon shape for the head. Add two ovals inside for the eyes, and use a small crescent shape for the nose. Teacher's Tip: Keep your pencil pressure light here; you'll want to erase these guidelines later!
Step 2: Defining the Face

Outline the head with a smooth curve and add a smaller curve for the chin. Draw the ear using a diagonal line and a few soft dashes for texture. Teacher's Tip: Use short, quick strokes to make the ear look soft and fuzzy.
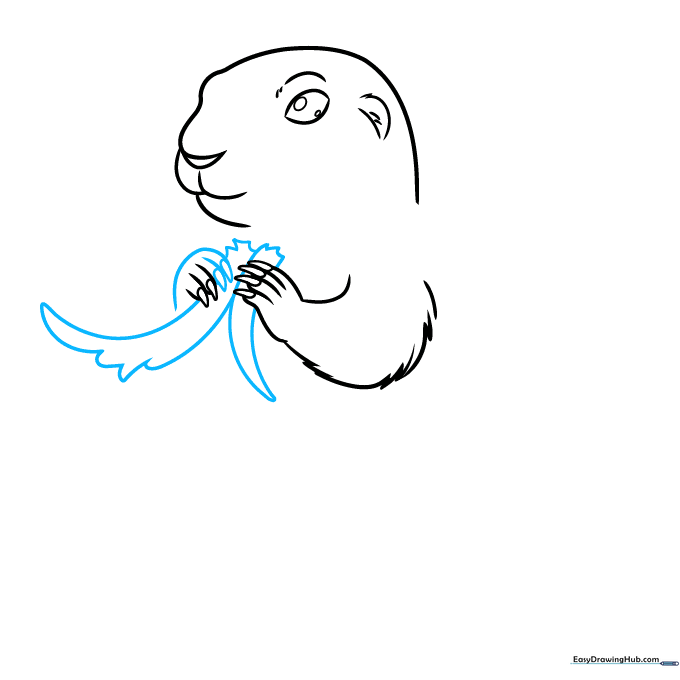
Step 3: Drawing the Hands
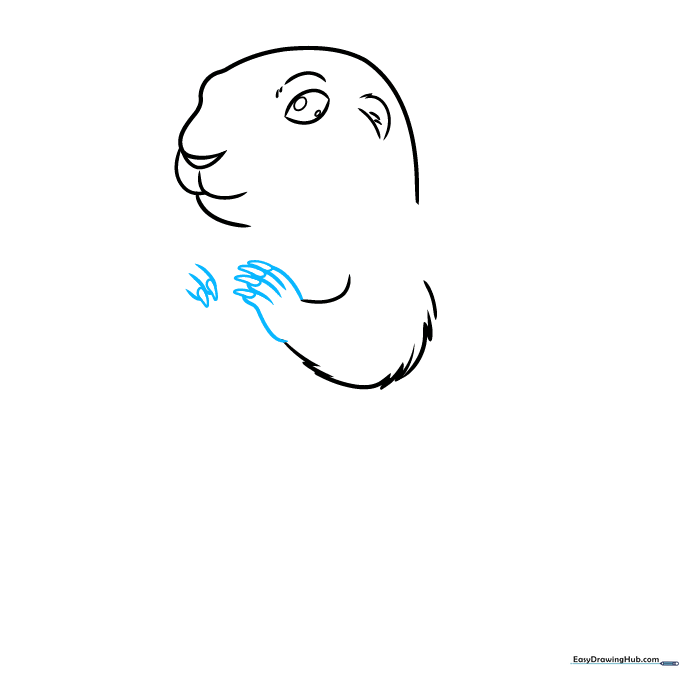
Draw small 'hot dog' shapes for the fingers—two on the left and four on the right. Add long, thin triangles at the tips for the claws. Teacher's Tip: Keep the fingers close together to make them look like little paws.
Step 4: Connecting the Arms
Add the remaining fingers and complete the left hand with a smooth curve. Between the hands, draw a curved triangle for the chest. Teacher's Tip: Use a jagged, 'bumpy' line to represent the prairie dog's fur.
Step 5: Building the Body
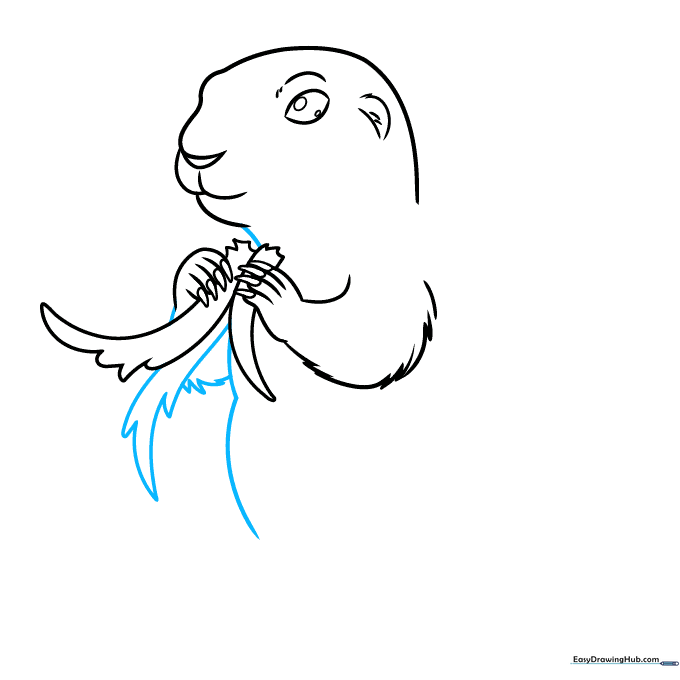
Add lines for the neck and wrist. Continue the body with two vertical curves, adding a pointed shape with three curved triangles for the belly. Teacher's Tip: Focus on keeping the lines fluid to show the animal's posture.
Step 6: Adding the Back
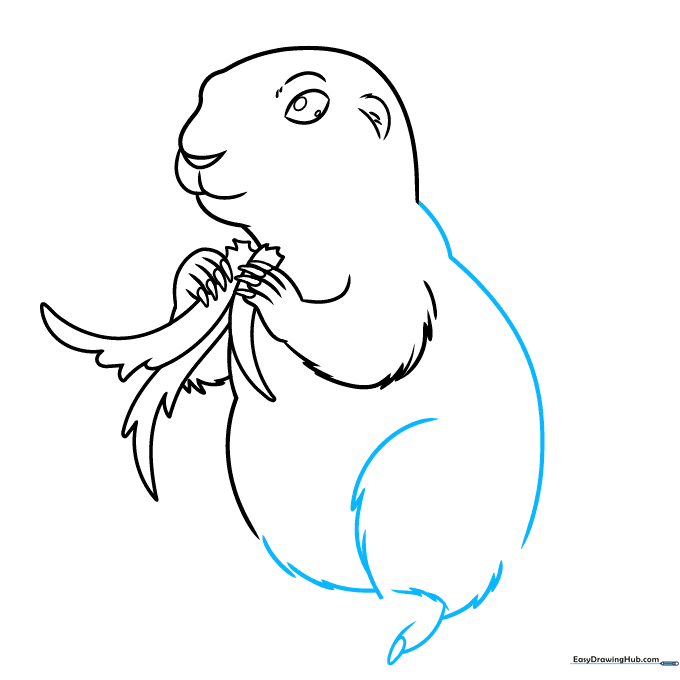
Outline the back with two smooth curves. Add small, sketchy curves around the body to suggest fur, and add a single toe to the foot. Teacher's Tip: Don't worry if your lines aren't perfectly straight; fur is naturally messy!
Step 7: Finishing the Feet
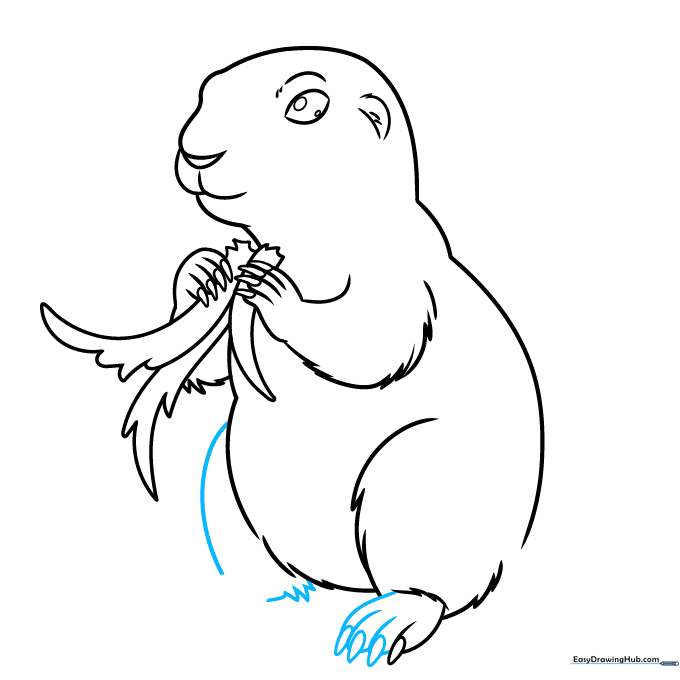
Sketch another curve on the left and a line with three triangles. Add three more toes on the right foot. Teacher's Tip: Vary the size of the triangles to make the claws look more realistic.
Step 8: Refining the Paws
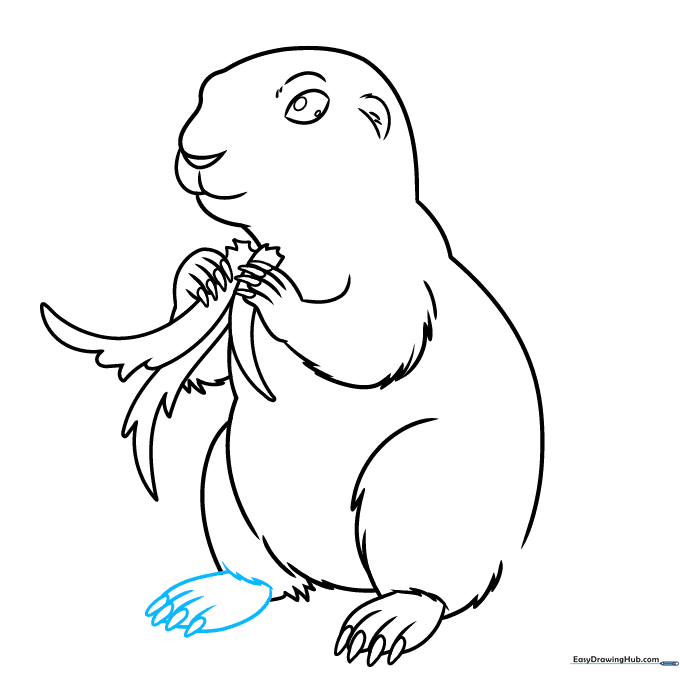
For the left foot, sketch an oval, outline the toes with straight lines, and add rounded triangles for claws. Teacher's Tip: Use a steady hand to make these small details stand out.
Step 9: Final Details
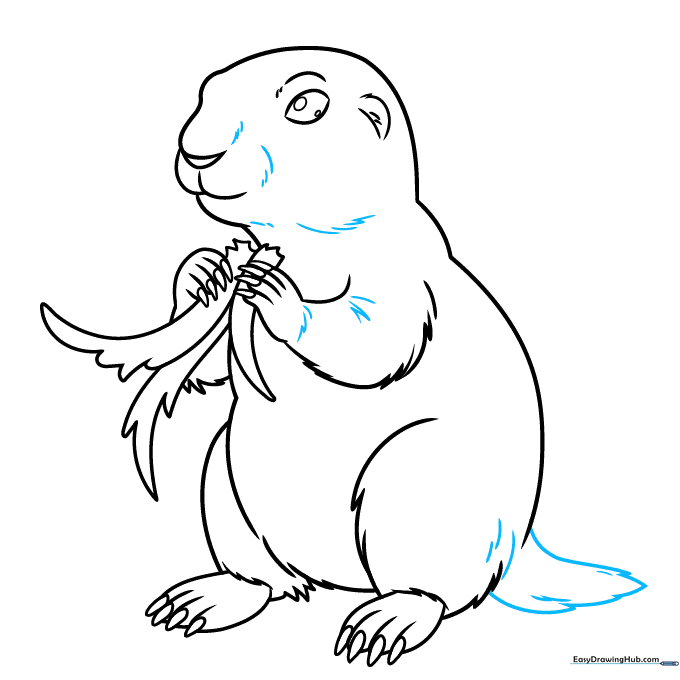
Draw the tail with narrow triangles. Add small dashes across the body to create a fur texture. Finally, outline your drawing with a black pen and erase any remaining pencil marks. Teacher's Tip: Take your time with the outline—it makes your drawing look professional!
Step 10: Adding Color
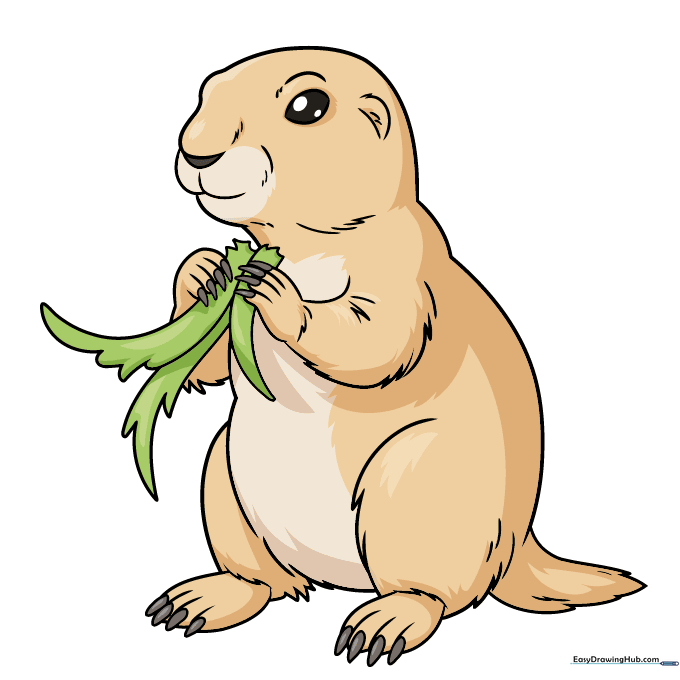
Bring your prairie dog to life! Use light tan for the face and stomach, and a warmer brown for the rest of the body. Color the nose and claws gray, and leave a tiny white dot in the eye to make it sparkle. Teacher's Tip: Use green for the ground to place your prairie dog in its natural habitat.
More Tutorials


