How to Draw a Power Ranger: Easy 10-Step Guide
Ready to morph into action? This tutorial is perfect for young fans ages 6+ looking to draw their own superhero. All you need is a pencil, an eraser, and a piece of paper to get started. Follow these simple steps to build your character's iconic armor and pose.
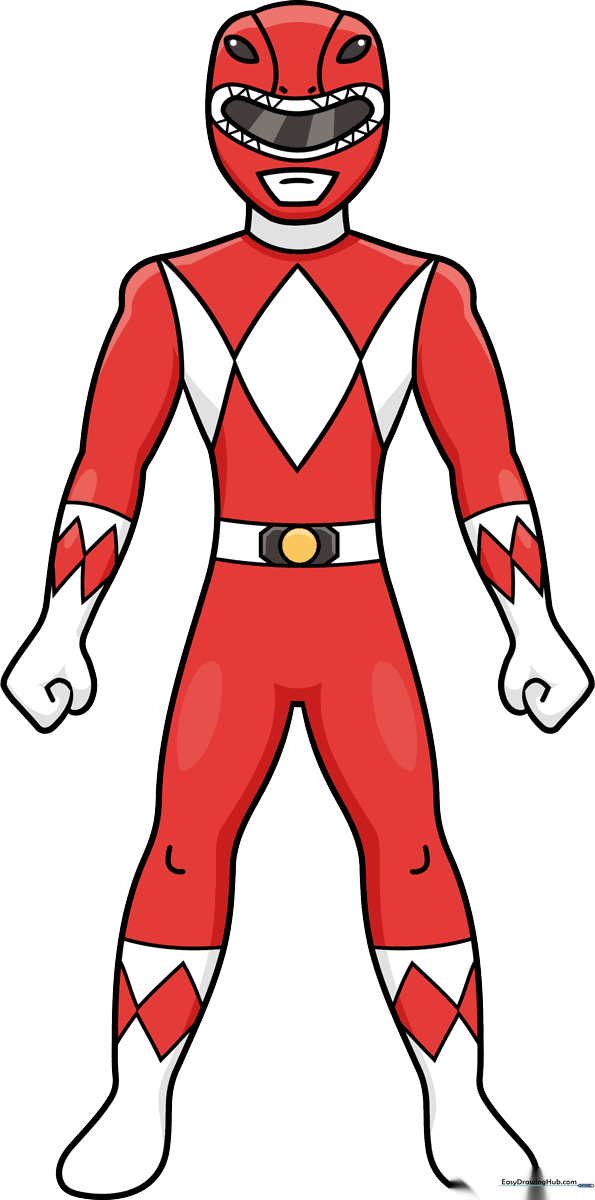
🎯 Final Result
Step-by-Step Instructions
Step 1: Sketching the Helmet Base
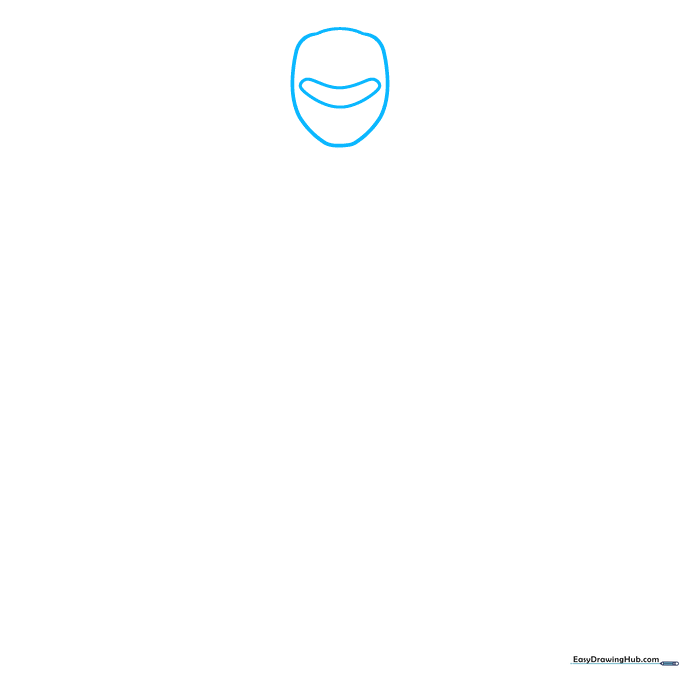
Start by drawing a soft, rounded shape for the head. In the center, sketch a curved 'boomerang' shape for the visor. Teacher's Tip: Keep your pencil lines light so you can easily adjust the shape of the helmet if needed.
Step 2: Defining the Helmet Details
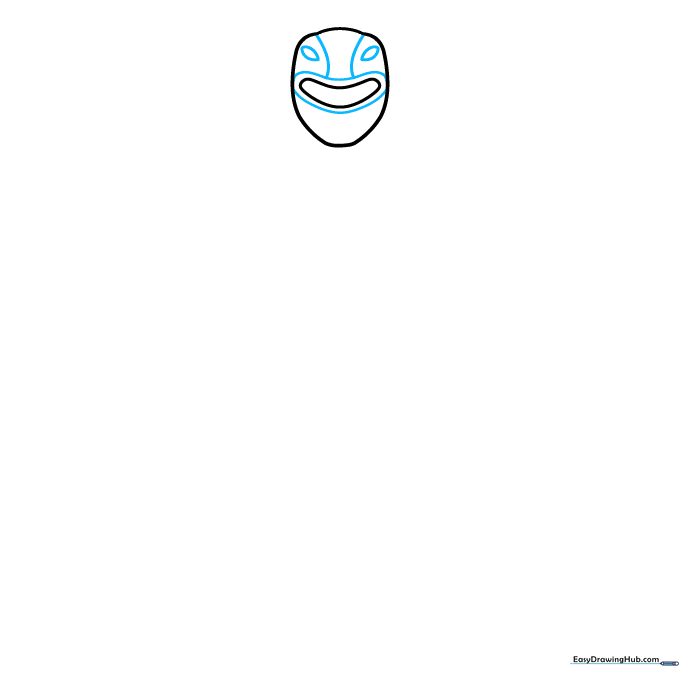
Add a second boomerang shape around the first to create the visor frame. Draw two curved lines leading to the top of the head, and add double-pointed shapes on the sides. Teacher's Tip: Symmetry is key here, so take your time matching the shapes on both sides.
Step 3: Adding the Mouthpiece

Shade two tiny ovals above the visor, then draw a zig-zag 'V' pattern around the visor area. Below that, draw a curved trapezoid with a line across it for the mouth. Teacher's Tip: The zig-zag lines give the helmet that classic robotic look!
Step 4: Sketching the Shoulders and Arms
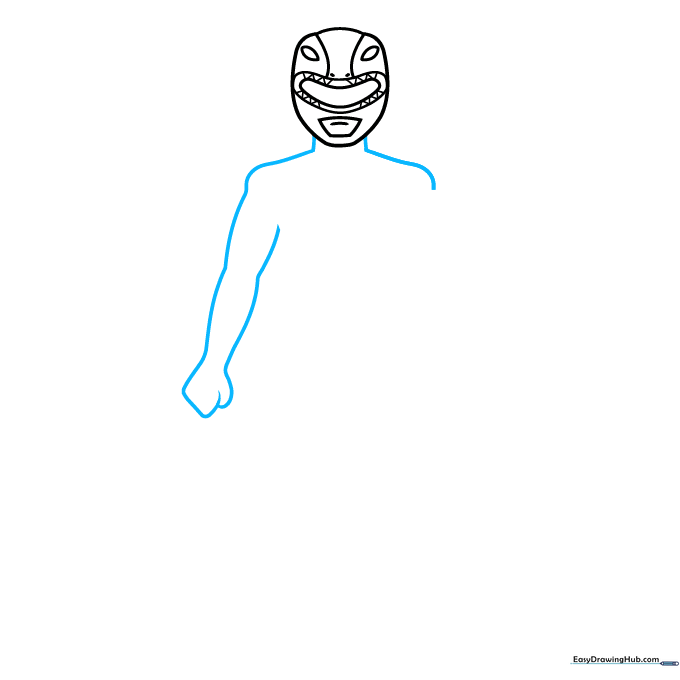
Draw two short lines for the neck, then extend curved lines outward to form the shoulders. Create the arm by doubling back a line to form the sleeve. Teacher's Tip: Use smooth, flowing motions to make the shoulders look rounded and strong.
Step 5: Forming the Gloves
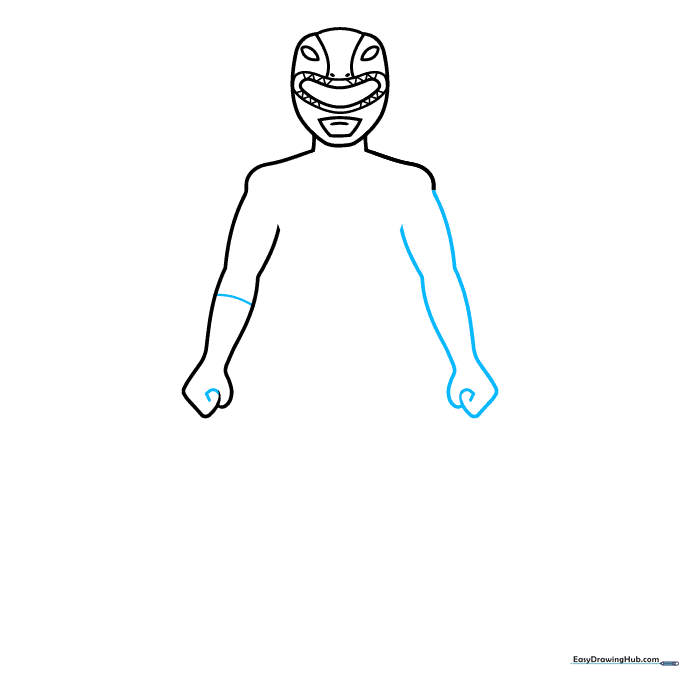
Continue the arm lines into a spiral shape to form the hands, then add a band at the wrist to define the glove. Repeat this for the other arm. Teacher's Tip: If the spiral is tricky, keep the hand shape simple—a rounded mitten shape works too!
Step 6: Adding Suit Details
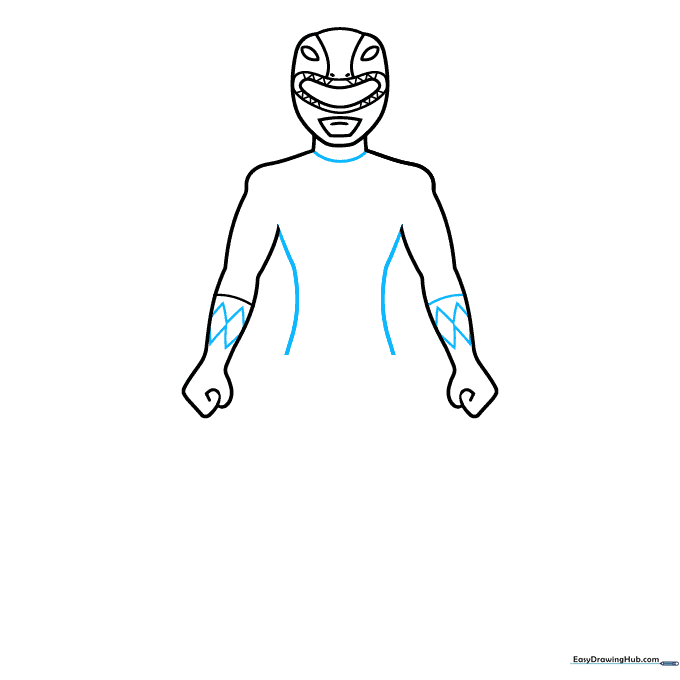
Draw two narrow diamonds on each glove. Add a band at the neck and draw curved lines from the underarms to create the torso. Teacher's Tip: The diamonds are a signature Power Ranger detail—take your time to make them sharp and even.
Step 7: Starting the Legs
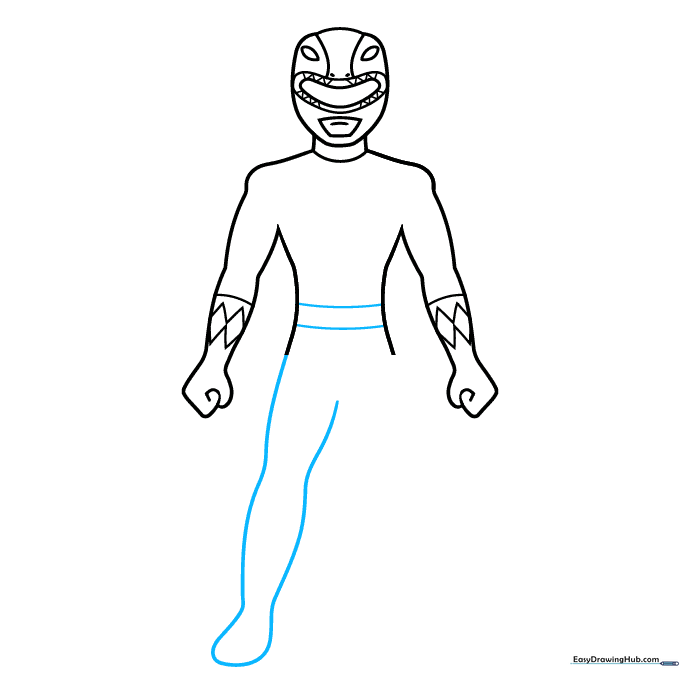
Band the torso with parallel curved lines for the belt area. Extend one side of the torso and double it back to form the first leg. Teacher's Tip: Keep the legs slightly wider at the top to give the character a sturdy, heroic stance.
Step 8: Completing the Legs and Boots
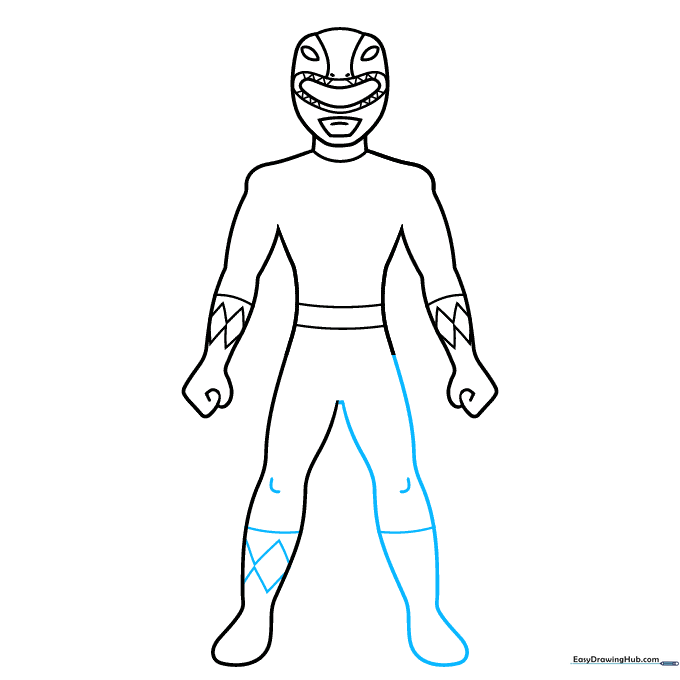
Draw the second leg, then add small curves for the knees. Band the calf to create the boot top, and add diamond shapes to the boots. Teacher's Tip: Adding those diamond shapes on the boots really makes the character look authentic!
Step 9: Final Suit Embellishments
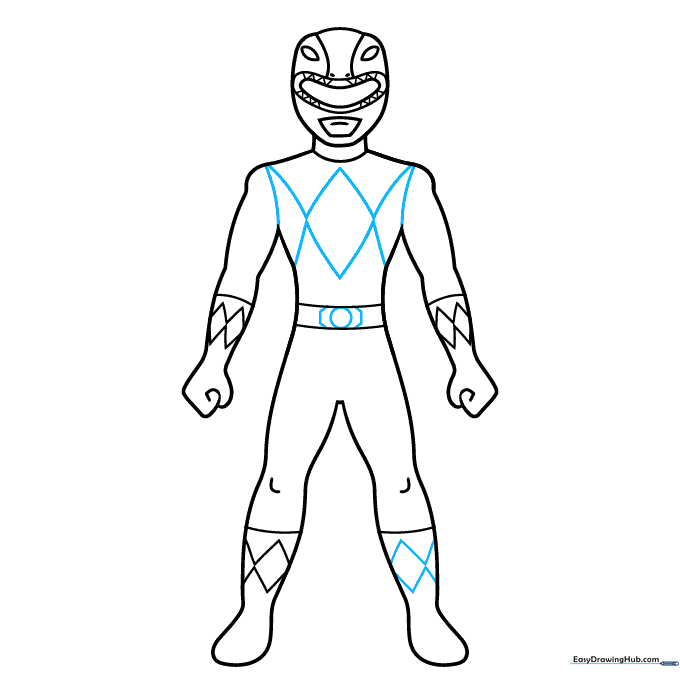
Add a diamond pattern to the chest and a circular belt buckle with an octagon border. Teacher's Tip: Use a ruler or a steady hand to make the octagon shape look clean and geometric.
Step 10: Bring Your Ranger to Life with Color
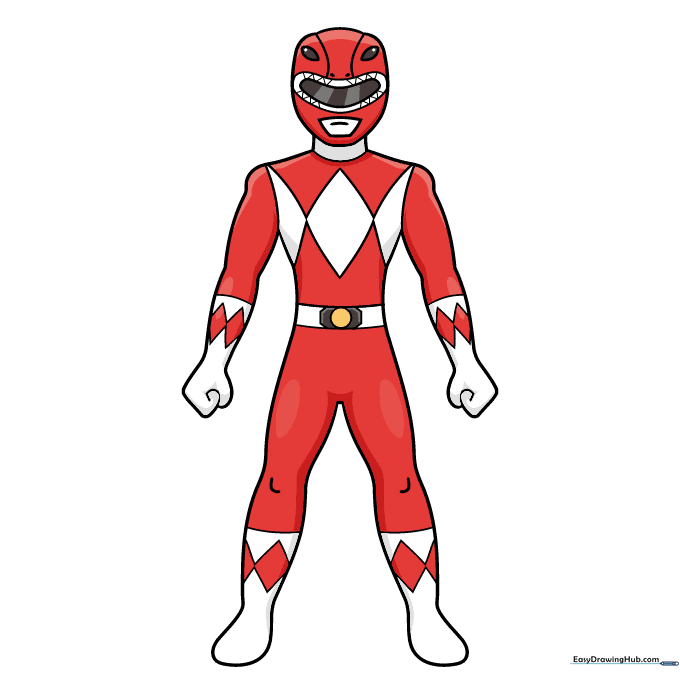
Your outline is complete! Color the suit in your favorite Ranger's signature color—red, blue, black, yellow, or pink—while keeping the gloves, boots, and chest diamonds white. Teacher's Tip: Use markers or colored pencils to make the colors pop!
More Tutorials


