How to Draw a Plane: Simple 10-Step Guide for Kids
Ready to take flight? This tutorial is perfect for young artists ages 5 and up who want to draw their own passenger jet. All you need is a pencil, an eraser, and a piece of paper to start building your aviation masterpiece.
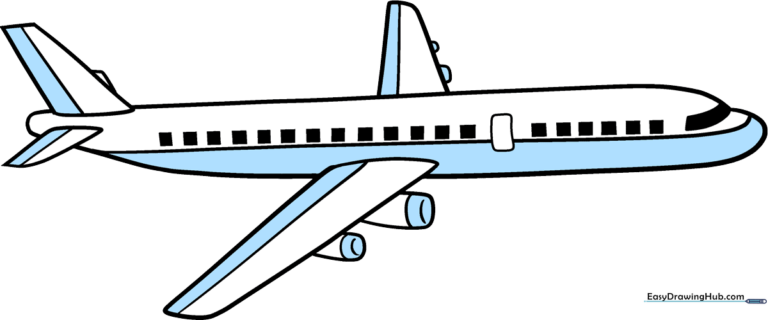
🎯 Final Result
Step-by-Step Instructions
Step 1: Sketching the Fuselage Top
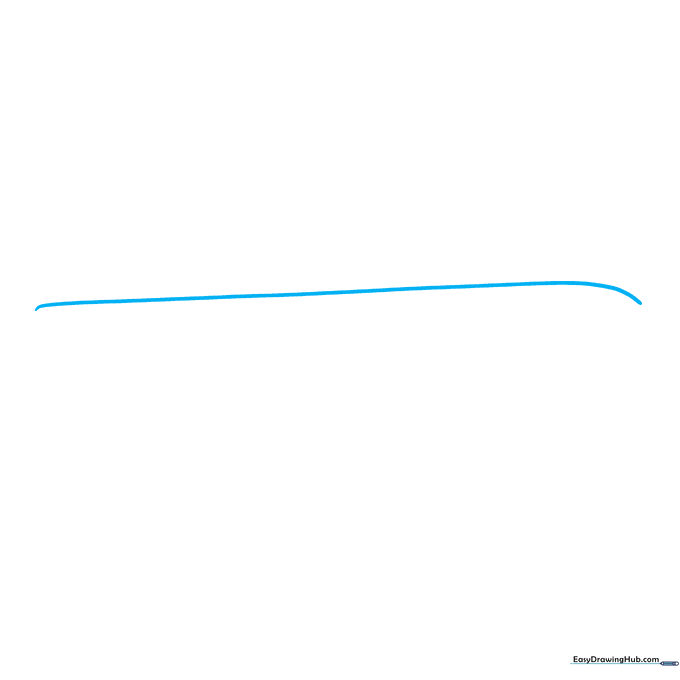
Draw a long, gentle curve to form the top of the airplane’s body. Teacher's Tip: Keep your pencil grip loose and your lines light so you can easily adjust the shape if you need to.
Step 2: Defining the Body
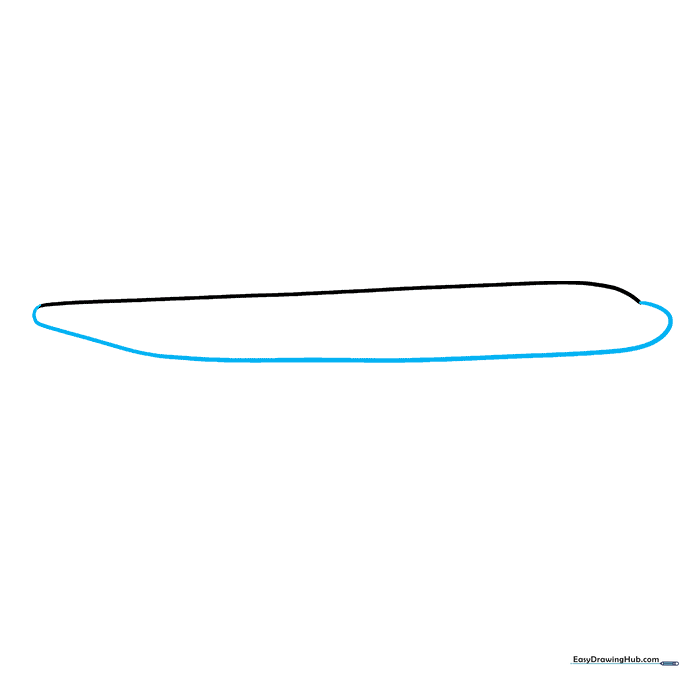
Connect the ends of your first line with a second curve to complete the body. Make sure the nose is rounded and the tail tapers off. Tip: Think of the shape like a long, smooth bean.
Step 3: Adding Windows and Doors
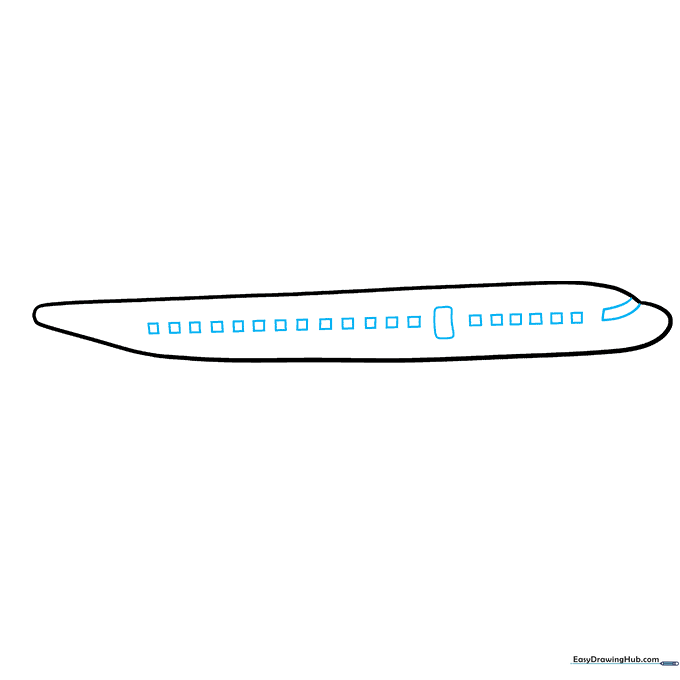
Draw a curved rectangle for the cockpit windshield and a series of small squares for the passenger windows. Add a larger rectangle with rounded corners for the door. Tip: Use a ruler if you want your window line to be perfectly straight!
Step 4: Drawing the First Wing
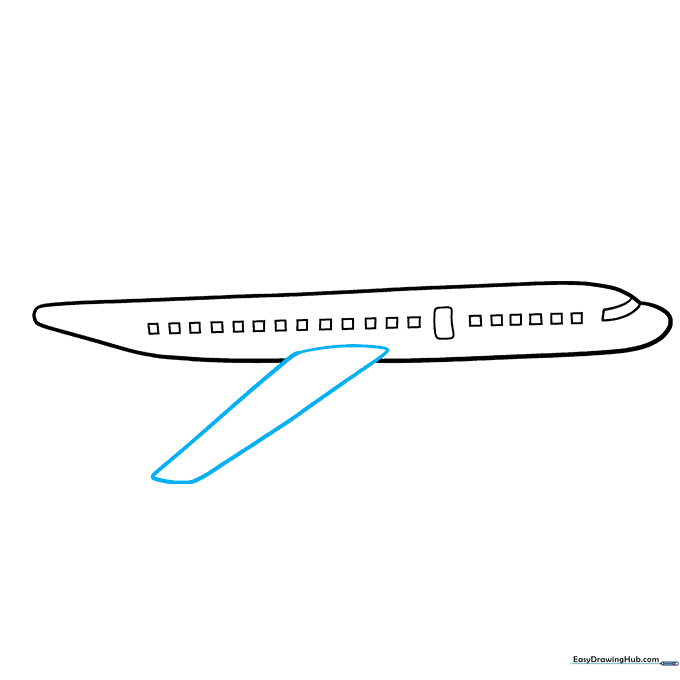
Sketch a blunt triangle shape on the side of the plane to create the wing. Tip: Don't worry about overlapping lines; you can erase the extra marks inside the wing once you're finished.
Step 5: Adding the Second Wing
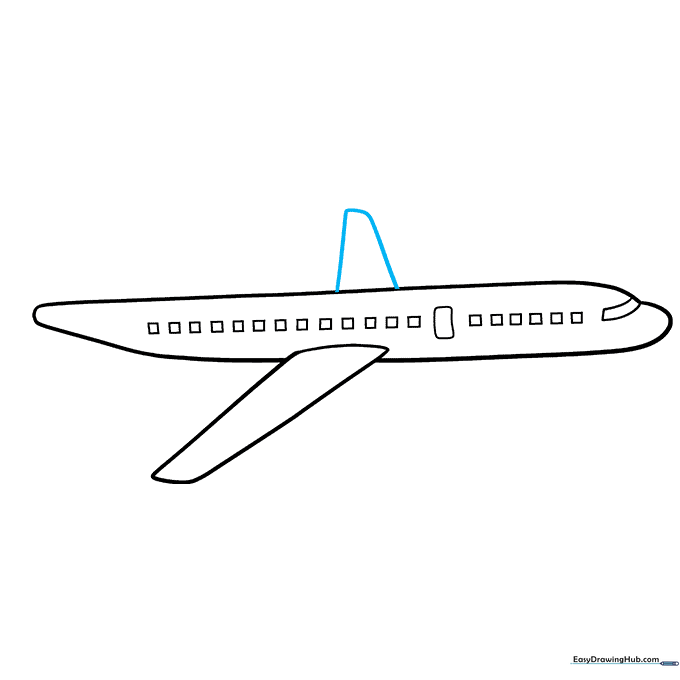
Draw a matching wing on the opposite side to give your plane depth. Tip: Try to make both wings the same size so your plane looks balanced and ready for flight.
Step 6: Attaching Jet Engines
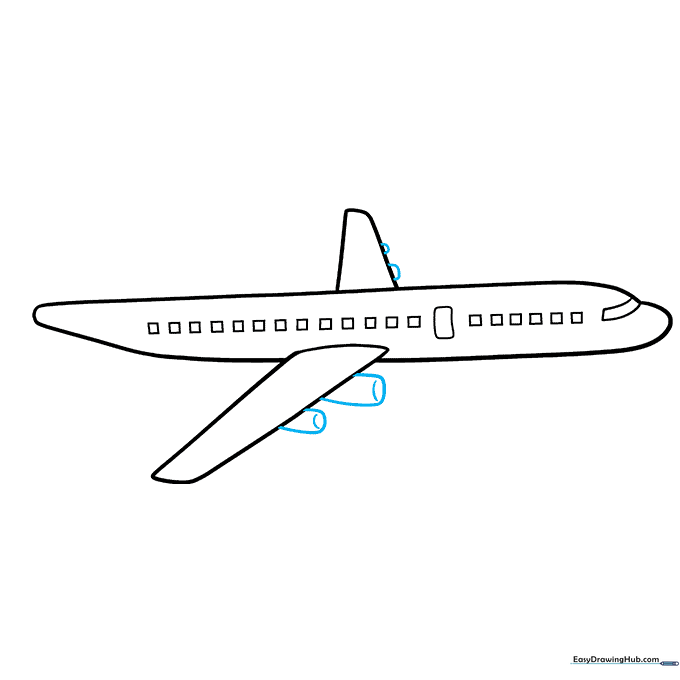
Draw two cylinder shapes under each wing. Use 'C' shaped lines on the front to show the engine intake. Tip: Keep these shapes simple—they don't need to be perfect circles to look great!
Step 7: Designing the Tail
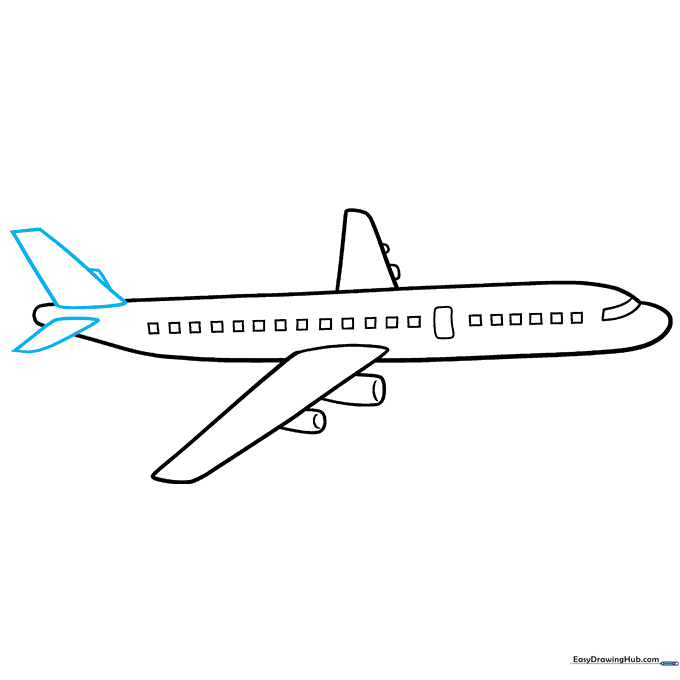
Add the tail stabilizers using a triangle on the side and a parallelogram on top. Tip: The tail helps the plane steer, so make sure these shapes are firmly attached to the back of the body.
Step 8: Adding Streamline Details
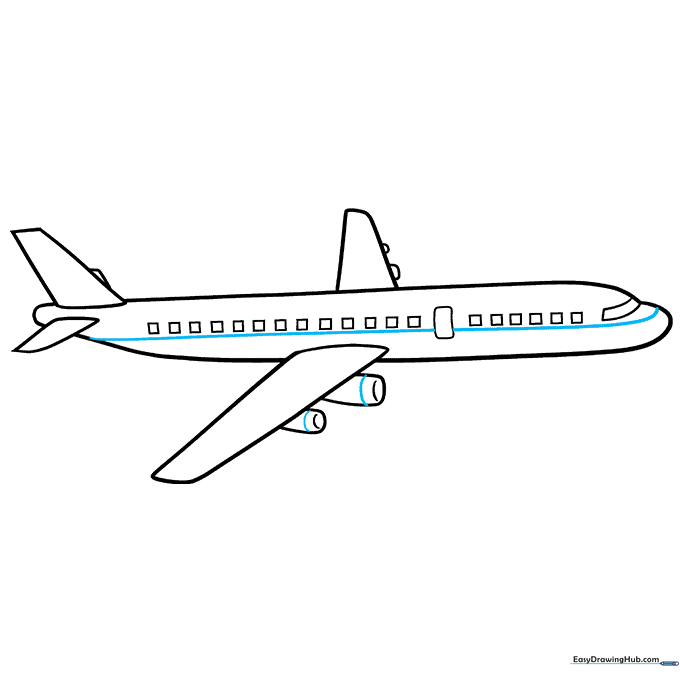
Draw a long line running down the center of the fuselage, curving around the nose. Add bands to the front of your engines. Tip: This line makes your plane look fast and aerodynamic!
Step 9: Final Touches
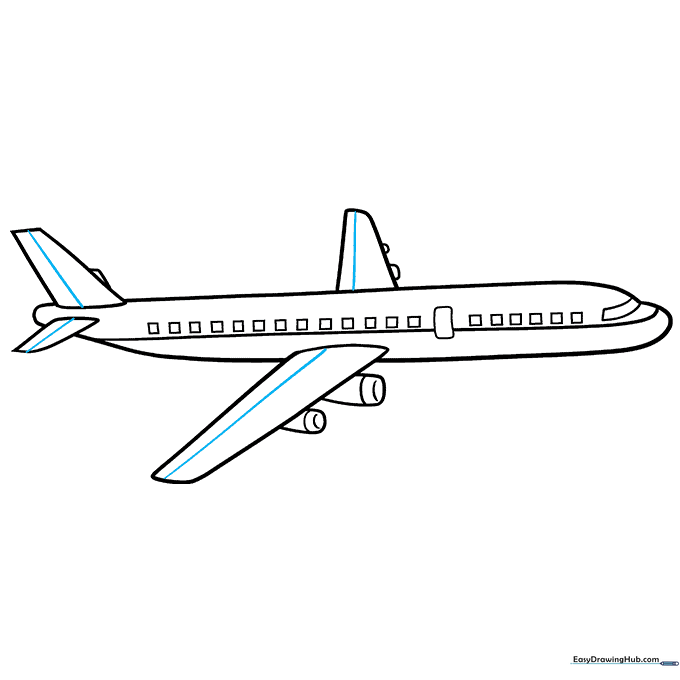
Add a straight line parallel to the back edge of each wing and stabilizer to show the flaps. Tip: These small details add a professional, realistic touch to your cartoon drawing.
Step 10: Color Your Aircraft
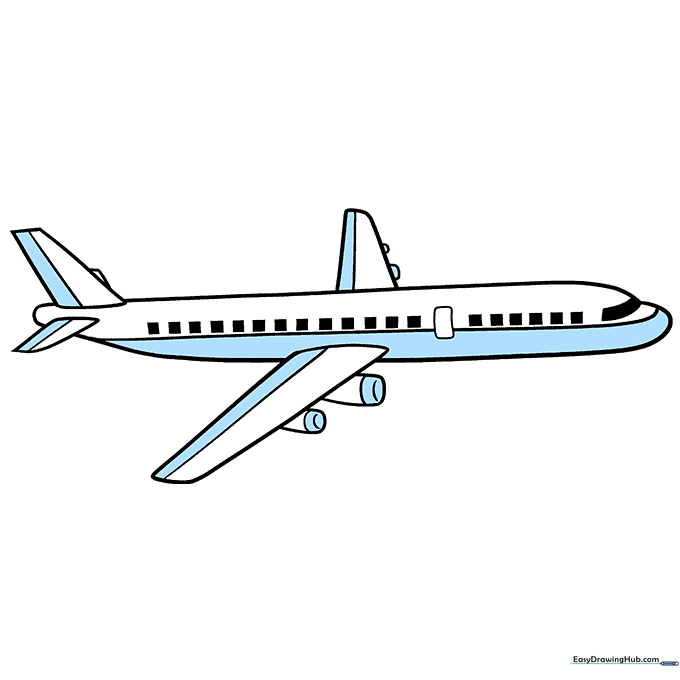
Your outline is finished! Now, bring your plane to life with color. Whether you choose classic white and blue or your own custom airline livery, have fun with it. Tip: Use markers for bold colors or colored pencils for soft shading.
More Tutorials


