How to Draw a Pioneer Wagon: Easy 10-Step Guide
Bring history to life with this step-by-step pioneer wagon tutorial, perfect for artists ages 6 and up. You will only need a pencil, an eraser, and some paper to build this classic wooden vehicle. Follow along to master basic shapes and perspective while creating a fun, historical scene.
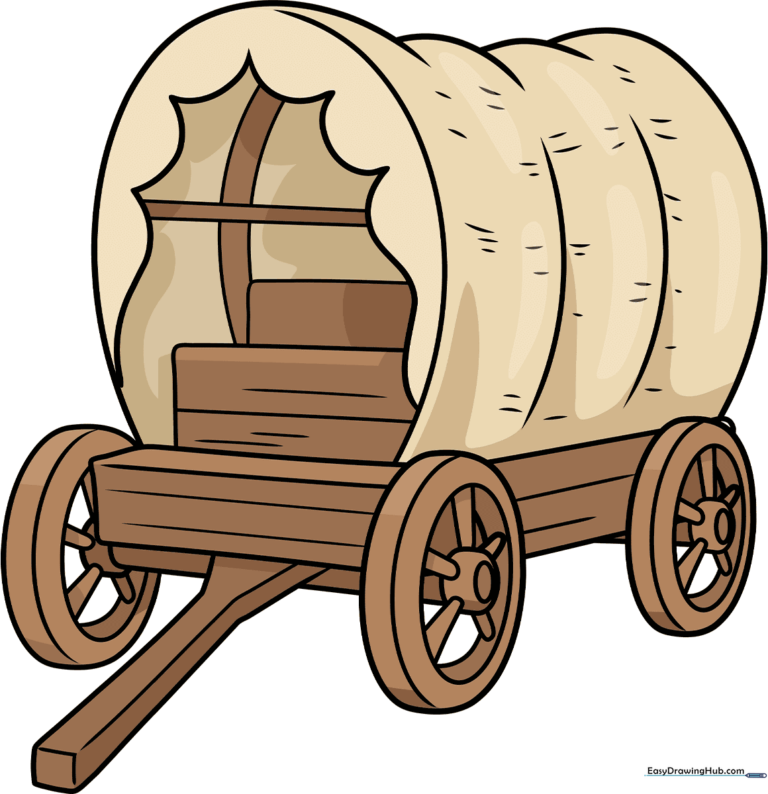
🎯 Final Result
Step-by-Step Instructions
Step 1: Sketching the Canvas Cover
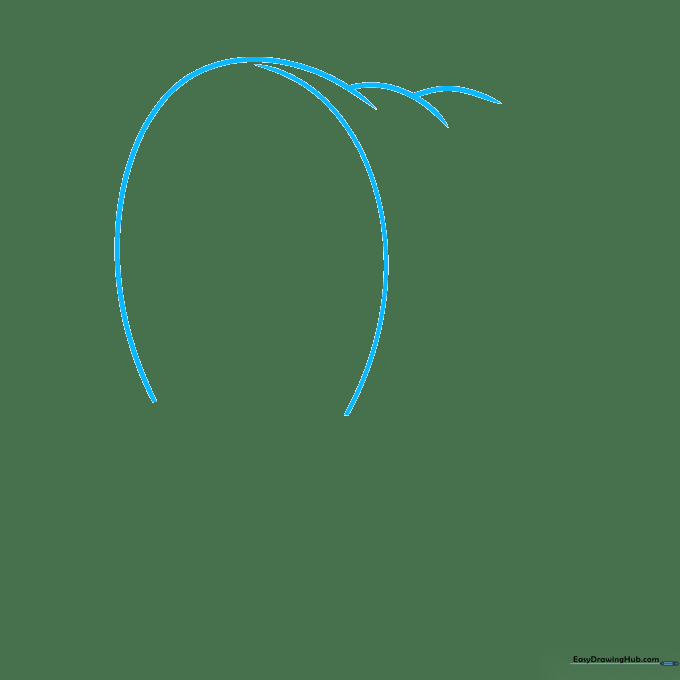
Draw two curved lines in an arch shape for the wagon's top. Tip: Don't worry if they aren't perfect; fabric covers were often lumpy and worn! Add two more overlapping curved lines to create the depth of the canvas.
Step 2: Defining the Wagon Body
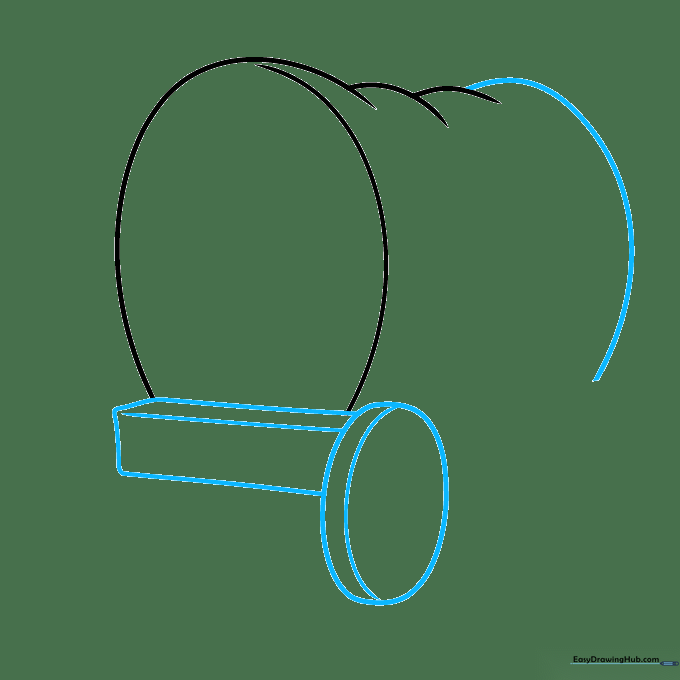
Complete the back of the cover with a long, sweeping curved line. At the front, draw an oval with a horizontal line through it to represent the first wheel. Use straight lines to sketch a rectangular prism for the wagon bed.
Step 3: Adding Wheel Depth
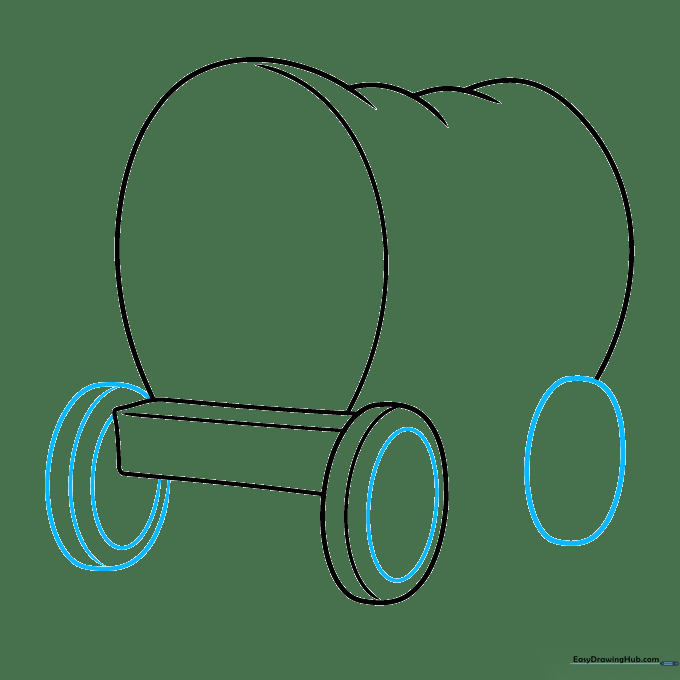
Draw smaller ovals inside your first wheel to create the rim. Add another wheel shape toward the back. Tip: Keep your pencil pressure light here so you can easily refine the circles later.
Step 4: Sketching the Spokes
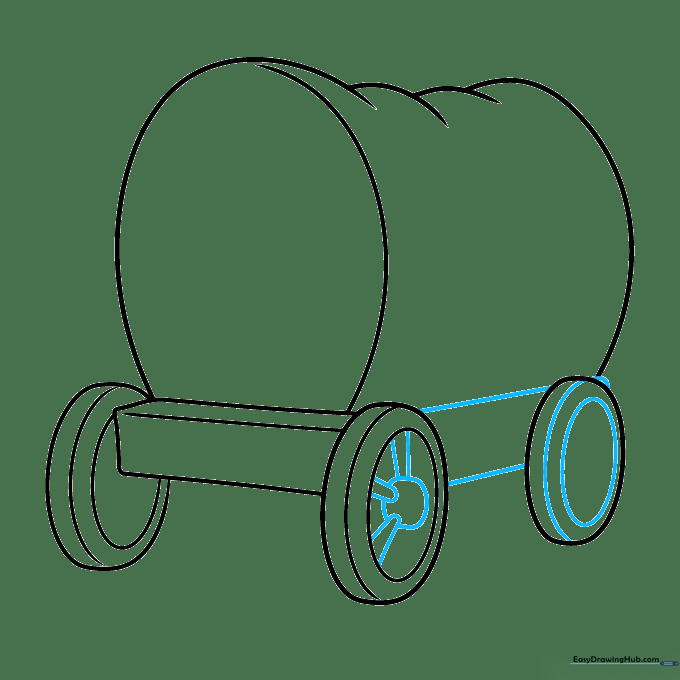
Add detail to the wheels by drawing spokes—use pairs of straight lines radiating from the center. Connect the front and back wheels with two straight lines to represent the axle.
Step 5: Detailing the Hubs
Draw a small circle in the center of each wheel for the hub. Add more spokes to the opposite wheels. Tip: Ensure the spokes are evenly spaced to make the wheels look balanced.
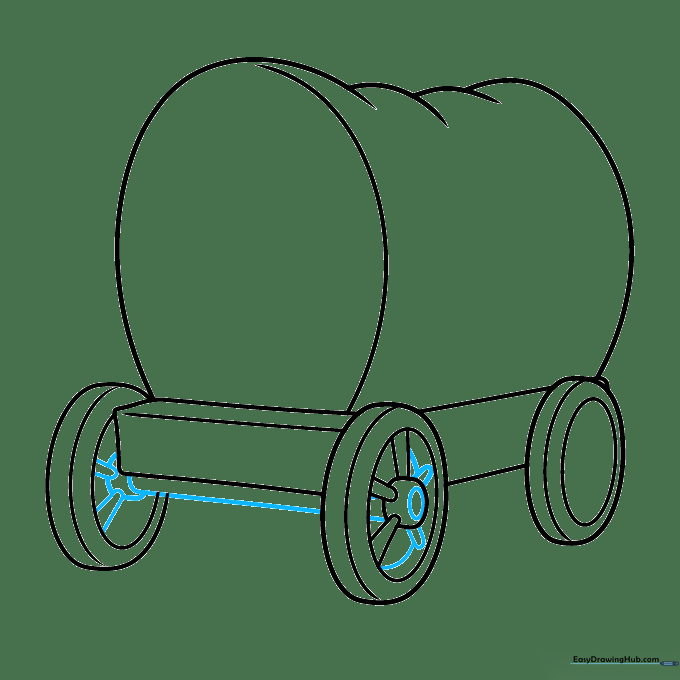
Step 6: Finalizing Wheels
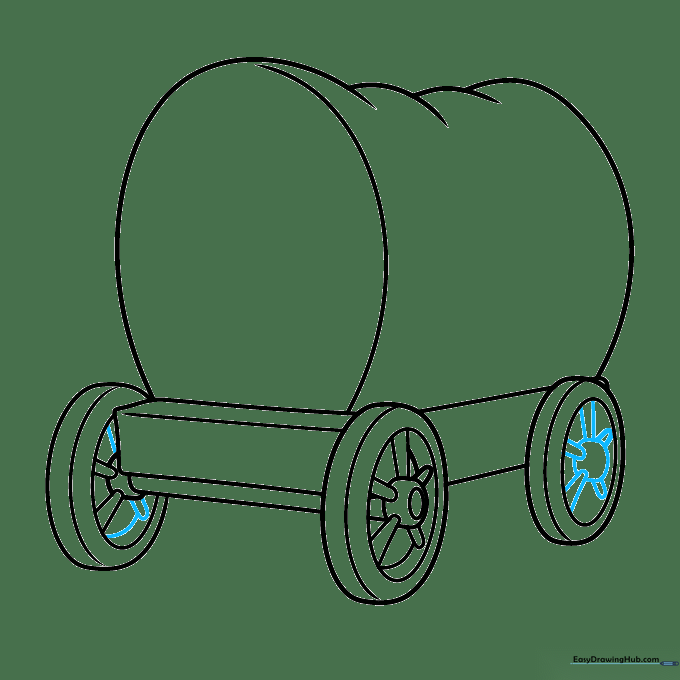
Go over your wheel outlines to make them bold. Ensure the hubs and spokes are clearly defined on both the front and rear wheels.
Step 7: Adding the Tongue and Seat
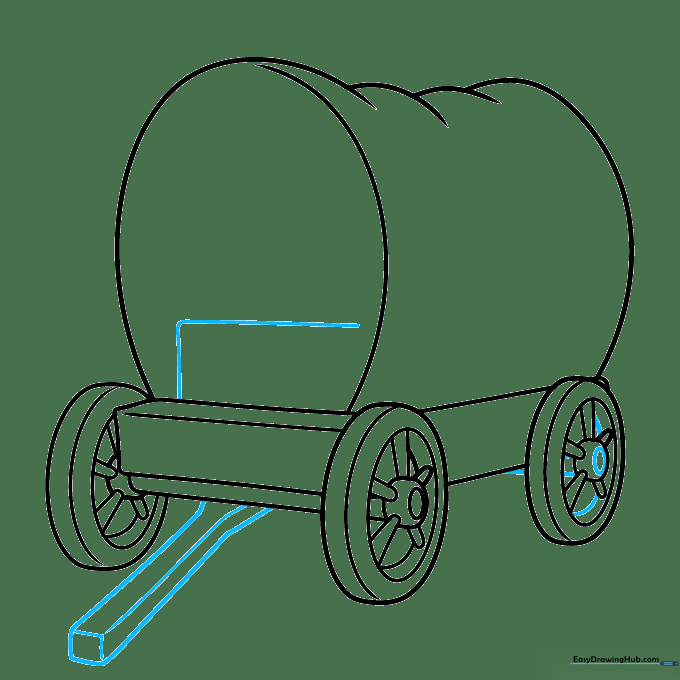
Draw a long, narrow rectangle at the front for the tongue—this is where the horses would attach. Inside the wagon, add an 'L' shaped line to represent the driver's seat.
Step 8: Canvas Texture
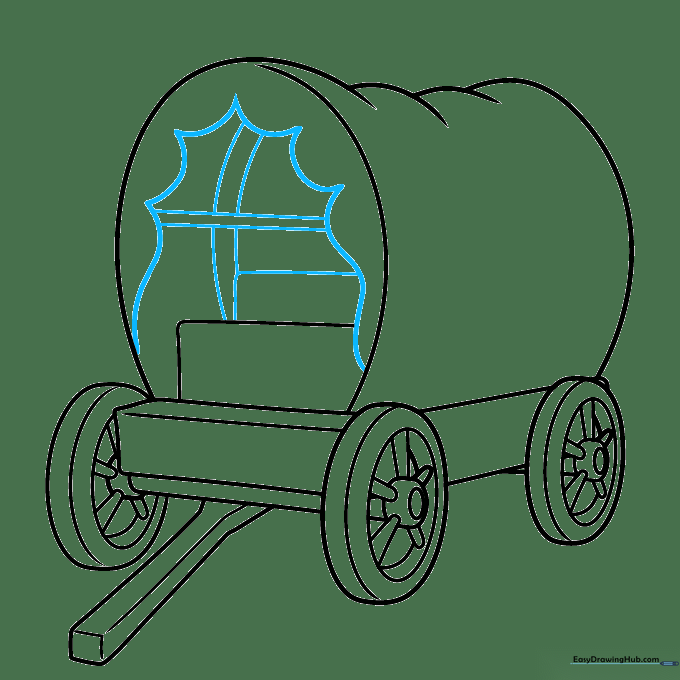
Add lines along the edges of the fabric cover. Draw pairs of vertical lines inside the cover to represent the wooden support bows. Tip: Keep these lines slightly wavy to mimic the look of fabric draped over wood.
Step 9: Adding Final Details
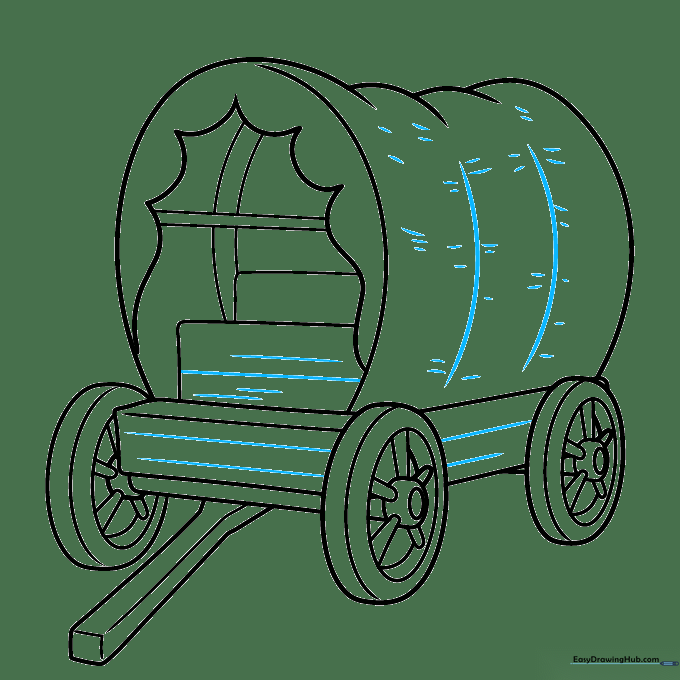
Use short, hatch-like lines to add texture to the wooden wagon bed and the canvas. This creates a realistic, rustic look.
Step 10: Bringing it to Life with Color
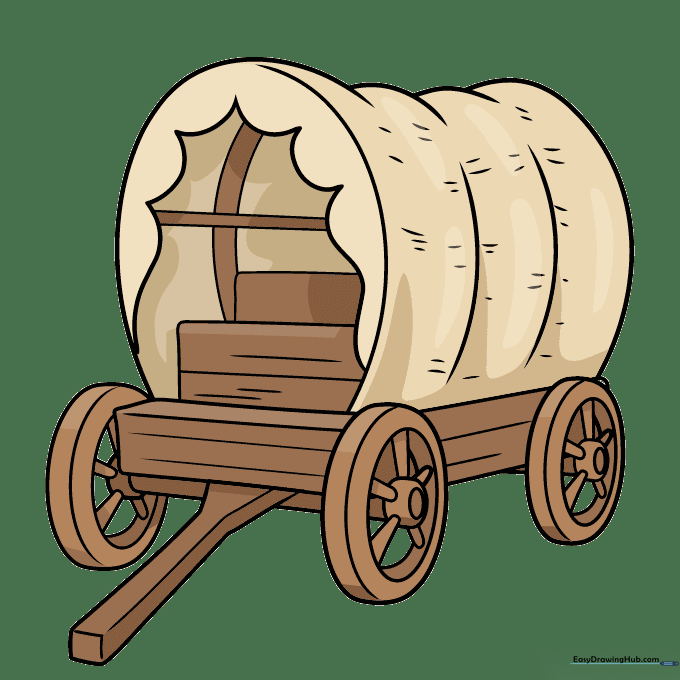
Your outline is complete! Use earthy tones like brown for the wooden wagon and a soft tan or off-white for the canvas cover. Tip: Use a darker brown pencil to add shadows under the wagon for a 3D effect.
More Tutorials


