How to Draw a Pinup Girl: Easy 10-Step Cartoon Guide
Ready to bring a retro-inspired character to life? This tutorial is perfect for intermediate artists looking to practice stylized human proportions and expressive poses. You will need a pencil, eraser, and a fine-liner pen to complete this fun, character-focused activity.
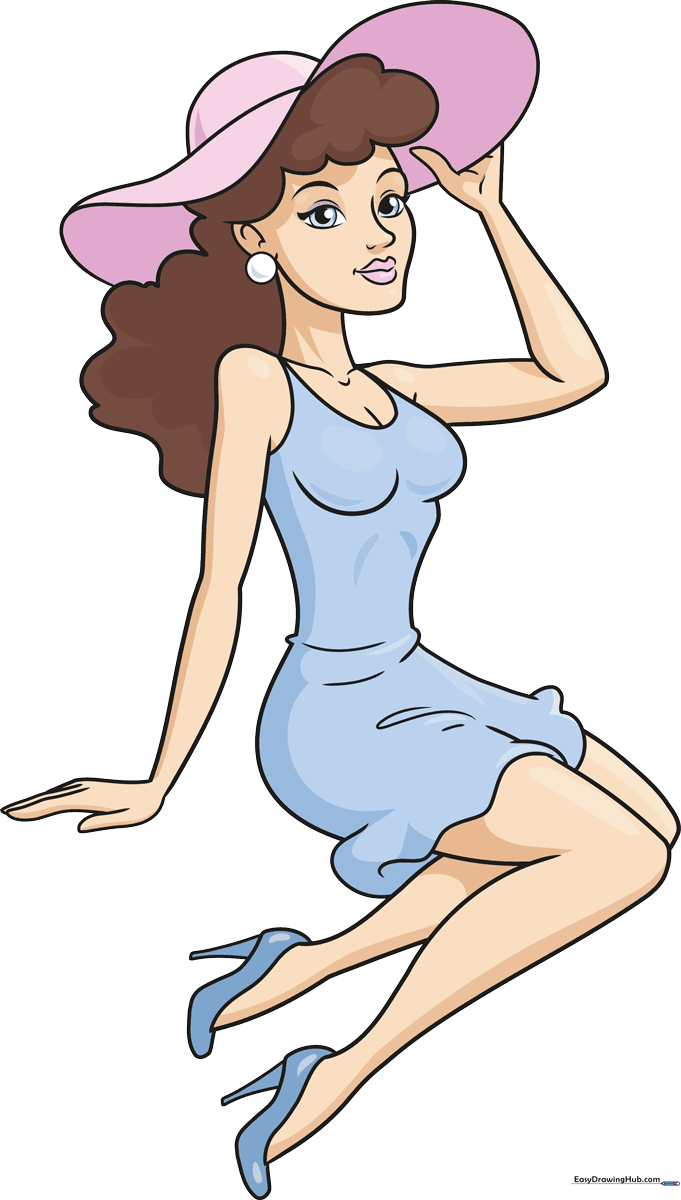
🎯 Final Result
Step-by-Step Instructions
Step 1: Sketching the Facial Features

Start with a small hook shape for the nose. Sketch almond-shaped eyes on either side, adding two circles inside each for the pupils. Teacher's Tip: Keep your pencil pressure light here so you can easily adjust the eye spacing if they look uneven.
Step 2: Defining the Face Shape
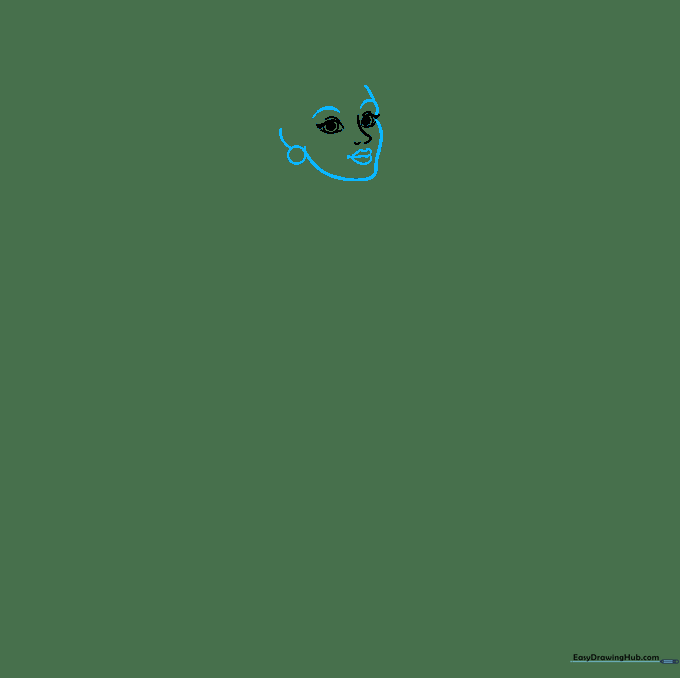
Draw a circle on the left for the cheek, adding a curved line upward for the jaw. Add two gentle arches for eyebrows and a simple mouth shape below the nose. Teacher's Tip: Use 'wavy' light strokes for the brows to give her a more playful, expressive look.
Step 3: Adding the Retro Hairstyle
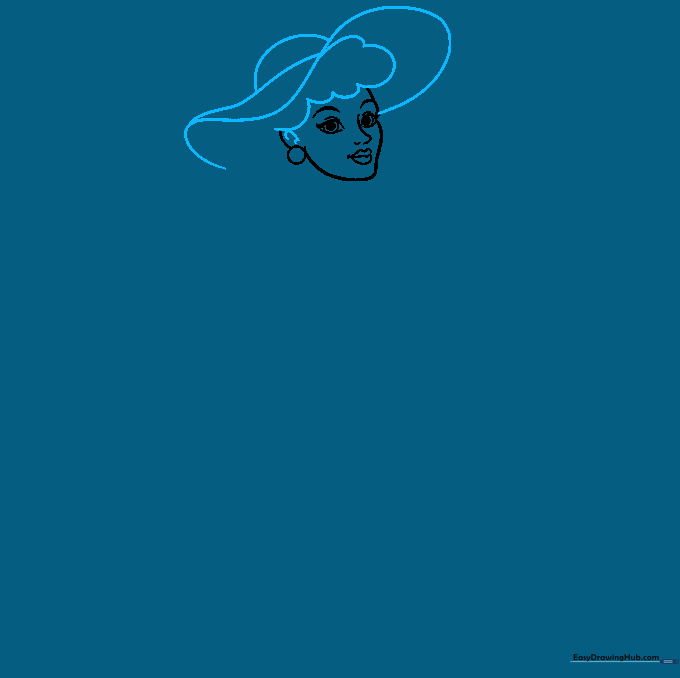
Use broad, wavy lines to create a cloud-like volume for the hair. Add a swooping 'M' shape on top and a dome to finish the crown. Teacher's Tip: Don't worry about perfect symmetry; hair has natural movement, so let your lines flow freely.
Step 4: Constructing the Neck and Shoulders
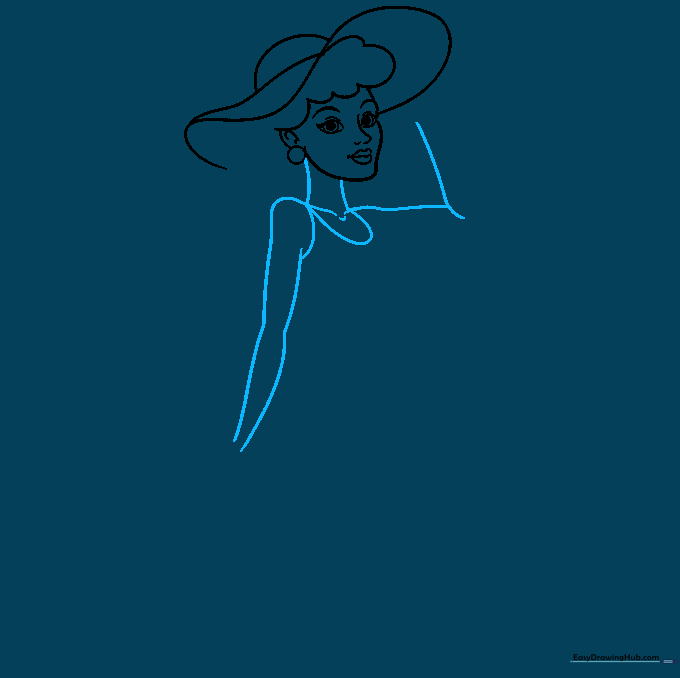
Draw two downward lines with a slight scoop for the neck, adding collarbones for structure. Sketch hook shapes for the shoulders. Teacher's Tip: Keep the neck narrow to maintain that classic, stylized cartoon proportion.
Step 5: Completing the Hair and Arms
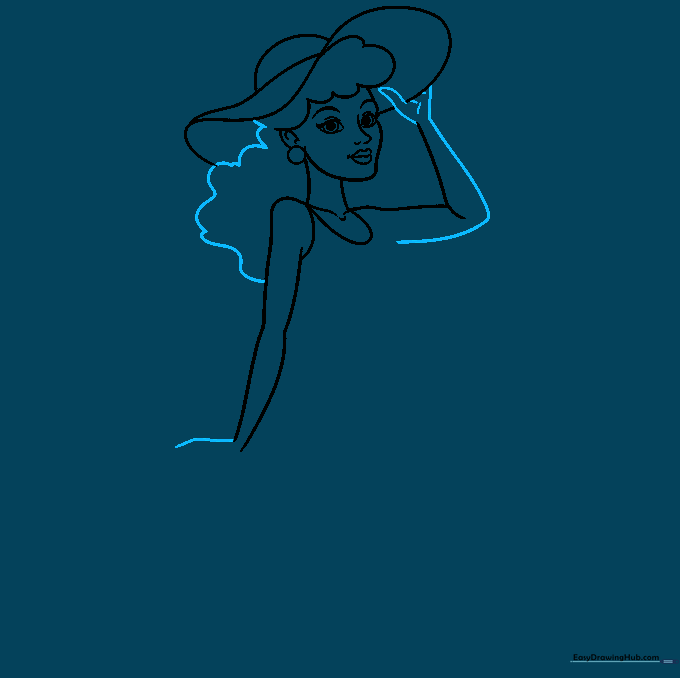
Finish the hair with loose cloud shapes. For the arms, use an L-shape on the right to connect the hand to the hat. Teacher's Tip: Use an elongated, 'hot dog' shape for the thumb to keep the hand simple and readable.
Step 6: Adding Fingers and Torso
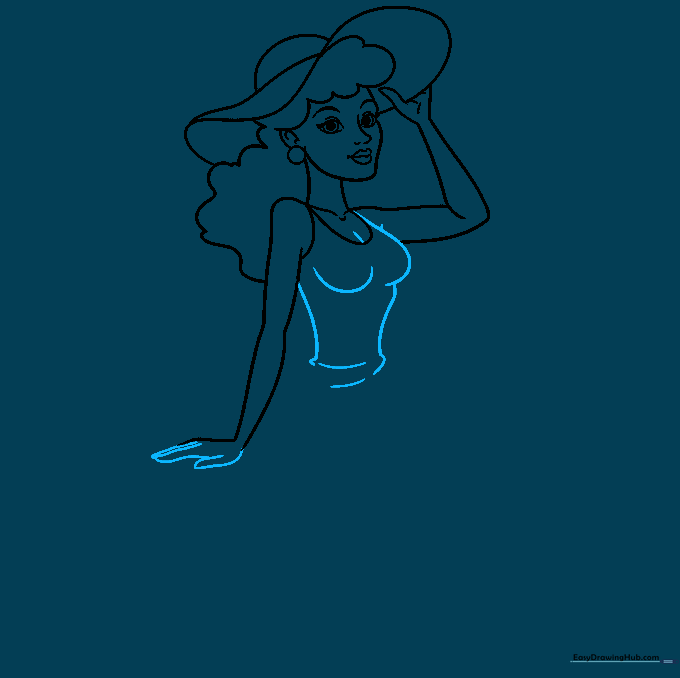
Add small, rounded shapes for the fingers on the left hand. Sketch the torso using two scoop shapes for the waist. Teacher's Tip: Keep the waist lines slightly curved to suggest movement in the pose.
Step 7: Drawing the Skirt
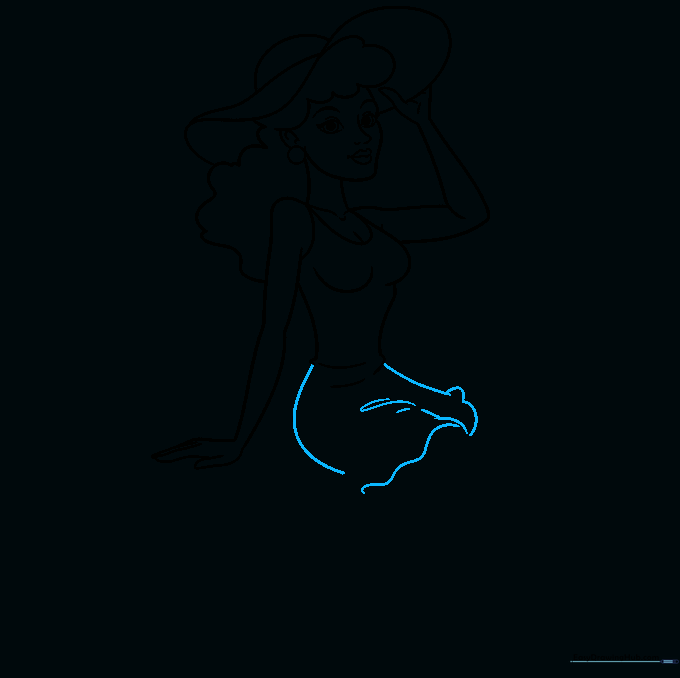
Sketch a wide curve for the skirt, adding extra lines to suggest fabric folds and wrinkles. Teacher's Tip: Wrinkles are just small, V-shaped lines—don't overthink them, just place them where the fabric would bunch up.
Step 8: Sketching the Legs and Shoes
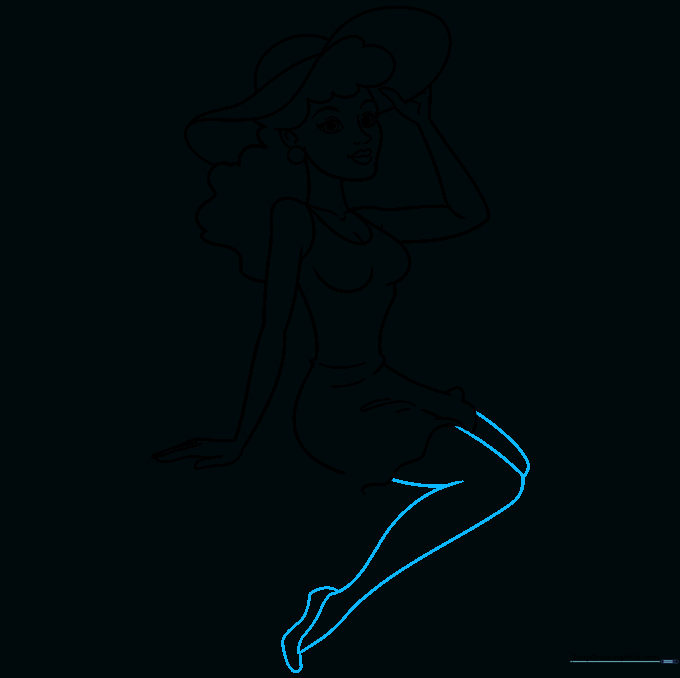
Draw an L-shape for the left leg and an oblong, snake-like shape for the shoe. Add a second line for the right leg. Teacher's Tip: Keep the shoe shape simple—an oval with a small triangle for the heel works perfectly.
Step 9: Refining the Lower Body
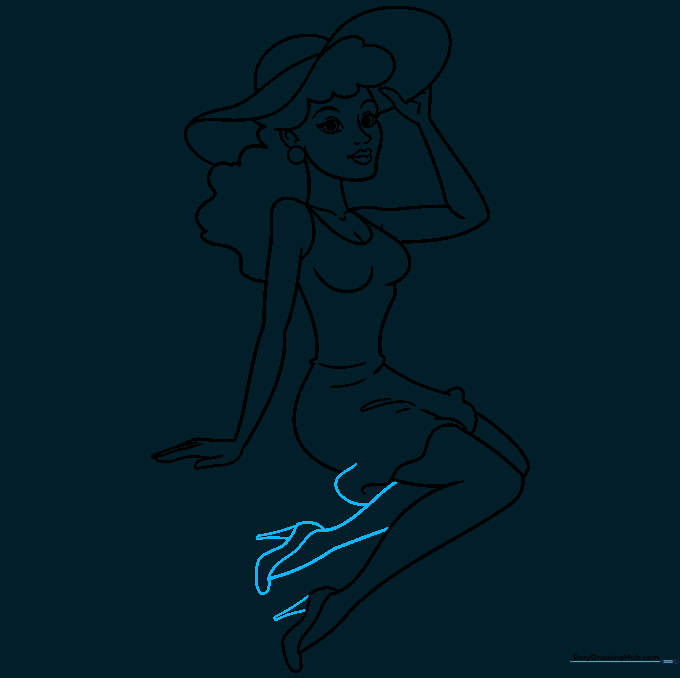
Complete the right leg with an uneven line and add the second shoe. Ensure the heels are narrow triangles. Teacher's Tip: Check that your legs are roughly the same length to keep the character balanced.
Step 10: Final Outline and Coloring
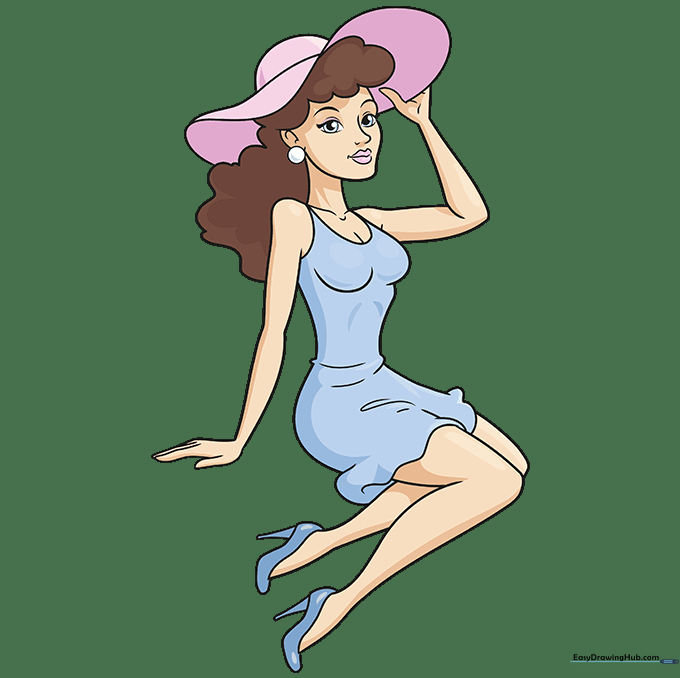
Trace your lines with a black pen and erase your pencil marks. Color the dress light blue, the heels dark blue, and use pink for the hat and lipstick. Teacher's Tip: Use a dark brown for the hair to give it a rich, retro look before filling in the skin tone.
More Tutorials


