How to Draw a Pinecone: Easy 10-Step Nature Drawing Guide
Capture the beauty of nature with this simple pinecone drawing guide, perfect for artists ages 5 and up. You will only need a pencil, an eraser, and a piece of paper to get started. By following these steps, you will learn how to layer organic shapes to create a realistic, textured forest find.
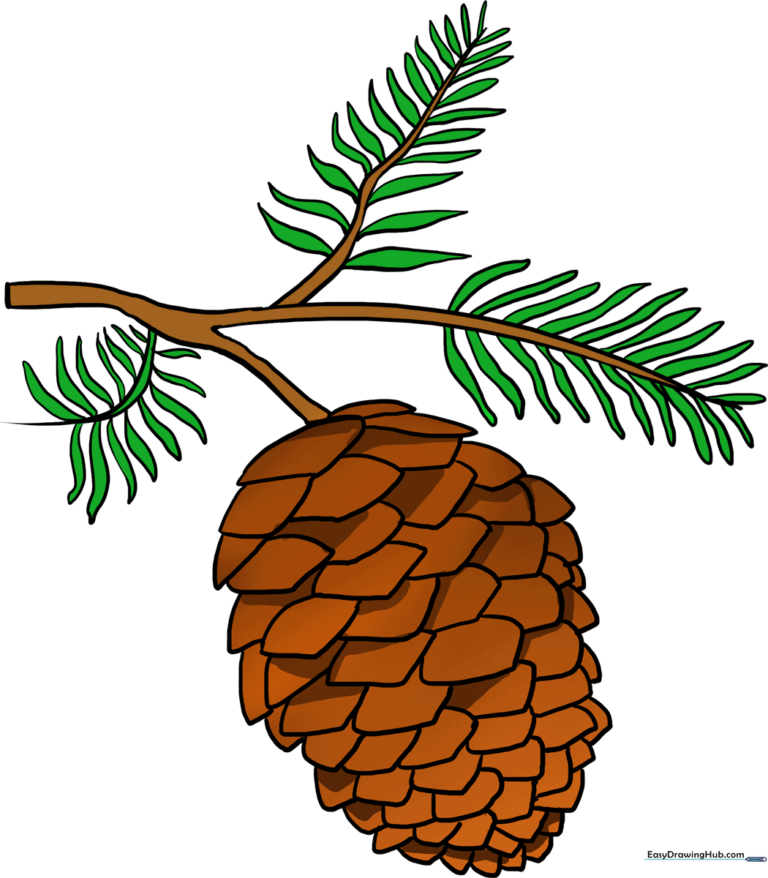
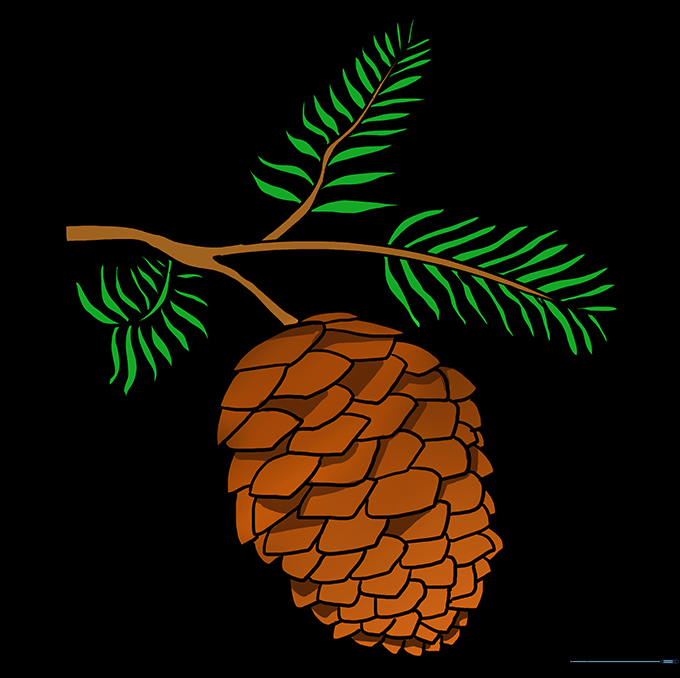
🎯 Final Result
Step-by-Step Instructions
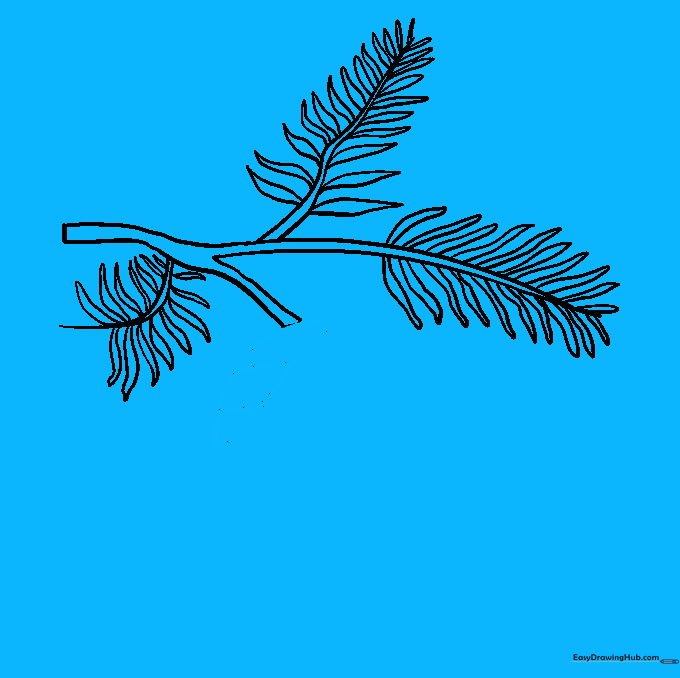
Step 1: Sketching the Main Branch
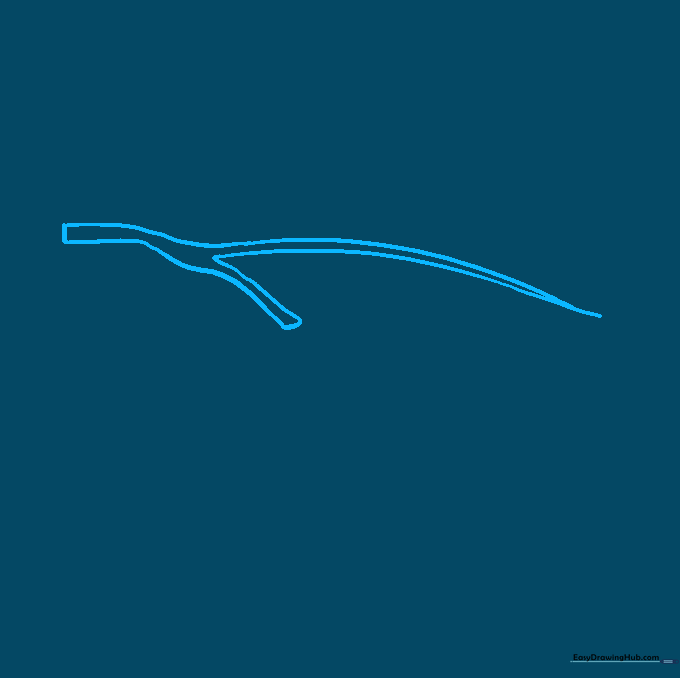
Start by drawing a sturdy twig using two long, slightly curved lines. Teacher's Tip: Keep your pencil pressure light so you can easily adjust the branch shape later if it looks too stiff.
Step 2: Adding Secondary Twigs and Needles
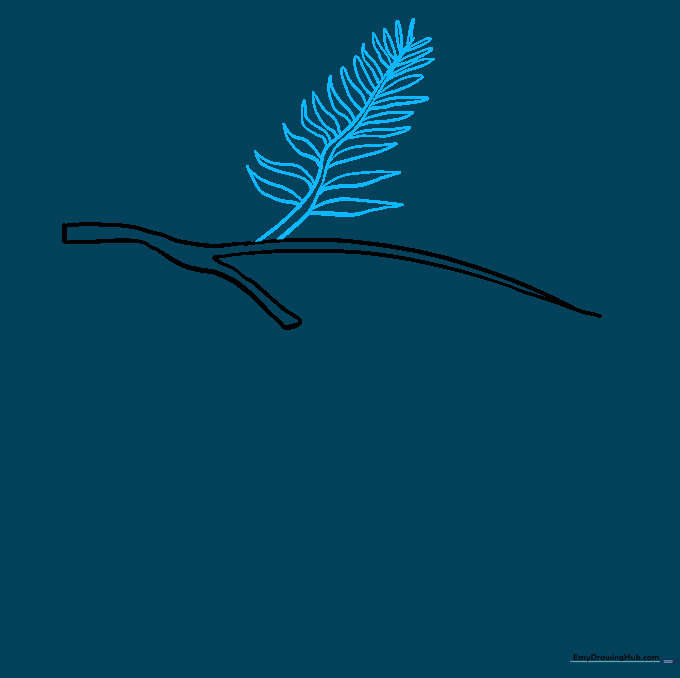
Draw a smaller twig branching off the main one. Add pine needles by drawing pairs of curved lines that meet at a sharp point. Tip: Make the needles near the base of the twig slightly longer to show perspective.
Step 3: Filling the Branch with Needles
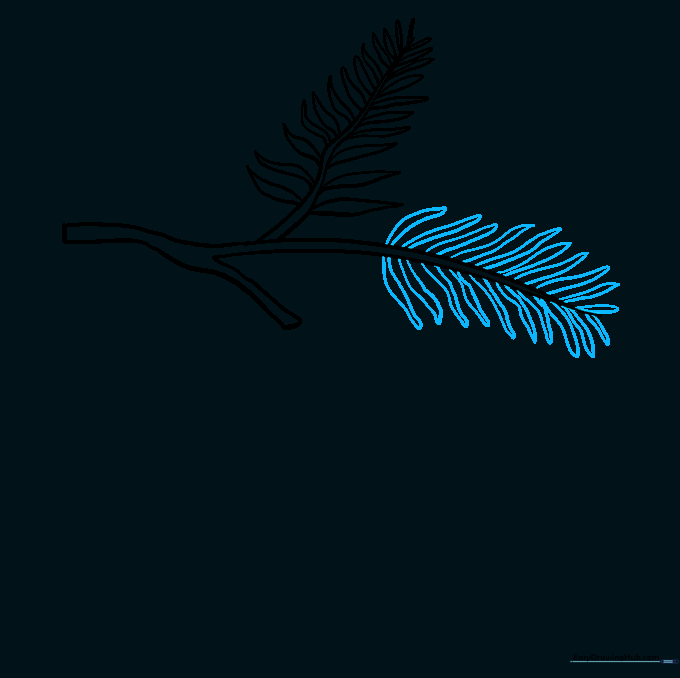
Continue adding needles along the length of the main twig. Tip: Don't worry about making them perfectly uniform; nature is messy, so varying the angles of your needles makes the drawing look more authentic.
Step 4: Completing the Branch Structure

Add one more small twig at the bottom. Fill it with needles using the same two-line technique. Tip: Ensure the needles overlap slightly to create a sense of depth.
Step 5: Starting the Pinecone Scales
At the end of the remaining twig, draw an upside-down rounded triangle. Add a four-sided shape beneath it. These are the first scales of your pinecone. Tip: Imagine these as overlapping roof shingles.
Step 6: Building the Pinecone Body
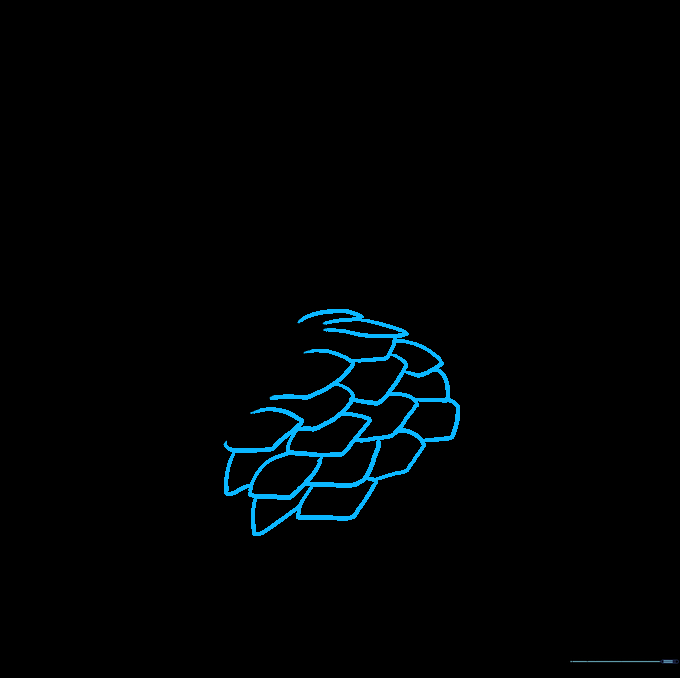
Continue adding overlapping scales down the length of the pinecone. Tip: Keep the points of the scales facing downward to give the pinecone its natural, hanging appearance.
Step 7: Tapering the Pinecone
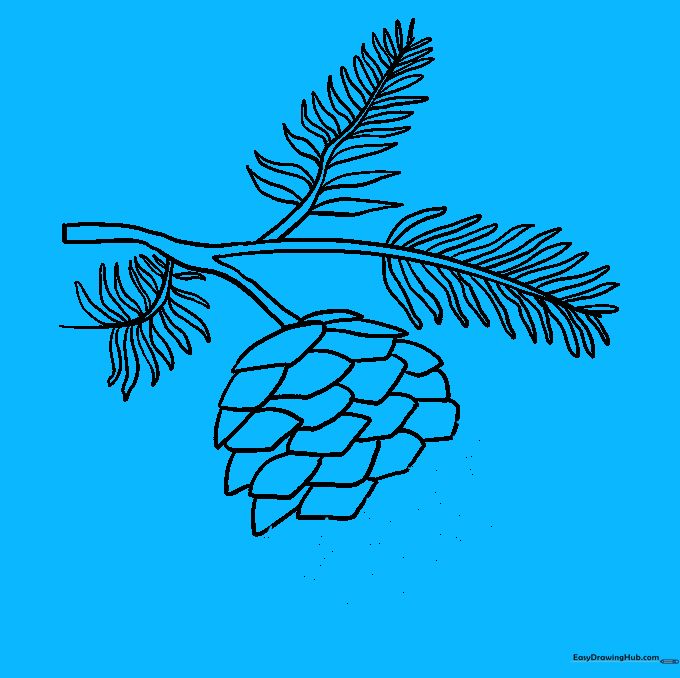
As you continue drawing scales, gradually make the shape narrower toward the bottom. Tip: This tapering effect is what makes the pinecone look realistic rather than just a cylinder.
Step 8: Adding Texture and Detail

Add smaller scales near the bottom tip. Tip: Since these are smaller, use shorter, quicker pencil strokes to define them.
Step 9: Finalizing the Outline
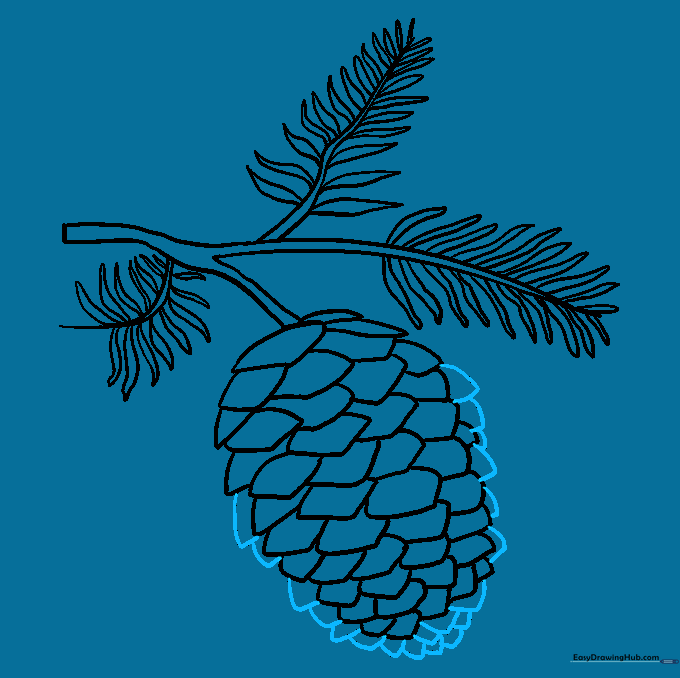
Close off the shape with a few final pointed scales at the very tip. Tip: Double-check that all your scale points are facing the same direction for a clean, finished look.
Step 10: Adding Color
Bring your drawing to life with color! Use warm browns for the pinecone and deep forest greens for the needles. Tip: Use a darker brown in the crevices between scales to add a sense of shadow and volume.
More Tutorials


