How to Draw a Piggy Bank: Easy 10-Step Guide for Kids
Ready to save some art skills? This tutorial is perfect for young artists ages 5 and up. All you need is a pencil, an eraser, and your favorite markers or crayons to bring this adorable piggy bank to life.
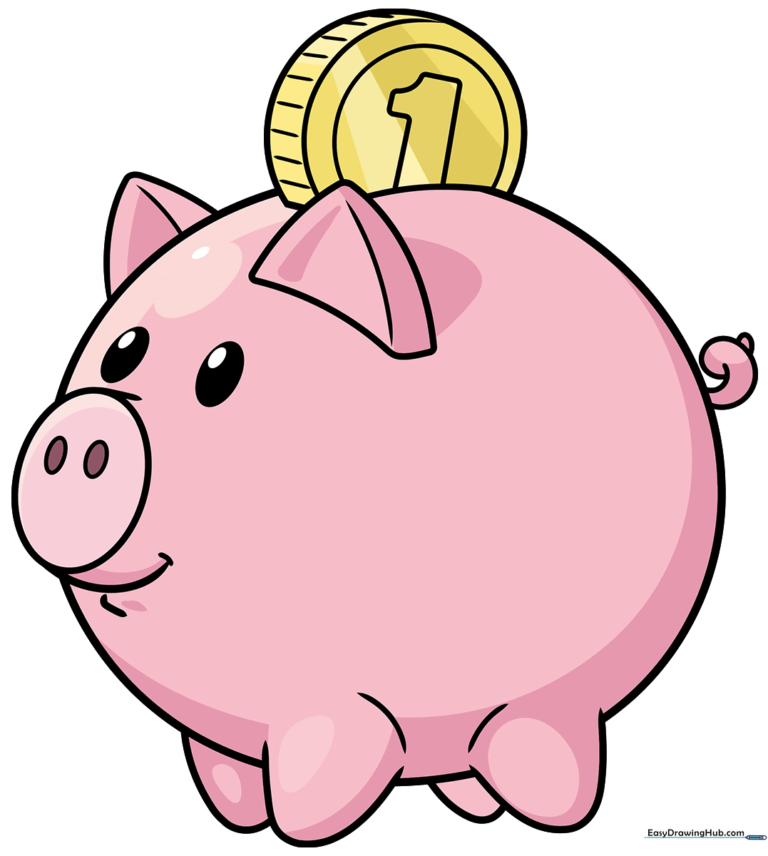
🎯 Final Result
Step-by-Step Instructions
Step 1: Sketching the Face and Snout
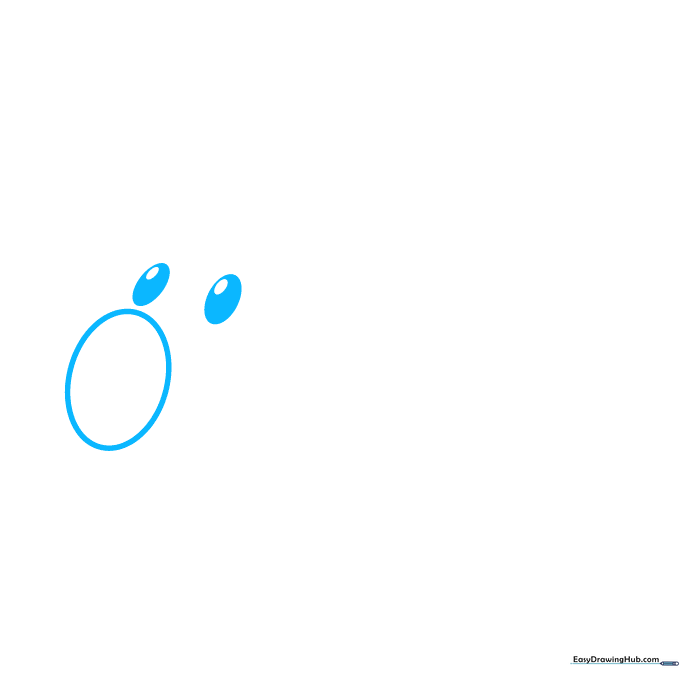
Start by drawing one large oval for the head and two smaller ones for the eyes. Add a tiny oval inside each eye for the pupils, and a small oval for the snout. Teacher's Tip: Keep your pencil lines light and sketchy so they are easy to erase if you need to adjust your placement.
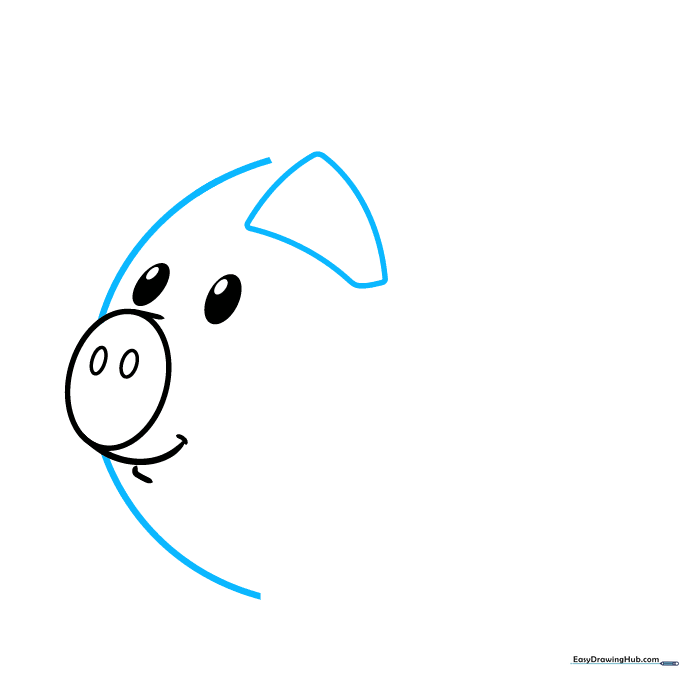
Step 2: Adding Facial Features

Draw two small ovals inside the snout for nostrils. Use soft, curved lines to define the top of the snout, a happy smiling mouth, and a rounded chin. Teacher's Tip: A gentle curve for the mouth makes the piggy look friendly and approachable.
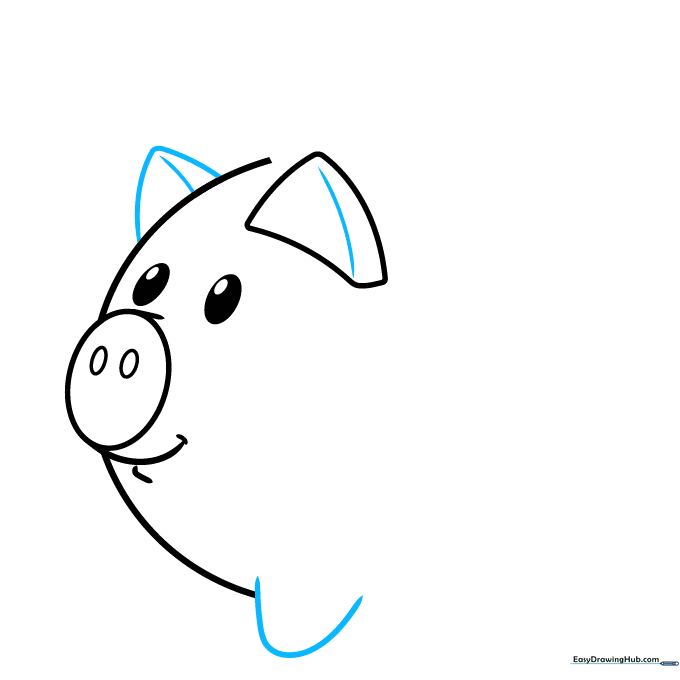
Step 3: Drawing the Ear and Head Shape
Sketch a triangular ear on top of the head. Then, use a long, smooth curved line to connect the face and form the side of the head. Teacher's Tip: Don't worry if your triangle isn't perfect; pig ears are naturally floppy and organic!
Step 4: Second Ear and First Leg
Add the second triangular ear behind the first one, adding a small line inside for depth. Draw a 'U' shape below the body for the front leg. Teacher's Tip: Using a 'U' shape is a great way for beginners to practice drawing solid, grounded forms.
Step 5: Completing the Legs and Body
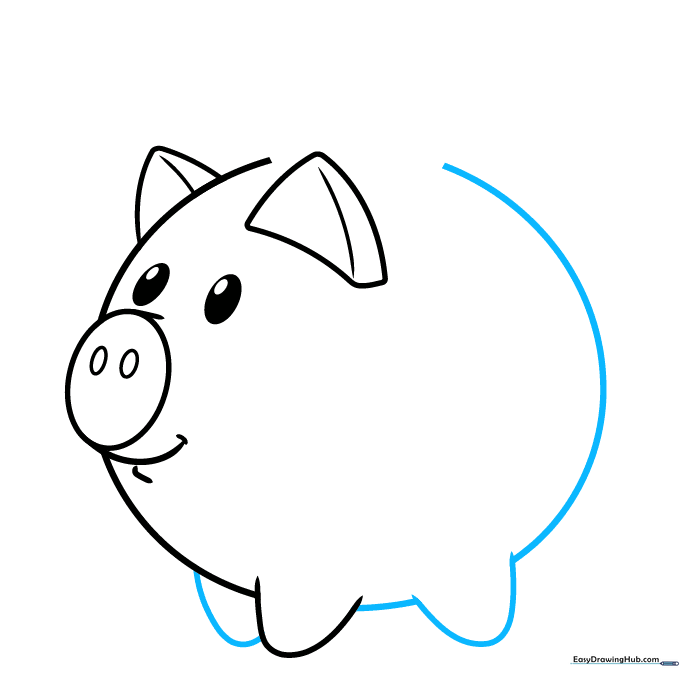
Draw two more 'U' shapes for the back legs and connect them with a curved line to create the belly. Extend a long curved line from the head to finish the back of the body. Teacher's Tip: Keep your lines fluid to make the piggy look plump and cute.
Step 6: Final Leg and Tail
Draw the final visible leg and add small lines above the feet to show the hooves. Finish with a cute, curly spiral for the tail! Teacher's Tip: A spiral tail adds a lot of personality—make it as tight or loose as you like.
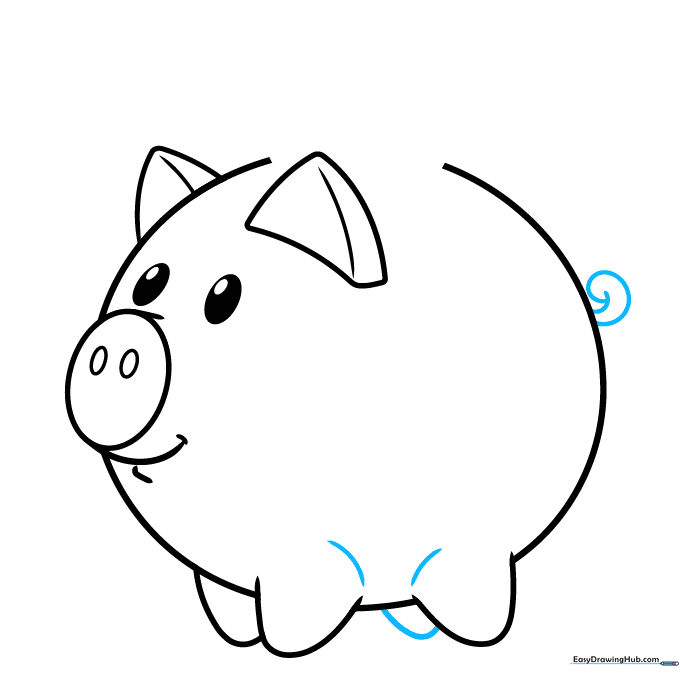
Step 7: The Coin Slot

Draw a partial circle on the pig's back to represent a coin being dropped into the slot. Teacher's Tip: Make sure the coin looks like it's halfway in by drawing the line slightly overlapping the back.
Step 8: Detailing the Coin

Add a curved line along the edge of the coin to give it thickness. Draw a bold number '1' in the center to show it's a penny. Teacher's Tip: Use a steady hand for the number to make it stand out clearly.
Step 9: Final Touches
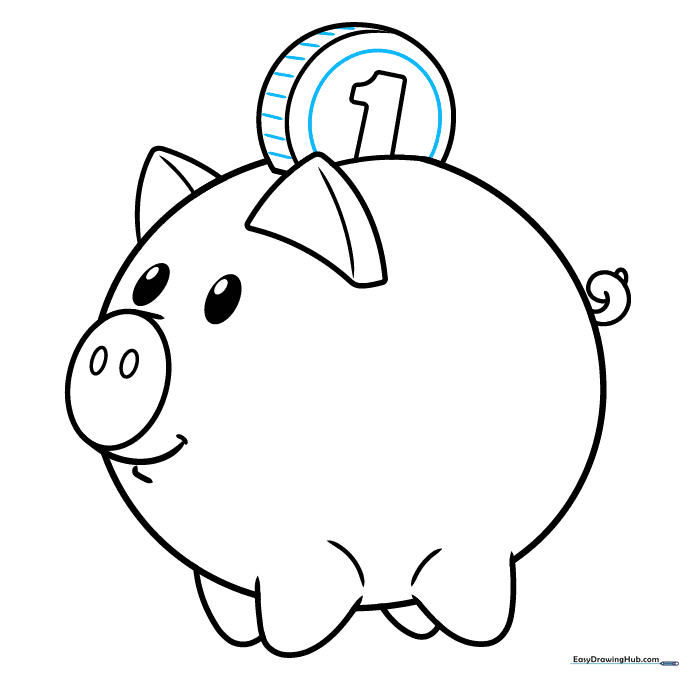
Draw a circle around the '1' and add small, straight lines around the edge of the coin for texture. Teacher's Tip: These little details make your drawing look professional and finished.
Step 10: Time to Color!
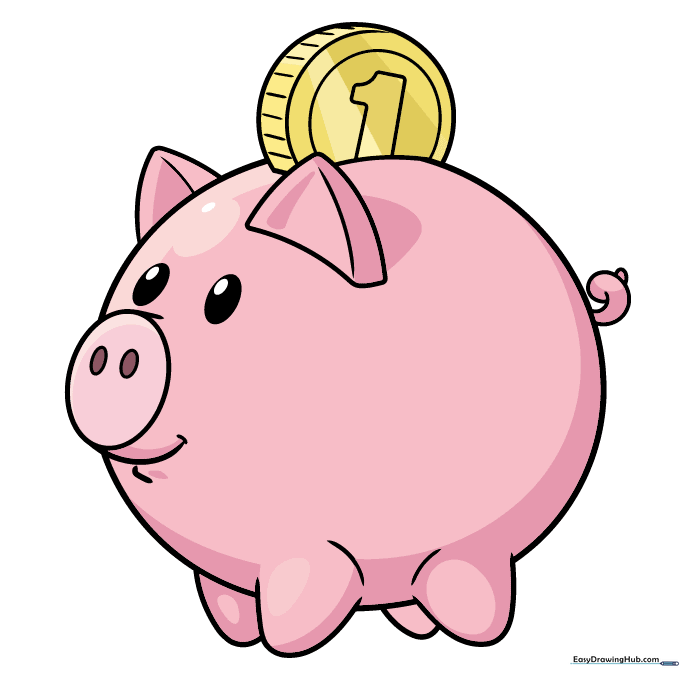
Your piggy bank is complete! Now, grab your markers or colored pencils. While pink is the classic choice, feel free to get creative—maybe your piggy bank is polka-dotted or bright blue!
More Tutorials


