How to Draw a Peony: Easy 10-Step Guide for Beginners
Bring the beauty of spring to your sketchbook with this simple peony tutorial, perfect for artists ages 5 and up. You will only need a pencil, an eraser, and your favorite coloring supplies to create this lush, multi-layered flower. Follow along to master the art of drawing organic, flowing petals.
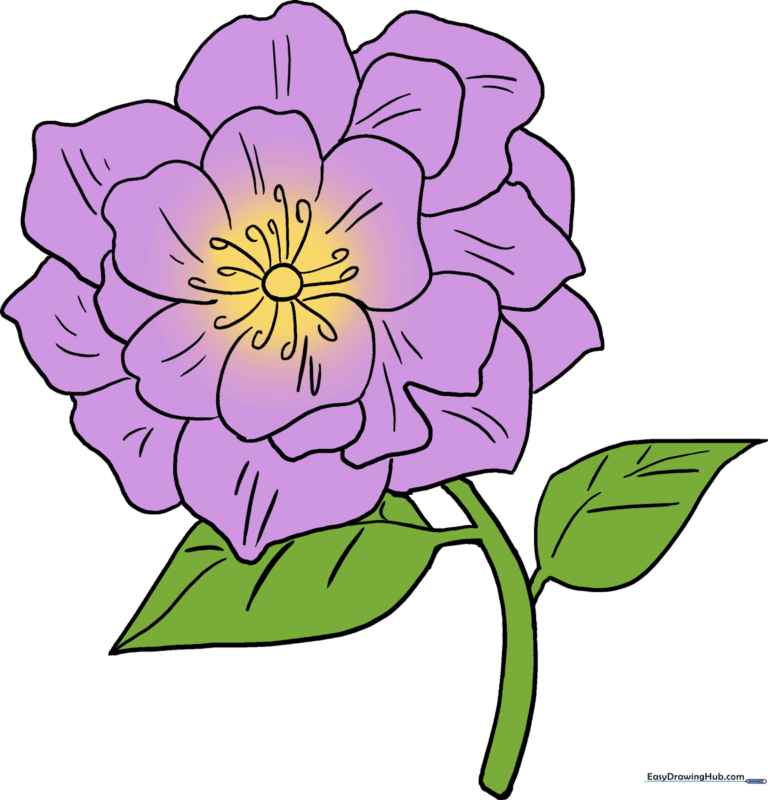
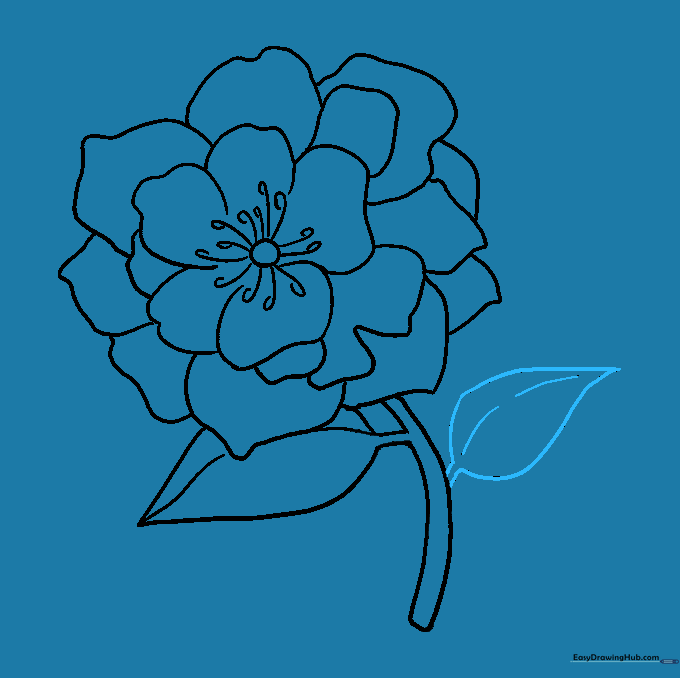
🎯 Final Result
Step-by-Step Instructions
Step 1: Sketching the Flower Center

Draw a small, neat circle in the middle of your paper. Teacher's Tip: Keep this circle small; it acts as the anchor for all your petals, so don't press too hard!
Step 2: Adding the Anthers

Draw short, curved lines radiating outward from your circle, ending in small loops. These are the flower's filaments and anthers. Tip: Think of these like little 'matchsticks' surrounding the center.
Step 3: Forming the Inner Petals
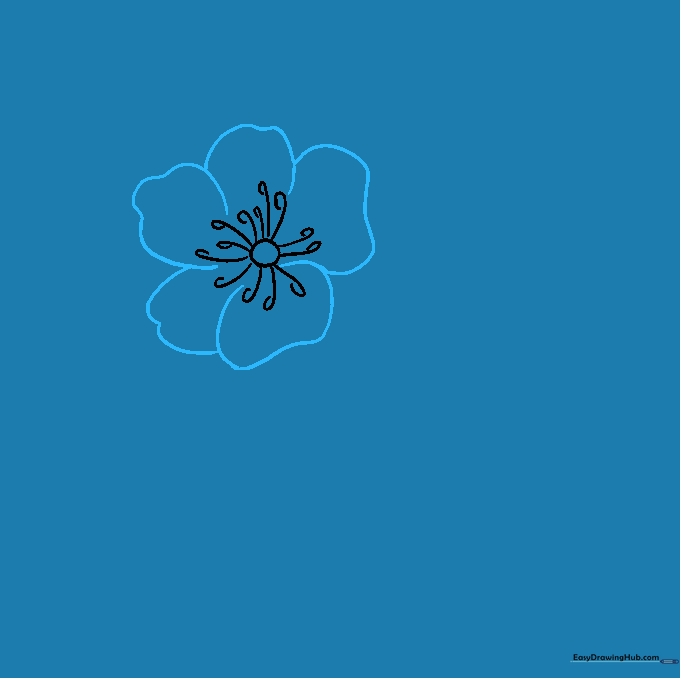
Draw five irregular, curved shapes around the anthers to create the first layer of petals. Tip: Petals are rarely perfect circles; give them slightly wavy edges to make them look realistic.
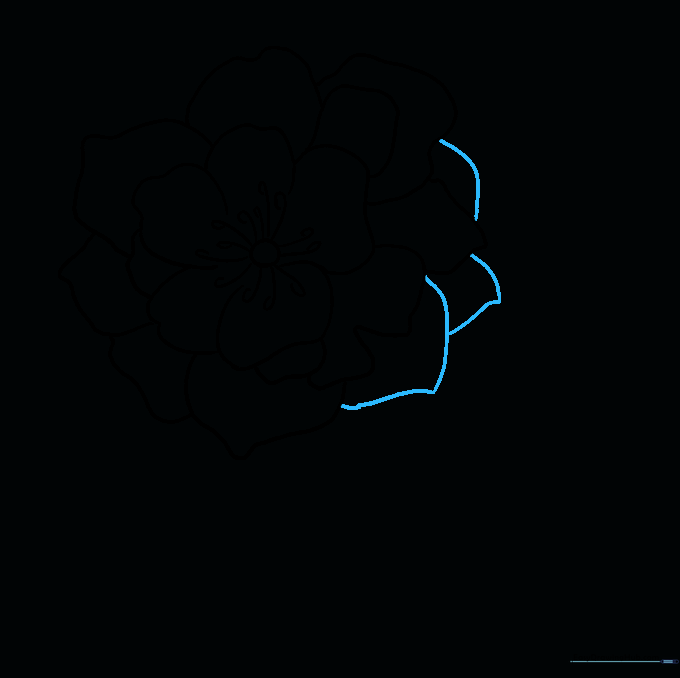
Step 4: Building the Second Layer

Add a second layer of petals by drawing larger, overlapping curved lines around the first set. Tip: Vary the size of these petals to give the flower a full, fluffy appearance.
Step 5: Expanding the Bloom

Continue adding more curved lines to create a third layer of petals. Tip: If you run out of space, just draw smaller petals tucked behind the larger ones.
Step 6: Filling the Gaps
Look for any empty spaces and add a few more curved lines to 'close' the flower shape. Tip: This is where you can make your peony look as big or as small as you like!
Step 7: Drawing the Stem and First Leaf
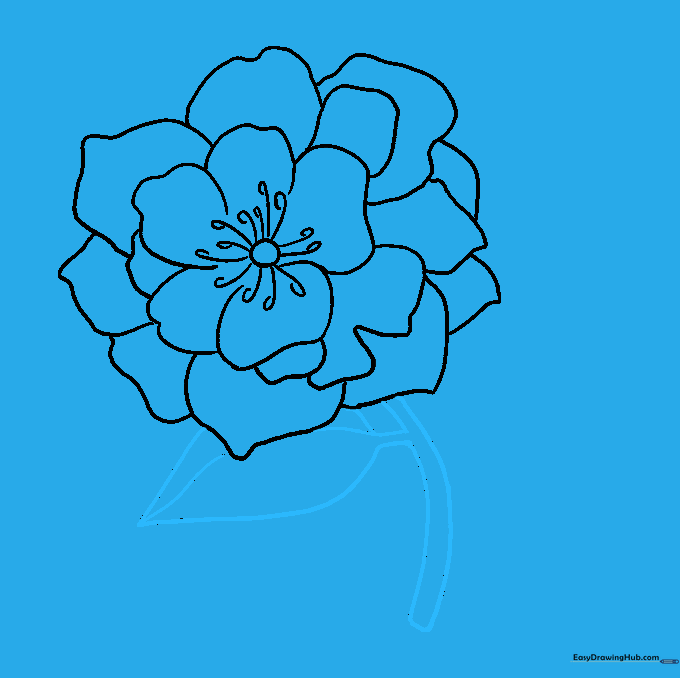
Draw two parallel lines downward for the stem, then add a leaf shape with a central vein. Tip: Make the leaf pointed at the end to give it a natural, organic look.
Step 8: Adding the Second Leaf
Repeat the leaf-drawing process on the opposite side of the stem. Tip: Try to make the second leaf slightly different in size to keep the drawing looking balanced but natural.
Step 9: Adding Texture and Detail

Add small lines to the petals and leaves to show texture. Tip: Use light, quick strokes to create the look of veins in the leaves and folds in the petals.
Step 10: Bringing Your Peony to Life with Color

Time to color! Use pinks, reds, or even soft yellows. Tip: Try blending two shades—a darker color near the center and a lighter color on the edges—to create a beautiful gradient effect.
More Tutorials


