How to Draw Nyan Cat: Easy 10-Step Guide for Kids
Bring the iconic internet-famous Nyan Cat to life with this beginner-friendly drawing tutorial. Designed for young artists ages 6+, this activity requires only a pencil, paper, and your favorite markers to create a colorful, pixel-art style masterpiece. Follow along to master basic geometric shapes while creating your own space-faring feline.
🎯 Final Result

Step-by-Step Instructions
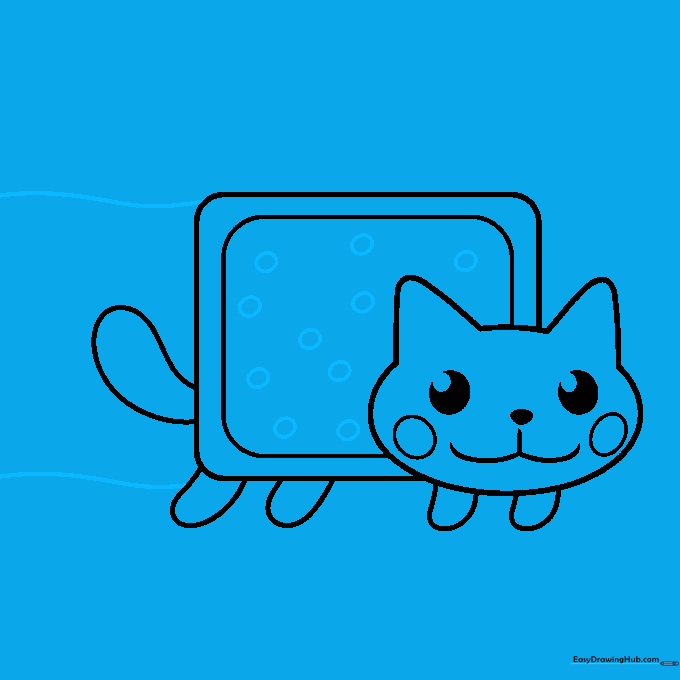
Step 1: Sketching the Pop-Tart Body

Draw a rectangle with rounded corners to form the base of the Pop-Tart body. Tip: Keep your pencil lines light so you can easily erase any overlapping lines later.
Step 2: Adding the Head and Ears
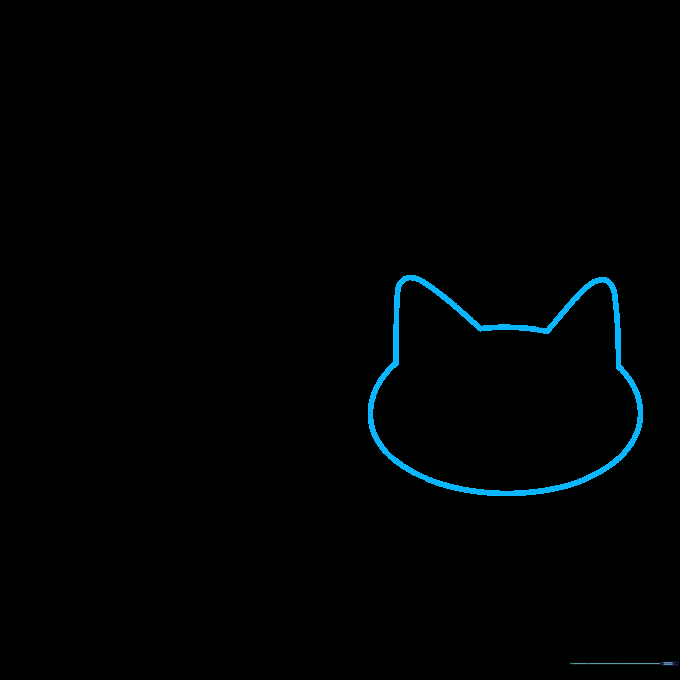
Sketch an oval overlapping the right side of the rectangle. Add two small triangles with rounded tops on the oval for the ears. Tip: Make sure the ears are symmetrical to give your cat a balanced, cute look.
Step 3: Drawing the Face

Draw two circles for the eyes and a small, rounded triangle for the nose. Tip: Leave a tiny white dot inside each eye to create a 'sparkle' effect that makes the character look lively.
Step 4: Adding Cheeks and Mouth

Add a small vertical line under the nose, followed by two curves to form the mouth. Add two ovals on the sides for rosy cheeks. Tip: Keep the cheeks soft and rounded to emphasize the 'kawaii' style.
Step 5: Sketching the Feet

Draw small, rounded loops along the bottom of the body for the feet. Tip: Try to space them evenly so the cat looks like it's floating steadily.
Step 6: Adding the Tail

Draw a curved loop extending from the back of the body to create the tail. Tip: Keep the tail shape simple and thick to match the cartoon aesthetic.
Step 7: Detailing the Pastry
Add small circles inside the body to represent the 'sprinkles' on the Pop-Tart. Draw two wavy lines on the left side to start the rainbow trail. Tip: Vary the size of the circles to make the sprinkles look more natural.
Step 8: Creating the Rainbow and Stars
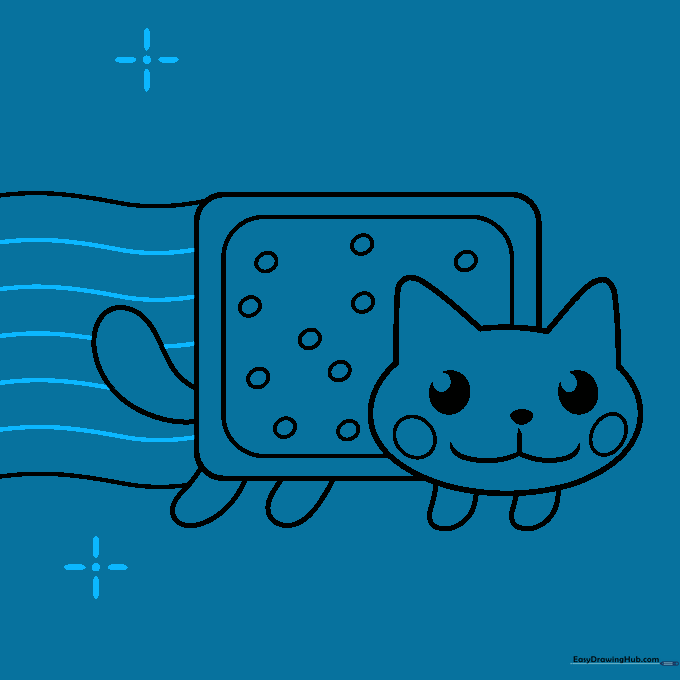
Draw parallel wavy lines to complete the rainbow trail. Add small stars around the cat using simple lines and circles. Tip: Use a ruler if you find it hard to keep the rainbow lines parallel.
Step 9: Finalizing the Background

Add more stars of varying sizes around the cat to fill the space. Tip: Placing stars at different heights creates a sense of depth and movement.
Step 10: Adding Color
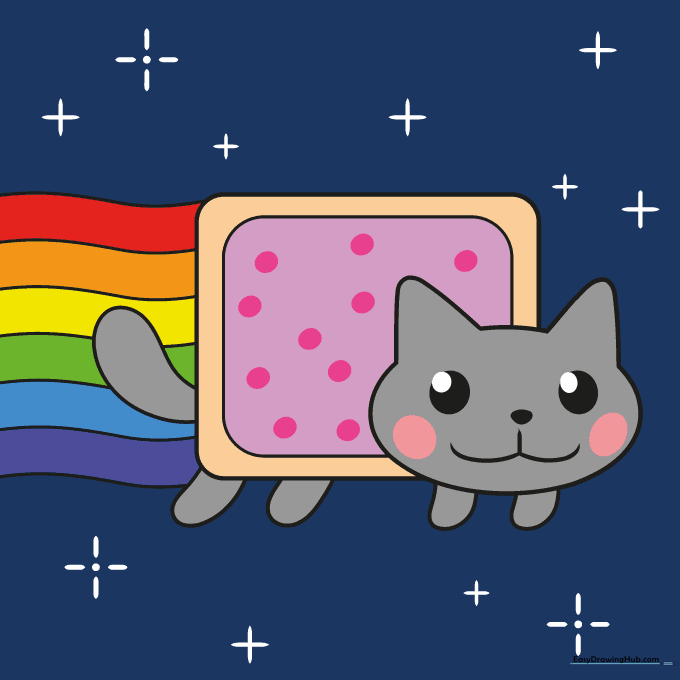
Outline your drawing with a black marker. Color the rainbow in bright, vibrant shades, use gray for the cat, and pink for the cheeks and pastry. Tip: Use a dark blue background to make the rainbow colors really pop!
More Tutorials


