How to Draw a Simple Rope Knot: Easy Step-by-Step Guide
Master the art of drawing a classic rope knot with this straightforward, 10-step tutorial. Designed for beginners, this activity uses simple geometric shapes to help you build confidence in your sketching technique. Grab a pencil and paper to get started on this practical drawing exercise.
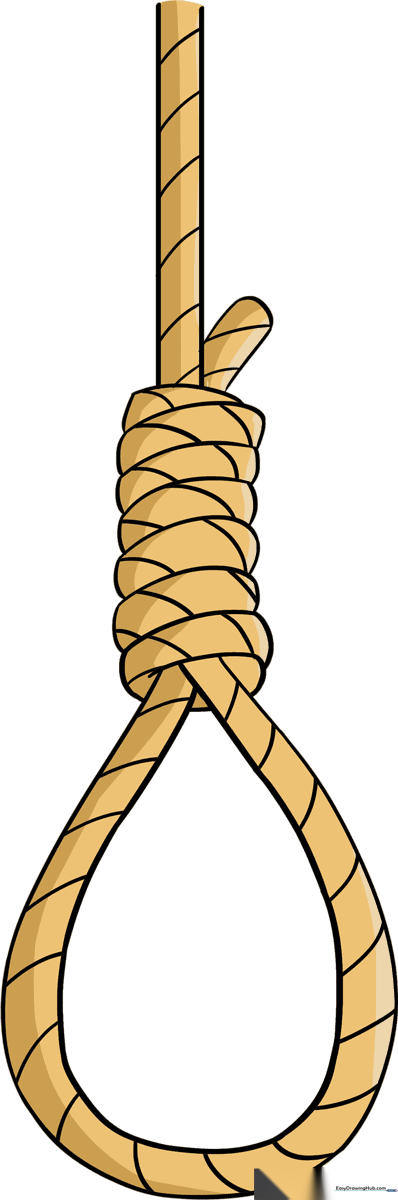
🎯 Final Result
Step-by-Step Instructions
Step 1: Sketching the Base Knot
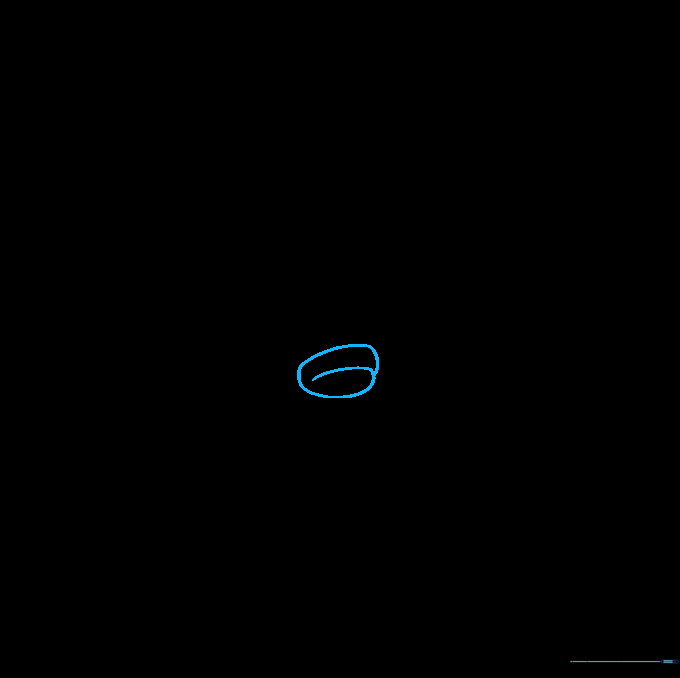
Start by drawing a small oval, then add a curved line across the center. Teacher's Tip: Keep this shape small and centered on your page to leave room for the rest of the rope.
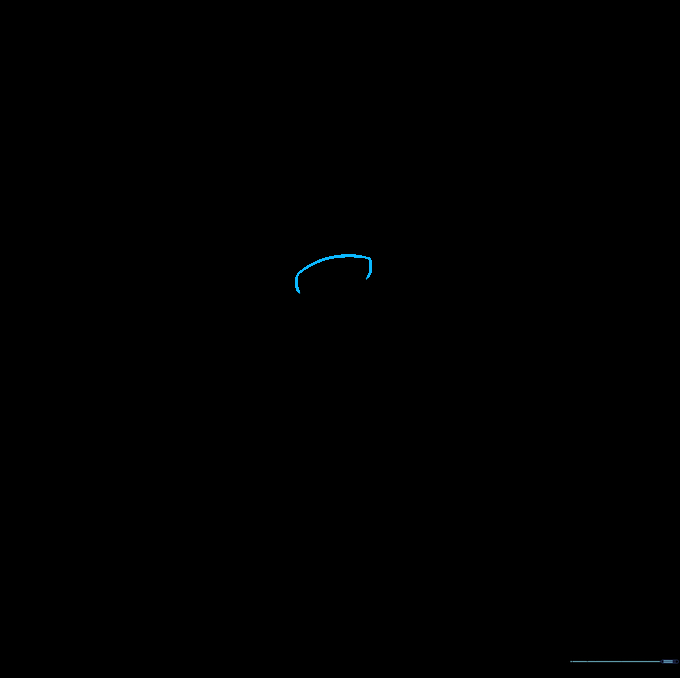
Step 2: Building the Knot Structure

Draw a curved line to enclose a half-oval above your first shape. This begins the layered look of the knot. Tip: Use a light touch to ensure the lines connect smoothly.
Step 3: Continuing the Knot

Add another half-oval segment on top of the previous one. Tip: Try to keep the width of these segments consistent to make the rope look uniform.
Step 4: Extending the Knot

Enclose another half-oval on top of the knot structure. Tip: Don't worry if the lines aren't perfect; rope is naturally irregular!
Step 5: Adding Height
Use a curved line to enclose another segment at the top. Tip: Keep your pencil strokes fluid to mimic the flexibility of real rope.
Step 6: Finishing the Knot Top
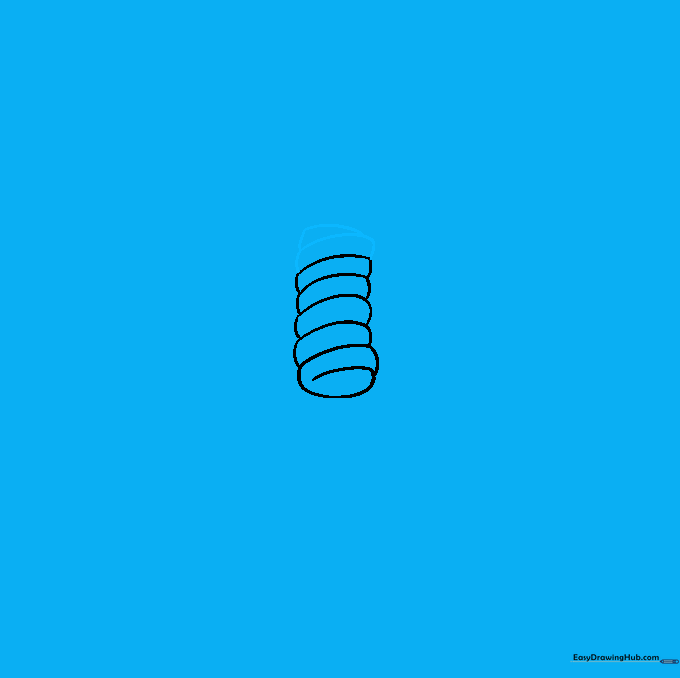
Add one more segment, then a smaller line to cap off the top of the knot. Tip: This smaller segment helps create the illusion of the rope turning.
Step 7: Drawing the Rope
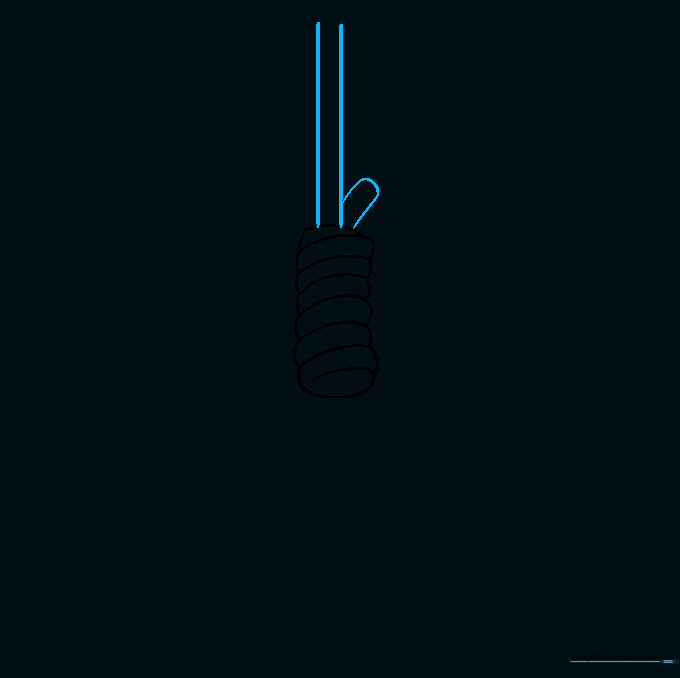
Draw two parallel vertical lines extending from the top. Use a curved line to show the rope emerging from the knot. Tip: Use a ruler if you want perfectly straight lines, or freehand for a more organic look.
Step 8: Creating the Loop
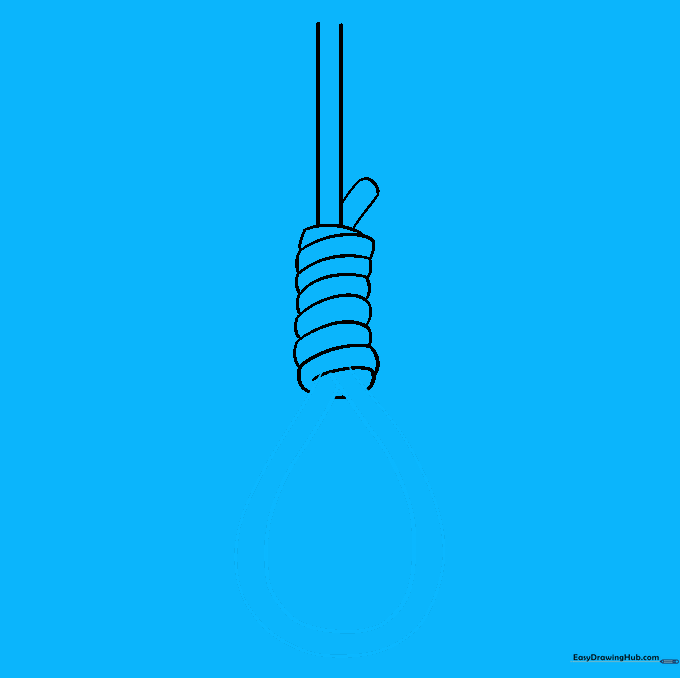
Draw a large teardrop shape at the bottom, then a smaller one inside it to outline the loop. Tip: Ensure the loop is wide enough to look realistic.
Step 9: Adding Texture
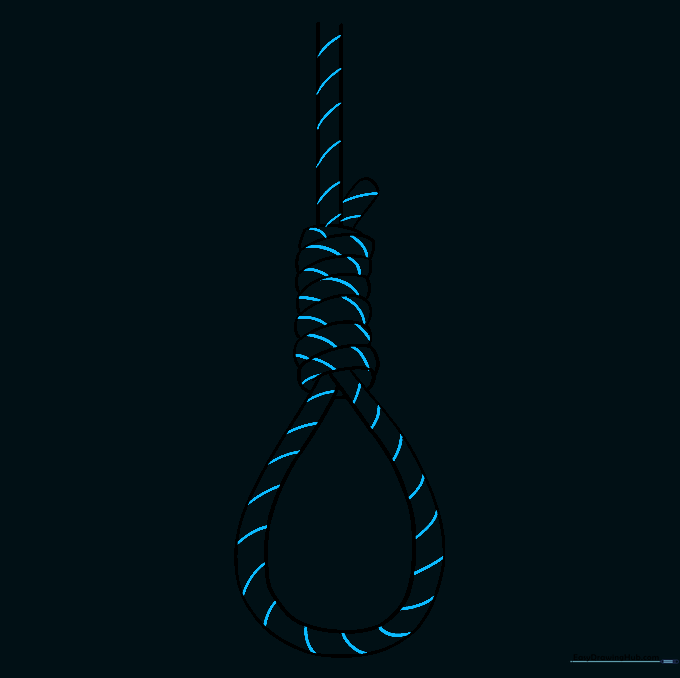
Add short, diagonal lines across the rope and knot to suggest texture. Tip: Vary the spacing of these lines to make the rope look braided.
Step 10: Final Coloring
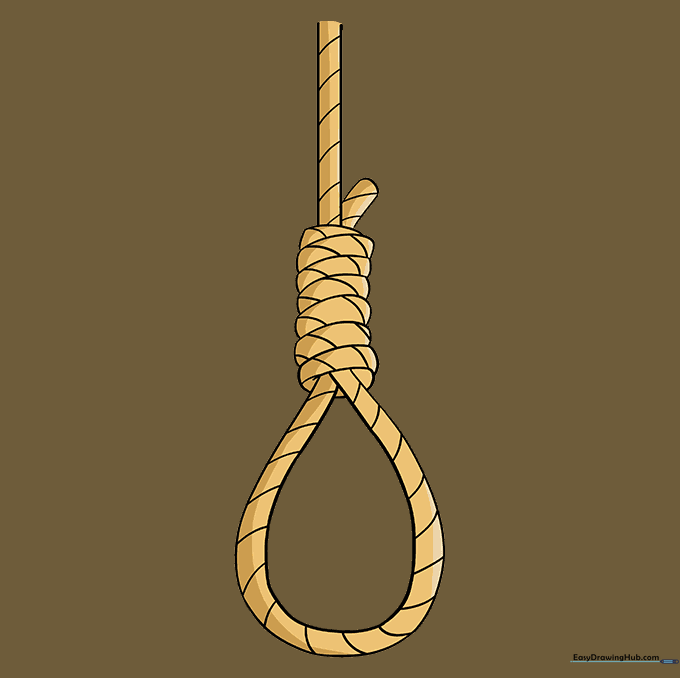
Add color to your drawing. Traditional rope colors like tan, beige, or light brown work best. Tip: Use a darker shade on one side of the rope to create a simple shadow effect.
More Tutorials


