How to Draw a Mouth and Tongue: Easy 10-Step Guide
Mastering facial features starts with the mouth! This tutorial is perfect for young artists and beginners looking to add personality to their character portraits. All you need is a pencil, an eraser, and a sheet of paper to get started.
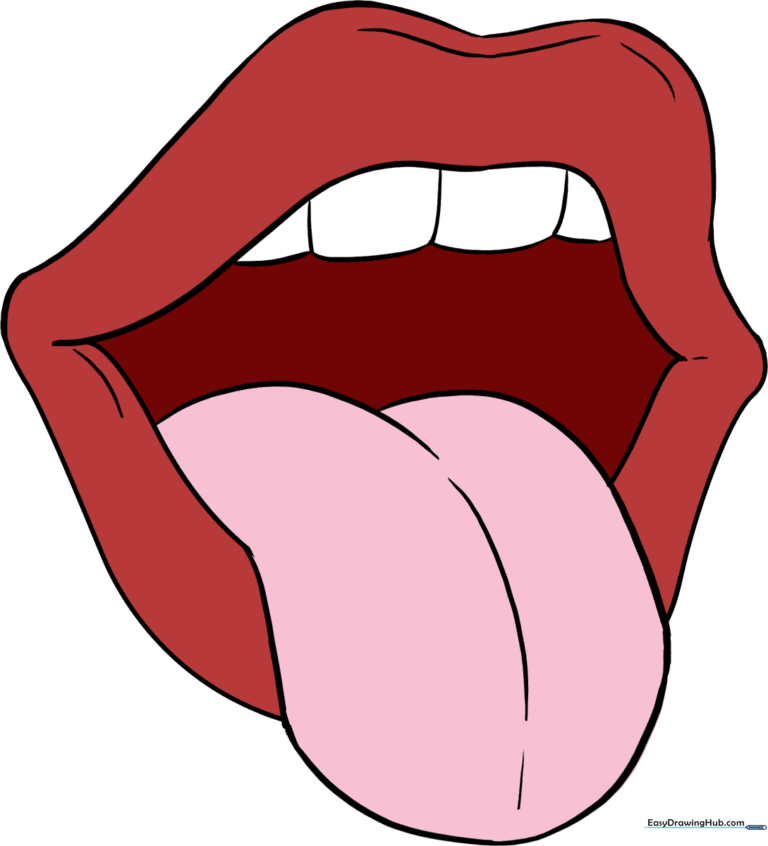
🎯 Final Result
Step-by-Step Instructions
Step 1: Sketching the Upper Lip Line

Draw a long, curved line that dips in the center, resembling a soft, rounded letter 'M'. Teacher's Tip: Keep this line light; it serves as the anchor for the entire mouth shape.
Step 2: Defining the Lower Lip

Add a wide, curved line underneath to form the bottom lip, connecting it to the top. Tip: Add a slight 'bulge' near the corners to give the lips a natural, full appearance.
Step 3: Adding Inner Lip Detail

Draw a curved line inside the mouth that follows the contour of the upper lip. This creates the inner edge of the lip. Tip: Make sure this line is parallel to the top one for a balanced look.
Step 4: Enclosing the Mouth

Use a long 'U' shaped line to enclose the inner mouth area. Ensure the corners come to a sharp point to make the expression look realistic. Tip: Don't press too hard; keep the lines smooth.
Step 5: Starting the Tongue

Draw two overlapping curved lines inside the mouth. These will serve as the base for the tongue. Tip: Think of these as two small hills sitting inside the mouth.
Step 6: Extending the Tongue

Connect the sides of the tongue with a large 'U' shaped line. This creates the shape of a tongue sticking out. Tip: Keep the curve rounded so it looks soft and fleshy.
Step 7: Cleaning Up

Carefully erase any overlapping guide lines inside the tongue area to make it look clean. Tip: Use a kneaded eraser if you have one to lift the graphite without smudging.
Step 8: Adding Teeth

Draw small, rounded rectangles along the top of the mouth to represent teeth. Tip: Don't make them perfectly square; slightly rounded corners look much more natural.
Step 9: Adding Dimension

Draw a light line down the center of the tongue and add small curves to the lips to show depth. Tip: These subtle lines make the drawing look 3D rather than flat.
Step 10: Adding Color
Bring your drawing to life with shades of red and pink. Tip: Use a darker shade of red near the back of the mouth to create a sense of shadow and depth.
More Tutorials


