How to Draw a Meerkat: Easy 9-Step Guide for Kids
Ready to bring a desert explorer to life? This tutorial is perfect for young artists ages 5 and up. All you need is a pencil, an eraser, and some paper to practice building shapes and character proportions.
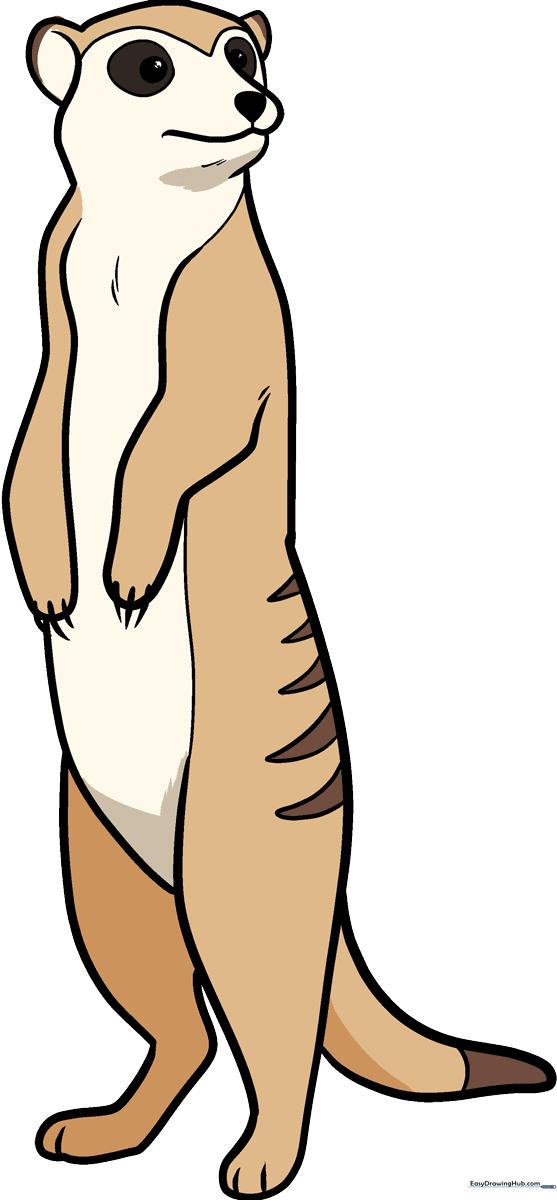
🎯 Final Result
Step-by-Step Instructions
Step 1: Sketching the Head and Face
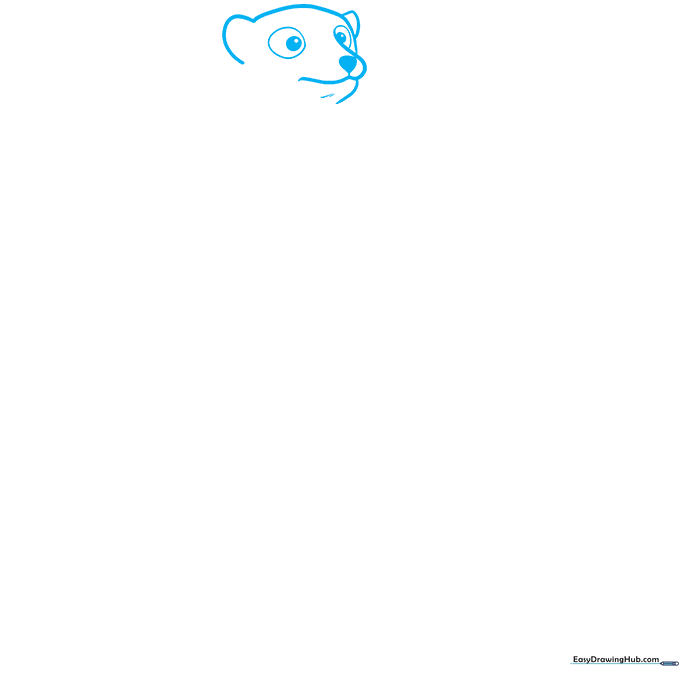
Start by sketching the meerkat's head using soft, curved lines for the ears and snout. Add a small rounded triangle for the nose and three circles for the eyes. Teacher's Tip: Keep your pencil pressure light so you can easily erase any overlapping lines later.
Step 2: Defining the Neck and Face Markings
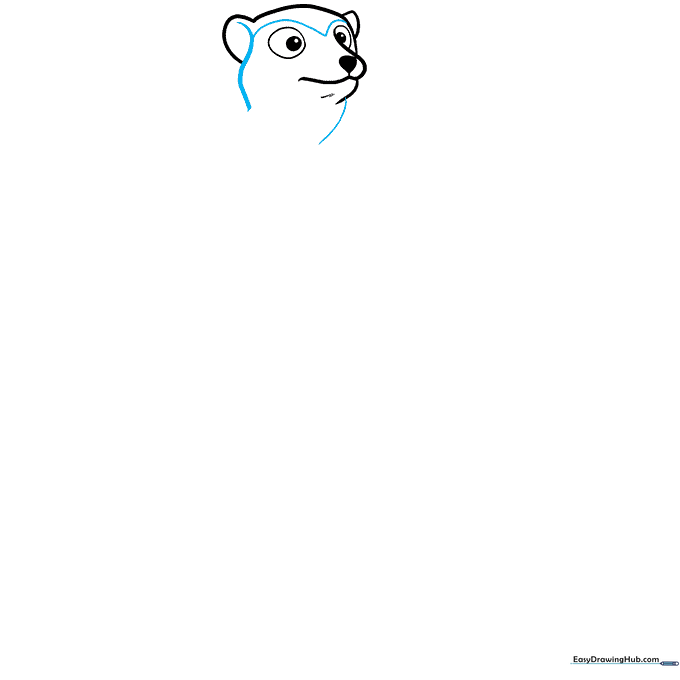
Draw the neck using smooth, downward-curving lines. Add a 'V' shape between the ears to define the meerkat's signature facial mask. Tip: Use a steady hand to make these curves look natural and fluid.
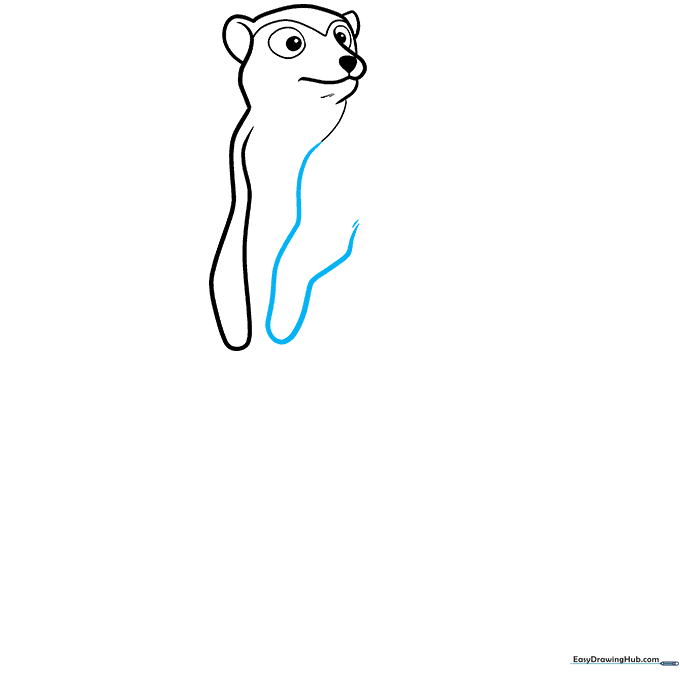
Step 3: Sketching the First Arm
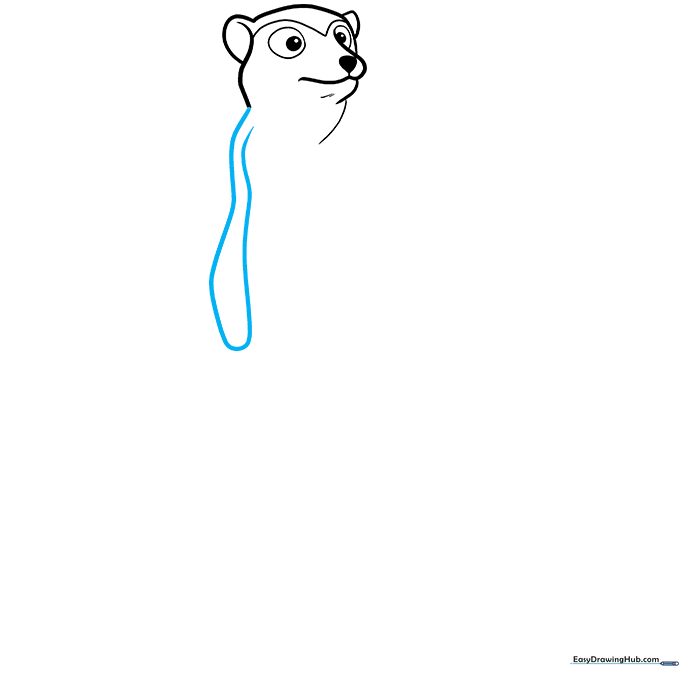
Extend a long, wavy line from the neck and loop it back to create the first arm. Tip: Think of this as a gentle 'S' curve to give the arm a relaxed, lifelike posture.
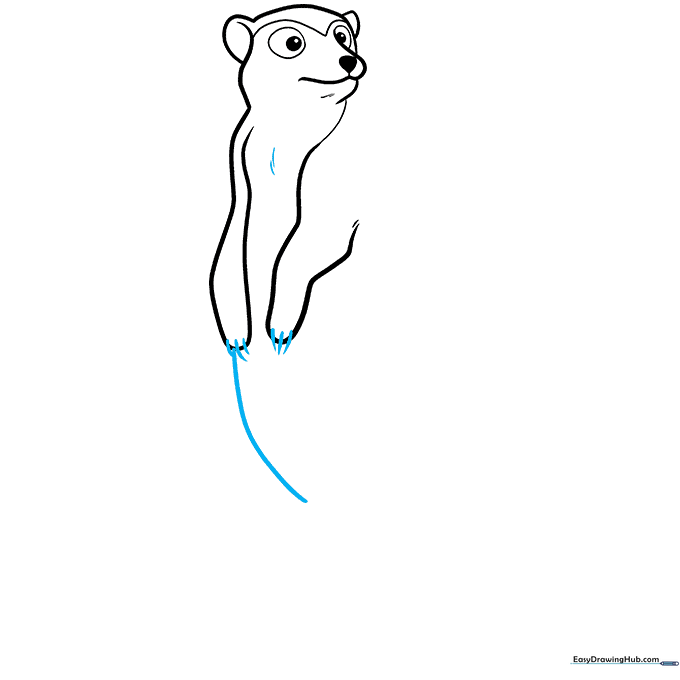
Step 4: Adding the Second Arm
Repeat the process on the opposite side of the neck to draw the second foreleg. Tip: Try to match the length of this arm to the first one to keep your meerkat balanced.
Step 5: Outlining the Belly and Claws
Connect the arms with a long, curved line to form the belly. Use short, quick strokes to add a 'furry' texture to the chest and draw tiny claws on the paws. Tip: Use very short lines for the fur to make it look soft.
Step 6: Drawing the Back and Rear Leg

Draw a long, sweeping curve for the back, then loop it back to form the first rear leg. Tip: Meerkats have strong legs for standing, so make this shape look sturdy.
Step 7: Adding the Second Rear Leg
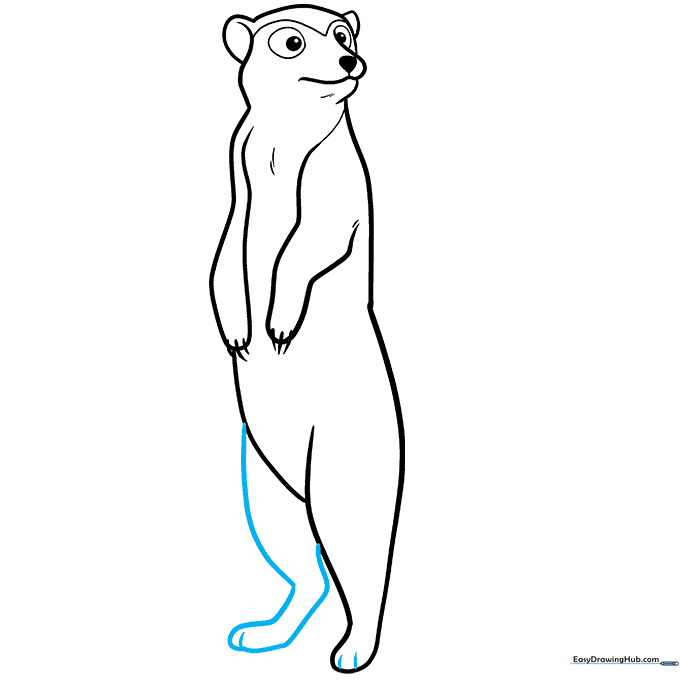
Draw the second rear leg using a similar curved line. Add small, short lines at the bottom of the feet to represent toes. Tip: These small details really help the character look more realistic!
Step 8: Sketching the Tail

Extend a long, curved line from the back of the leg and loop it back to enclose the tail. Tip: Keep the tail thick at the base and slightly thinner toward the tip.
Step 9: Final Details and Stripes
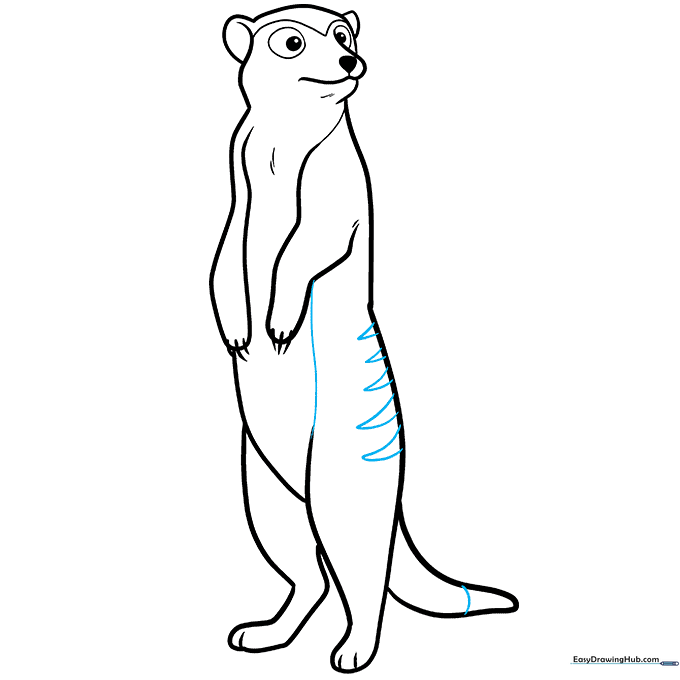
Add curved triangles on the back for stripes and a band at the tip of the tail. Tip: Use a darker pencil or marker to outline your final drawing once you are happy with the shape.
Step 10: Bringing Your Meerkat to Life with Color

Now for the fun part! Use tan for the body, brown for the stripes, and dark shades for the eye patches. Tip: Use light, circular motions with your colored pencils to create a smooth, even coat of color.
More Tutorials


