How to Draw a Manta Ray: Easy 9-Step Guide for Kids
Bring the wonders of the ocean to your sketchbook with this simple manta ray drawing guide. Designed for young artists ages 5 and up, this activity requires only a pencil, paper, and an eraser. Follow along to master the graceful curves of this majestic sea creature while building your confidence in character design.
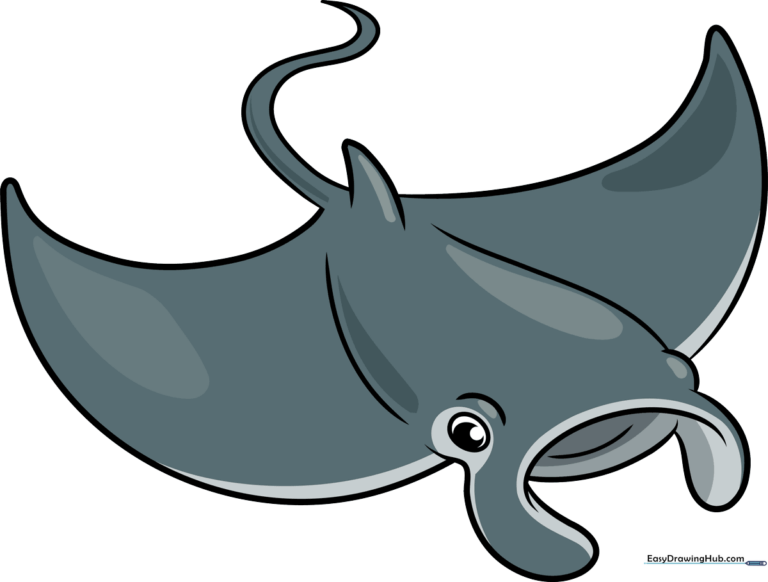
🎯 Final Result
Step-by-Step Instructions
Step 1: Sketching the Cephalic Fin
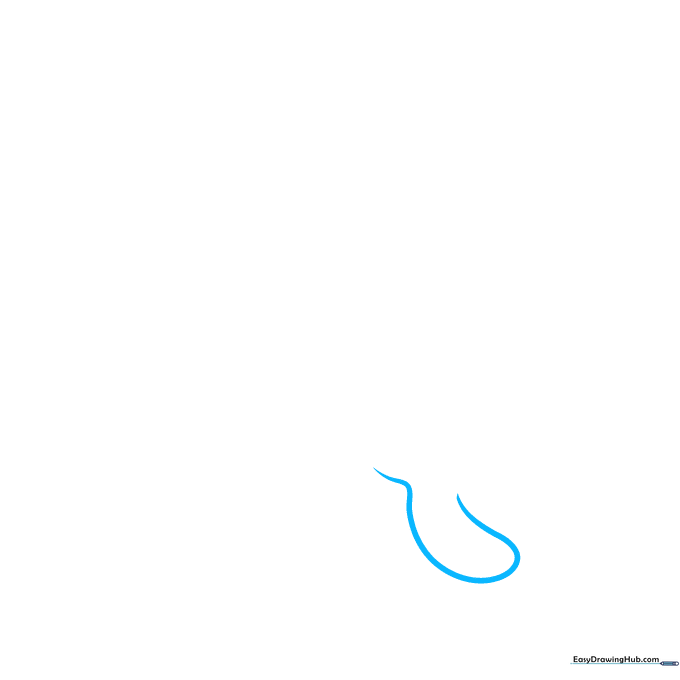
Begin by drawing a curved line that doubles back on itself to form one of the manta ray's cephalic fins. Teacher's Tip: Keep your pencil pressure light here so you can easily adjust the shape if it looks a bit too pointy!
Step 2: Drawing the Open Mouth

Draw a 'C' shaped line overlapping the fin to create the top of the mouth, then add a second curve for the bottom. Teacher's Tip: Remind students that manta rays are filter feeders, so keeping the mouth wide and open helps tell the story of how they eat!
Step 3: Adding the Second Fin
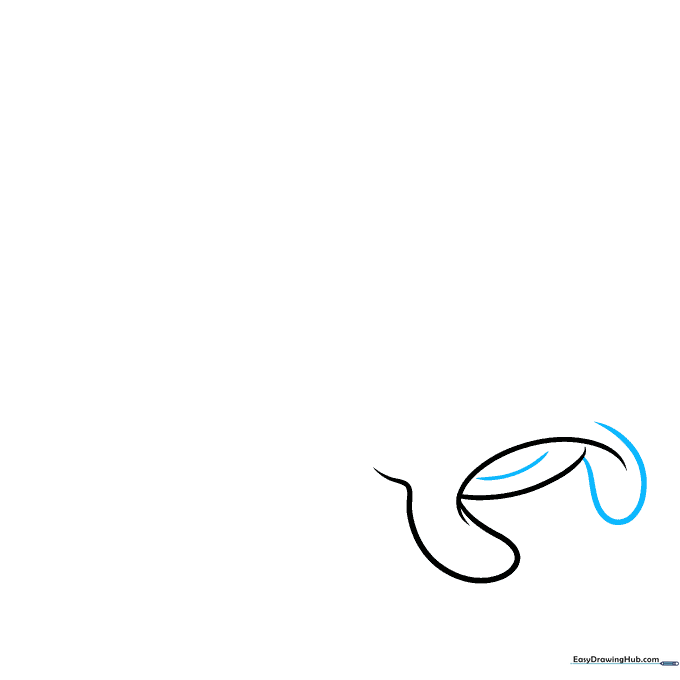
Mirror the first fin on the other side of the mouth with another curved, doubled-back line. Add a small contour inside the mouth to give it depth. Teacher's Tip: Symmetry can be tricky, so try drawing both sides at the same speed to keep them balanced.
Step 4: Sketching the Eye
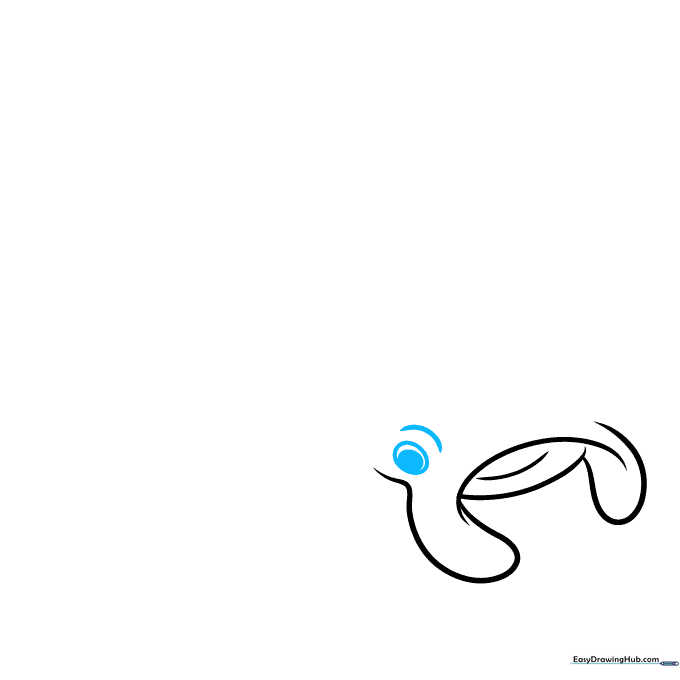
Draw an oval above the fin for the eye and shade a smaller circle inside for the pupil. Add a curved line above it to suggest the eye ridge. Teacher's Tip: Placing the eye slightly higher makes the ray look more alert and friendly.
Step 5: Defining the Body
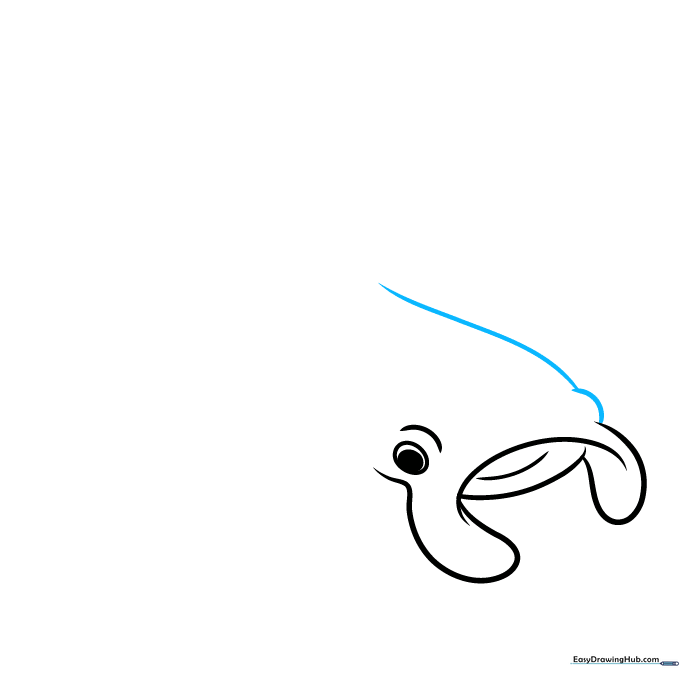
Add the second eye ridge and extend a long, sweeping curved line to start forming the main body. Teacher's Tip: Use a smooth, fluid motion with your wrist to get that graceful 'ocean wave' look for the body line.
Step 6: Creating the First Pectoral Fin
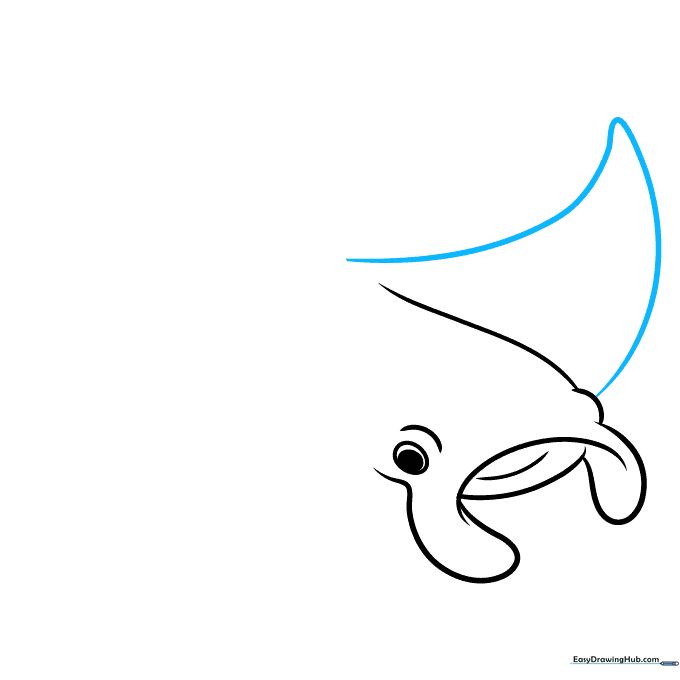
Draw the large, winglike pectoral fin using two curved lines that meet at a soft point. Teacher's Tip: Imagine the ray is gliding through the water—make your lines long and sweeping to capture that movement.
Step 7: Adding the Second Pectoral Fin
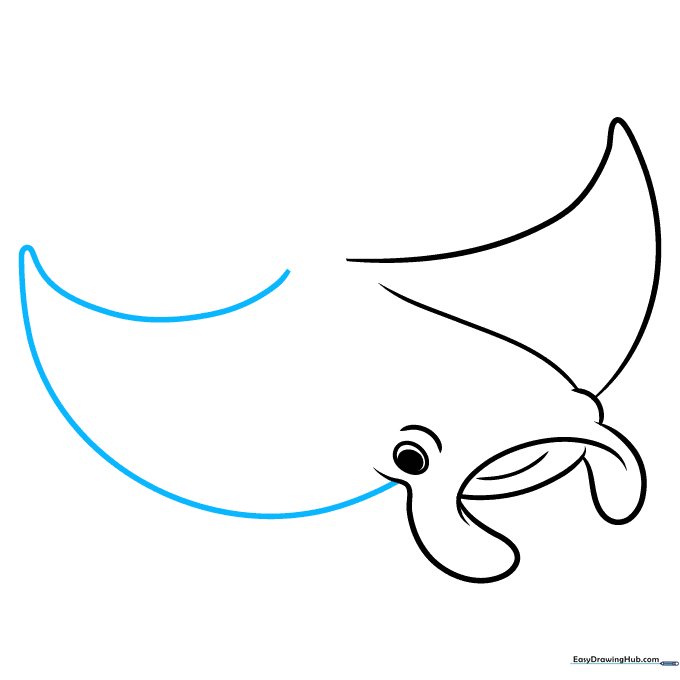
Repeat the process for the opposite side, ensuring the fin matches the size and angle of the first one. Teacher's Tip: If the fins look uneven, don't worry! Nature is rarely perfectly symmetrical, and it adds character to your drawing.
Step 8: Shaping the Tail
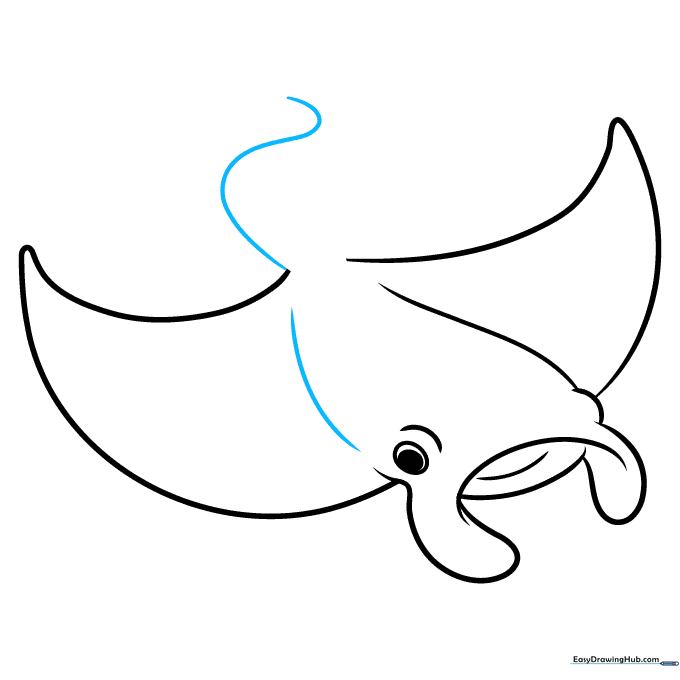
Contour the body with a curved line and extend an 'S' shaped line from the base to begin the tail. Teacher's Tip: Keep the tail thin and delicate to contrast with the large, powerful wings of the ray.
Step 9: Final Details and Dorsal Fin
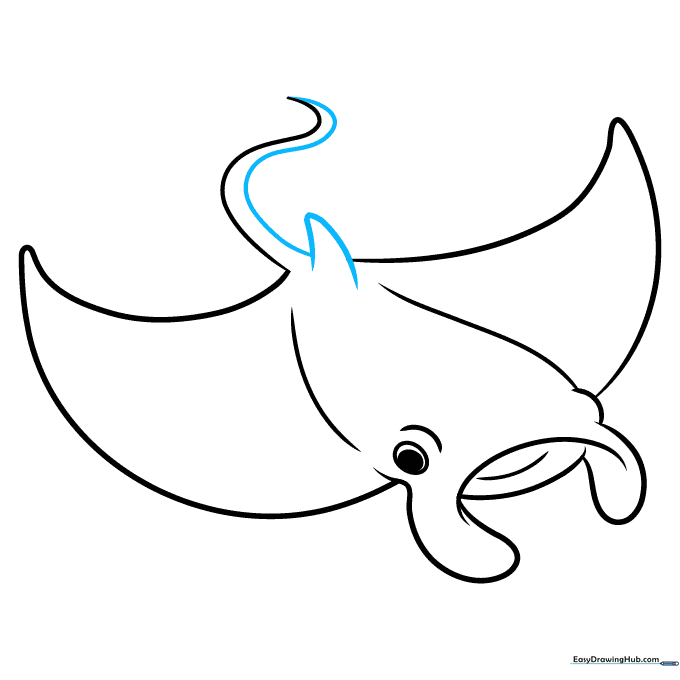
Add a small triangular dorsal fin on the back and finish the tail with a final 'S' curve. Teacher's Tip: Now is the time to erase any overlapping guidelines from earlier steps to make your drawing look clean and professional.
Step 10: Adding Color
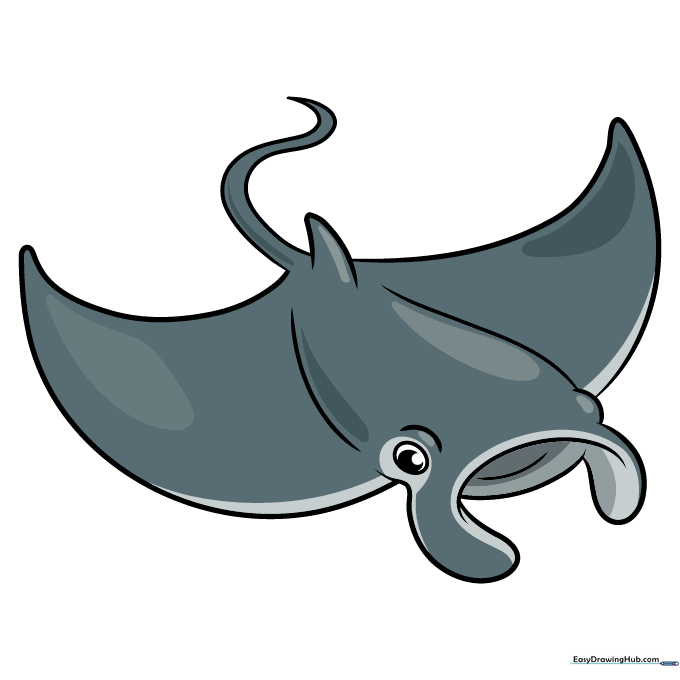
Bring your ray to life! We used shades of gray for the back and a lighter tone for the belly. Teacher's Tip: Try using a blue crayon for the background to make your manta ray look like it's swimming in the deep ocean.
More Tutorials


