How to Draw a Man: Easy 10-Step Guide for Beginners
Ready to bring a character to life? This tutorial is perfect for young artists ages 7+ looking to master human proportions. All you need is a pencil, an eraser, and a sheet of paper to start building your own cartoon character from the ground up.
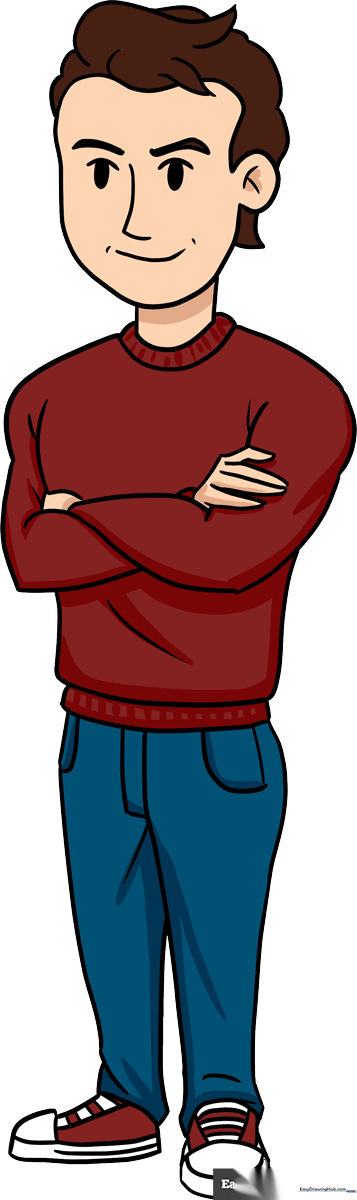
🎯 Final Result
Step-by-Step Instructions
Step 1: Sketching the Head and Guides

Draw a rounded shape for the head and a small 'C' curve for the ear. Add a vertical and horizontal line crossing in the center to create a crosshair. Teacher's Tip: Keep these lines very light—they are just a map for your facial features and will be erased later!
Step 2: Adding Facial Features
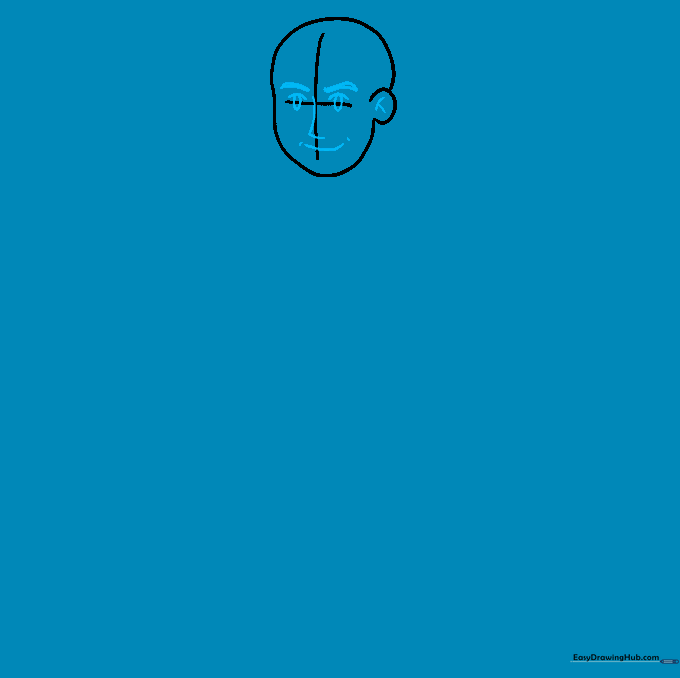
Place two ovals over the horizontal line for eyes, add curved brows, an 'L' shaped nose, and a simple mouth. Tip: Use the crosshair to ensure the eyes are level; if they look lopsided, just adjust your guide lines.
Step 3: Creating the Hair
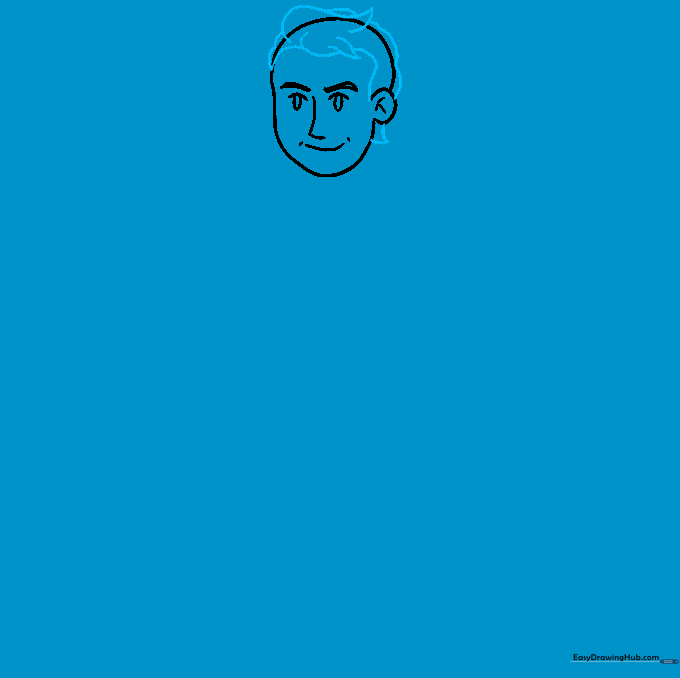
Erase your guide lines, then sketch the hair using overlapping, pointed curves. Tip: Think of hair as 'clumps' rather than individual strands to make it look more like a cartoon style.
Step 4: Drawing the Neck and Shoulders

Draw two vertical lines for the neck, a collar, and wide curves for the shoulders. Tip: Make the neck thick enough to support the head; a thin neck can make the character look unstable.
Step 5: Sketching Crossed Arms
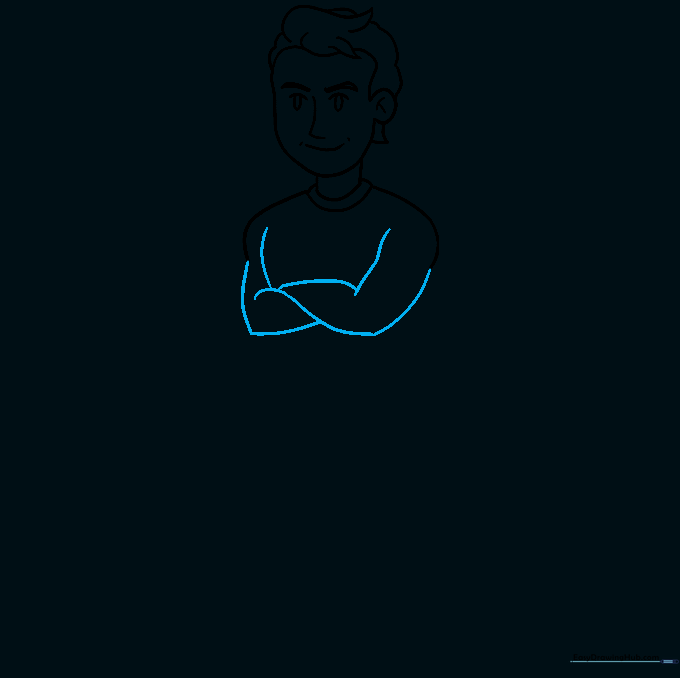
Use pairs of curved lines to draw the arms folded across the chest. Tip: Keep the curves smooth to imply muscle and movement.
Step 6: Adding Hands and Shirt Detail

Draw the hands tucked behind the arms and add small curves to show fabric folds at the elbows. Tip: Don't worry about drawing every finger; simple shapes work best for cartoons.
Step 7: Defining the Torso

Outline the rectangular shape of the torso and add a hem at the bottom. Tip: Keep the sides slightly curved to give the shirt a natural look.
Step 8: Drawing the Pants
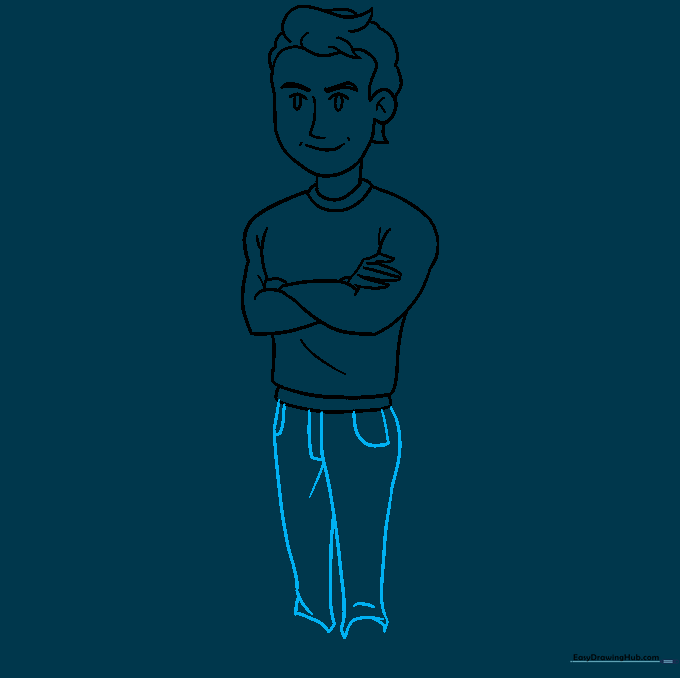
Draw the legs with long, slightly curved lines, adding folds at the bottom. Include pockets and a fly. Tip: Overlapping lines at the bottom create the illusion of fabric bunching near the shoes.
Step 9: Adding Shoes
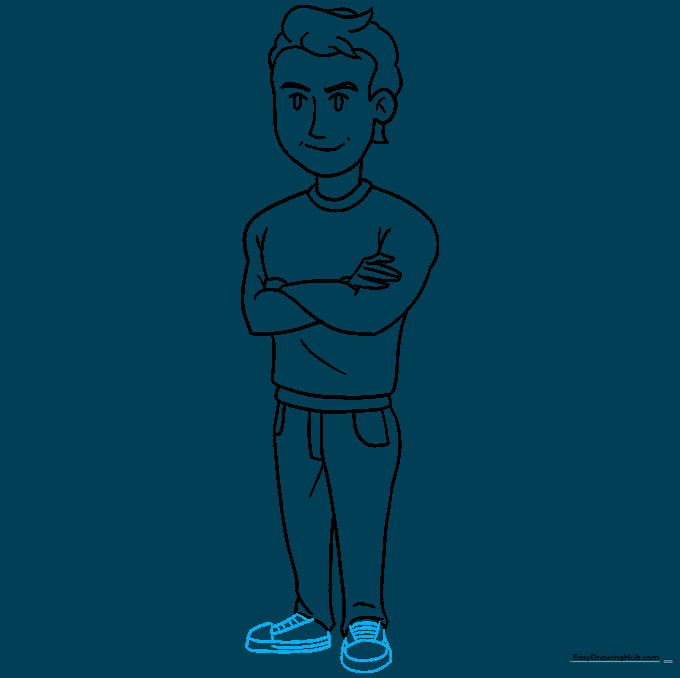
Outline the shoes with curved soles and add small lines for laces. Tip: Make the soles thick to ground the character on the page.
Step 10: Final Coloring

Add color to your character! Tip: Use light pressure with your colored pencils to create smooth gradients, or press harder for bold, vibrant cartoon colors.
More Tutorials


