How to Draw a Roaring Lion: Easy 10-Step Guide
Capture the king of the jungle in action with this fun, roaring lion tutorial. Designed for ages 7+, this project uses basic geometric shapes to build a complex character, helping young artists understand anatomy and expression. Grab your pencil, eraser, and paper, and let's bring this powerful cat to life!
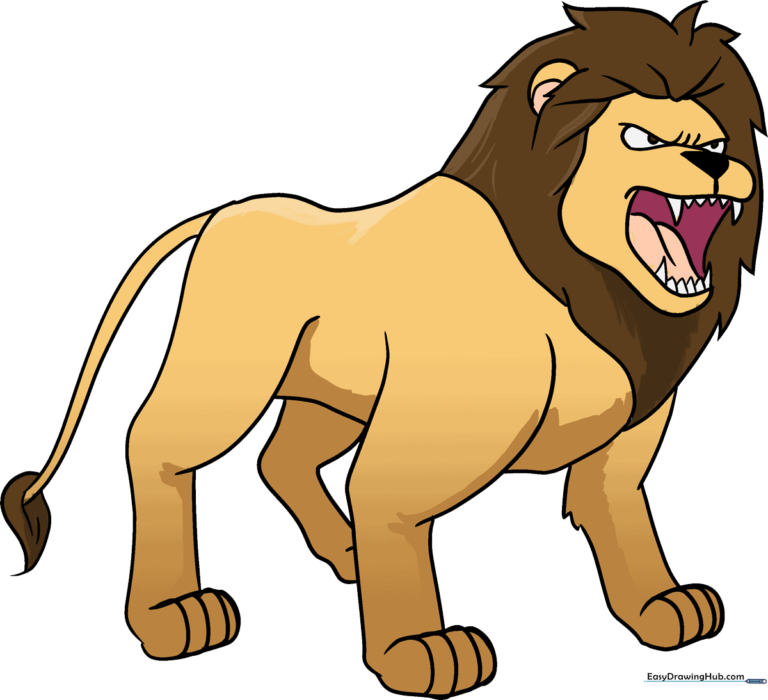
🎯 Final Result
Step-by-Step Instructions
Step 1: Sketching the Base Shapes

Lightly sketch three overlapping circles: one large for the chest, a smaller one above for the head, and a small one at the back for the hips. Teacher's Tip: Keep your pencil pressure very light here; these are just guides that we will erase later!
Step 2: Defining the Body and Snout
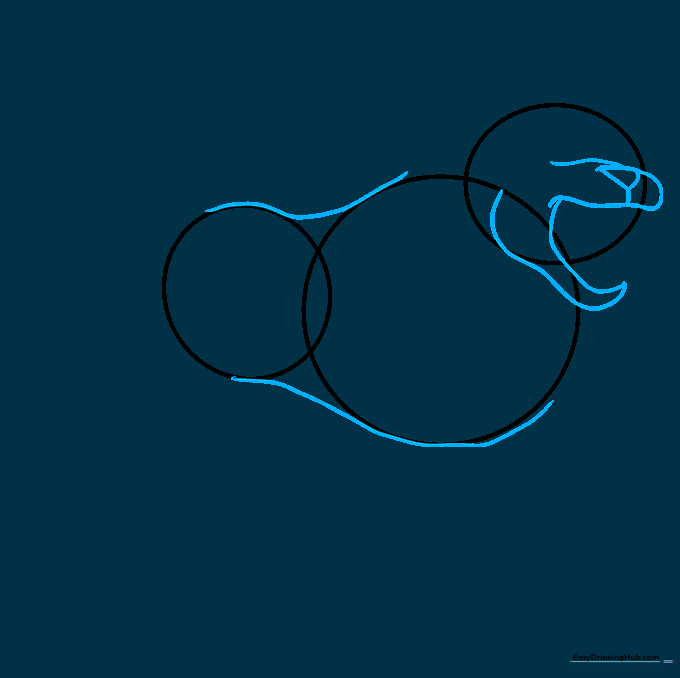
Connect the circles with curved lines to define the back and belly. In the head circle, draw a loose 'C' shape for the open mouth and a small inverted triangle for the nose. Tip: The 'C' shape should look like a wide-open jaw ready to roar!
Step 3: Adding Facial Features
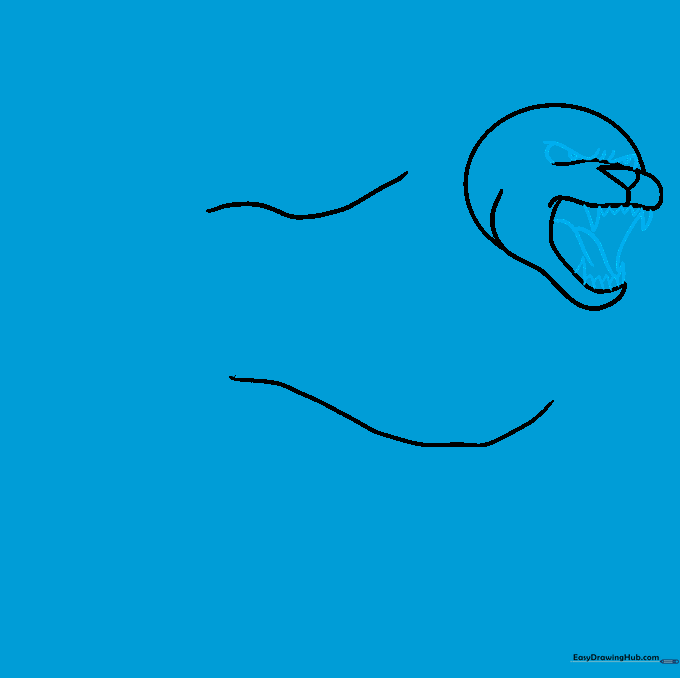
Erase your initial guide circles. Now, sketch teardrop-shaped eyes and a furrowed brow to give your lion a fierce expression. Add sharp, triangular teeth and a curved tongue inside the mouth. Tip: Focus on the brow—the closer it is to the eyes, the angrier the lion looks!
Step 4: Sketching the Mane
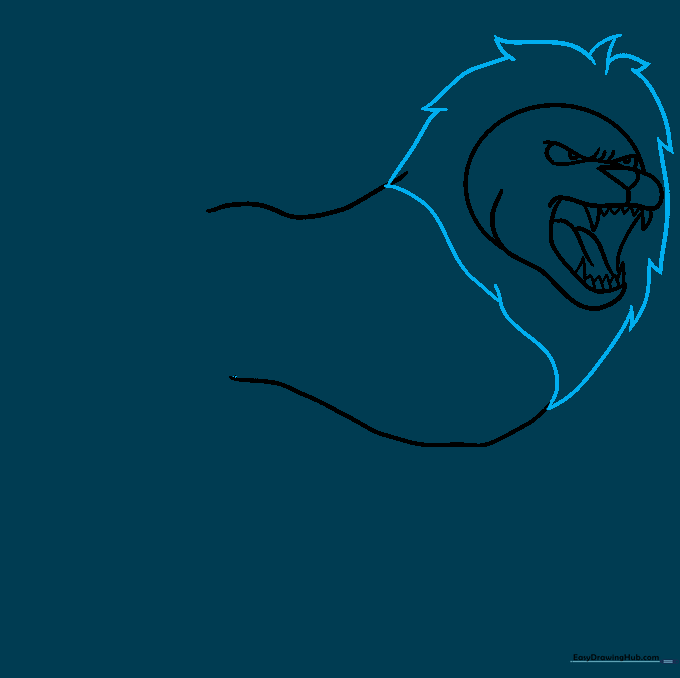
Draw the mane surrounding the head using a series of overlapping, jagged curved lines that meet at sharp points. Tip: Don't make the mane perfectly symmetrical; lions have wild, messy hair!
Step 5: Refining the Mane and Ears
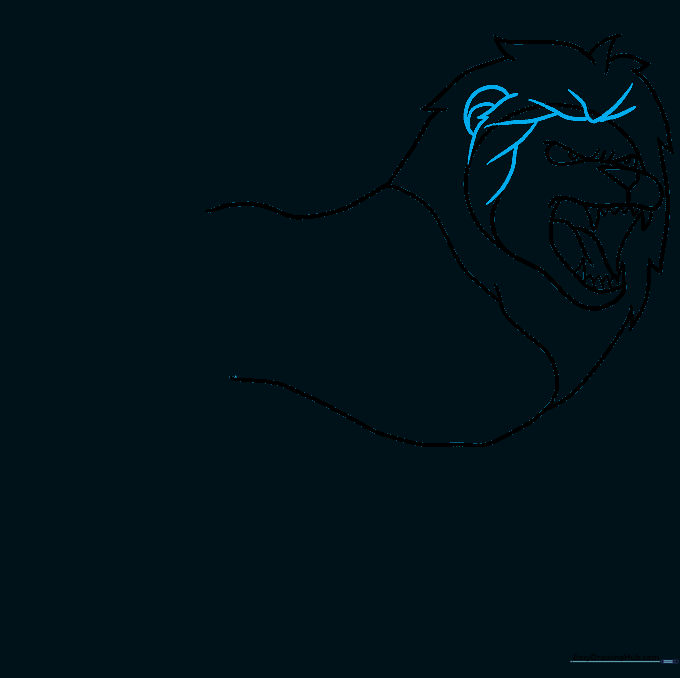
Add more overlapping curved lines to create depth in the mane. Draw two 'C' shaped lines on the side of the head to form the ear. Tip: Keep the ear small so the mane looks thick and full by comparison.
Step 6: Drawing the Front Paws
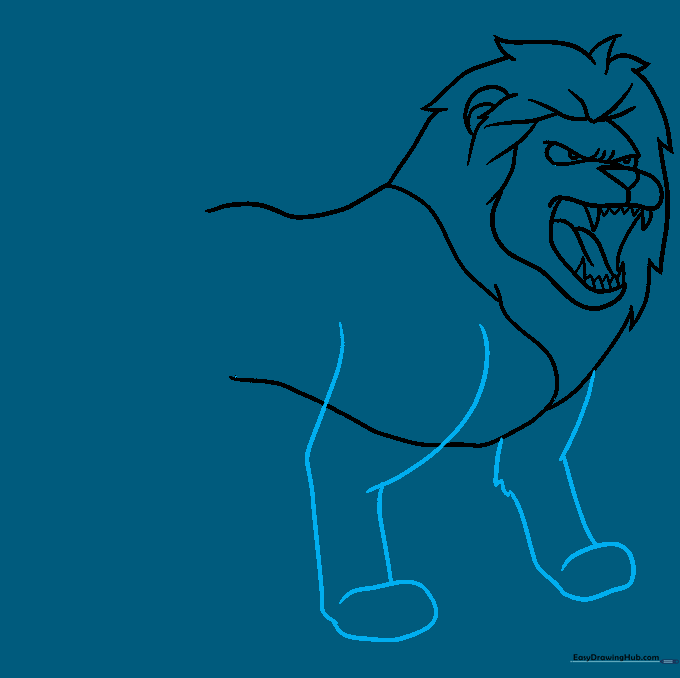
Erase any remaining guide lines. Draw the front legs using pairs of curved lines. At the bottom, double the line back to create the rounded shape of the paw. Tip: Make the paws look sturdy to support the lion's weight.
Step 7: Adding Rear Legs
Draw the rear legs using similar curved lines. Notice how the leg bends slightly; this gives your lion a sense of movement. Tip: Ensure the back legs look slightly thicker at the top to show muscle.
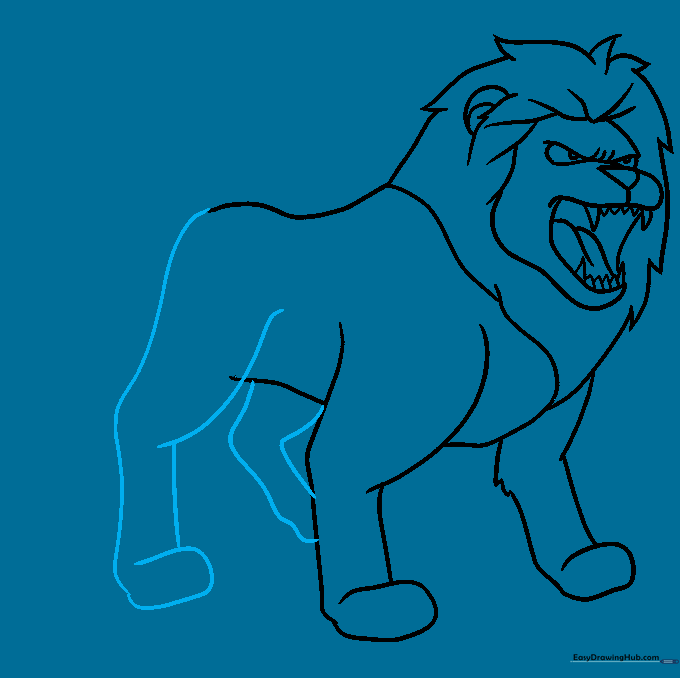
Step 8: Detailing the Toes
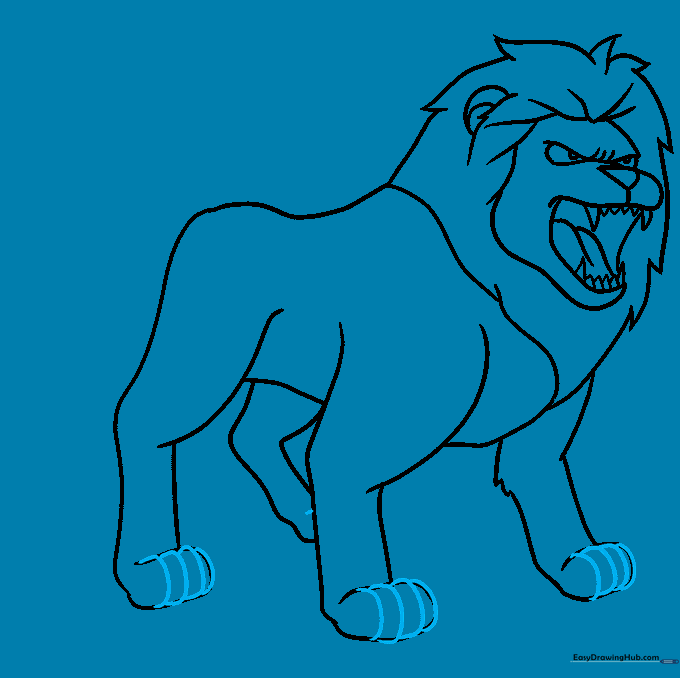
Add small, overlapping 'C' shaped lines to the paws to define the toes. Tip: Don't worry about making them perfect; a few simple curves are all you need to suggest claws.
Step 9: The Tail
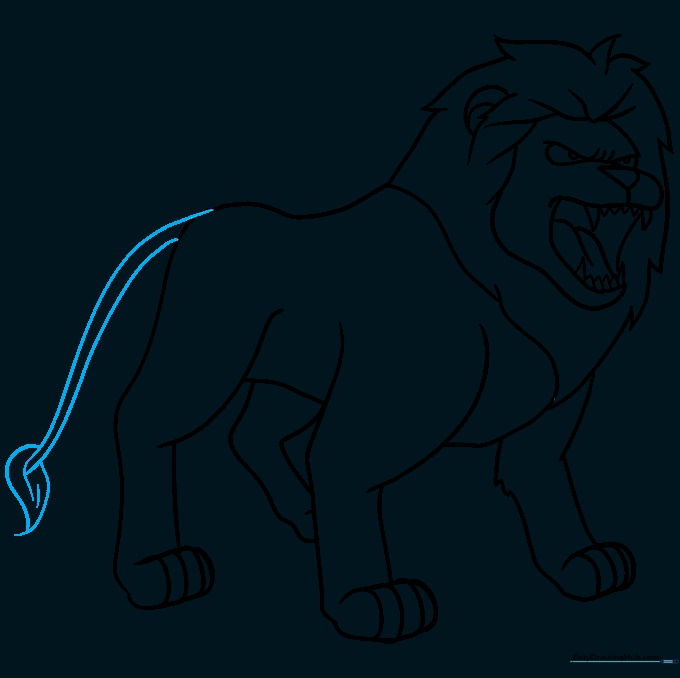
Extend two long, curved lines from the hips to form the tail. Finish it with a teardrop-shaped tuft of hair at the end. Tip: Add a few extra lines inside the tuft to give it a fluffy, textured look.
Step 10: Bring Your Lion to Life with Color
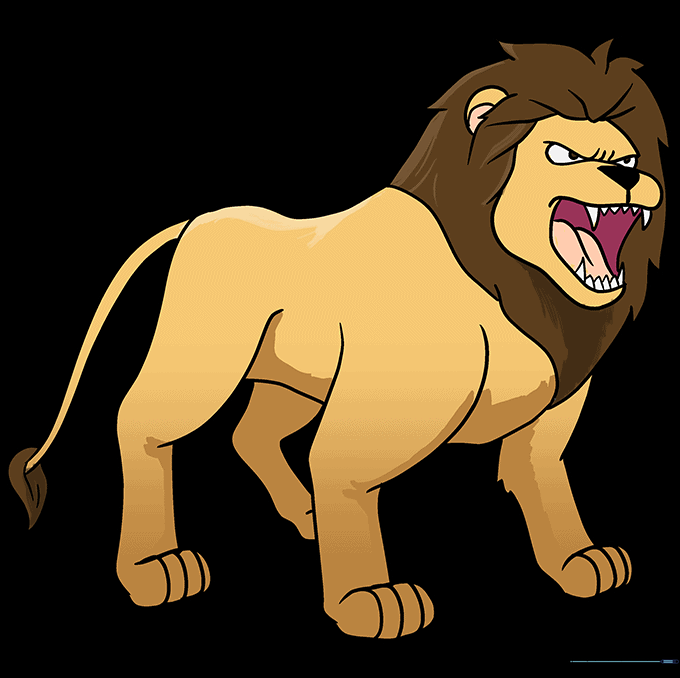
Time to color! Use sandy tans, golden yellows, or even reddish-browns for the fur. Don't forget to use a darker shade for the mane to make it stand out. Tip: Use light pressure with your colored pencils to create soft shading around the edges.
More Tutorials


