How to Draw a Lily: Easy 20-Step Guide for Beginners
Bring the beauty of spring to your sketchbook with this beginner-friendly lily tutorial. Designed for artists ages 5 and up, this project uses basic shapes to build confidence and fine motor control. All you need is a pencil, an eraser, and your favorite coloring supplies to create a stunning floral masterpiece.
🎯 Final Result

Step-by-Step Instructions
Step 1: Sketching the First Petal Base

Draw an irregular oval that is pointed and open on one end. Teacher's Tip: Keep your pencil lines light and feathery so they are easy to erase later if you need to adjust your shape.
Step 2: Adding the Second Petal

Draw another open, irregular oval below the first, letting them meet at the point. Tip: Think of these as organic, flowing shapes rather than perfect geometric circles.
Step 3: Building the Flower Center

Add a third open, irregular oval connected to the second. Tip: Vary the size of your ovals to make the flower look more natural and less stiff.
Step 4: Defining the Fourth Petal

Draw a fourth open shape using a smooth, curved line that connects to the third oval. Tip: Use a continuous motion to keep the curve looking fluid.
Step 5: Closing the Flower Shape

Use two curved lines in an 'M' shape to draw two more ovals, closing the gap between the first and fourth petals. Tip: This creates the depth needed for a realistic bloom.
Step 6: Extending the Left Petals

Extend the three petals on the left side into blunt points using gentle, curving lines. Tip: Imagine the petals are reaching out toward the sun.
Step 7: Extending the Right Petals

Repeat the process for the right side, extending the three petals into blunt points. Tip: Keep your strokes consistent with the left side to maintain balance.
Step 8: Cleaning Up Your Sketch

Carefully erase the internal oval lines that cross over your newly formed petals. Tip: Use a clean eraser and gentle pressure to avoid smudging your work.
Step 9: Drawing the First Anther
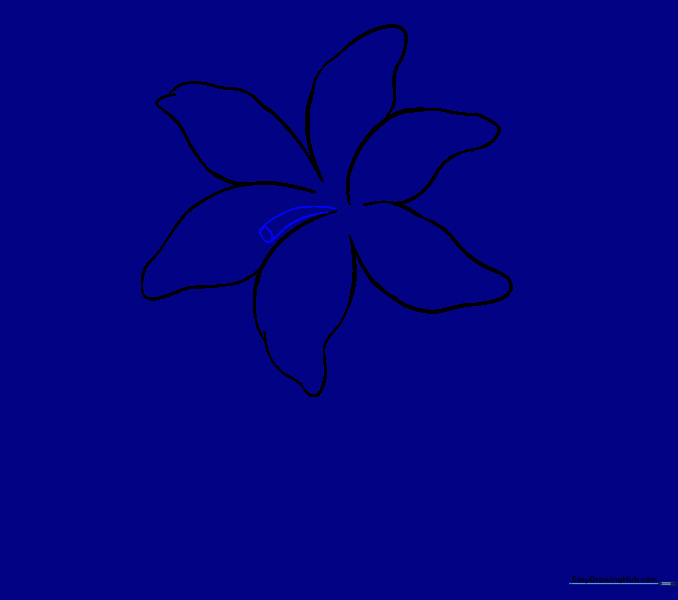
Extend two parallel, curving lines from the center, connecting them with a small oval at the tip. Tip: This represents the stamen, which gives the lily its distinct look.
Step 10: Adding More Anthers
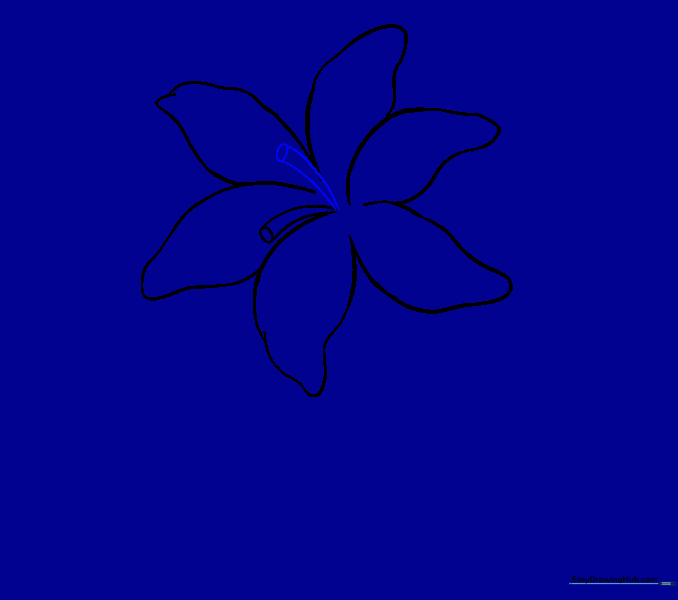
Draw another anther extending upwards from the center using the same parallel line technique. Tip: Keep the lines close together for a delicate appearance.
Step 11: Filling the Center

Draw two more anthers between the first two. Tip: Don't worry if they overlap; it adds realism to the flower's center.
Step 12: Finalizing the Center

Erase any guide lines visible inside the top two anthers. Tip: Precision here makes the flower look much more professional.
Step 13: Adding Petal Veins

Draw a small 'U' shape at the center, then extend graceful lines toward the tip of each petal. Tip: These lines represent the veins and give the petals texture.
Step 14: Drawing the Stem

Extend two long, parallel, curving lines from the bottom of the flower, connecting them with a small oval. Tip: A slightly curved stem looks more natural than a perfectly straight one.
Step 15: Starting the First Leaf

Extend a curved line from the stem, then add a second line to form the leaf's vein. Tip: Start the leaf near the middle of the stem for better composition.
Step 16: Shaping the Leaf

Use two wavy lines to form the body of the leaf, meeting at a point. Tip: Make the leaf wider in the middle and thinner at the ends.
Step 17: Adding a Second Leaf

Repeat the process on the left side of the stem. Tip: Try to make the second leaf look slightly different in angle to add variety.
Step 18: Completing the Second Leaf

Draw the second leaf using two wavy lines that meet at a point. Tip: Ensure the leaf looks like it is attached firmly to the stem.
Step 19: Adding Speckles

Add small dots and circles to the petals to mimic a lily's natural markings. Tip: Use varying sizes of dots to make the pattern look organic.
Step 20: Coloring Your Lily

Bring your drawing to life with color! Use white and cream for the petals, and light green for the center and anthers. Tip: Use light, layered strokes to build up the color for a soft, realistic look.
More Tutorials


