How to Draw a Lego Person: Easy 9-Step Guide for Kids
Bring your favorite toy to life! This tutorial is designed for young artists ages 5 and up to master the iconic proportions of a Lego minifigure. All you need is a pencil, an eraser, and a piece of paper to start building your own character.
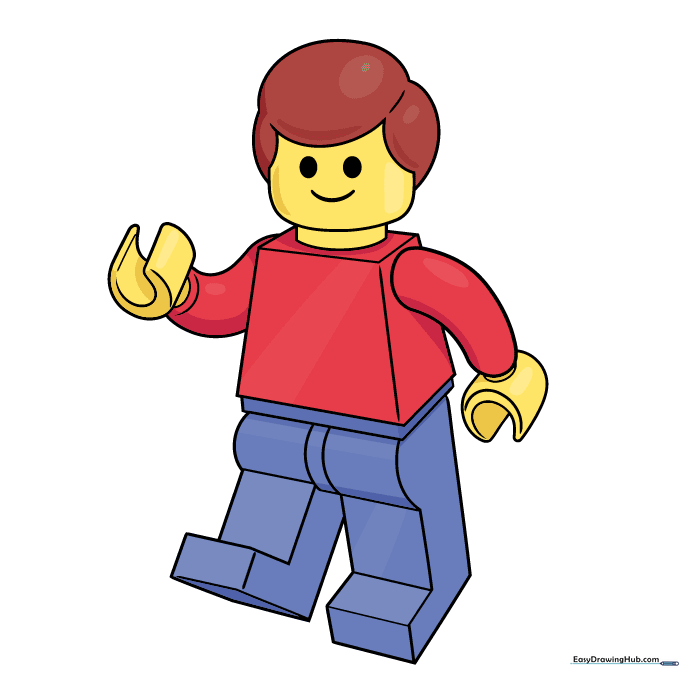
🎯 Final Result

Step-by-Step Instructions
Step 1: Sketching the Head and Face

Draw two curved lines to form the top and bottom of the head. Add two small ovals for eyes and a simple curved line for the mouth. Teacher's Tip: Keep your pencil lines light so you can easily adjust the expression if you want a surprised or silly face instead!
Step 2: Adding Hair and Neck
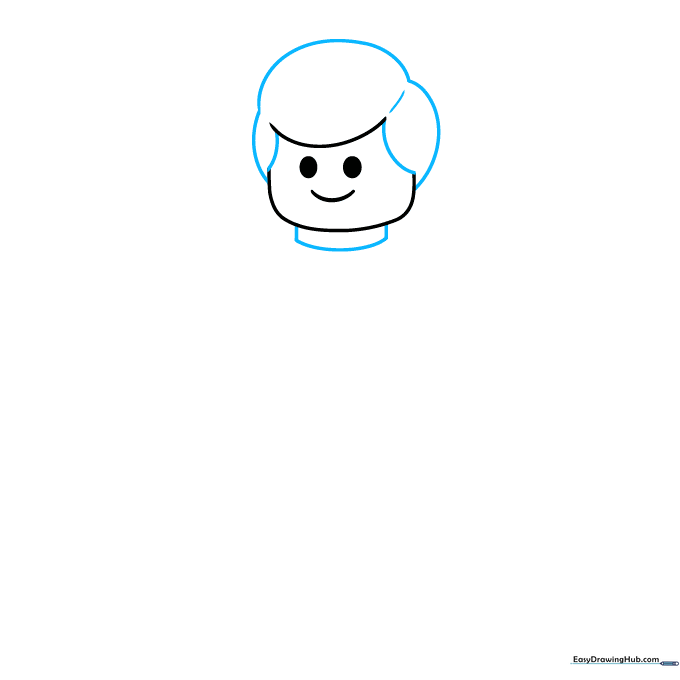
Use curved lines to cap the head with hair. Below the head, draw two short vertical lines connected by a curve to create the neck. Teacher's Tip: The neck should be narrower than the head to give it that classic toy look.
Step 3: Shaping the Torso
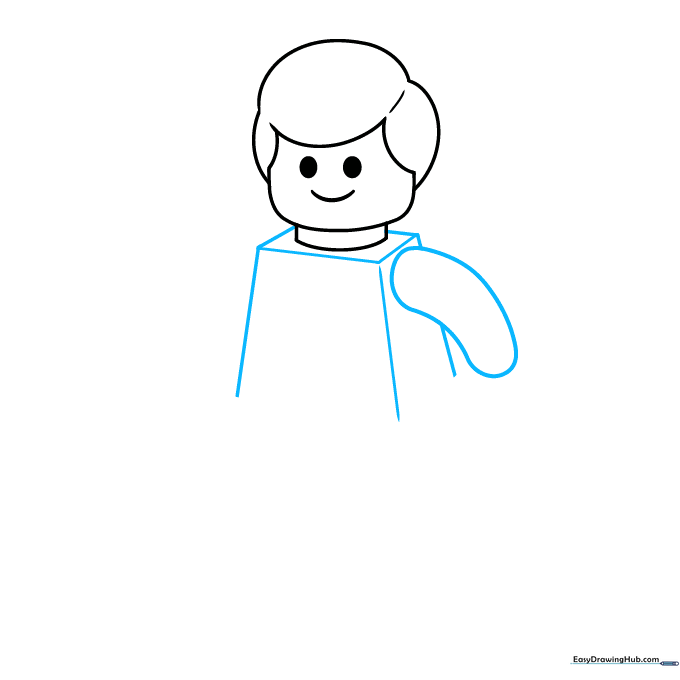
Draw a rectangle at the base of the neck, then extend lines downward to form a trapezoid-shaped torso. Add a long curved line on the side for the arm. Teacher's Tip: Lego bodies are blocky, so don't worry about making your lines perfectly straight—use a ruler if you want extra precision!
Step 4: Drawing the First Hand
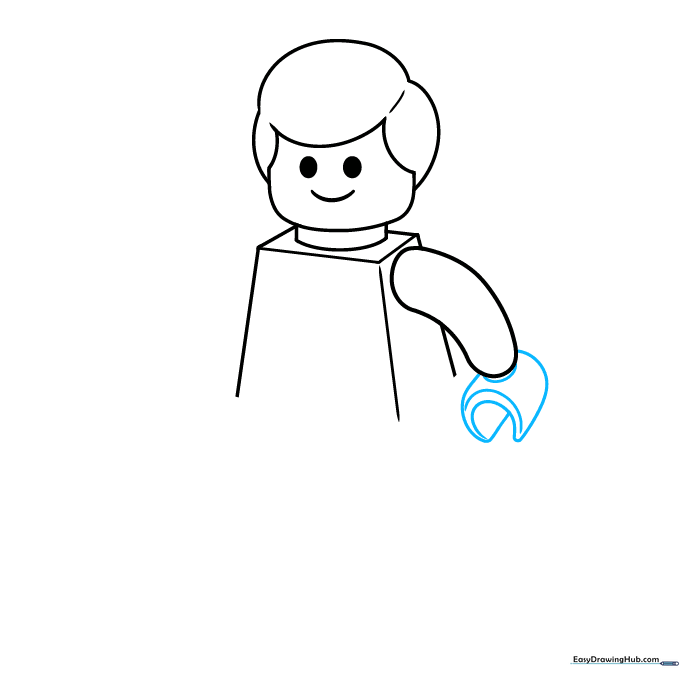
Draw a 'C' shape for the hand. Include small lines near the wrist to show the 3D plastic edge. Teacher's Tip: The 'C' shape is the most recognizable part of a Lego person, so make sure it looks like a sturdy claw!
Step 5: Adding the Second Arm
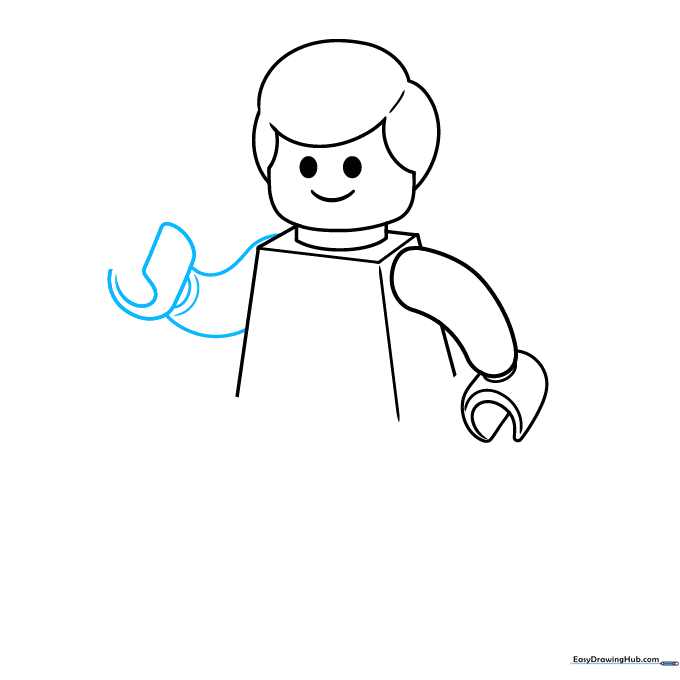
Repeat the process on the other side to draw the second arm using smooth, curved lines. Teacher's Tip: Keep the arms symmetrical to maintain the character's balance.
Step 6: Finishing the Torso and Waist
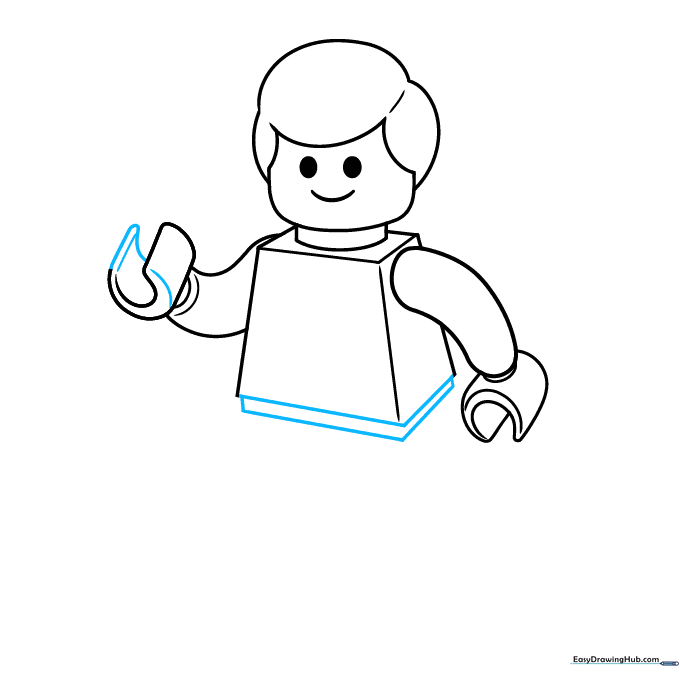
Close the torso with a straight line and add a small rectangle below it to represent the waist connection. Teacher's Tip: This small gap is where the legs will attach, so keep it centered.
Step 7: Sketching the First Leg
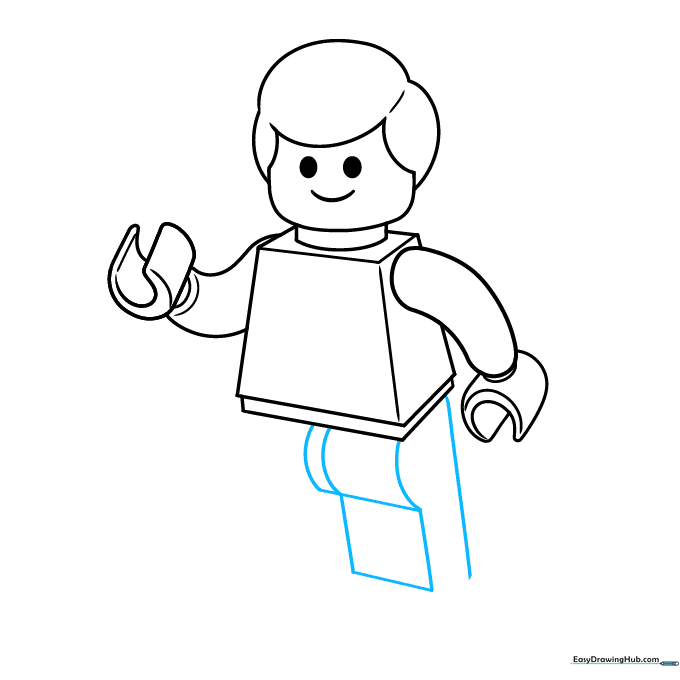
Draw the leg using a combination of curved and straight lines. The top is a partial cylinder, and the front is a square. Teacher's Tip: Think of the leg as a blocky shape with rounded corners.
Step 8: Adding the Feet
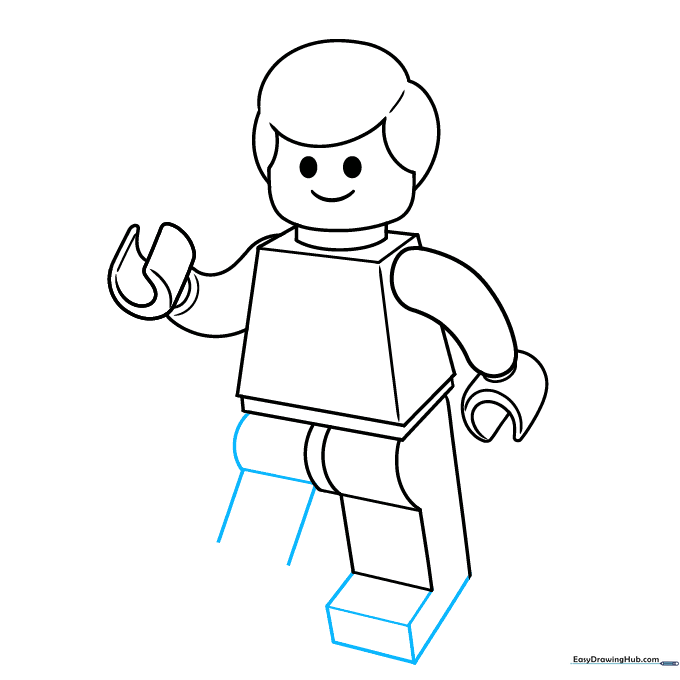
Draw a cube-shaped foot at the bottom of the first leg, then start sketching the second leg next to it. Teacher's Tip: Ensure the feet are flat so the character looks like it's standing firmly on the ground.
Step 9: Completing the Legs
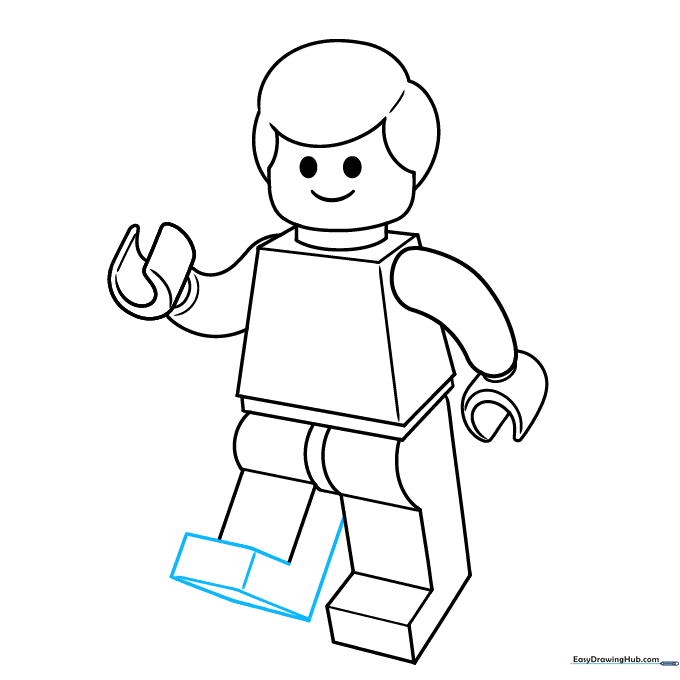
Finish the outline of the second leg with straight lines. Teacher's Tip: Check your proportions—the legs should be roughly the same length as the torso.
Step 10: Bringing Your Drawing to Life with Color
Now for the fun part! Use bright yellow for the face and hands. You can choose any color for the hair and clothes to match your favorite minifigure. Teacher's Tip: Use bold, flat colors to mimic the look of real plastic bricks.
More Tutorials


