How to Draw a Leafy Sea Dragon: Easy 10-Step Guide
Ready to bring the magic of the ocean to your sketchbook? This tutorial is perfect for young artists ages 8+ looking to practice organic shapes and fluid lines. Grab a pencil, an eraser, and some paper to create your own whimsical sea creature in just 10 simple steps.
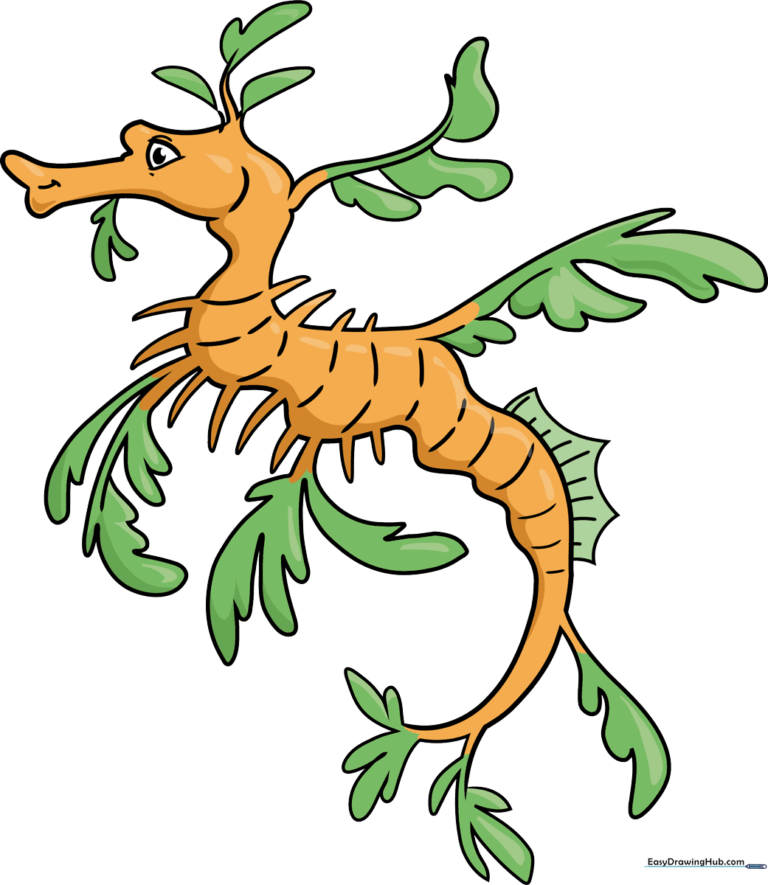
🎯 Final Result
Step-by-Step Instructions
Step 1: Sketching the Head and Eye

Start by drawing a hook shape on the left side of your paper for the top of the head. Add a second, deeper hook shape facing the opposite way for the snout. For the eye, draw a small triangle with a curved base and a pupil inside. Teacher's Tip: Keep your pencil pressure light so you can easily adjust the snout shape later.
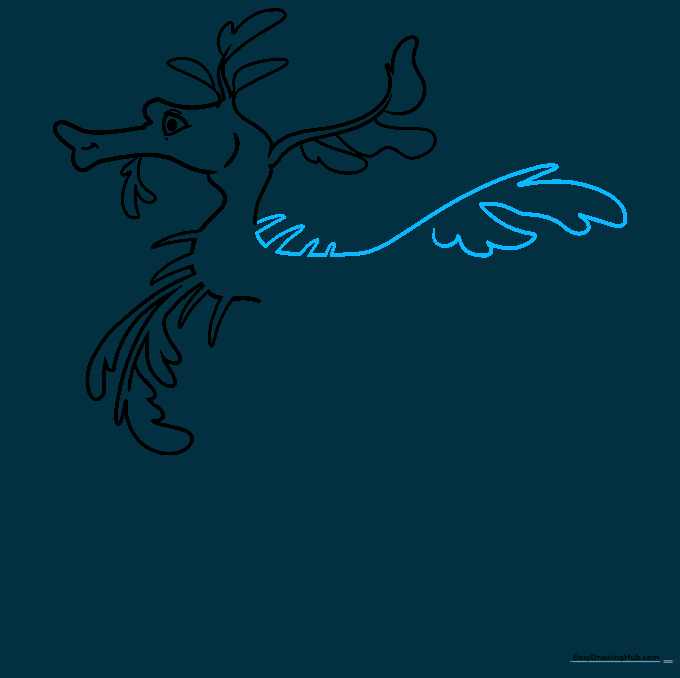
Step 2: Adding Leafy Appendages
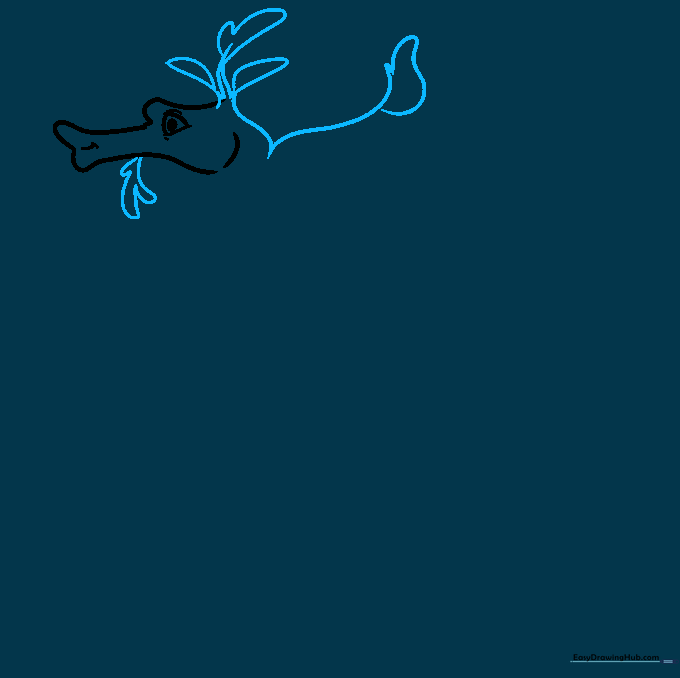
Use sweeping, fluid lines to draw the seaweed-like structures around the head. Create a curvy V-shape that tapers to a point. Teacher's Tip: Think of these as flowing underwater plants—don't worry about making them perfectly symmetrical!
Step 3: Defining the Neck
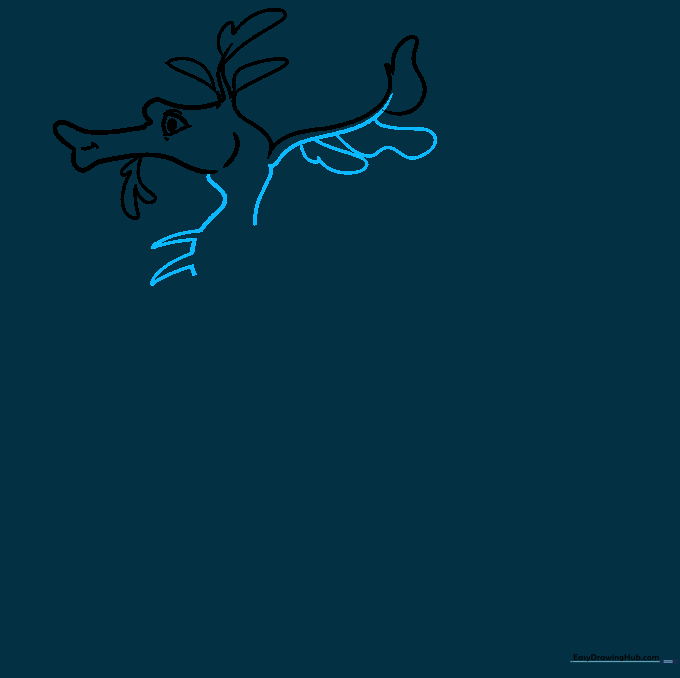
Draw a hill shape on the left side of the neck with two small, sharp spikes. On the right, connect a sweeping line to your previous leaf shapes. Teacher's Tip: Use short, quick strokes to create the spikes for a more natural, organic look.
Step 4: Building the Body
Draw a large, swooping line on the left, adding two teardrop shapes. Create a parallel curved line with similar hill and teardrop patterns. Add two long spikes underneath the body. Teacher's Tip: Vary the size of your teardrops to make the dragon look more realistic.
Step 5: Adding Dorsal Spikes
Draw four spikes along the top of the body. Use a curved line that points upward, followed by a narrow triangle. Teacher's Tip: Imagine these are like the leaves of a plant swaying in the current.
Step 6: Creating the Back Fin

Add two more curved lines with hill shapes. Use wavy lines to create a loose, feather-like fin on the back. Teacher's Tip: Use a scalloped motion with your pencil to get that soft, fin-like texture.
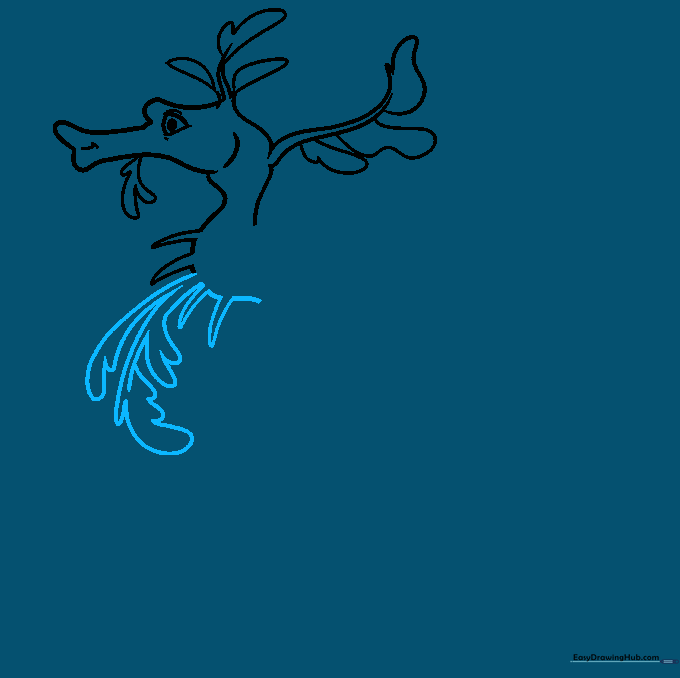
Step 7: Adding Plant-like Structures
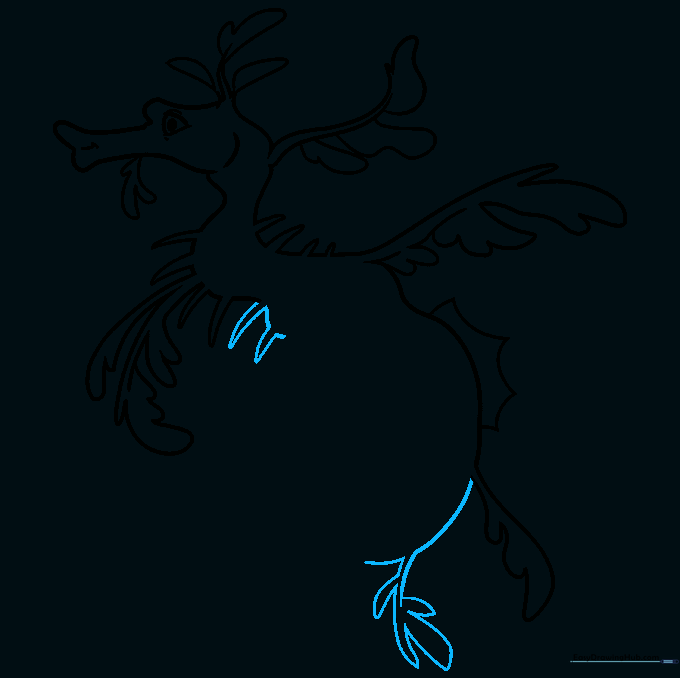
Sketch two more spikes on the left side. On the right, add loose, oblong shapes to create a plant-like structure extending from the body. Teacher's Tip: These shapes don't need to be perfect; the more varied they are, the more 'natural' they look.
Step 8: Completing the Tail

Finish the tail with a jagged curve and two final spikes. Underneath, draw a fern-like shape using long, swooping teardrops. Teacher's Tip: Use long, confident strokes for the tail to give it a sense of movement.
Step 9: Adding Final Details
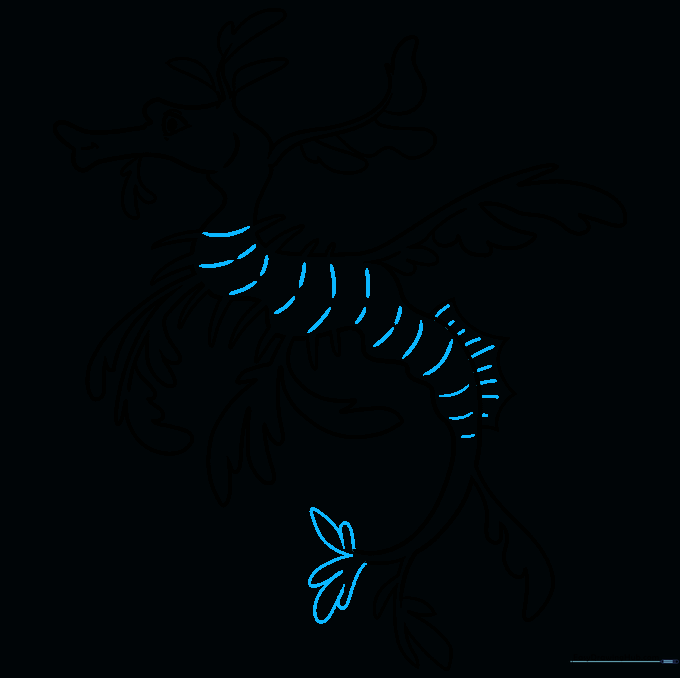
Add interior lines to the body for texture. Complete the tail by drawing loops that match your previous shapes. Teacher's Tip: These inner lines help define the dragon's segments and make it look more 3D.
Step 10: Coloring Your Masterpiece
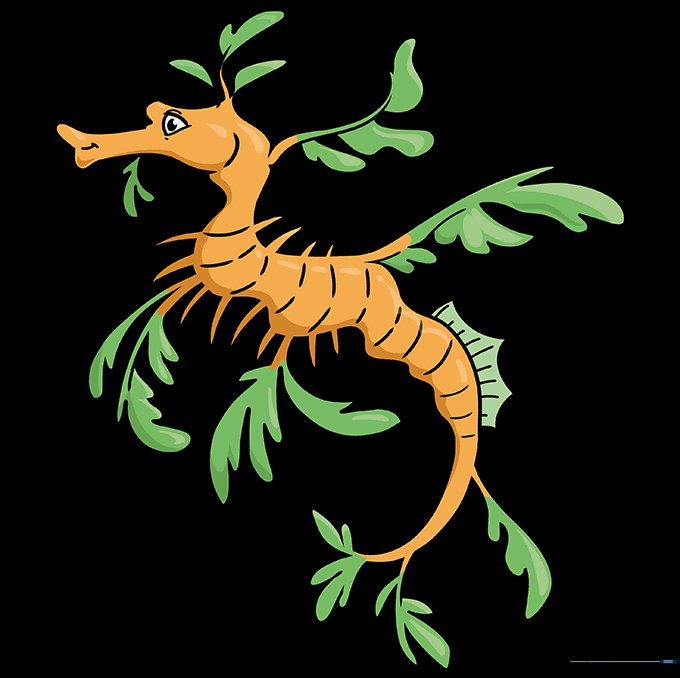
Outline your drawing with a fine-liner pen. Color the body in shades of orange and the fins in green. Teacher's Tip: Use darker shades of orange and green in the crevices to create shadows, and leave the eye white to make it pop!
More Tutorials


