How to Draw a Labrador Retriever: Easy 9-Step Guide
Capture the loyal expression of a Labrador Retriever with this beginner-friendly drawing guide. Designed for ages 5 and up, this activity requires only a pencil, paper, and an eraser. Follow these steps to build confidence in your sketching skills while creating a charming canine portrait.
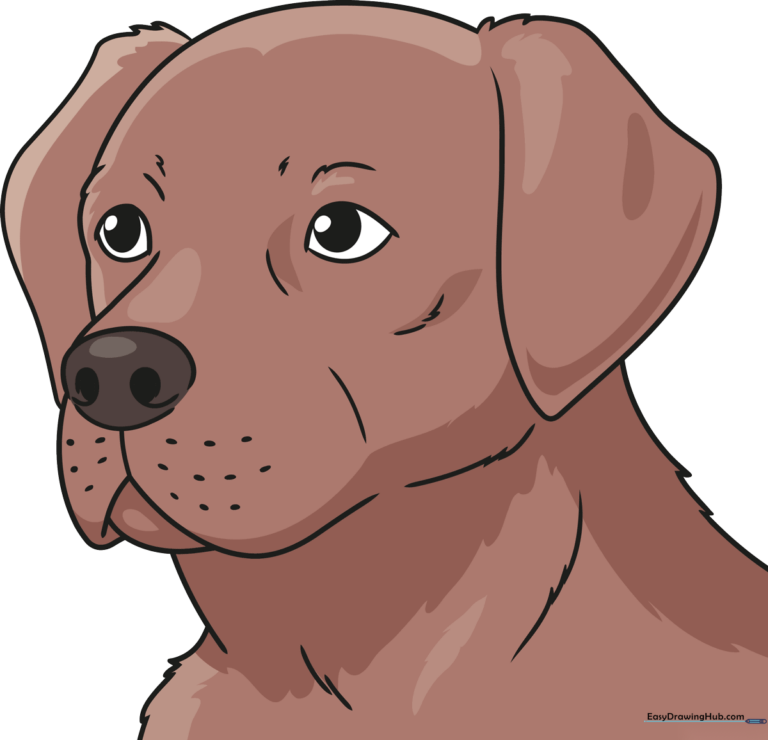
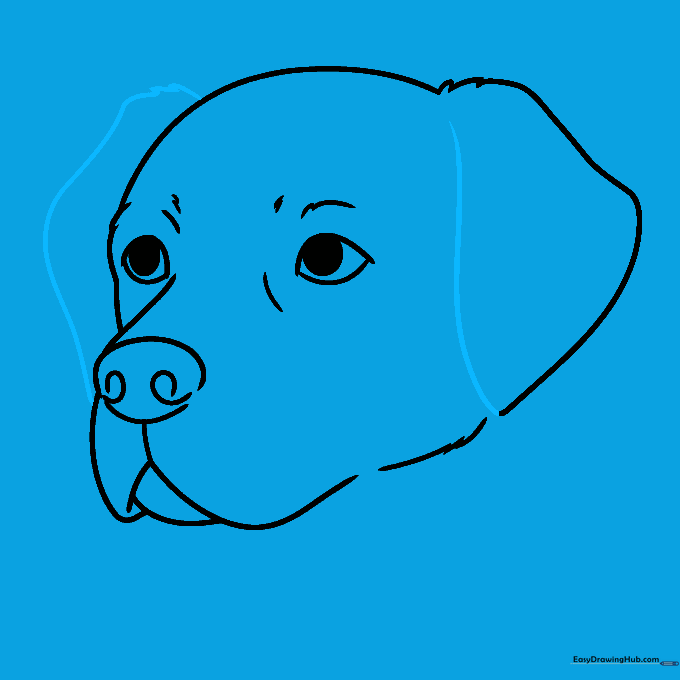
🎯 Final Result
Step-by-Step Instructions
Step 1: Sketching the Expressive Eye

Start by drawing the eye using two curved lines that meet at points. Add a large, dark circle inside for the pupil. Teacher's Tip: Keep your pencil pressure light so you can easily adjust the shape if it looks a bit lopsided.
Step 2: Adding the Second Eye

Draw the second eye using similar curved lines. Because the head is at an angle, this eye should look slightly narrower or 'squished.' Add a soft curve above it for the brow. Teacher's Tip: Think of the eyes as the anchor for the whole face; keep them level with each other.
Step 3: Shaping the Snout

Sketch an oval-shaped nose, leaving the bottom lines open. Connect this to the snout area with gentle curves. Teacher's Tip: Labs have broad noses; don't make it too pointy or it will look more like a fox!
Step 4: Defining the Mouth
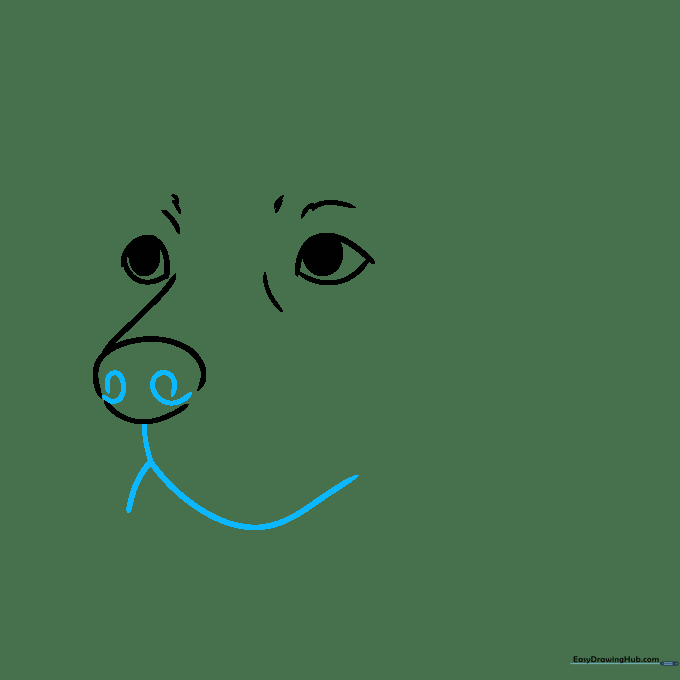
Add two spiral shapes inside the nose for nostrils. Below, draw an inverted 'Y' for the mouth. Teacher's Tip: Make the longer side of the 'Y' curve slightly to give your dog a friendly, smiling expression.
Step 5: Sketching the Jawline
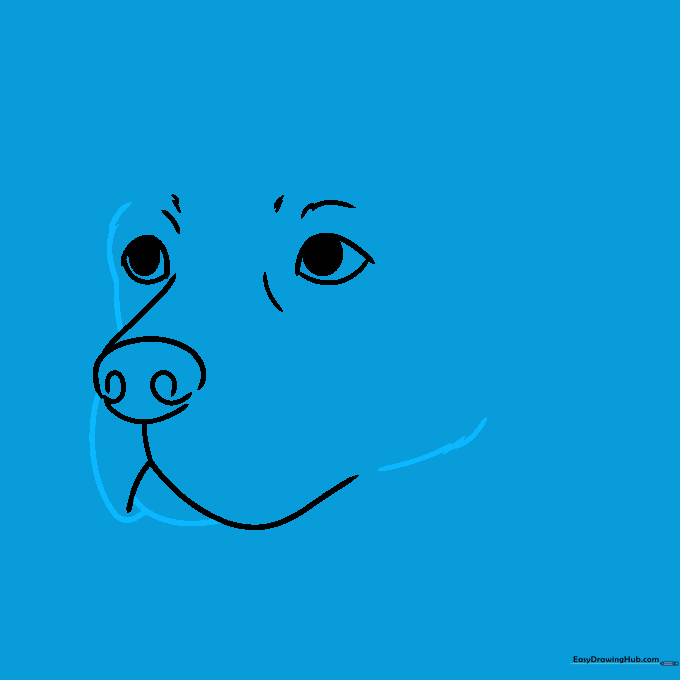
Use short, overlapping jagged lines to define the jaw and lower lip. Teacher's Tip: These jagged strokes are the secret to making the dog look soft and furry rather than smooth like plastic.
Step 6: The Top of the Head
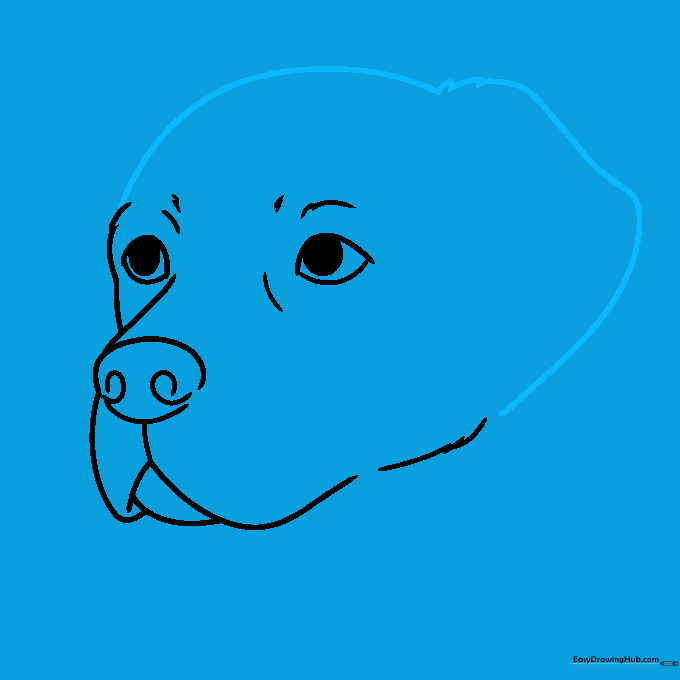
Draw a long, sweeping curve for the top of the head and the ear. Connect them with small, quick 'zig-zag' strokes to mimic fur texture. Teacher's Tip: Don't worry about making the fur lines perfect; real fur is messy and uneven!
Step 7: Completing the Ears
Finish the first ear by doubling the line back, then draw the second ear on the other side. Teacher's Tip: Labrador ears are floppy and soft, so keep your lines rounded and loose.
Step 8: Neck and Shoulders
Use jagged lines to sketch the neck and shoulder area, connecting them to the head. Teacher's Tip: This grounds your drawing and gives the dog a sturdy, realistic posture.
Step 9: Final Details and Whiskers
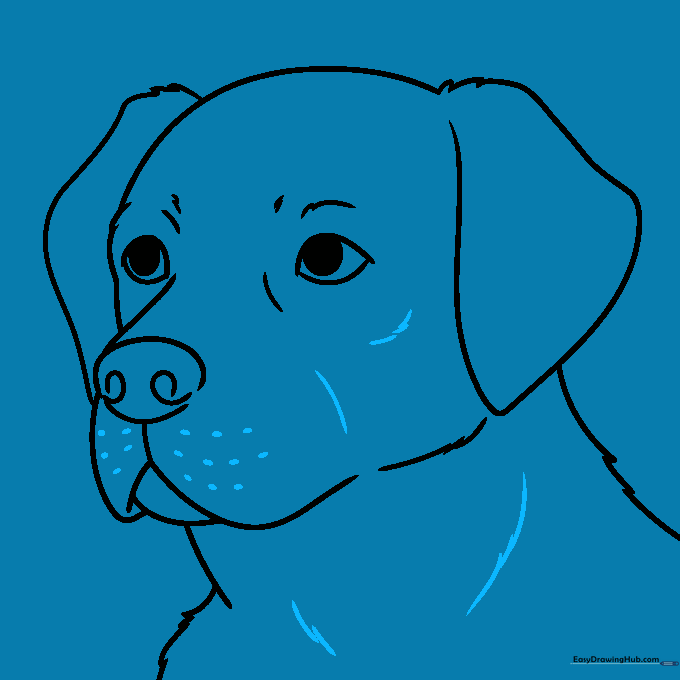
Add final texture lines around the face and neck. Don't forget the small ovals on the muzzle for whiskers! Teacher's Tip: Whiskers are the final touch—draw them with quick, confident flicks of your pencil.
Step 10: Bring Your Lab to Life with Color
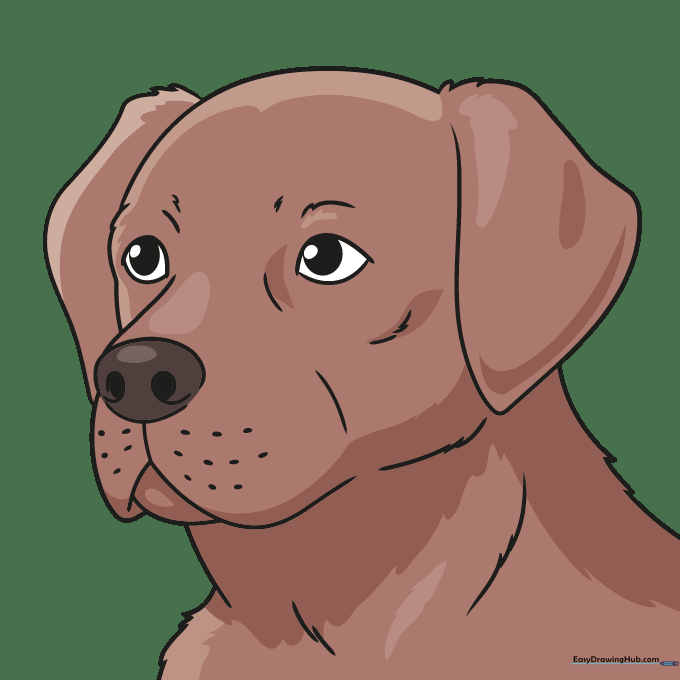
Time to color! We chose a classic chocolate brown, but Labs come in black, yellow, and even silver. Teacher's Tip: Use light, circular motions with your colored pencils to create a smooth, even coat.
More Tutorials


