How to Draw a Labrador: Easy 10-Step Guide for Kids
Ready to bring a loyal Labrador to life? This tutorial is perfect for young artists ages 5 and up. Grab a pencil, an eraser, and some paper to practice capturing the gentle expression and sturdy build of everyone's favorite retriever.
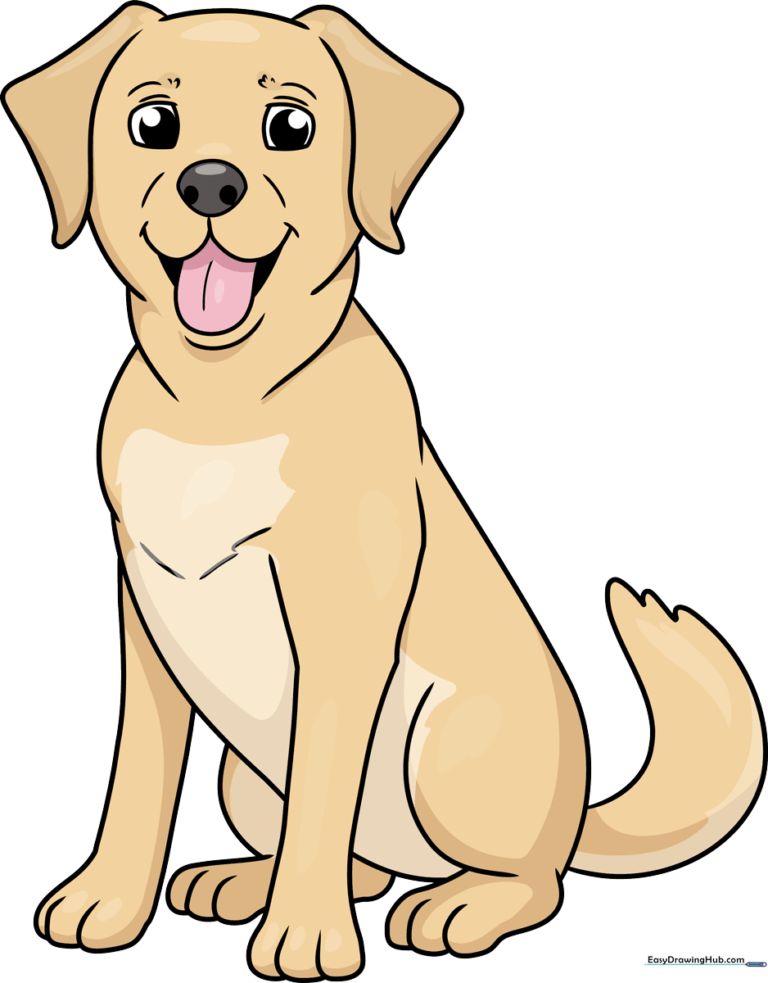
🎯 Final Result
Step-by-Step Instructions
Step 1: Sketching the Expressive Eyes

Draw two rounded squares for the eyes. Add a large, dark circle inside each for the pupil, and draw a small curved line above each eye for the brow. Tip: Add a tiny tuft of fur on the inner corner of the brow to give your dog a friendly, alert look.
Step 2: Defining the Nose and Muzzle
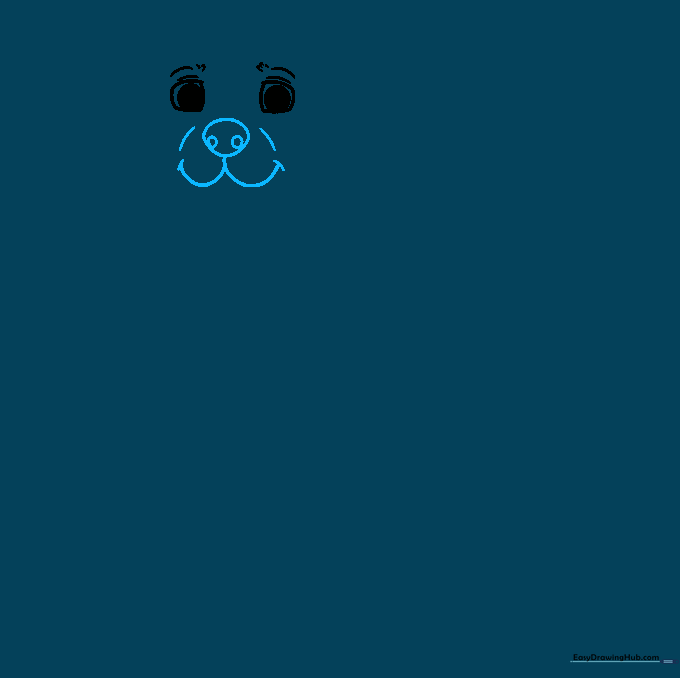
Sketch a pointed, rounded shape for the nose with two small circles inside for nostrils. Below this, draw a wide 'W' shape for the mouth. Tip: Keep the 'W' soft and rounded to make the puppy look happy rather than serious.
Step 3: Adding the Tongue and Ear
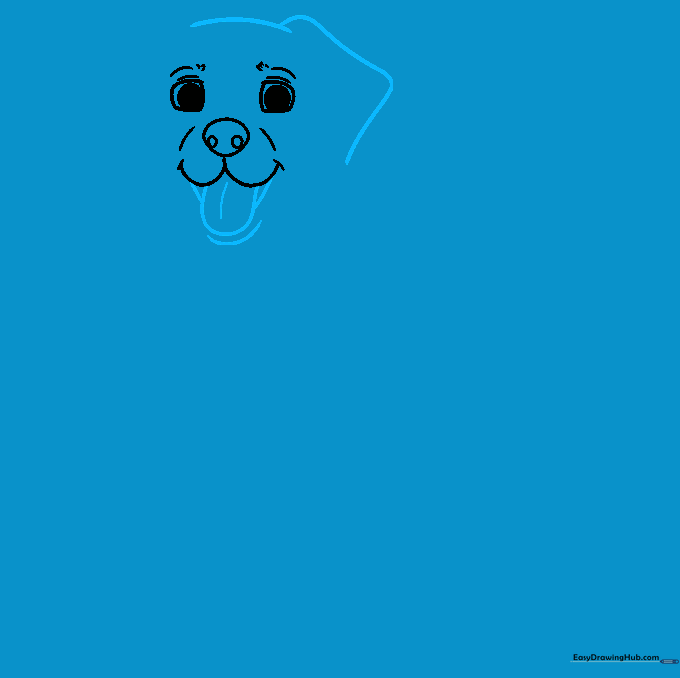
Draw a large 'U' shape for the tongue hanging from the mouth. Then, use overlapping curved lines to start the floppy ear on one side of the head. Tip: Make the ear lines slightly wavy to mimic the soft texture of dog fur.
Step 4: Completing the Head Shape

Finish the ear with a line that doubles back, then draw the side of the head. Repeat this on the other side to create a balanced, symmetrical face. Tip: Don't worry if the sides aren't perfect; real dogs have unique faces too!
Step 5: Sketching the Neck and Chest
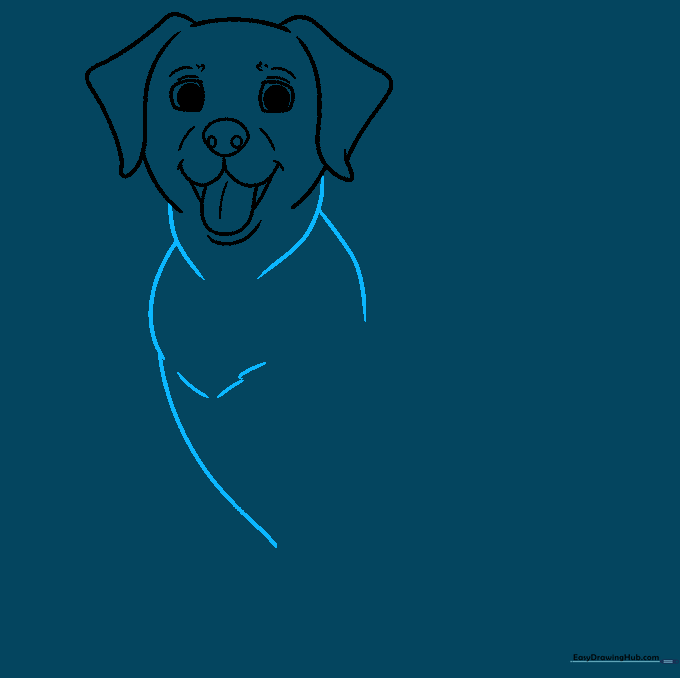
Draw curved lines for the neck and shoulders. Add a 'V' shaped texture on the chest to represent fluffy fur. Tip: Use short, quick pencil strokes for the fur texture to make it look soft and natural.
Step 6: Outlining the Front Legs
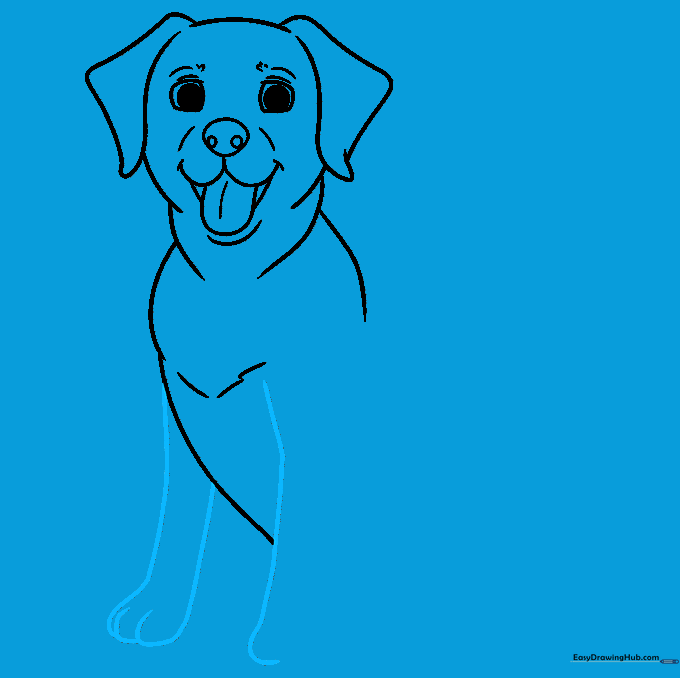
Use long, smooth curved lines to outline the front legs. Ensure the lines overlap slightly at the bottom to form the toes. Tip: Imagine the legs are like two sturdy pillars supporting the dog's body.
Step 7: Adding the Back Legs
Finish the front paw details, then sketch the crouching rear leg using overlapping curves. Tip: The crouching position gives the dog a playful, ready-to-run energy.
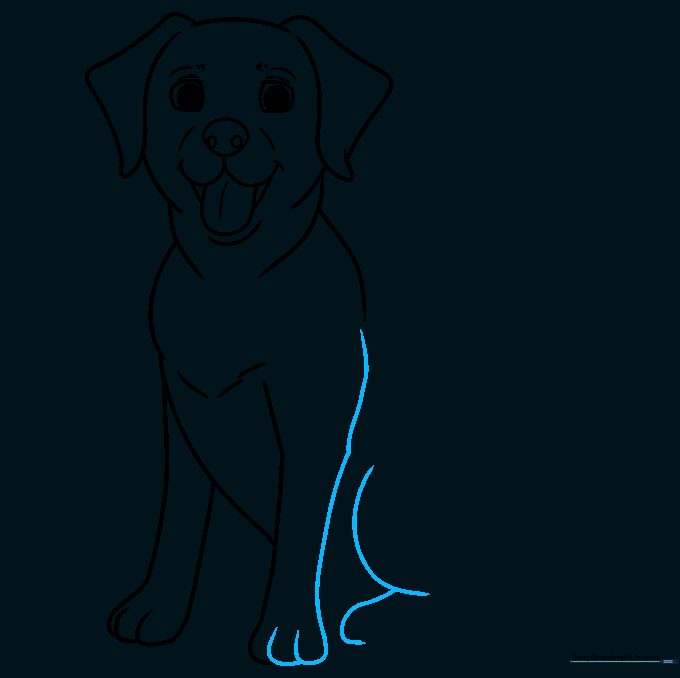
Step 8: Drawing the Back and Rear Paws

Continue the back line down to the rear paws. Keep these lines smooth to show the dog's sleek back. Tip: Check your proportions—make sure the back isn't too long compared to the legs.
Step 9: Finishing the Tail
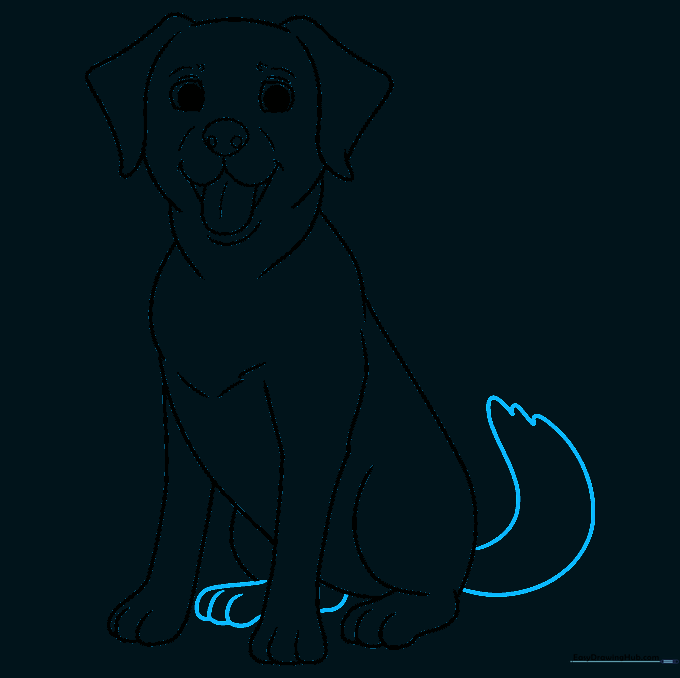
Complete the final rear paw and add a thick, happy tail. Use jagged lines at the tip to show fur. Tip: A Labrador's tail is often called an 'otter tail' because it's thick at the base—draw it nice and sturdy!
Step 10: Adding Color
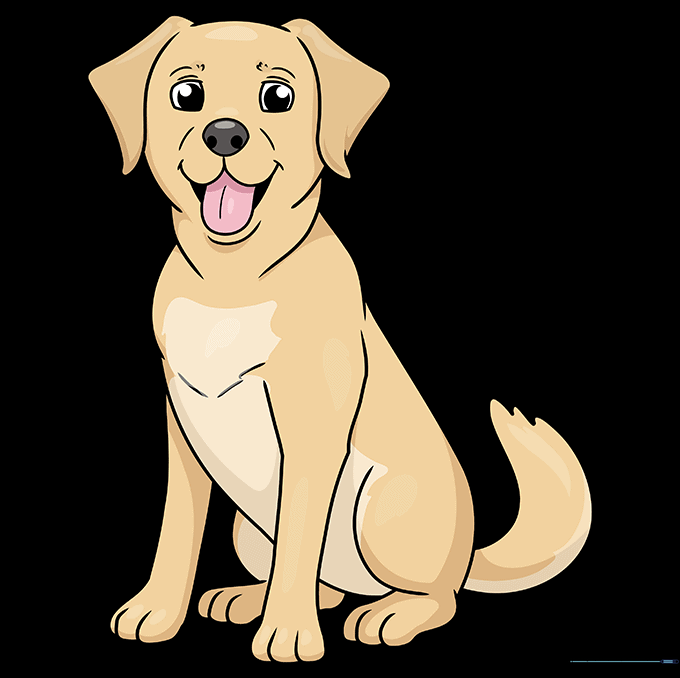
Bring your Labrador to life with color! You can choose a sandy yellow, a rich chocolate brown, or a sleek black. Tip: Use light pressure with your colored pencils to create smooth, even layers of color.
More Tutorials


