How to Draw a Kookaburra: Easy 10-Step Guide for Beginners
Bring the iconic laughter of the Australian bush to your sketchbook! This tutorial is designed for young artists ages 5+ to practice basic shapes and layering. All you need is a pencil, an eraser, and your favorite markers to create this cheerful bird.
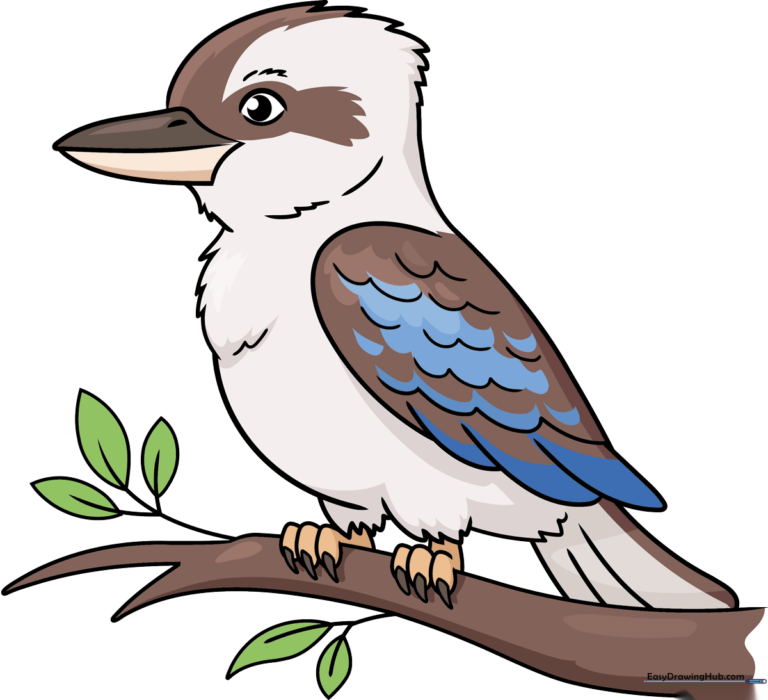
🎯 Final Result
Step-by-Step Instructions
Step 1: Sketching the Beak and Eye
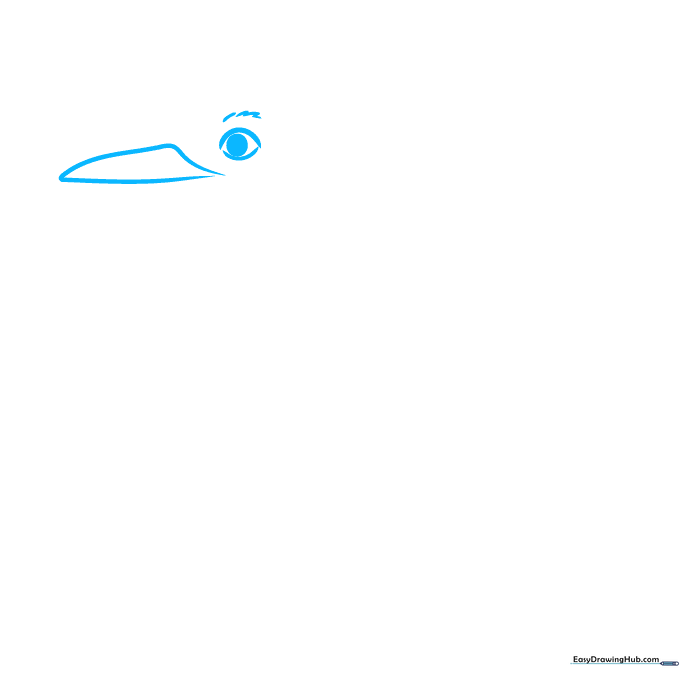
Start by drawing a large, curved triangle for the beak. Next, outline the eye with a smooth curve and add a dark circle for the pupil. Teacher's Tip: Keep the eye shape simple; it acts as the anchor for the rest of the face.
Step 2: Defining the Head Shape
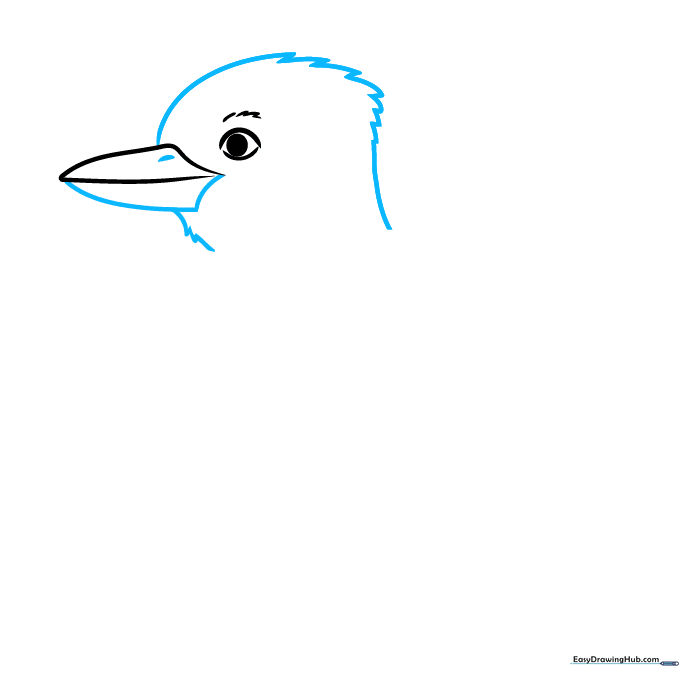
Complete the bottom of the beak with a curved line and add a tiny teardrop shape for the nostril. Then, draw the rectangular shape of the head. Teacher's Tip: Use short, light strokes to create the 'fluffy' texture of the bird's head feathers.
Step 3: Sketching the Chest

Use a series of jagged, connected lines to sketch the chest and belly. Teacher's Tip: Don't worry about making these lines perfectly straight; feathers are naturally uneven and soft.
Step 4: Adding the Wing
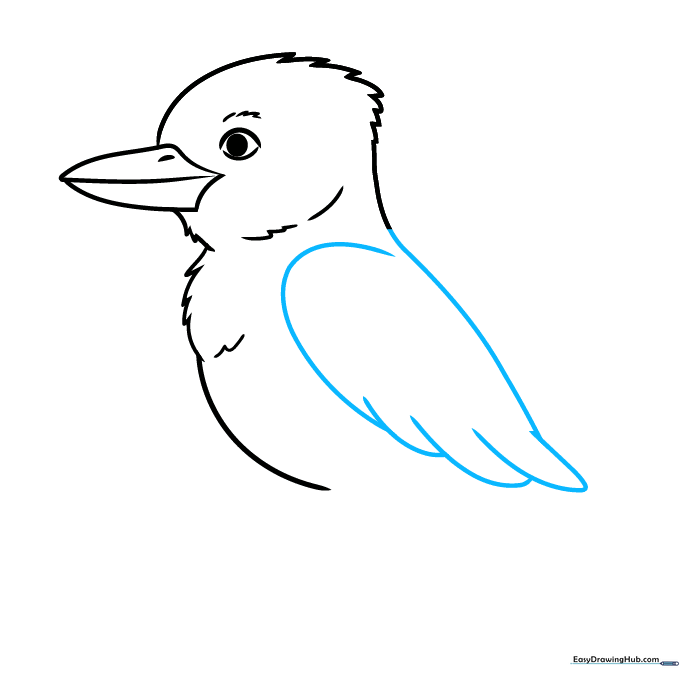
Draw a long, sweeping curve for the back and another for the top of the wing. Use overlapping curves to suggest the flight feathers. Teacher's Tip: Imagine the wing is like a folded fan.
Step 5: Adding Feather Texture
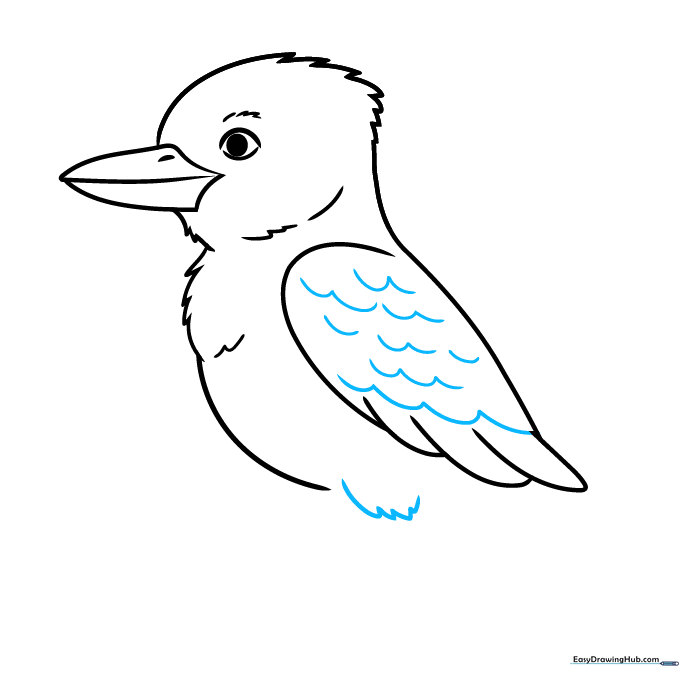
Fill the wing with rows of 'U' shaped lines to create a scale-like texture. Add the feathered upper leg using short, jagged lines. Teacher's Tip: Vary the size of your 'U' shapes to make the feathers look more realistic.
Step 6: Drawing the Feet
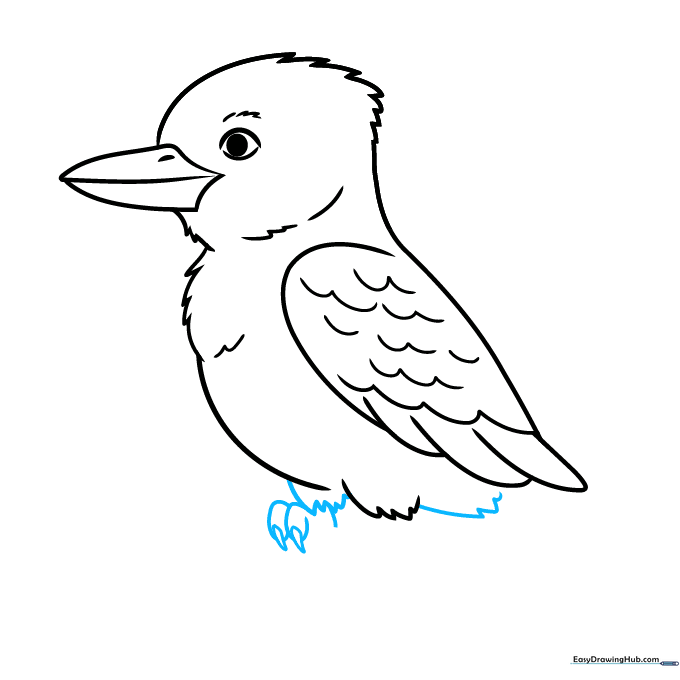
Draw the legs and tail base. For the toes, use overlapping curved lines and finish with small, sharp triangles for the claws. Teacher's Tip: Keep the toes rounded to give them a cute, cartoonish look.
Step 7: Completing the Feet
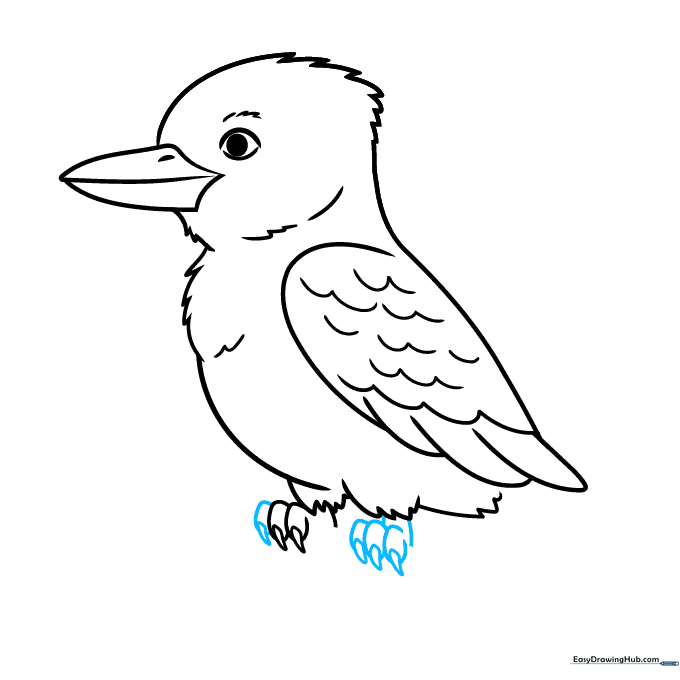
Finish the first foot and sketch the second one behind it. Teacher's Tip: Ensure the feet look like they are gripping something, which helps set up the next step.
Step 8: Adding the Tail and Branch
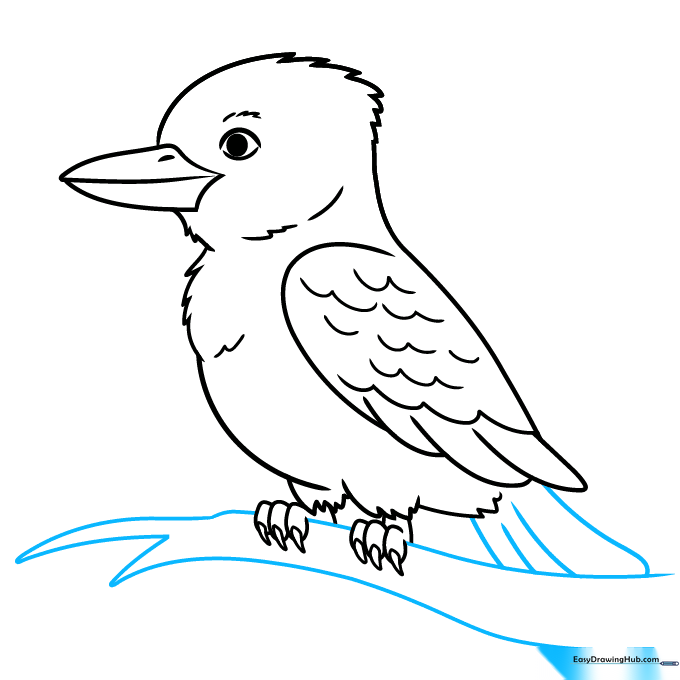
Outline the tail feathers and draw a sturdy tree branch beneath the bird. Teacher's Tip: Use long, sweeping lines for the branch to create a sense of movement.
Step 9: Adding Leaves
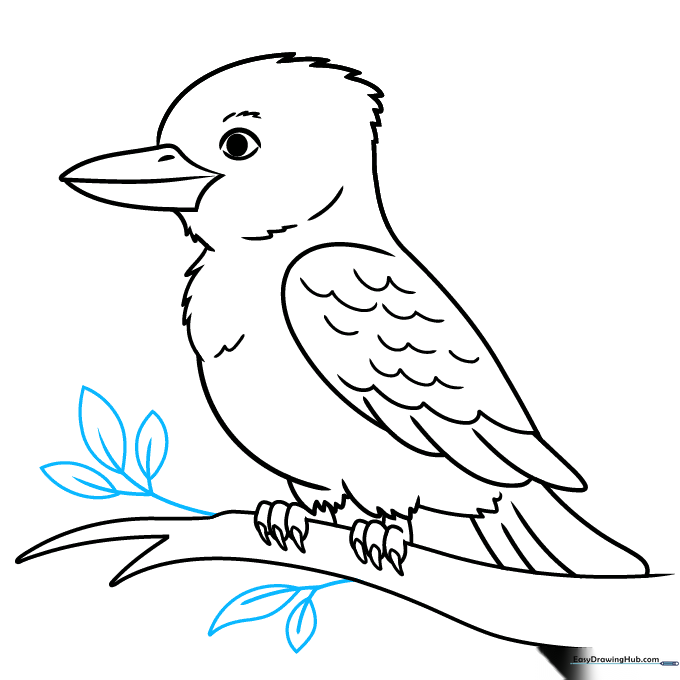
Add small twigs and leaves to the branch to complete the scene. Teacher's Tip: Keep the leaves simple—two curved lines meeting at a point is all you need.
Step 10: Bringing it to Life with Color
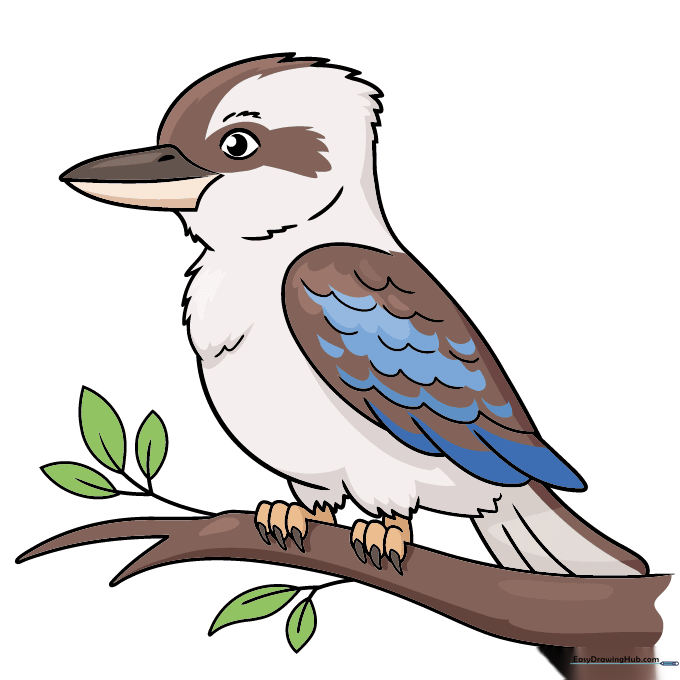
Now for the fun part! Color your Kookaburra using cream and brown tones. If you want to draw a blue-winged variety, add bright blue accents to the wings. Teacher's Tip: Use light pressure with your pencils to blend colors smoothly.
More Tutorials


