How to Draw a Kayak: Easy 10-Step Guide for Kids
Ready to hit the water? This tutorial is perfect for young artists ages 5 and up. All you need is a pencil, an eraser, and some markers to bring your own kayak to life, building confidence and hand-eye coordination with every stroke.
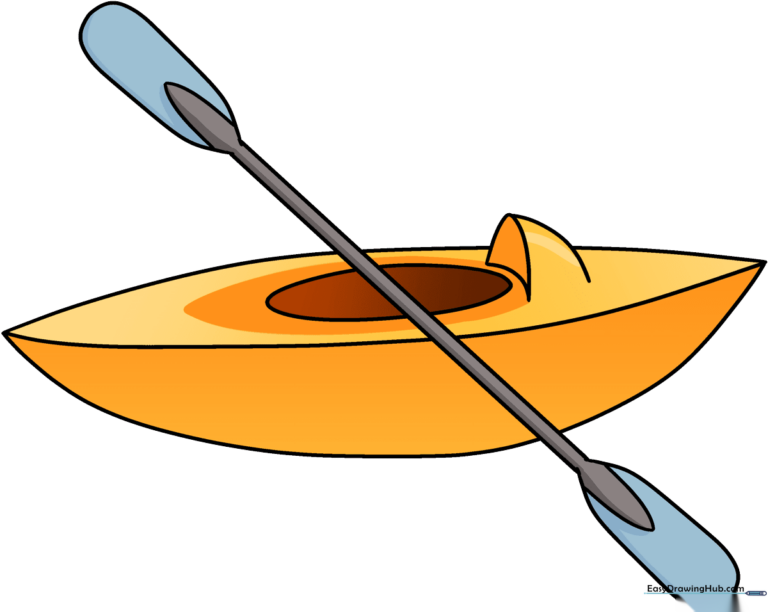
🎯 Final Result
Step-by-Step Instructions
Step 1: Sketching the Top Curve

Draw a long, gentle curved line to form the top edge of the kayak. Teacher's Tip: Keep your pencil grip loose and light so you can easily adjust the shape if needed.
Step 2: Closing the Hull
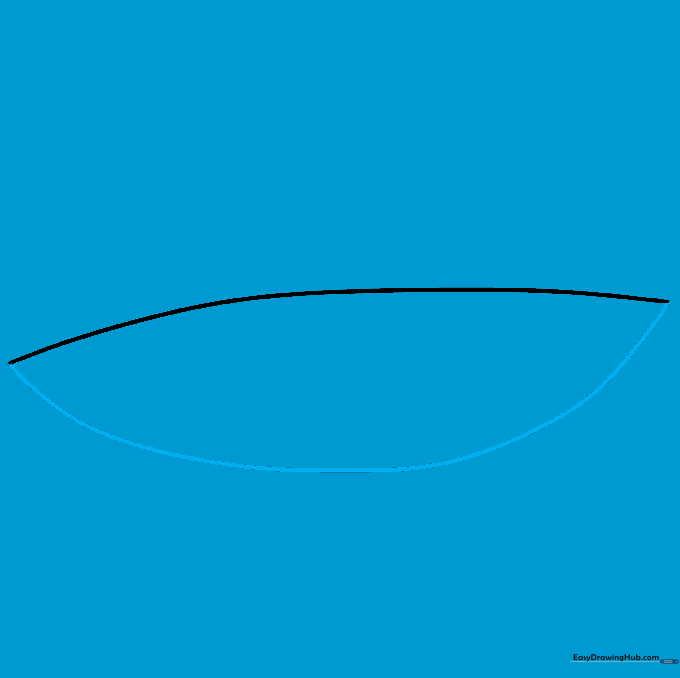
Draw a second curved line underneath, connecting it to the ends of your first line. Tip: Think of this as drawing a long, skinny almond shape.
Step 3: Adding the Side Panel

Draw a curved line through the middle to show the side of the boat. Tip: This line adds depth, making your kayak look 3D rather than flat.
Step 4: Drawing the Cockpit
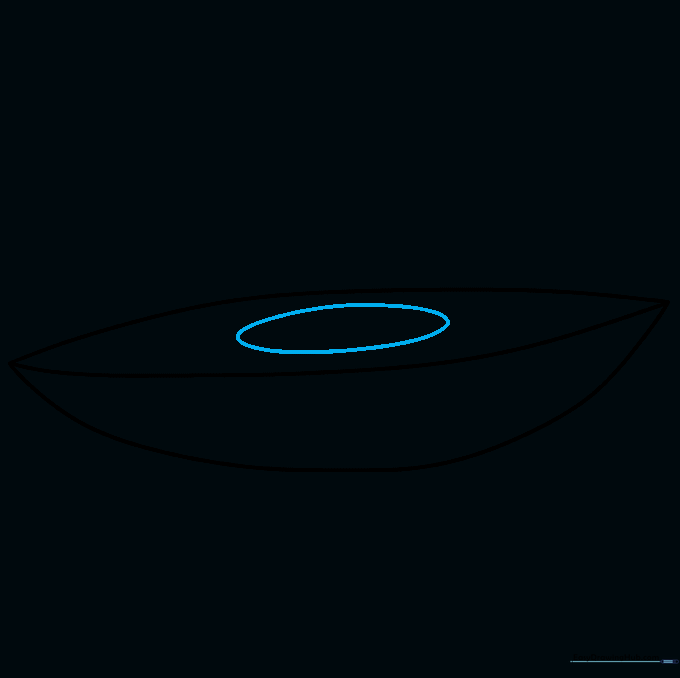
Draw an oval in the center of the top section. This is the cockpit where the kayaker sits. Tip: Make sure the oval is centered so the boat looks balanced.
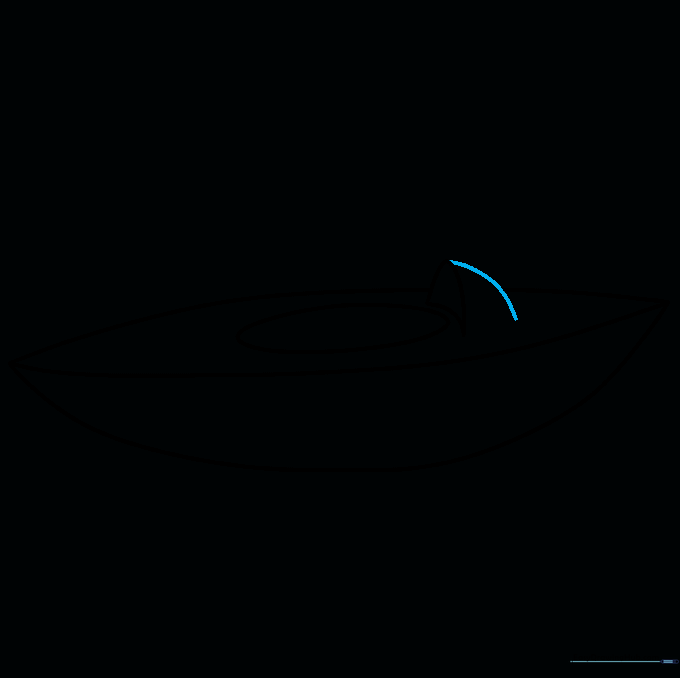
Step 5: Sketching the Seat Back

Add a small curved shape inside the oval to represent the seat back. Tip: Keep this shape simple; it doesn't need to be perfect to look great.
Step 6: Refining the Seat
Add a second curved line behind the first seat line to give it thickness. Tip: Erase any overlapping lines inside the seat to keep your drawing clean.
Step 7: Drawing the Paddle Shaft
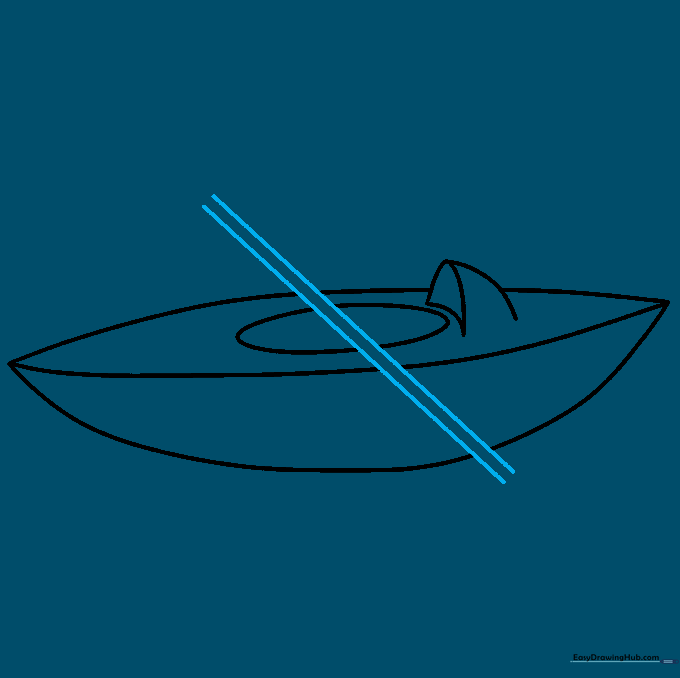
Draw two long, parallel lines across the kayak to create the paddle handle. Tip: Use a ruler if you want the lines perfectly straight, or go freehand for a natural look.
Step 8: Adding the First Paddle Blade
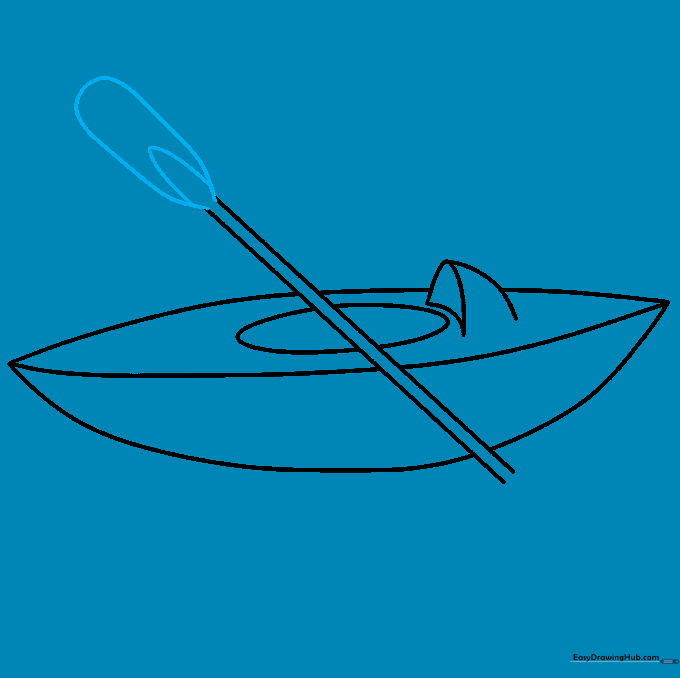
Draw a curved blade at one end of the handle. Add a small 'V' shape at the base of the blade for detail. Tip: Blades are usually wider than the handle, so make it nice and broad.
Step 9: Completing the Paddle
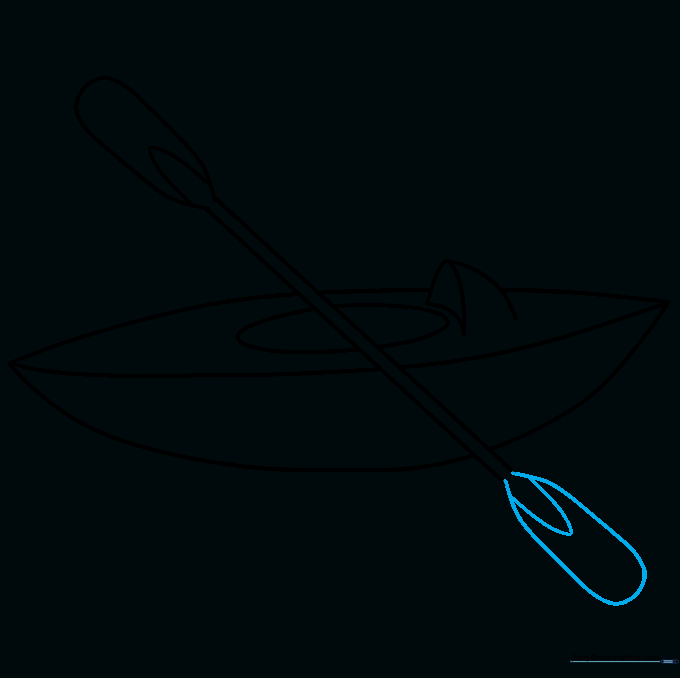
Repeat the process on the other side to draw the second paddle blade. Tip: Try to match the size and curve of the first blade to keep the paddle looking symmetrical.
Step 10: Bringing Your Kayak to Life with Color
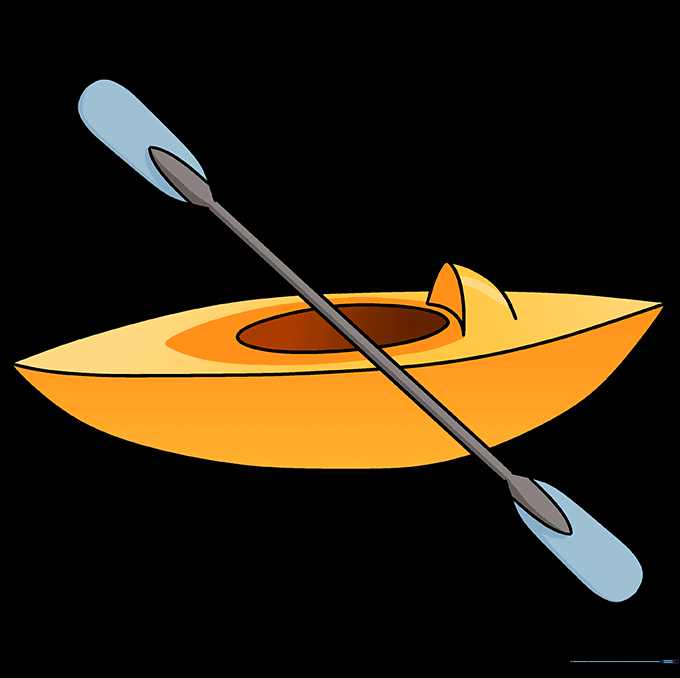
Time to color! Use bright colors like red, yellow, or blue to make your kayak pop. Tip: Use a darker shade of your chosen color along the edges to create a simple shadow effect.
More Tutorials


