How to Draw a Japanese Dragon: Easy 10-Step Guide
Bring mythical legends to life with this step-by-step Japanese dragon tutorial, designed for artists ages 8 and up. You will need a pencil, eraser, and paper to practice these fluid, serpentine lines. By the end of this lesson, you will have mastered the iconic flowing whiskers and powerful scales of this legendary creature.
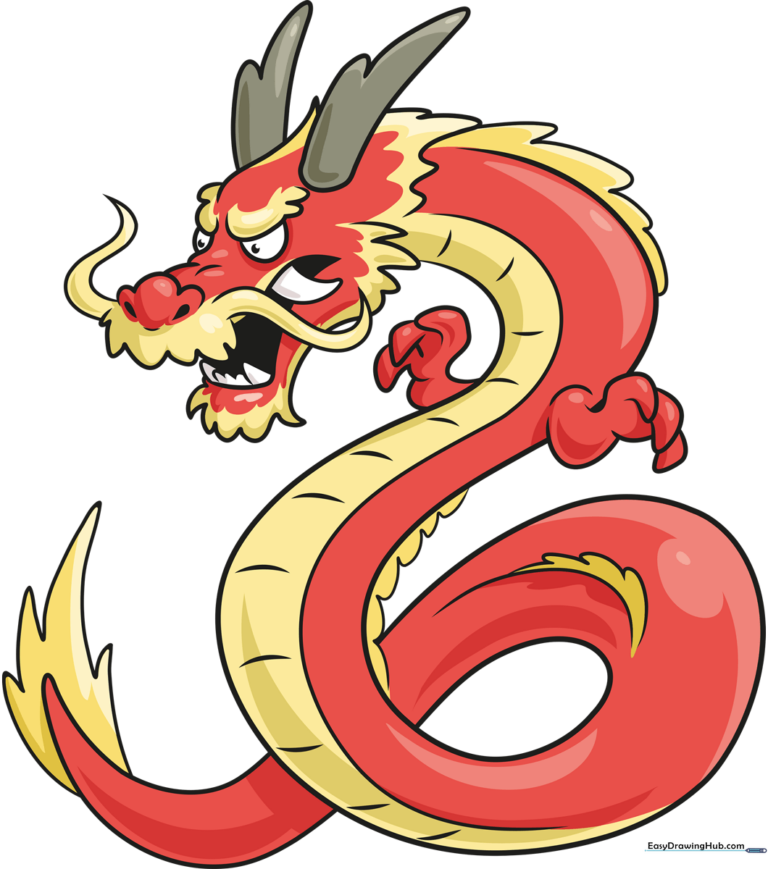
🎯 Final Result
Step-by-Step Instructions
Sketching the Snout and Nostrils

Start by drawing a series of upside-down 'U' shapes for the nose, followed by 'U' shapes for the upper lip. Add two small teardrop shapes for the nostrils. Teacher's Tip: Keep your pencil pressure light here so you can easily adjust the proportions later.
Defining the Eyes and Brow

Use overlapping curved lines to build the bridge of the nose and the brow ridge. Place half-circle shapes under the brows for the eyes, shading in small circles for the pupils. Teacher's Tip: The placement of the pupils determines the dragon's expression—place them centrally for a focused look.
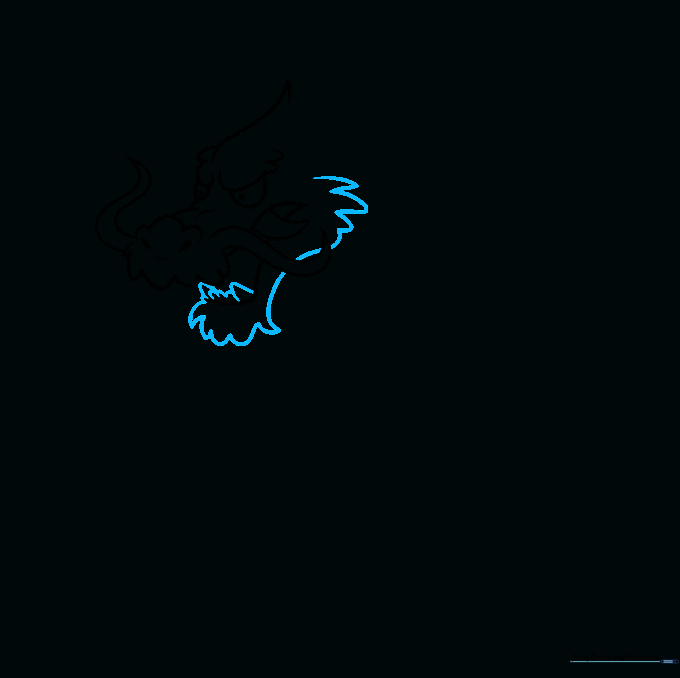
Adding Whiskers and Jaw

Extend curved lines from the nose to form the iconic dragon whiskers, meeting at sharp points. Sketch the open mouth using triangular shapes for the jaw and fang. Teacher's Tip: Use quick, flicking motions with your pencil to make the whiskers look tapered and natural.
Detailing Teeth and Beard
Add sharp, triangular teeth inside the mouth. Use soft, wavy lines to sketch the dragon's beard flowing from the lower jaw. Teacher's Tip: Vary the size of the teeth to make the mouth look more dynamic and realistic.
Forming Horns and Neck
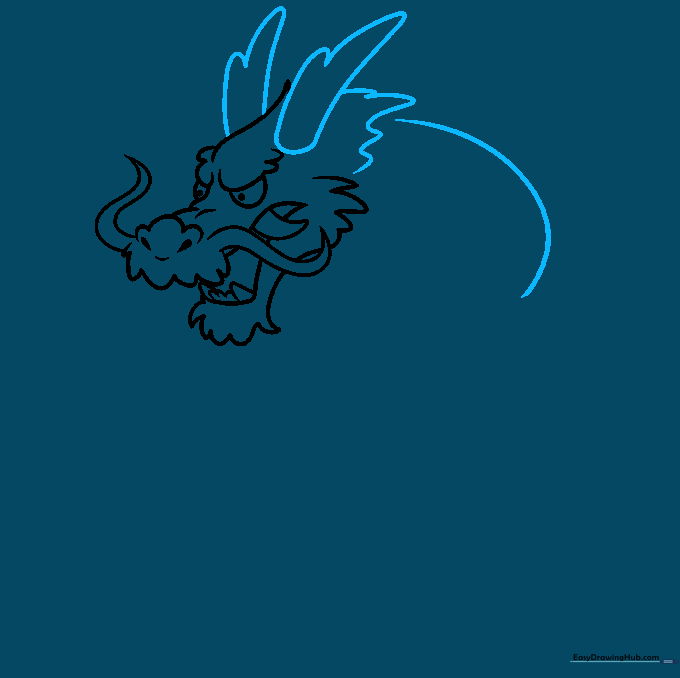
Enclose irregular shapes atop the head for the horns. Use a wavy line for the back of the head and a long, sweeping curve for the neck. Teacher's Tip: Japanese dragon horns are often branched; feel free to add a small 'Y' shape to the top of your horns.
Adding Mane and Claws
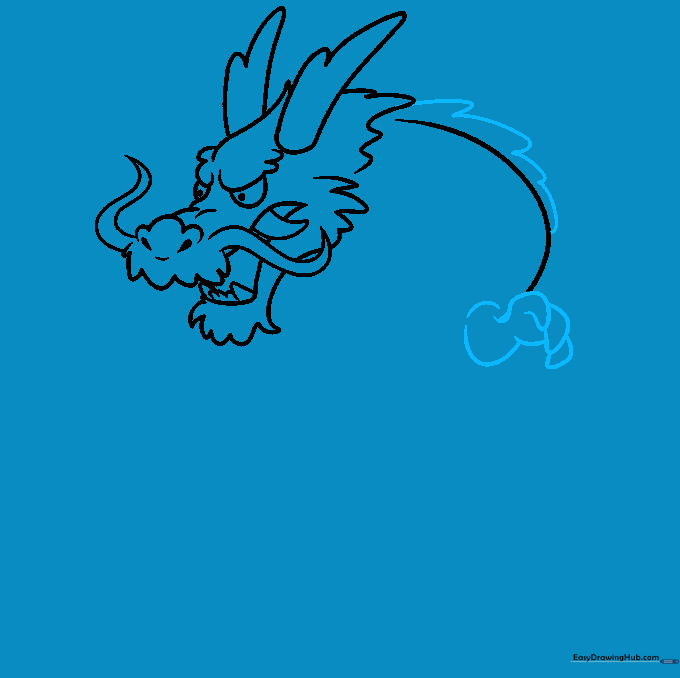
Draw curved lines along the neck to represent the mane. Sketch the arm and hand, focusing on the triangular, sharp claws. Teacher's Tip: Keep the claws curved rather than straight to give the dragon a more 'grasping' appearance.
Constructing the Serpentine Body
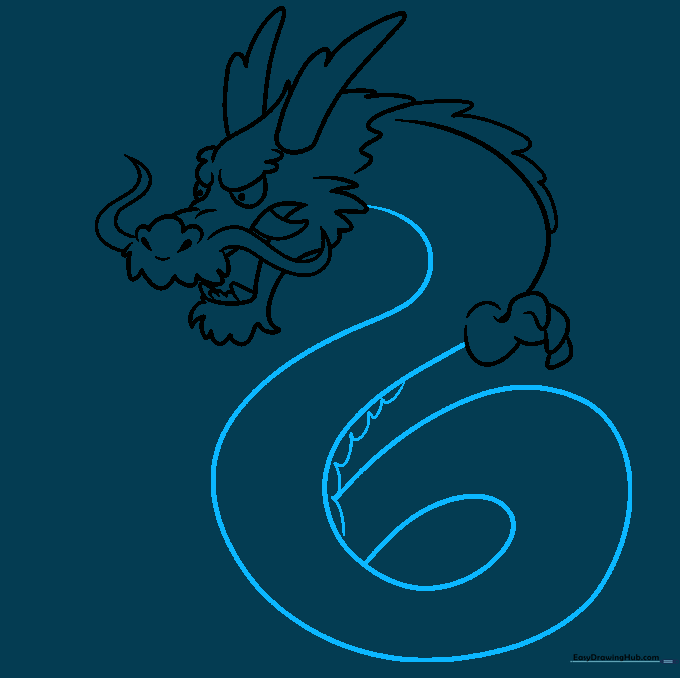
Use two long, winding lines to create the dragon's body, connecting it to the neck. Add a series of small, curved spikes down the spine. Teacher's Tip: Think of the body like a ribbon—let it twist and turn to create a sense of motion.
Defining the Belly and Second Paw
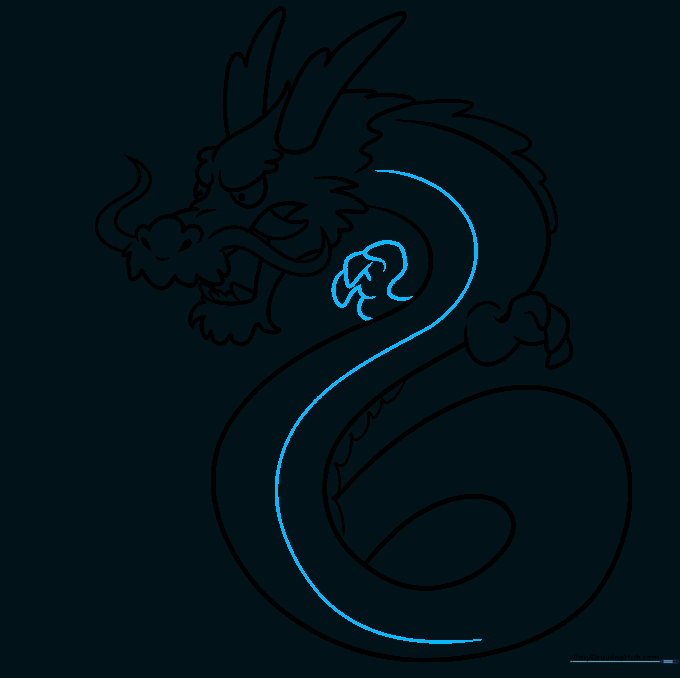
Draw a curved line parallel to the body to define the belly. Sketch the second hand or paw reaching out. Teacher's Tip: The belly line should follow the same curves as the back to keep the body looking consistent in thickness.
Finalizing the Tail and Belly Details
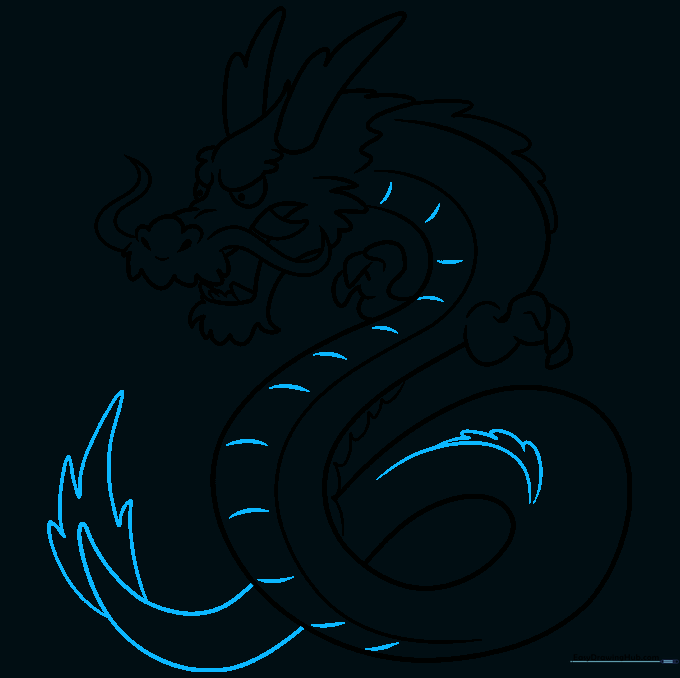
Add horizontal bands to the belly for texture. Draw the tail tapering to a point, finishing with a series of decorative spikes. Teacher's Tip: Use a slightly darker pencil stroke for these final details to make them pop against the body.
Adding Color

Bring your dragon to life with color! While traditional Japanese dragons are often crimson or gold, feel free to use any palette you like. Teacher's Tip: Use lighter shades on the belly and darker shades on the back to create a sense of depth and volume.
More Tutorials


