How to Draw a Jackal: Easy 9-Step Guide for Kids
Bring the African savanna to your sketchbook with this fun, beginner-friendly jackal drawing guide. Designed for ages 5 and up, this activity requires only a pencil, eraser, and paper to build confidence in character design. Follow along to create a charming, stylized jackal while learning how to use simple geometric shapes to build complex animal forms.
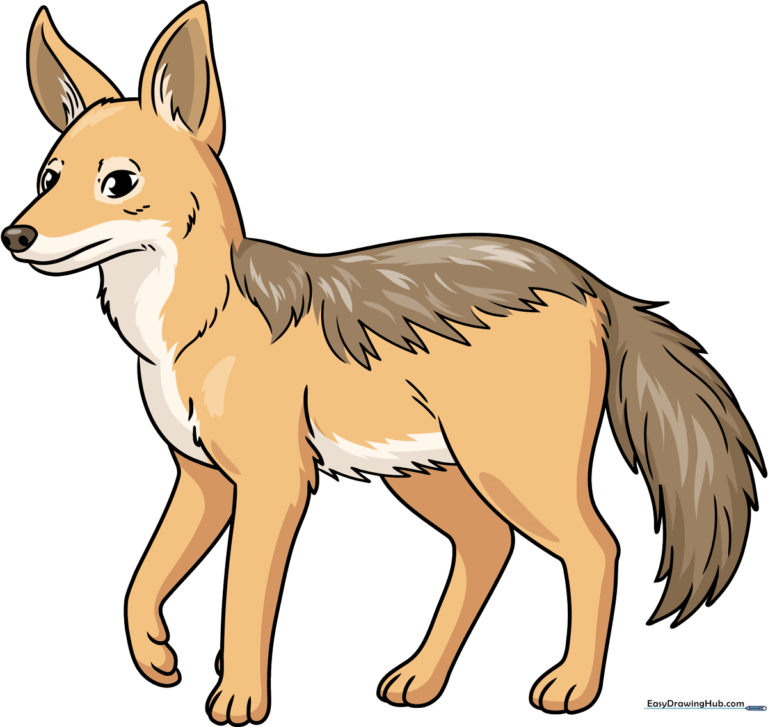
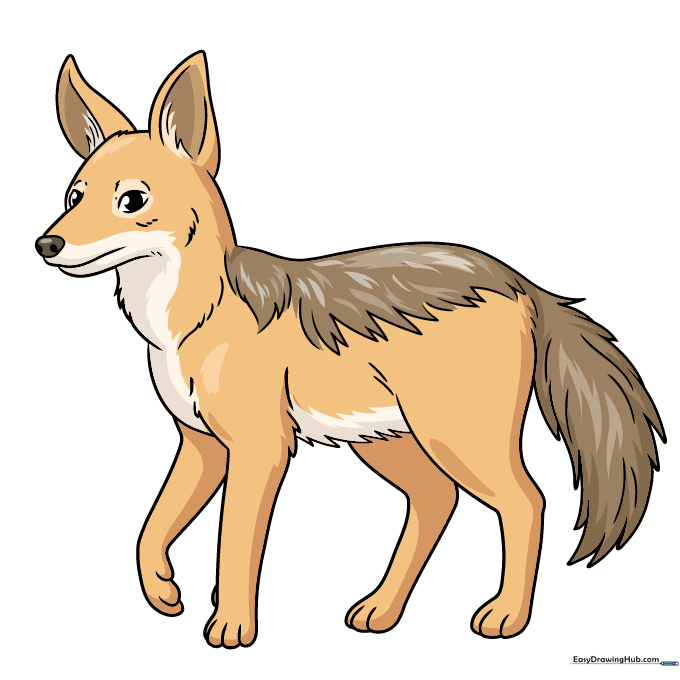
🎯 Final Result
Step-by-Step Instructions
Step 1: Sketching the Snout and Nose
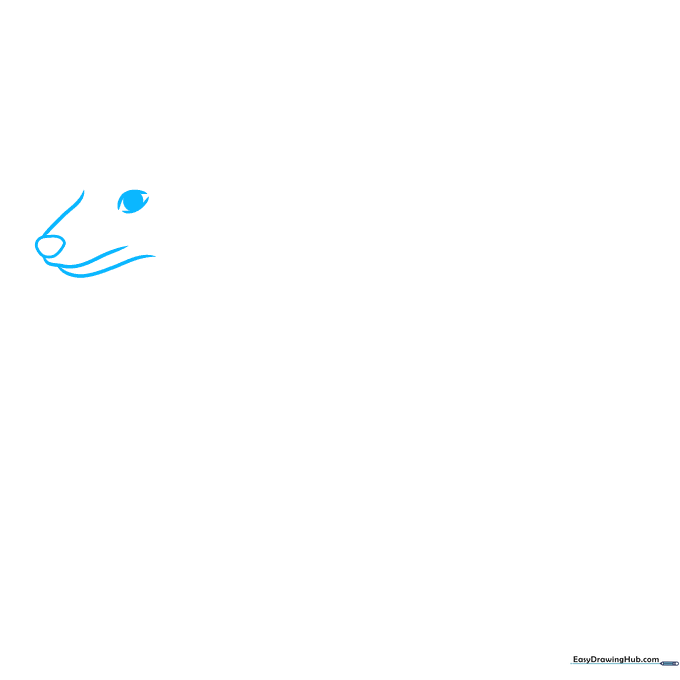
Start by drawing an irregular round shape for the nose pad. Extend two curved lines outward to form the snout, and a third curved line below for the jaw. Tip: Keep the snout compact to give your jackal a cute, cartoonish look.
Step 2: Adding Eyes and Ears

Add two small circles inside the nose for nostrils. Sketch the top of the head using jagged, short lines to mimic fur texture. Draw two pointed ears on top. Tip: Use quick, flicking motions with your pencil to make the fur look realistic and soft.
Step 3: Defining the Neck and Chest
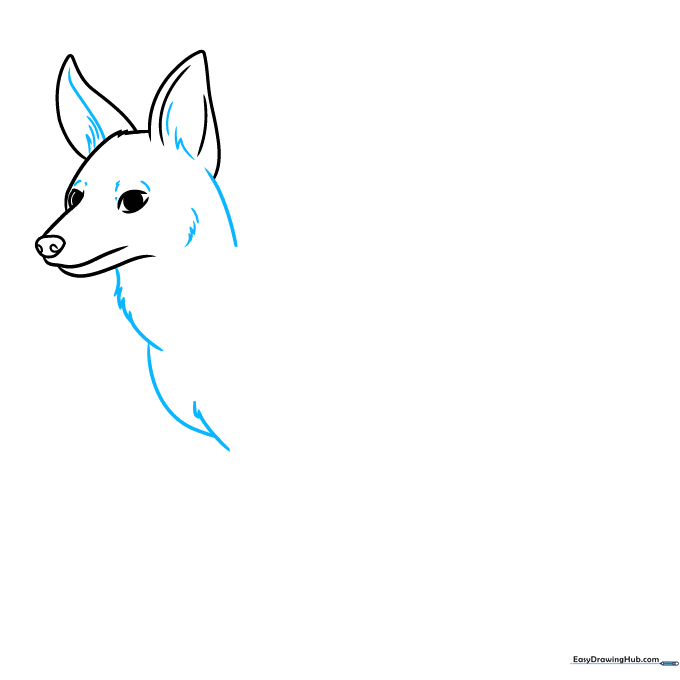
Use overlapping curved lines to connect the head to the body. Continue using those jagged, short strokes to suggest a thick, furry neck. Tip: Imagine the jackal is wearing a fluffy scarf to help you place these fur lines naturally.
Step 4: Sketching the Front Leg
Draw the front leg using long, smooth lines for the limb and shorter, overlapping lines for the paw. Tip: Ensure the paw is slightly wider than the leg to give it a sturdy, grounded appearance.
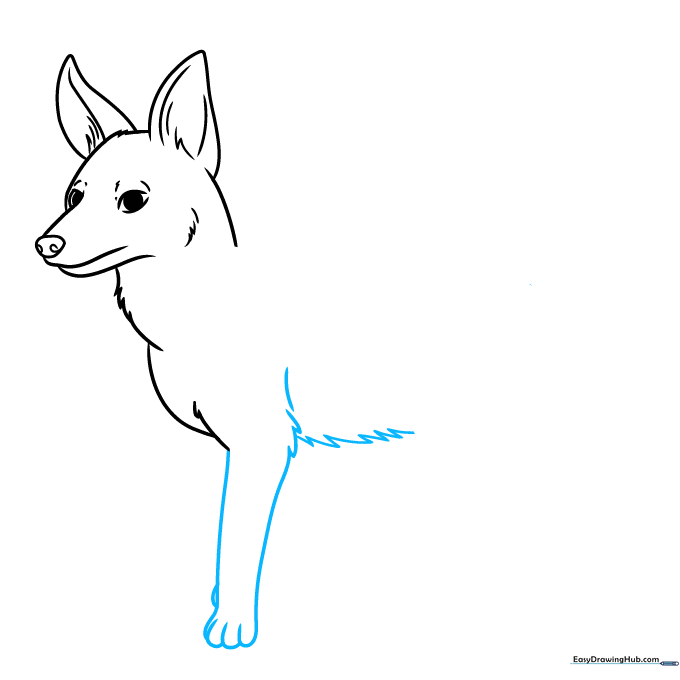
Step 5: Forming the Back and Rear Leg
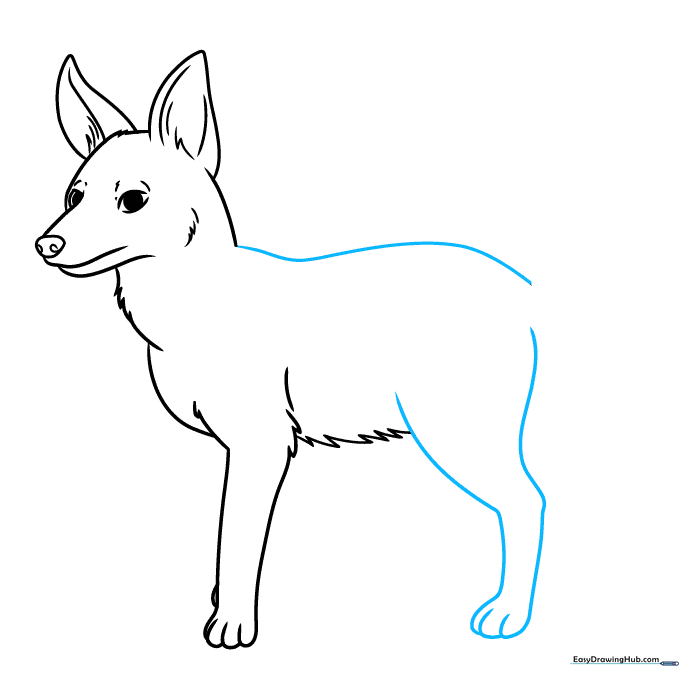
Extend a long, graceful curve from the neck to create the back. Add the rear leg using similar long lines. Tip: Keep the back line smooth to contrast with the textured fur around the neck.
Step 6: Adding the Remaining Legs
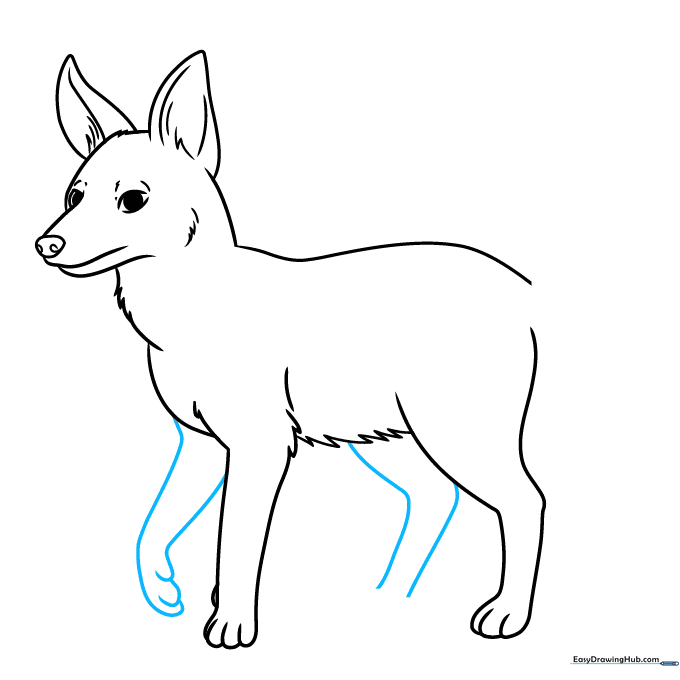
Draw the legs on the far side of the body to create depth. Use slightly lighter lines for these to make them appear further away. Tip: Remember that the legs should look like they are supporting the animal's weight.
Step 7: Drawing the Bushy Tail
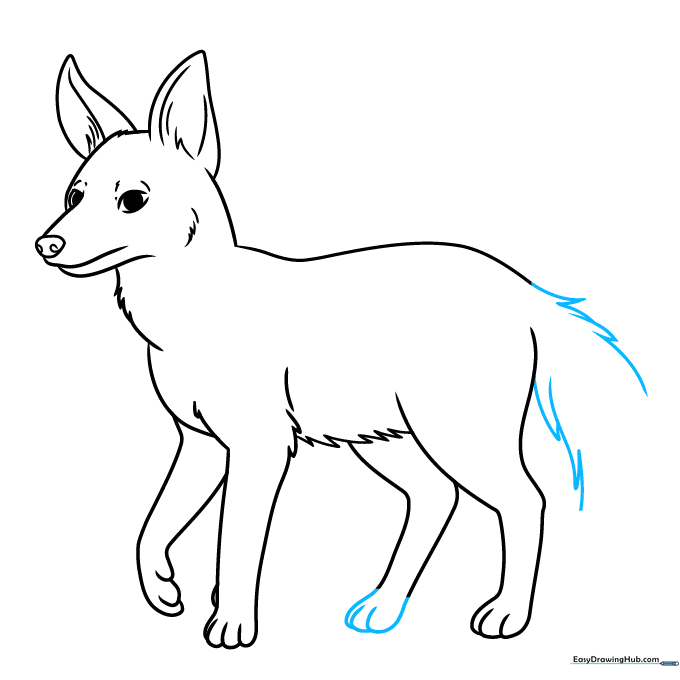
Finish the final paw, then start the tail. Use jagged, zigzag lines to make the tail look thick and bushy. Tip: A bushy tail is a signature feature of a jackal, so don't be afraid to make it nice and large!
Step 8: Adding Markings
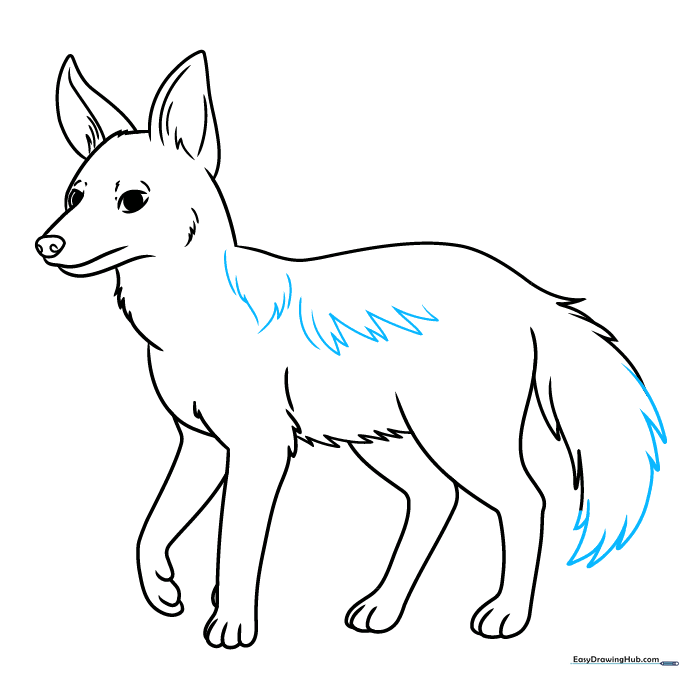
Complete the tail and add a dark patch along the back using jagged lines. Tip: This patch helps define the jackal's unique coat pattern.
Step 9: Final Touches

Add a few extra curved lines throughout the body to suggest fur direction. Tip: Less is more—a few well-placed lines are better than cluttering the drawing.
Step 10: Bring Your Jackal to Life with Color
Time to color! Use tan for the main body and black or gray for the back and tail markings. Tip: Use light pressure with your colored pencils to create a soft, natural look.
More Tutorials


