How to Draw a Hyena: Easy 10-Step Guide for Kids
Ready to bring a cheeky safari friend to life? This tutorial is perfect for young artists ages 7+ looking to practice character design. All you need is a pencil, an eraser, and your favorite markers to create a expressive, spotted hyena.
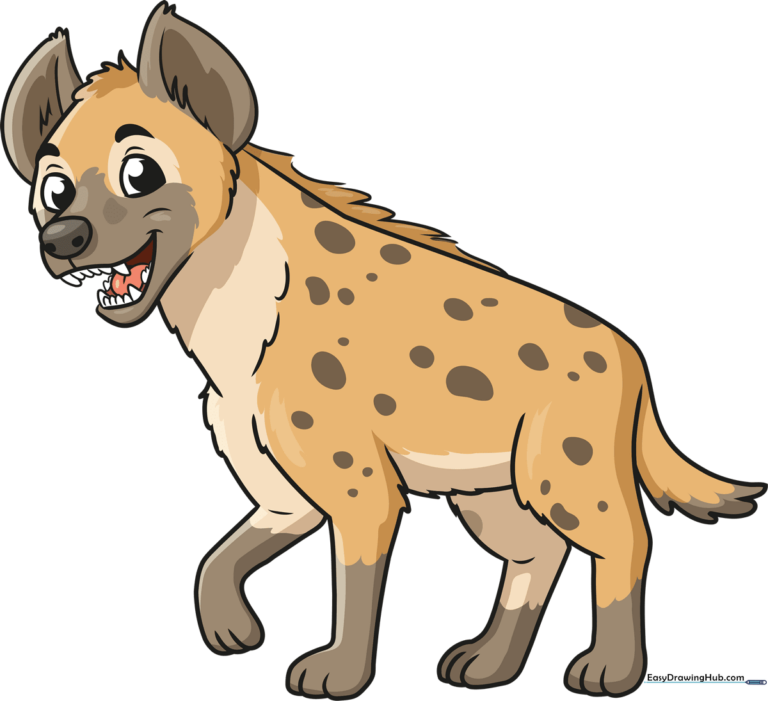
🎯 Final Result
Step-by-Step Instructions
Step 1: Sketching the Eyes and Nose

Start by sketching the hyena's face. Draw two irregular rounded shapes for the eyes and a small nose. Inside the eyes, draw two circles—one large, one small—and shade the space between to create a pupil. Tip: Keep your pencil pressure light here so you can refine the shapes later.
Step 2: Defining the Face Outline

Use smooth, curved lines to outline the face. Focus on the muzzle area and the open mouth. Tip: Add a few jagged, short lines along the jaw to represent the hyena's scruffy fur texture.
Step 3: Adding Teeth and Tongue

Draw triangular shapes for the teeth inside the jaw. Make the canine teeth slightly longer to give your hyena a classic, playful look. Add a curved line for the tongue. Tip: Use a steady hand to keep the teeth sharp and distinct.
Step 4: Drawing the Ears
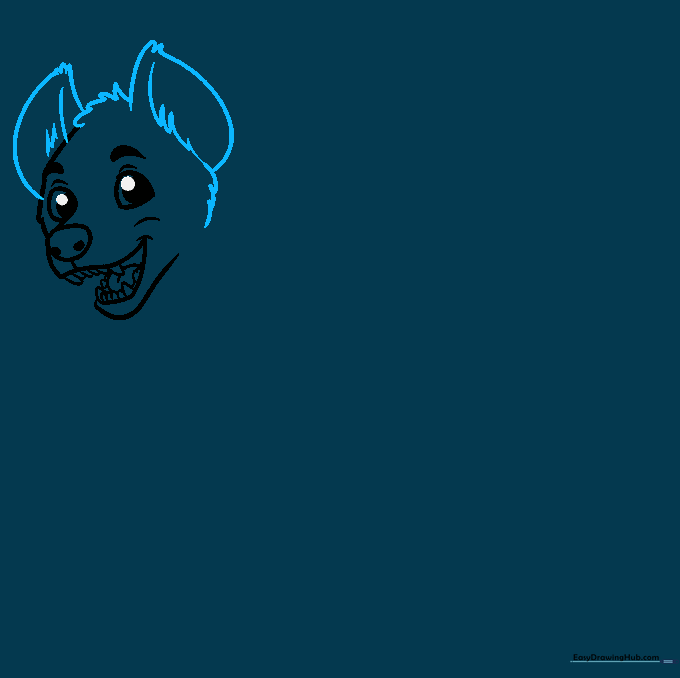
Draw two large, rounded ears using long curved lines. Connect the tops with 'U' shaped lines to show the inner ear structure. Tip: Add a tuft of fur between the ears to make the head look more realistic.
Step 5: Neck and Front Leg
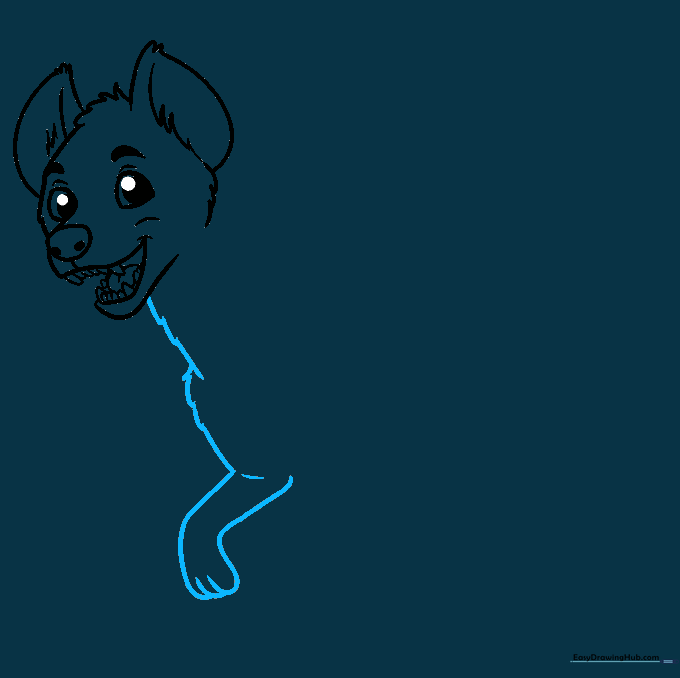
Use overlapping curved lines to sketch the neck and chest. Draw a pair of lines for the front leg, ending in small, overlapping 'U' shapes for the toes. Tip: Vary the length of your lines to create a natural, furry appearance.
Step 6: The Back and Tail
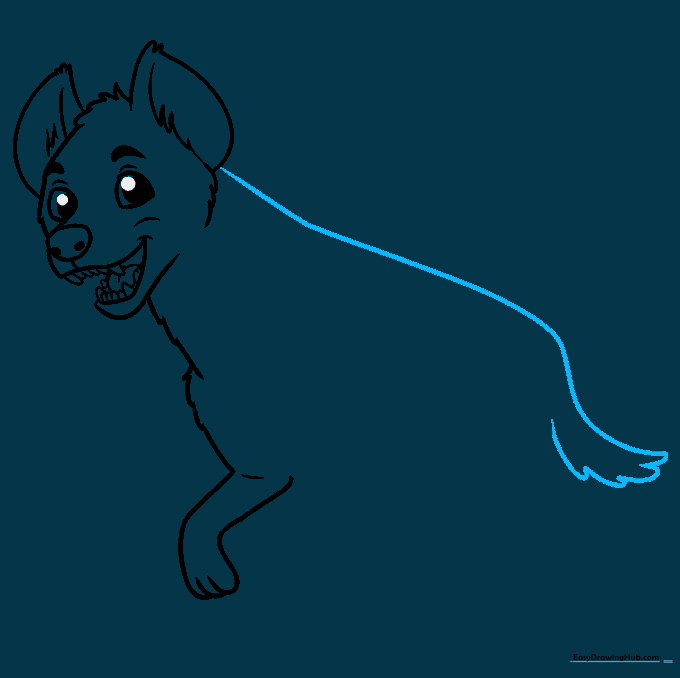
Draw a long, sloping line for the back and a curved line for the tail. Tip: Hyenas have a distinct sloping back, so try to make the line angle downward toward the tail.
Step 7: Belly and Second Front Leg
Sketch the belly with soft, curved lines and add the second front leg. Ensure the paw matches the first one for consistency. Tip: Use short, quick strokes to suggest fur along the belly line.
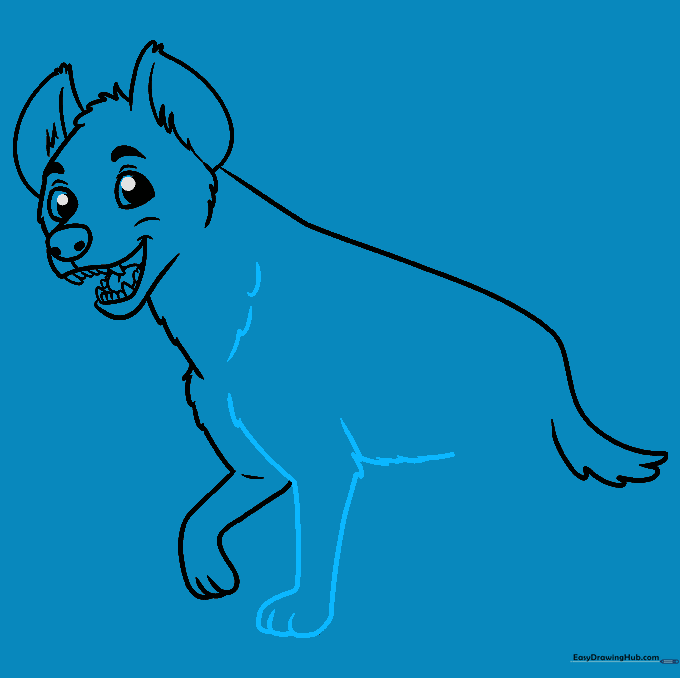
Step 8: Drawing the Rear Legs
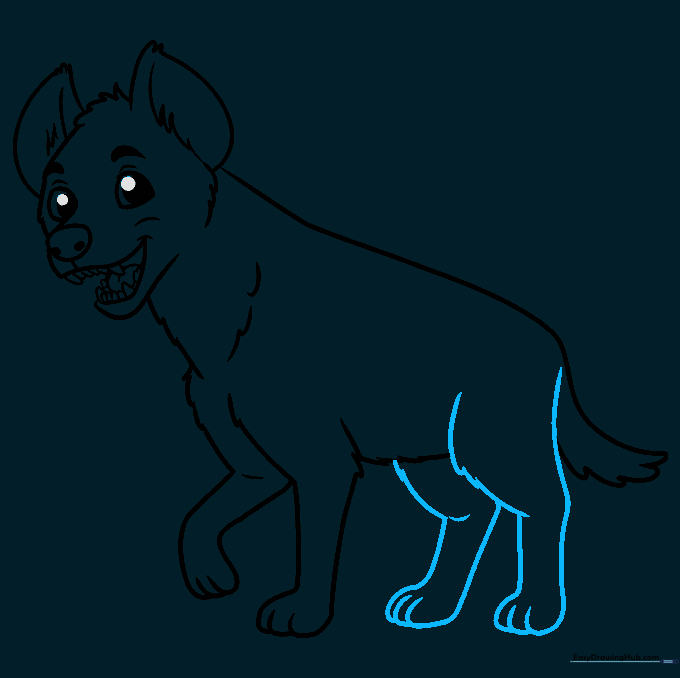
Sketch the rear legs using thicker, curved lines to show the muscle structure. Connect them at the bottom with small, overlapping curves for the paws. Tip: The rear legs should look slightly more powerful than the front ones.
Step 9: Mane and Spots
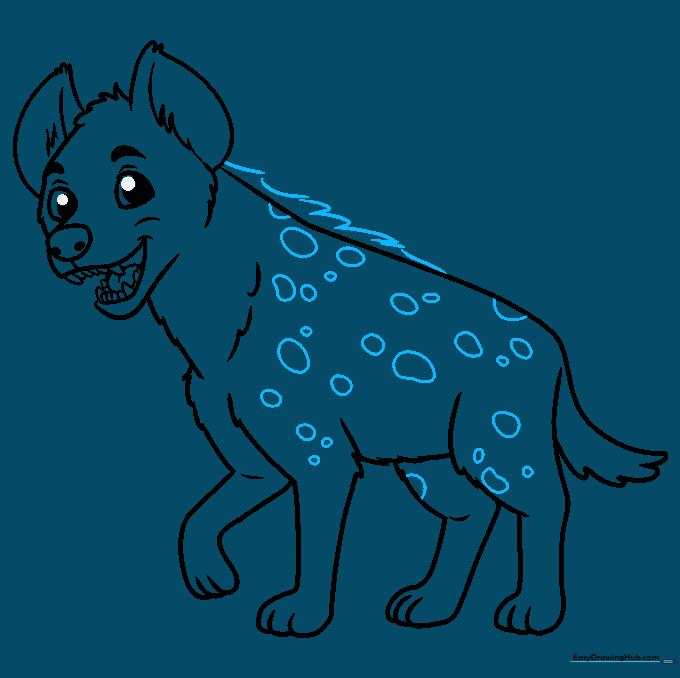
Draw jagged lines along the back of the neck to create the mane. Add various circles and ovals across the body for the hyena's signature spots. Tip: Don't make the spots too uniform; random placement looks more natural.
Step 10: Coloring Your Hyena
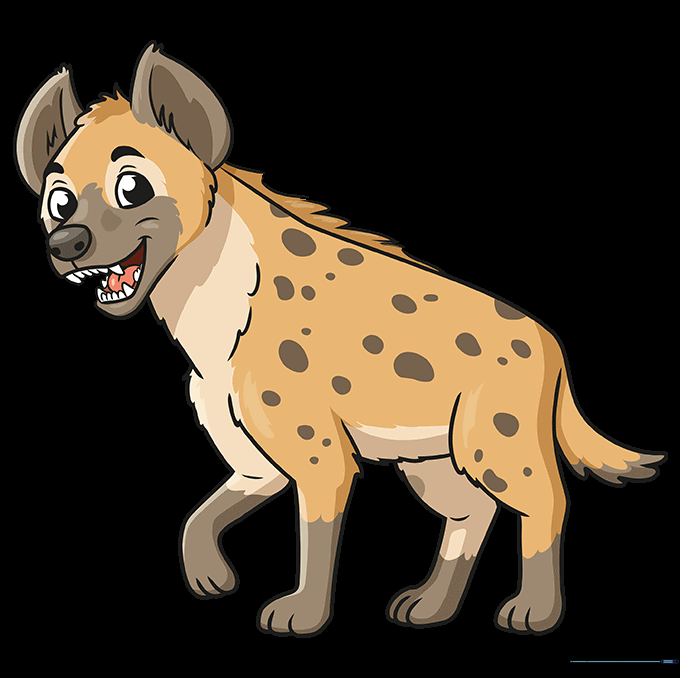
Bring your drawing to life with color! Use shades of brown, cream, and grey. Keep the spots darker than the base coat. Tip: Use a light brown for the main body and a darker brown or grey for the spots to create contrast.
More Tutorials


