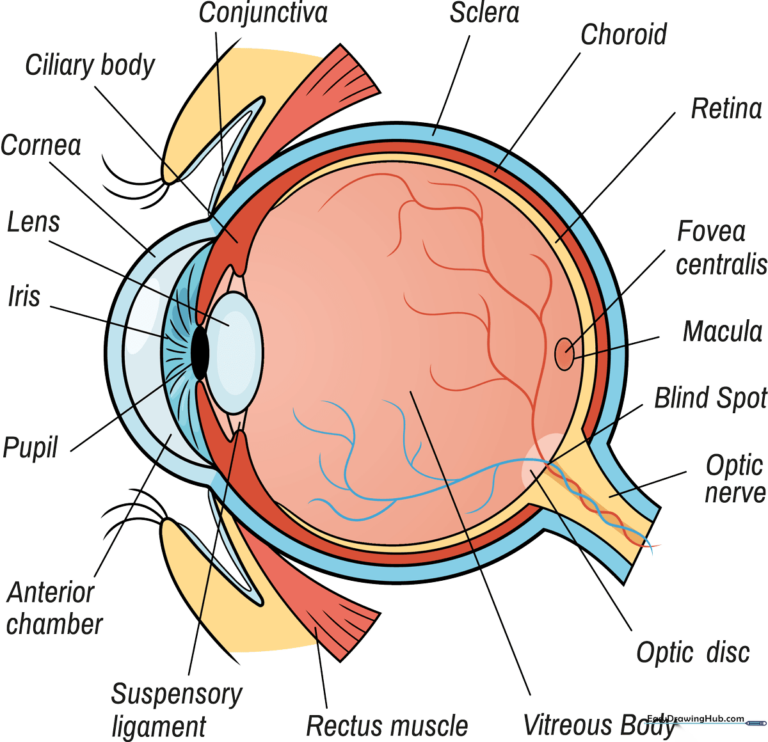
How to Draw a Human Eye Diagram: Easy Science Lesson
Bring biology to life with this clear, step-by-step guide to drawing a human eye diagram. Designed for students and curious learners, this activity helps you memorize anatomical structures while building your artistic skills. All you need is a pencil, an eraser, and a steady hand to get started.
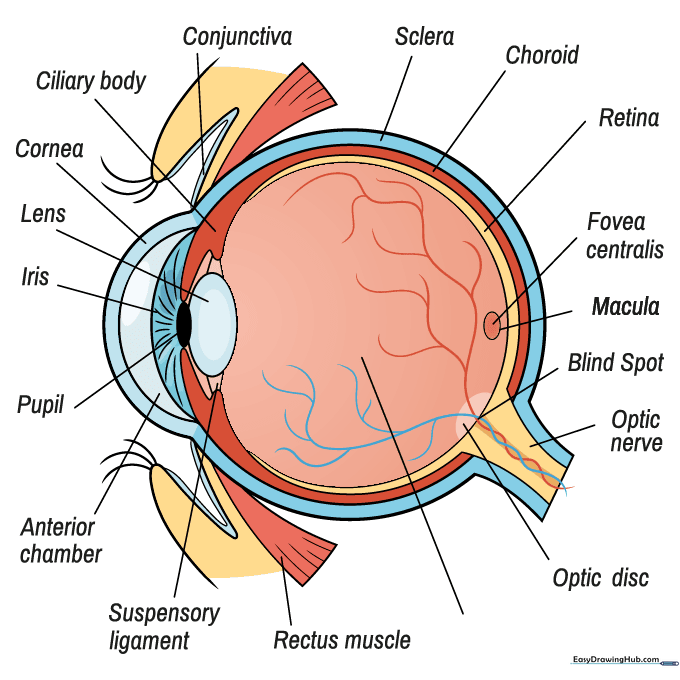
🎯 Final Result
Step-by-Step Instructions
Step 1: Sketching the Outer Eye Shape

Start by drawing the basic profile of the eye using a mix of curved and straight lines. Think of it as a circle with a slight bulge for the cornea and a rectangular extension for the optic nerve. Teacher's Tip: Keep your pencil pressure light so you can easily refine these shapes later.
Step 2: Defining the Sclera and Retina
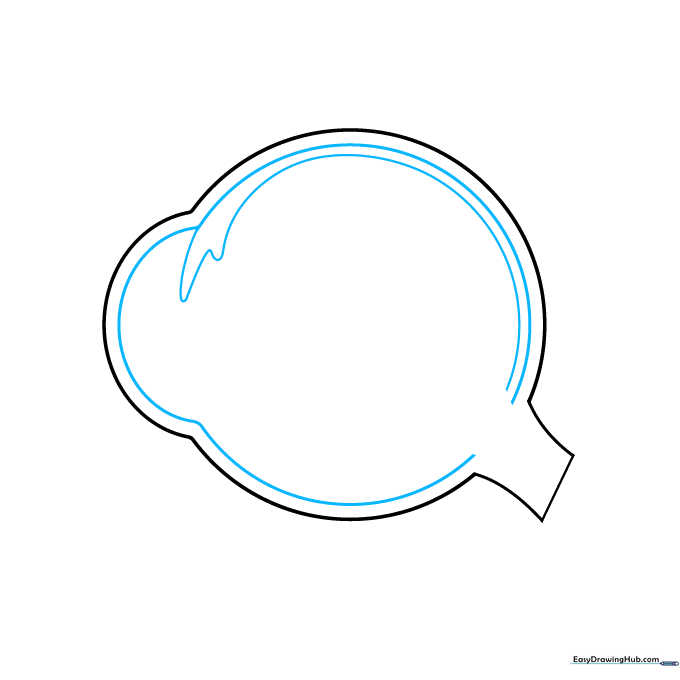
Draw a curved line inside your outline to represent the sclera—the tough white outer layer. Add a second line near the top to create the ciliary body. Teacher's Tip: Use a 'dripping' motion for the ciliary body line to mimic the natural, organic look of muscle tissue.
Step 3: Adding the Pupil and Retina
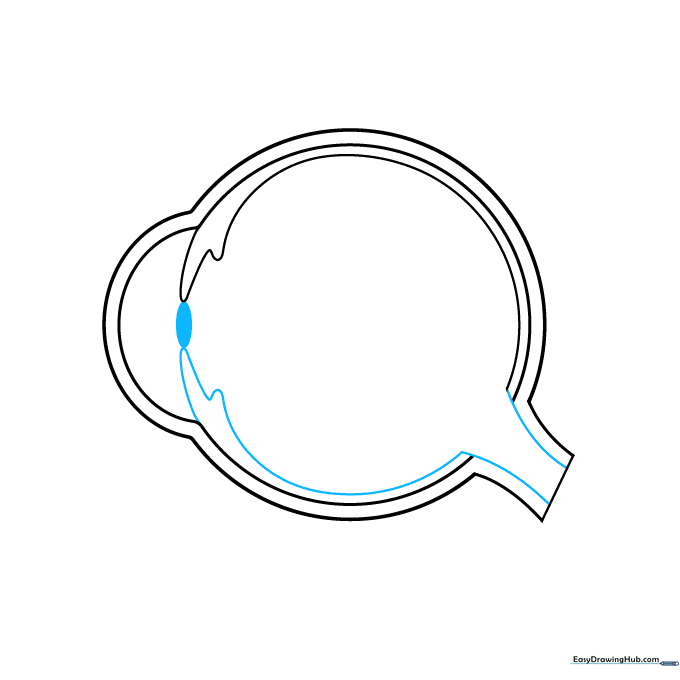
Enclose the bottom retina with a smooth curve and shade a small oval between the ciliary bodies to create the pupil. Extend lines from the retina toward the optic nerve area. Teacher's Tip: Keep your shading for the pupil dark and solid to make it stand out as the light-entry point.
Step 4: Drawing the Lens and Iris
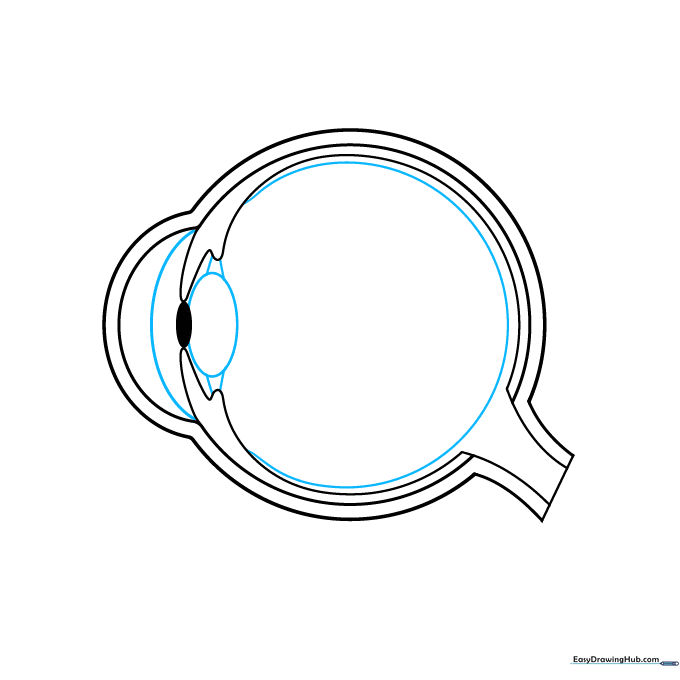
Place an oval behind the pupil for the lens and a partial circle in front for the iris. Draw a large circle in the center to define the vitreous chamber. Teacher's Tip: Imagine the aqueous humor as a clear liquid—keep these lines clean and simple to represent the eye's internal structure.
Step 5: Detailing the Iris and Muscles
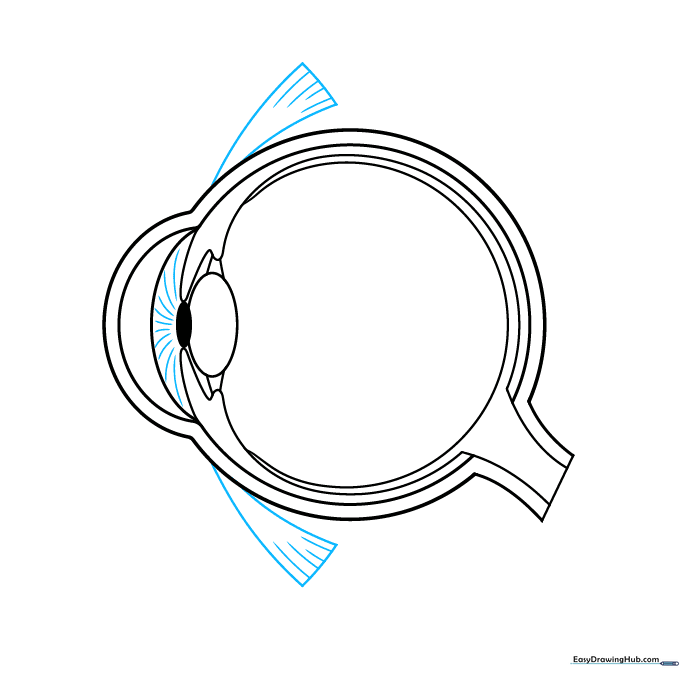
Add texture to the iris with fine curved lines. Then, draw curved triangles at the top and bottom to represent the rectus medialis muscles. Teacher's Tip: Use short, rhythmic strokes for the muscle contours to give them a sense of depth and tension.
Step 6: Adding Skin and Eyelids
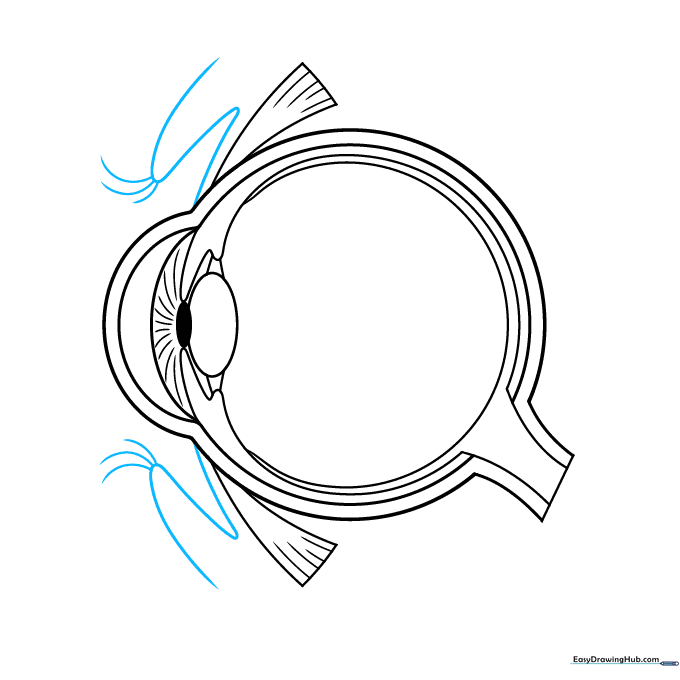
Use zigzag lines to sketch the skin surrounding the eye muscles. Extend curved lines outward to form the eyelids and lashes. Teacher's Tip: Keep the lashes sparse and slightly curved to maintain a realistic, anatomical look rather than a cartoonish one.
Step 7: Adding the Conjunctiva and Vessels
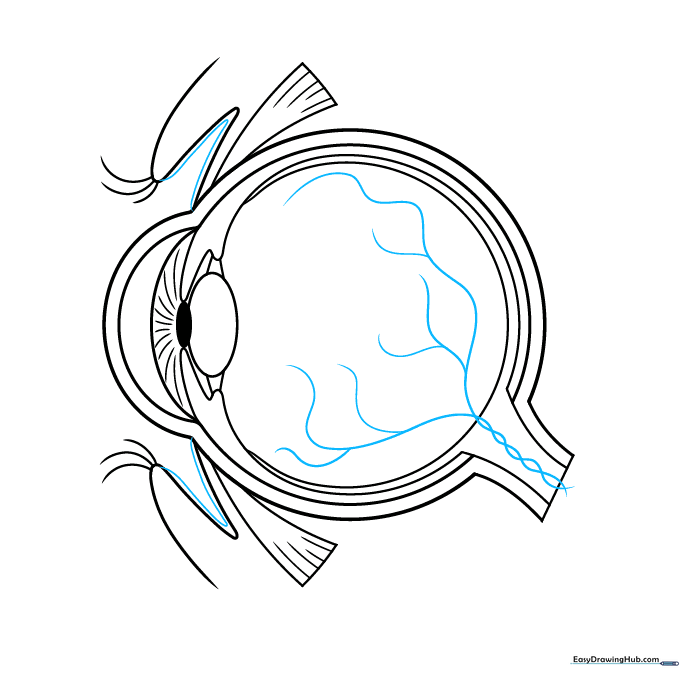
Draw a line parallel to the skin for the conjunctiva. Add spiraling lines in the nerve area to represent blood vessels. Teacher's Tip: Branch your vessels out like a tiny tree—this adds a high level of scientific accuracy to your drawing.
Step 8: Labeling Key Structures
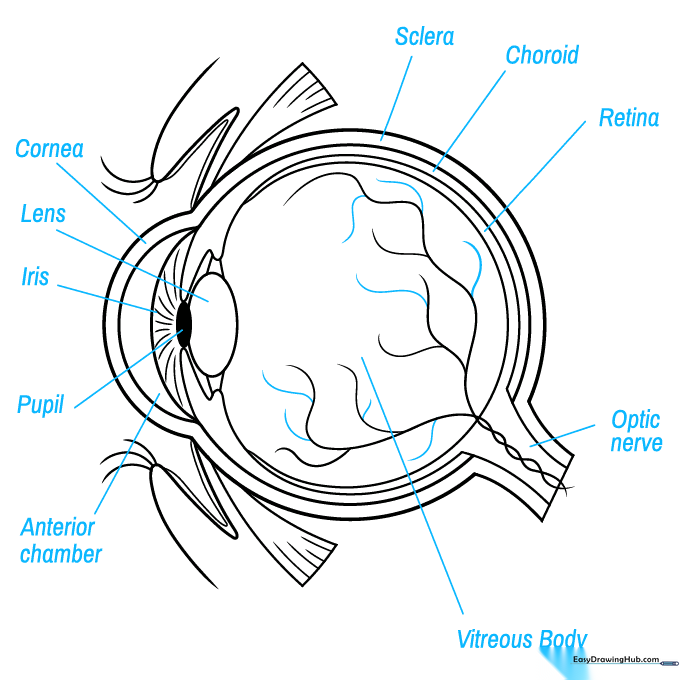
Use a ruler to draw clean lines from your diagram to the labels. Clearly mark the cornea, lens, iris, pupil, and other major parts. Teacher's Tip: Use neat, all-caps lettering for your labels to ensure the diagram is easy to read for study purposes.
Step 9: Finalizing Anatomy Labels

Add the final details like the fovea centralis and blind spot. Complete your labeling to ensure every part is identified. Teacher's Tip: Check your biology textbook to ensure each label points to the exact correct location.
Step 10: Adding Color
Bring your diagram to life with color! Use different shades to distinguish between the muscles, the iris, and the internal chambers. Teacher's Tip: Use a color-coding system—for example, use blue for fluids and red for blood vessels—to make your study guide even more effective.
More Tutorials


