How to Draw a Horse Head: Easy Step-by-Step Guide
Ready to bring a majestic horse to life on paper? This tutorial is perfect for young artists ages 6 and up, requiring only a pencil, eraser, and paper. Follow along to master the proportions of a horse's profile and build your confidence in sketching animal features.
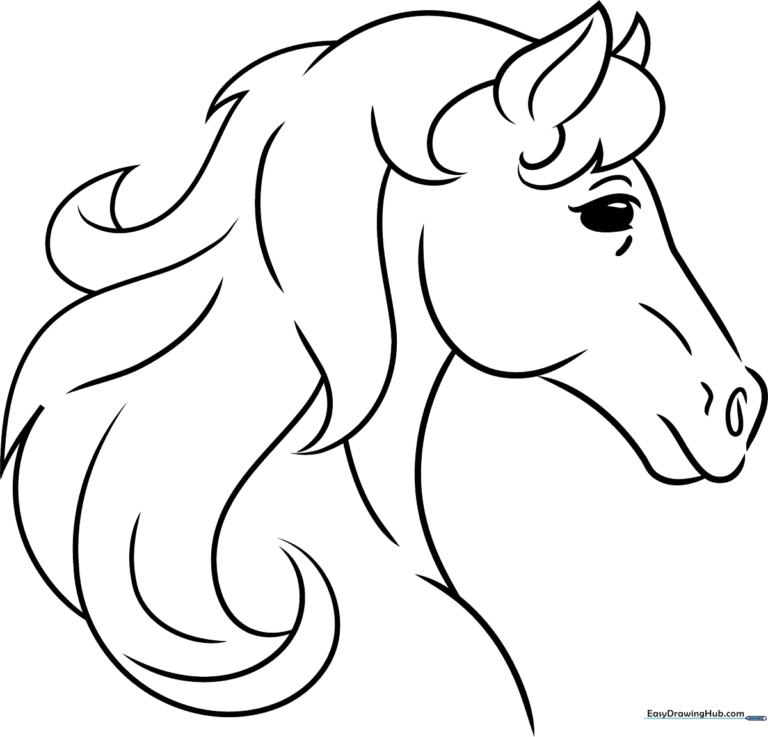
🎯 Final Result
Step-by-Step Instructions
Step 1: Sketching the Profile and Eye

Start by drawing a gentle, curved line to define the bridge of the nose. Next, sketch the eye using two soft, curved lines with a shaded oval in the center. Teacher's Tip: Keep your pencil pressure light here so you can easily adjust the shape if needed!
Step 2: Defining the Muzzle

Draw a smooth curve for the nose and a small, rounded line for the upper lip. Add a spiral shape for the nostril and an 'L' shaped contour to give the face depth. Teacher's Tip: A horse's nostril is quite expressive—try to make your spiral look like a comma for a natural look.
Step 3: Shaping the Jaw
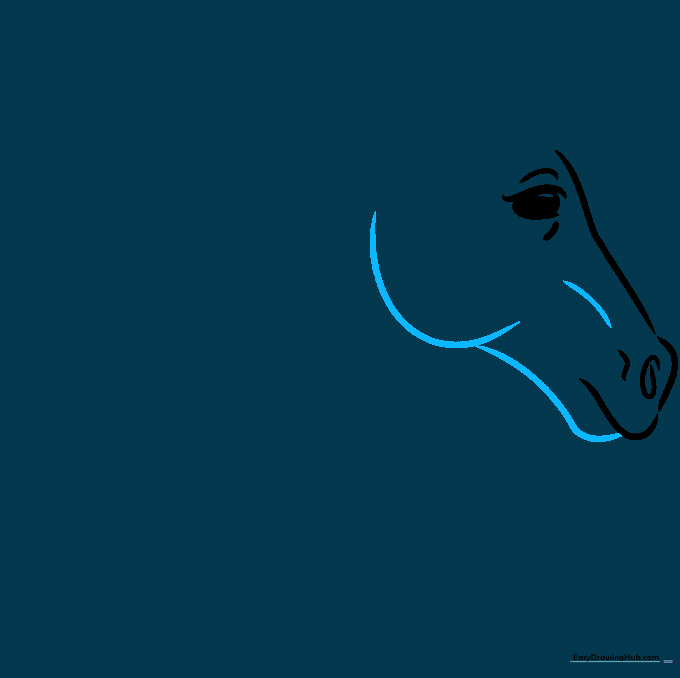
Extend a long, graceful curve for the lower lip and connect it with a 'C' shaped line to form the strong jawline. Add a short curved line between the eye and nose to define the cheekbone. Teacher's Tip: Horses have very strong jaw muscles, so don't be afraid to make that 'C' curve nice and bold.
Step 4: Starting the Mane
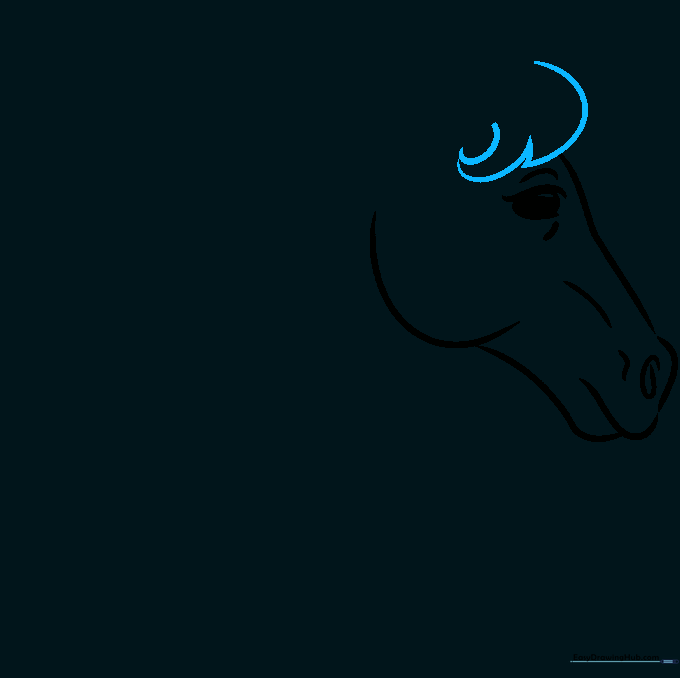
Begin sketching the flowing mane using varied curved lines that meet at sharp points. Teacher's Tip: Think of the mane like ribbons blowing in the wind—varying the length of your lines makes the hair look much more realistic.
Step 5: Drawing the Ears

Draw two pointed, leaf-shaped ears at the top of the head. Add a small curved line inside the nearest ear to show depth. Teacher's Tip: Ears are great for showing emotion; keep them upright to make your horse look alert and happy!
Step 6: Outlining the Neck

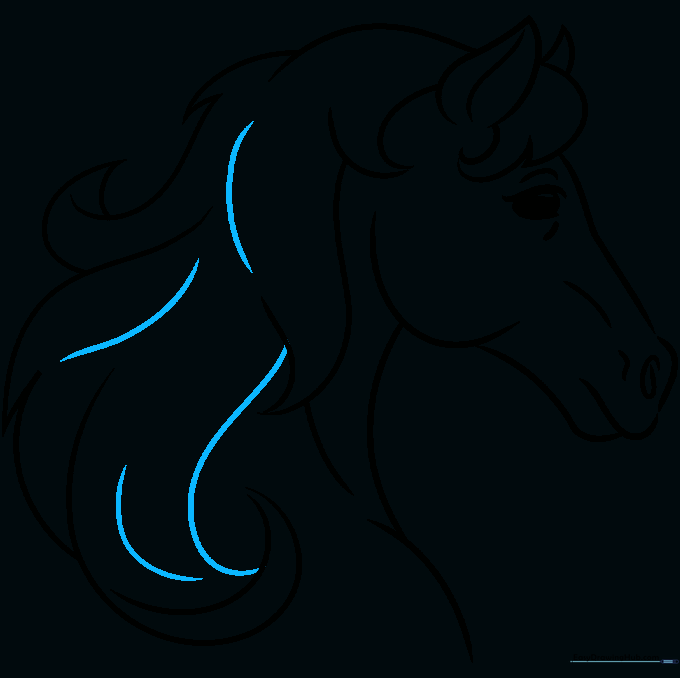
Extend a long, smooth curve downward to form the neck. Continue adding overlapping lines for the mane. Teacher's Tip: Use long, sweeping strokes for the neck to give your horse a graceful, elegant silhouette.
Step 7: Adding Shoulder Detail

Draw curved lines from the mane downward to contour the shoulder area. This helps create a sense of three-dimensional form. Teacher's Tip: Overlapping your lines here is key to making the horse look like it has real muscle and movement.
Step 8: Refining the Mane

Keep adding more curved lines to the mane, allowing them to meet at different points to create texture. Teacher's Tip: Don't worry about making every hair perfect; the goal is to show the flow and volume of the mane.
Step 9: Final Touches
Enclose the mane with one final curved line and add a few extra strokes for texture. Teacher's Tip: Take a moment to erase any stray guidelines from your initial sketch to make your final outline pop!
Step 10: Coloring Your Masterpiece

Bring your horse to life with color! Use earthy browns, blacks, or even creative colors like chestnut or white. Teacher's Tip: Try using light and dark shades of the same color to add shadows and highlights, making your drawing look even more realistic.
More Tutorials


