How to Draw a Head Outline: Simple Step-by-Step Guide
Ready to bring your characters to life? This guide is perfect for budding artists ages 6 and up who want to master the basics of facial structure. Grab a pencil, an eraser, and a sheet of paper to start building your portrait skills with this simple, confidence-boosting exercise.
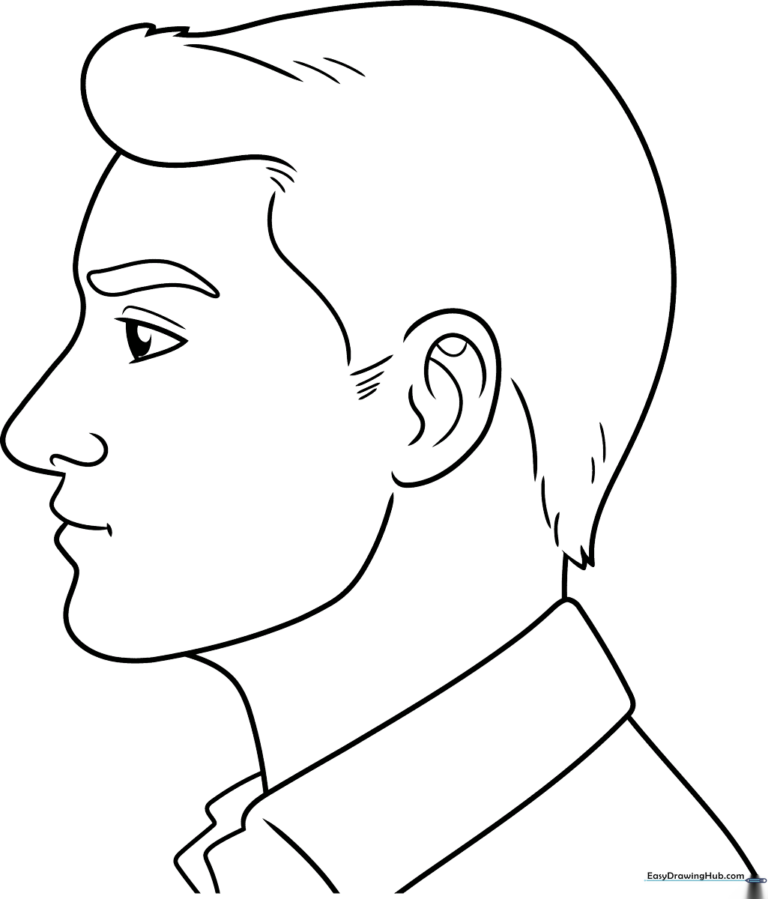
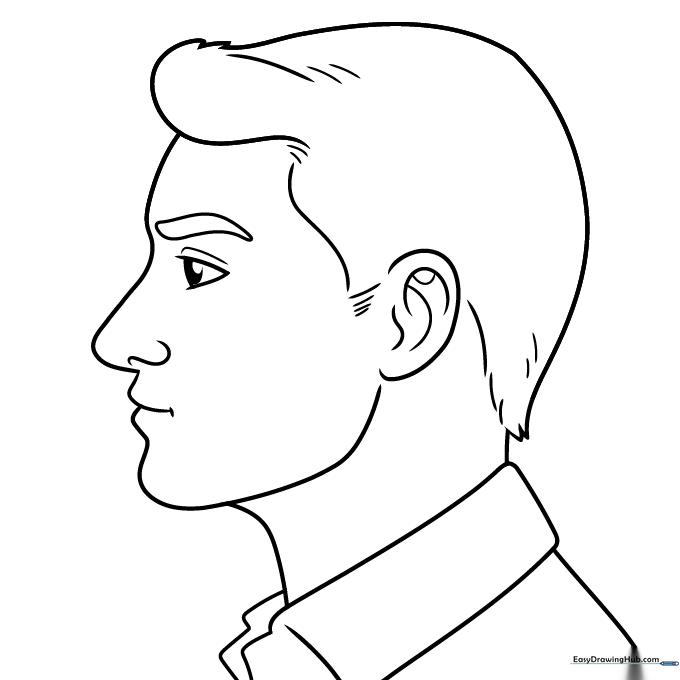
🎯 Final Result
Step-by-Step Instructions
Step 1: Sketching the Eye

Start by drawing a sideways “V” for the eye socket. Add a partial oval inside with a smaller circle for the pupil. Teacher's Tip: Keep the pupil dark and bold to give your character an expressive, focused look.
Step 2: Defining the Brow and Forehead
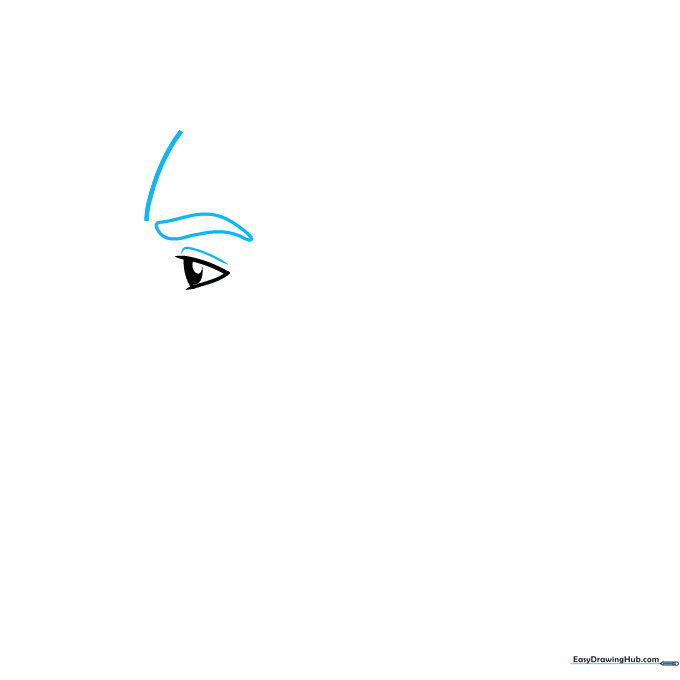
Contour the eyelid with a soft curve. Above it, draw a blunt, pointed eyebrow shape. Add a curved line in front to start the forehead. Teacher's Tip: Use a light touch here; the forehead should look smooth and rounded.
Step 3: Shaping the Nose
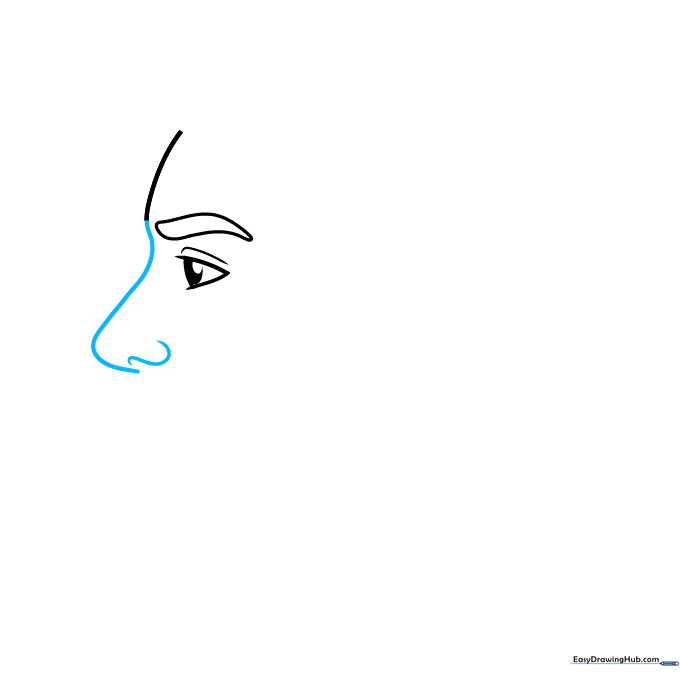
Extend the forehead line downward to form the bridge of the nose. Add a small, squiggly “S” shape for the nostril. Teacher's Tip: Don't over-detail the nose; a simple curve is often enough for a clean cartoon style.
Step 4: Drawing the Mouth and Jaw
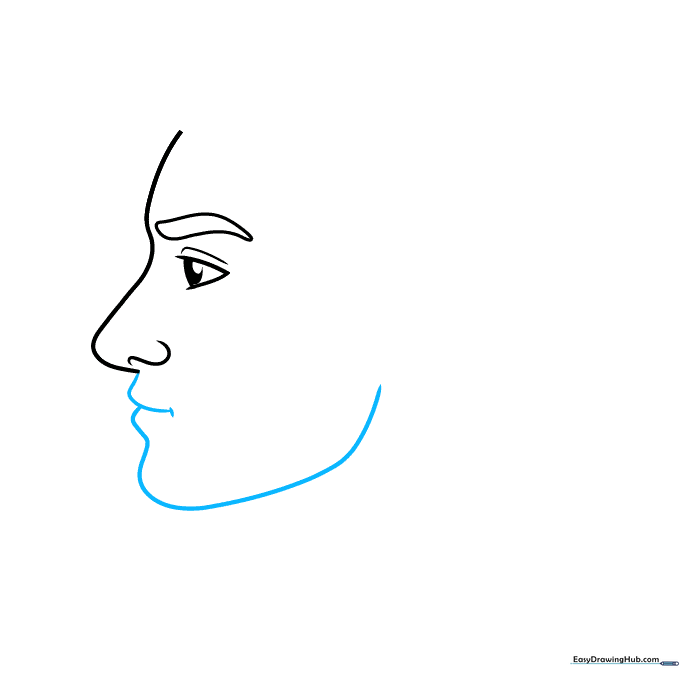
Draw a gentle smile line below the nose, then add a small dash for the mouth corner. Continue the line to enclose the lips, chin, and jaw. Teacher's Tip: Make the chin slightly rounded to give the face a friendly, approachable look.
Step 5: Sketching the Hairline
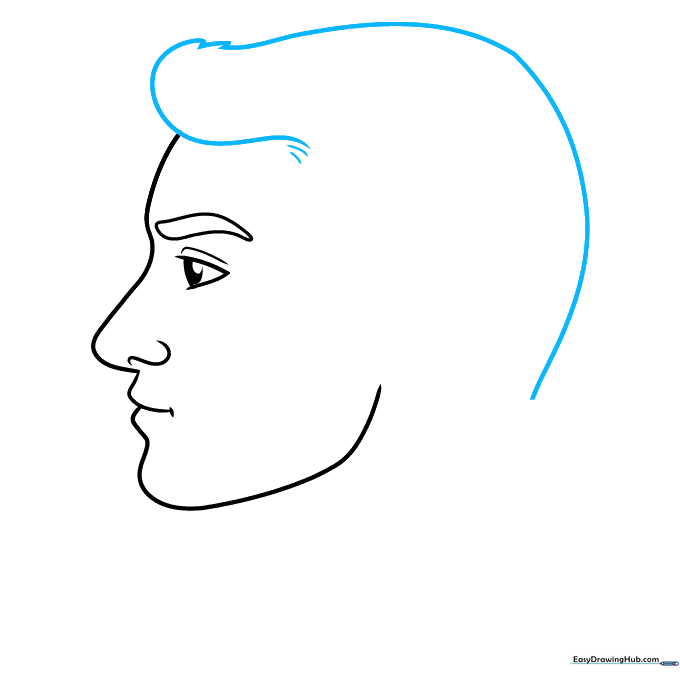
Use a long, sweeping curve for the back of the head and shorter, varied strokes for the front hairline. Teacher's Tip: Vary the length of your hair strokes to make the hair look natural and textured rather than like a solid block.
Step 6: Adding the Ear
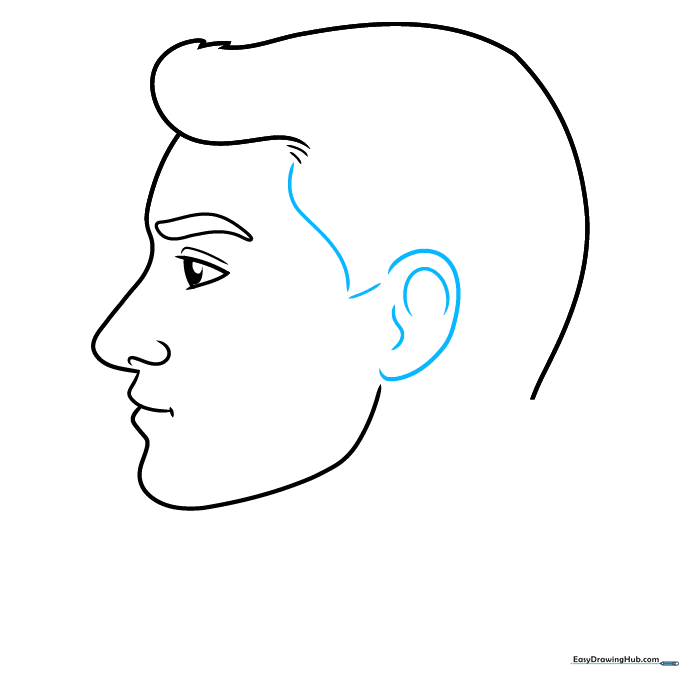
Draw the ear using a curved line, adding inner contours and sideburns in front. Teacher's Tip: The top of the ear usually aligns with the eyebrow, and the bottom with the nose—use this as a guide for placement!
Step 7: Refining Details and Neck
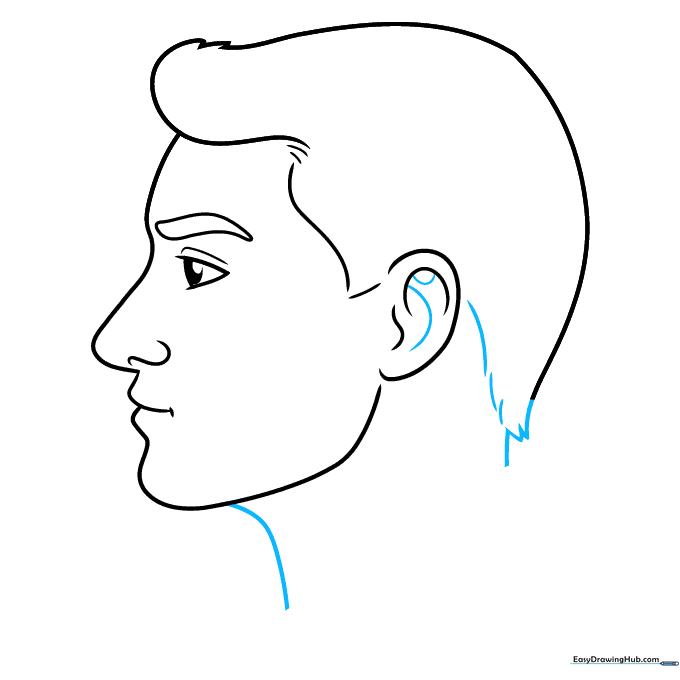
Add two curved lines inside the ear for detail. Sketch more hair at the back and extend lines down for the neck. Teacher's Tip: Keep the neck lines parallel to give the head a sturdy, balanced look.
Step 8: Adding the Shirt Collar
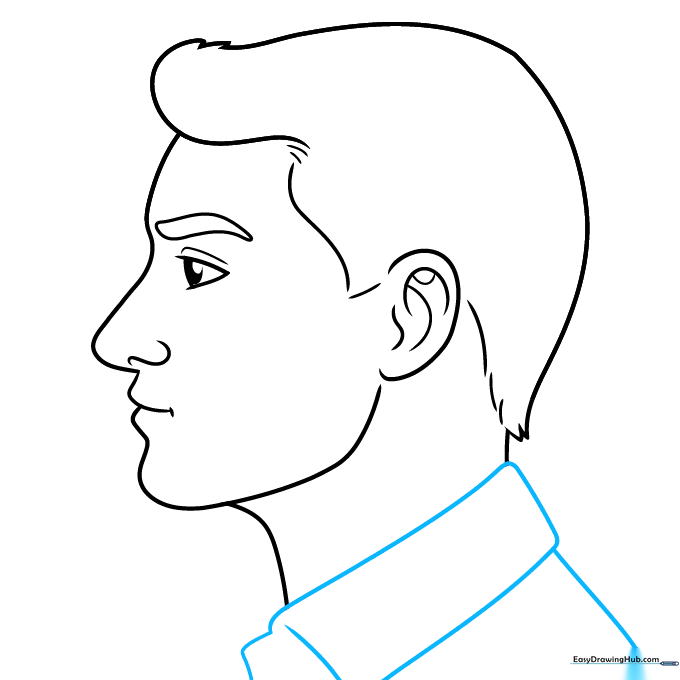
Use gentle curves to draw the rectangular collar and the back of the shirt. Teacher's Tip: Ensure the collar sits comfortably around the neck lines you just drew.
Step 9: Final Touches

Add texture to the hair with short curved lines and complete the other side of the shirt collar. Teacher's Tip: Use a darker pencil for these final lines to make your drawing pop!
Step 10: Color Your Portrait
Your head outline is complete! Now, bring it to life with your favorite colors. Teacher's Tip: Try using light skin tones and darker shades for the hair to add depth.
More Tutorials


