How to Draw a Haunted House: Easy 10-Step Guide
Ready to create your own spooky masterpiece? This tutorial is perfect for young artists ages 6 and up. All you need is a pencil, an eraser, and a piece of paper to bring this mysterious mansion to life.
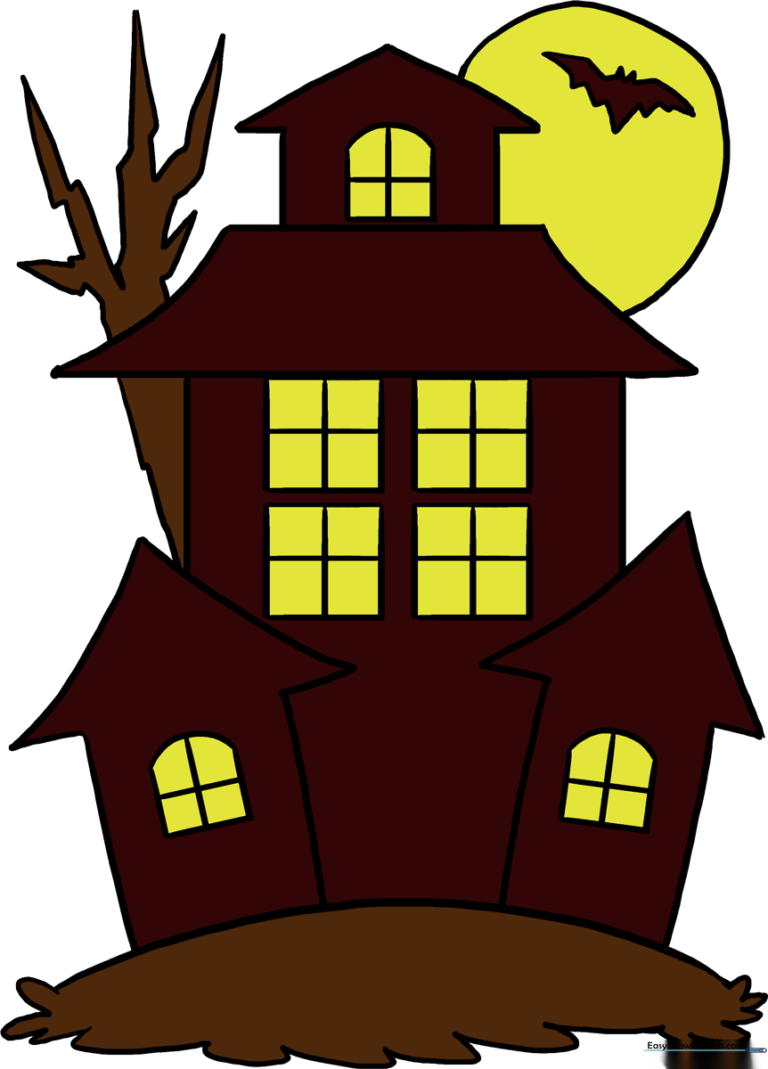
🎯 Final Result
Step-by-Step Instructions
Step 1: Sketching the Hill

Draw a gentle, sweeping curved line across the bottom of your page. Teacher's Tip: Keep this line light; it’s the foundation for your house, and we want it to look like a natural, bumpy hill.
Step 2: Adding Texture to the Ground

Use small, connected 'U' shapes along the line to create a grassy texture. Teacher's Tip: Don't worry about making them perfect; uneven grass adds to the 'abandoned' look of a haunted house.
Step 3: Building the Side Wings

Sketch two small rectangular sections on either side of your hill, topped with triangles for roofs. Teacher's Tip: Use a ruler if you want straight lines, but slightly wobbly lines make the house look older and creepier.
Step 4: Constructing the Main Structure

Draw a larger, taller rectangle in the center, connecting it to the side wings. Add a wide, slanted roof on top. Teacher's Tip: Ensure the center building is taller than the sides to give your house a grand, imposing silhouette.
Step 5: Adding the Attic Tower

Draw a small, peaked tower on top of the main roof. Teacher's Tip: This is the perfect spot for a 'haunted' window later, so keep the space inside the tower clear.
Step 6: Drawing the Windows

Add square windows to the main body and arched windows to the side wings. Draw a cross inside each to create panes. Teacher's Tip: Make some windows slightly crooked to enhance the spooky, abandoned effect.
Step 7: Creating the Moon

Draw a large circle behind the house to represent the full moon. Teacher's Tip: Don't draw the full circle; let the house 'overlap' it so it looks like the moon is sitting in the background sky.
Step 8: Adding a Spooky Tree
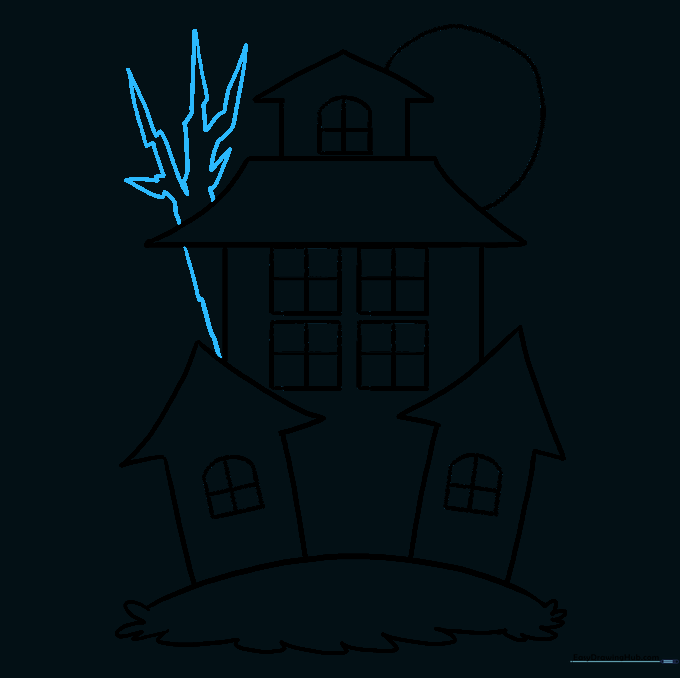
Sketch a gnarled tree next to the house using jagged, uneven lines for the trunk and sharp, pointed branches. Teacher's Tip: Think of 'claw-like' shapes for the branches to make it look extra eerie.
Step 9: Adding a Bat

Draw a small bat flying near the moon using a jagged, 'M' shaped line for the wings. Teacher's Tip: Keep the bat small so it doesn't distract from the house, but give it pointy ears to make it recognizable.
Step 10: Bringing it to Life with Color
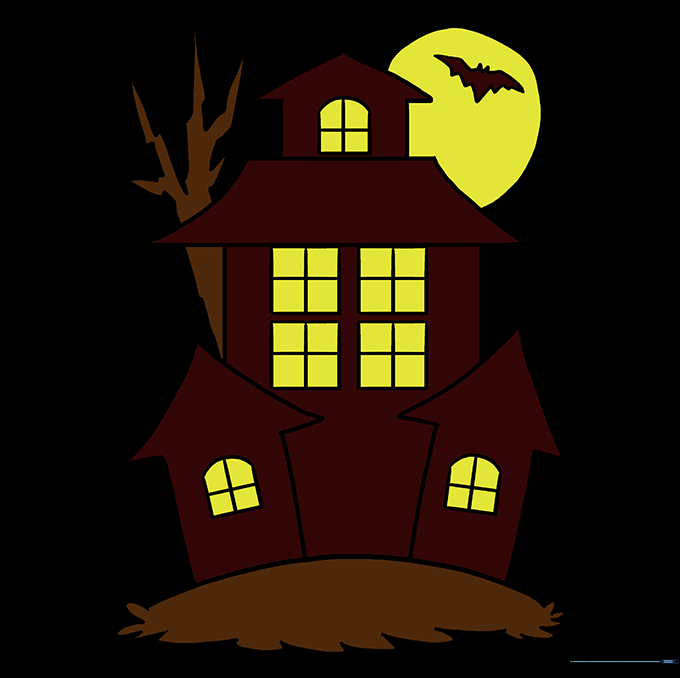
Time to color! Use dark blues or purples for the night sky, and yellow for the moon and windows. Teacher's Tip: Use a black marker to outline your work; it makes the colors pop and gives the drawing a finished, professional look.
More Tutorials


