How to Draw a Gymnast: Easy 10-Step Guide for Kids
Ready to capture the grace of a gymnast on paper? This tutorial is perfect for young artists ages 7+ looking to practice drawing human figures in motion. All you need is a pencil, an eraser, and your favorite markers to bring this athlete to life.
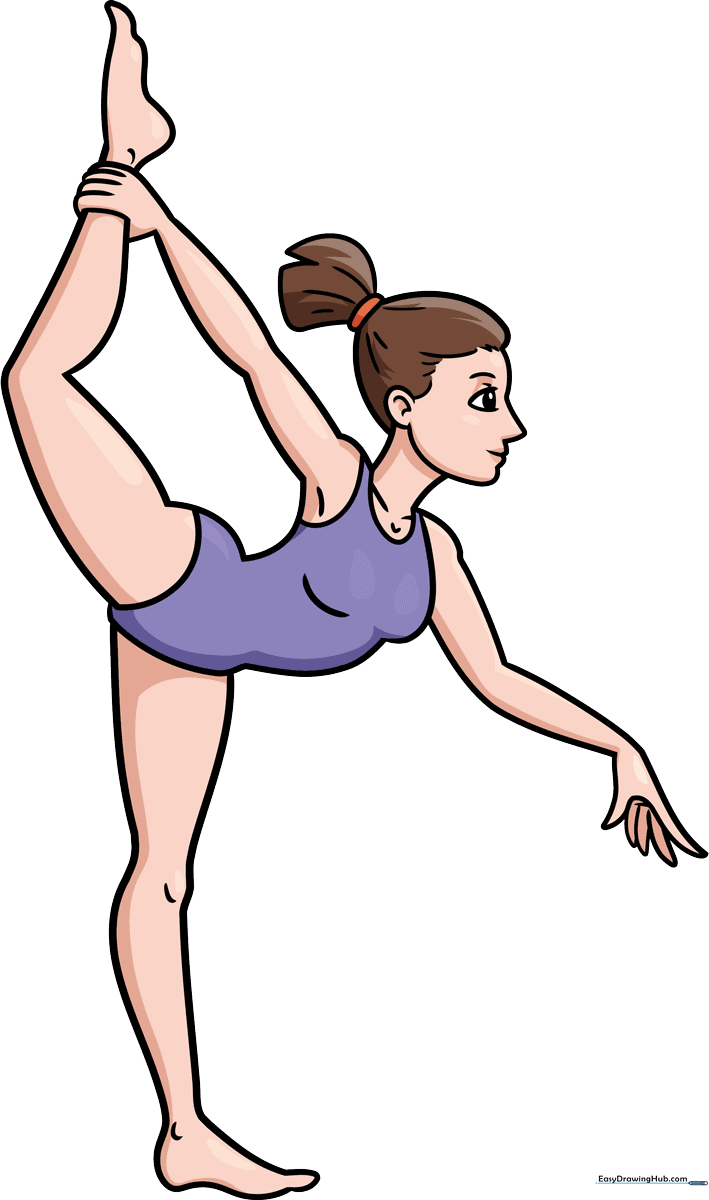
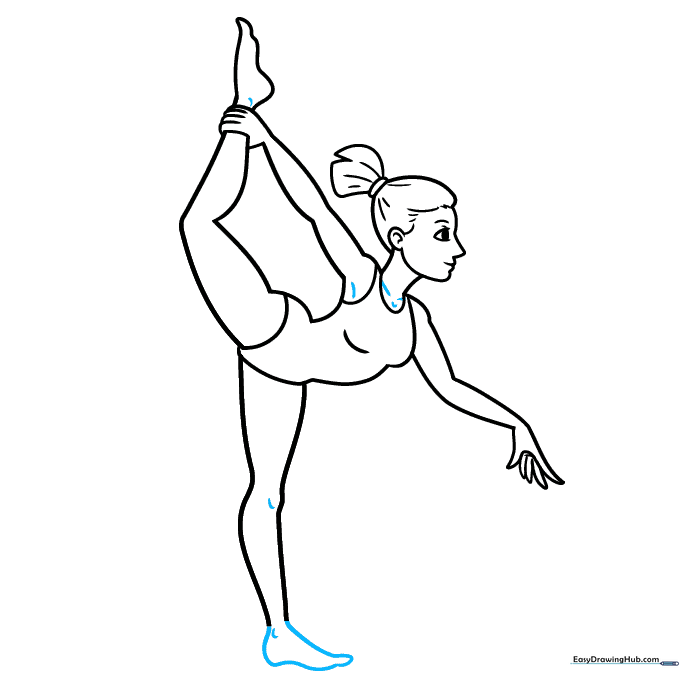
🎯 Final Result
Step-by-Step Instructions
Step 1: Sketching the Facial Profile
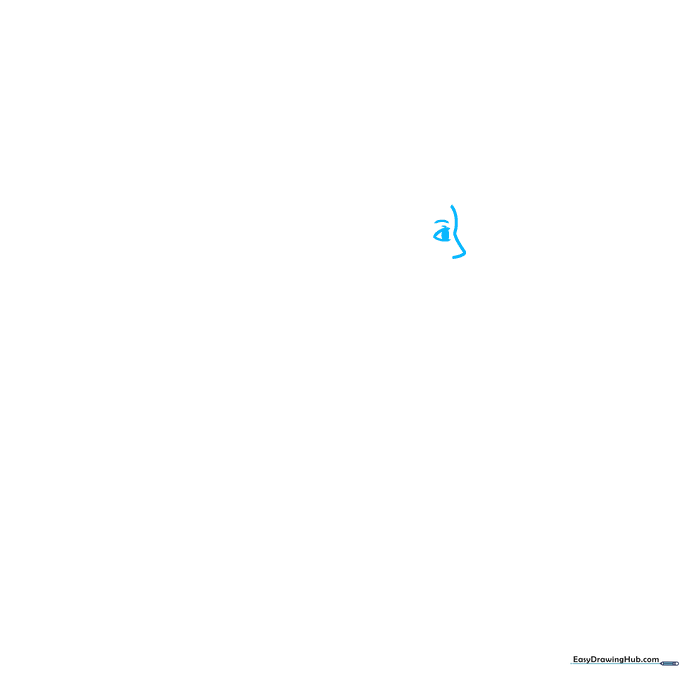
Start by drawing the gymnast's profile. Use a gentle curved line for the nose and forehead. Add a 'U' shape for the eye and a small oval for the pupil. Teacher's Tip: Keep the eye simple—a larger pupil makes the character look more expressive and friendly.
Step 2: Defining the Head and Jaw

Draw a long, smooth curve for the top of the head. Connect it to the chin and jawline using a series of soft curves, and add a small ear. Tip: Draw a small circle at the back of the head to mark where the ponytail will attach.
Step 3: Adding the Ponytail
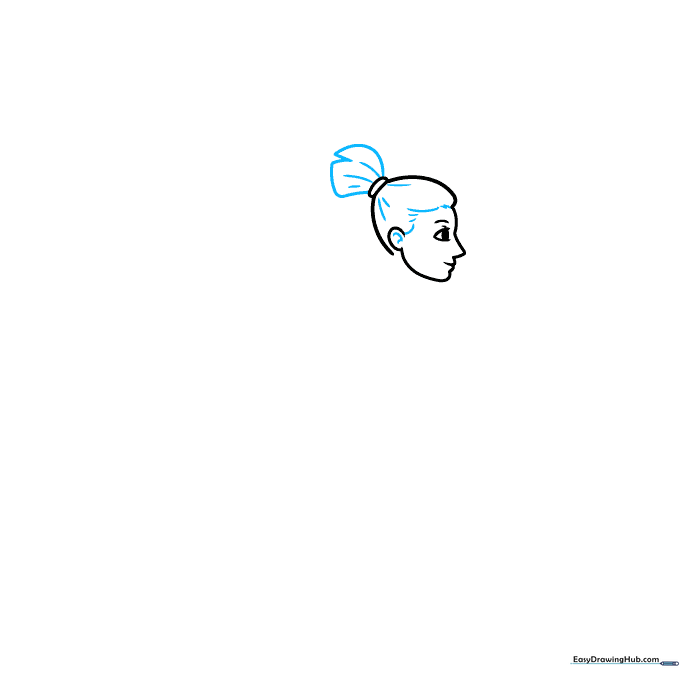
Use jagged, overlapping curved lines to create a bouncy ponytail. Add a few short strokes inside the ear and along the hairline to give the hair texture. Tip: Don't make the lines too straight—hair has natural volume and movement!
Step 4: Sketching the Torso and Arm
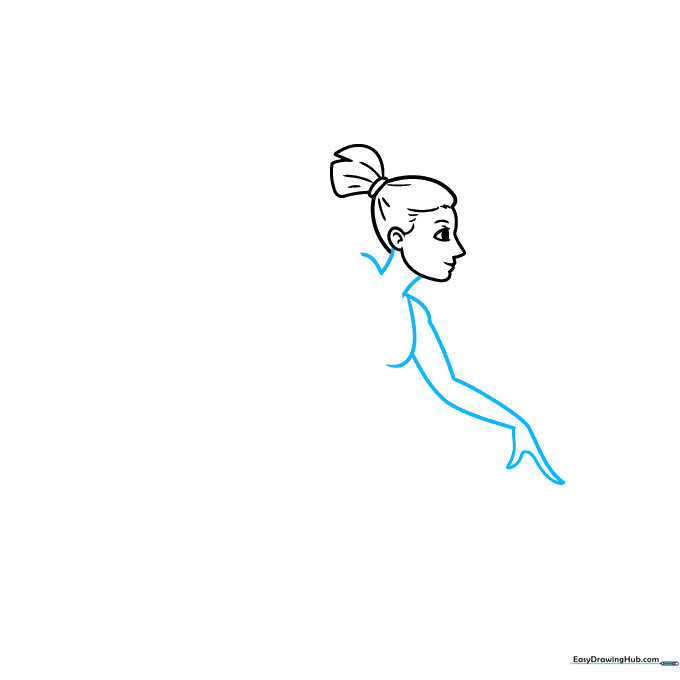
Extend two lines down from the head for the neck, then curve outward for the shoulders. Sketch the arm reaching out, ending in a wide 'U' shape for the hand. Tip: Keep the arm lines fluid to show the gymnast is in motion.
Step 5: Defining the Fingers
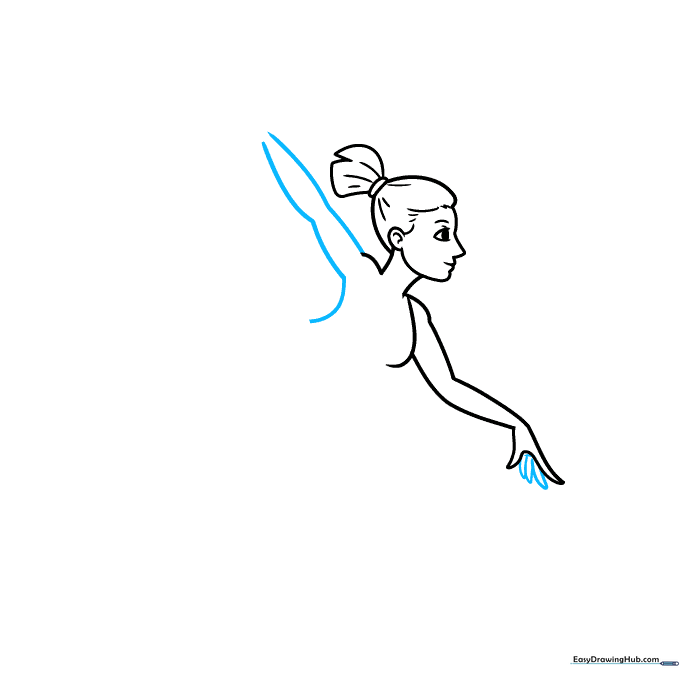
Add three small 'U' shapes between the thumb and pointer finger to complete the hand. Then, draw the second arm reaching upward. Tip: Use light pressure here so you can easily adjust the angle of the arm if it looks off.
Step 6: Shaping the Body
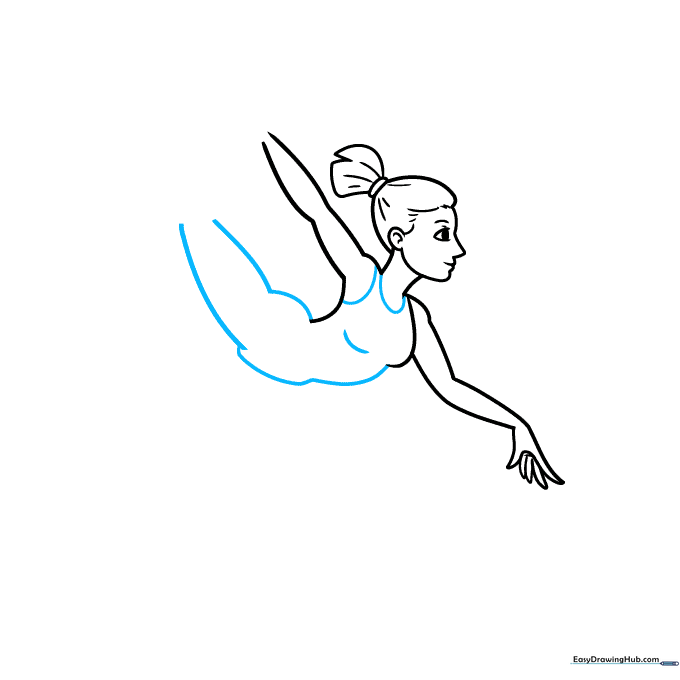
Connect the lines from the chest and back to form the torso and hips. Add curved lines around the neck and arm to suggest the leotard straps. Tip: Imagine the body as a series of simple shapes to keep the proportions balanced.
Step 7: Drawing the Leg and Ankle
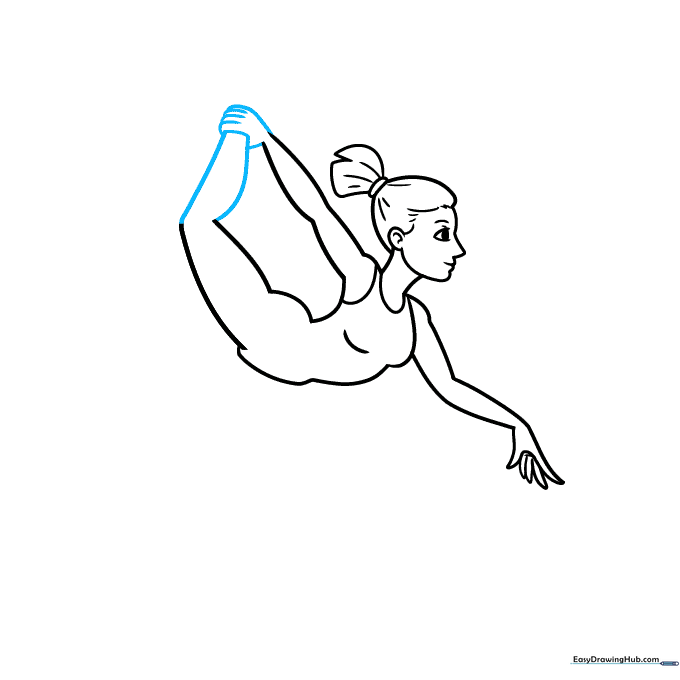
Draw the hand grasping the ankle. Use overlapping curves to show the fingers wrapping around the leg. Tip: This is a tricky part! Focus on the 'C' shape of the hand meeting the curve of the calf.
Step 8: Adding the Foot and Second Leg
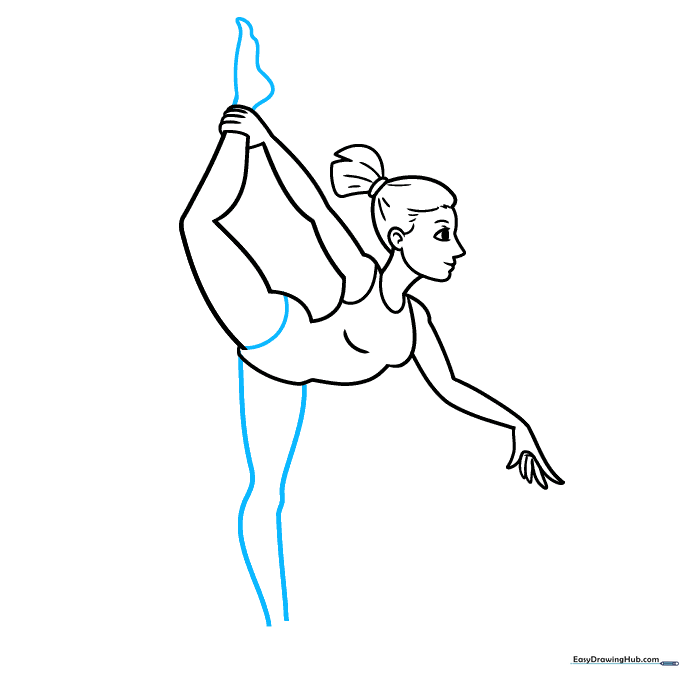
Extend a line from the hand to form the foot, curving it back on itself. Then, draw the second leg extending from the torso. Tip: Keep the foot shape slightly pointed to match the gymnast's athletic pose.
Step 9: Final Details
Refine the foot shape and add small lines to contour the ankle, knee, and collarbones. These small details add realism to your drawing. Tip: Use a darker pencil or pen to go over your final lines before erasing the construction marks.
Step 10: Bring It to Life with Color
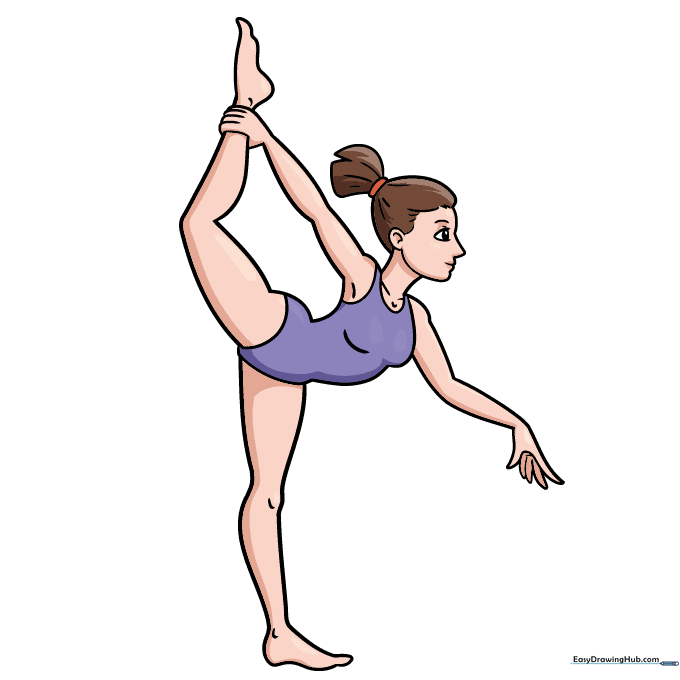
Now for the fun part! Add color to your gymnast. Choose bright, bold colors for the leotard and match the hair and skin tones to your liking. Tip: Use a slightly darker shade of your leotard color to add a little shadow on one side for a 3D effect.
More Tutorials


