How to Draw a Grey Whale: Easy 10-Step Guide for Kids
Ready to dive into the ocean? This tutorial is perfect for young artists ages 5 and up. All you need is a pencil, an eraser, and some paper to bring this gentle giant to life while practicing your curved line control.
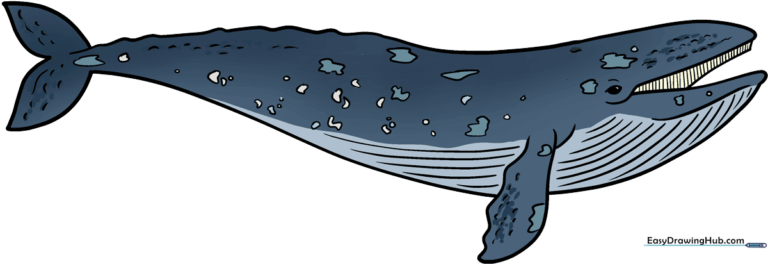
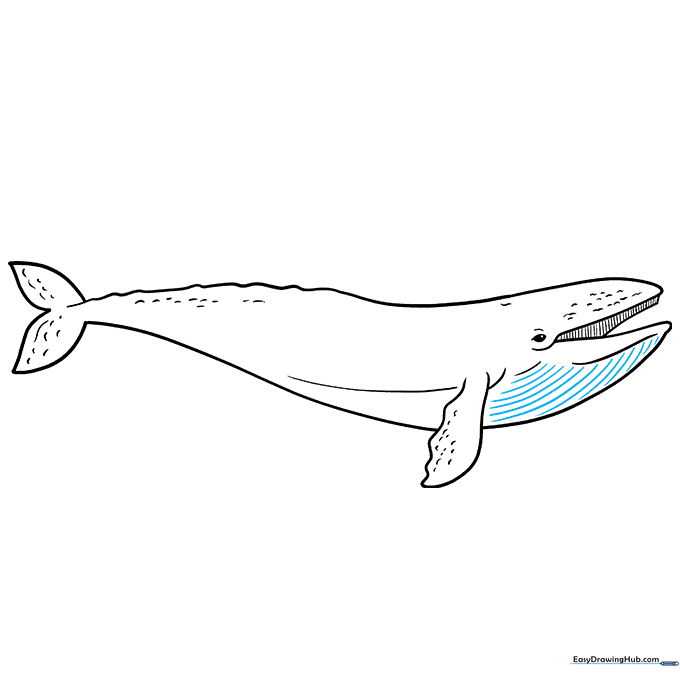
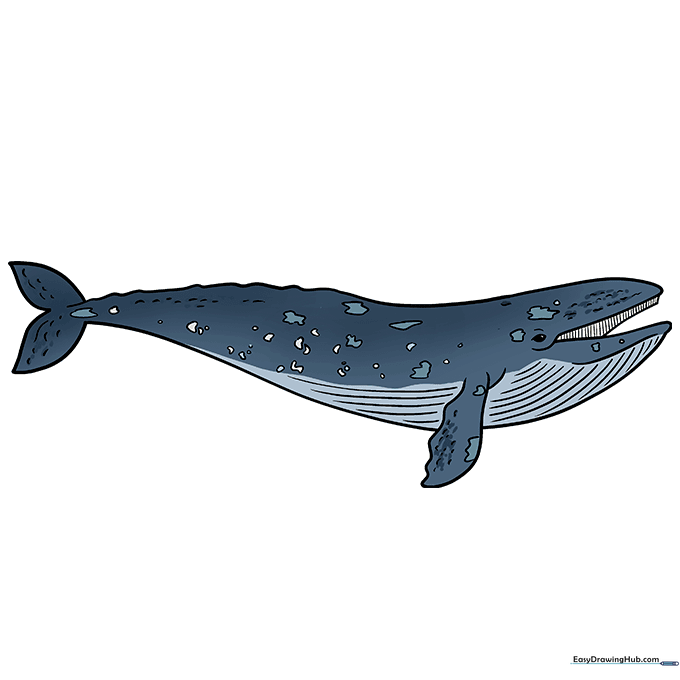
🎯 Final Result
Step-by-Step Instructions
Step 1: Sketching the Head

Draw the whale's head using two curved lines that meet to form the open jaw. For the eye, sketch a small, partial circle and shade the pupil. Teacher's Tip: Keep your pencil pressure light so you can easily erase any overlapping lines later.
Step 2: Defining the Blowhole
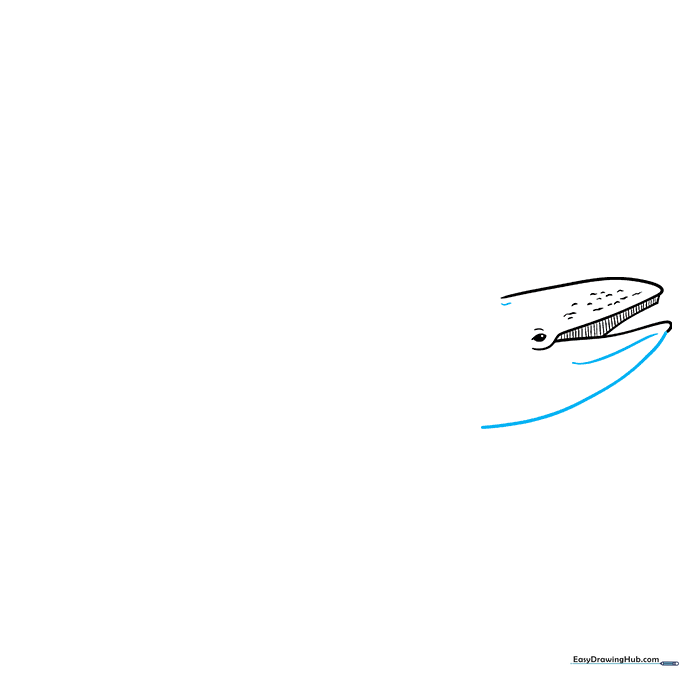
Extend the lower jaw line and add a small, curved mark on top of the head to represent the blowhole. Teacher's Tip: Think of the blowhole as a tiny 'comma' shape to give it a realistic look.
Step 3: Adding the Flipper

Draw a long, scalloped curved line to create the side flipper. Connect it to the body and add a few short lines for texture. Teacher's Tip: Use short, quick strokes to make the flipper look like it has natural skin folds.
Step 4: Shaping the Back
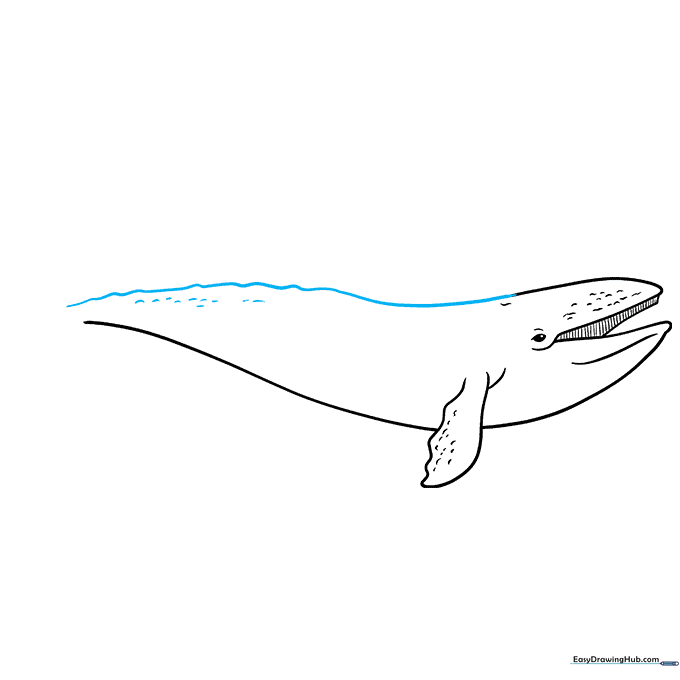
Continue the head line to form a wavy, lumpy back. This gives the whale its characteristic 'grey whale' silhouette. Teacher's Tip: Don't worry about making the line perfectly smooth; whales have bumpy skin!
Step 5: Sketching the Tail
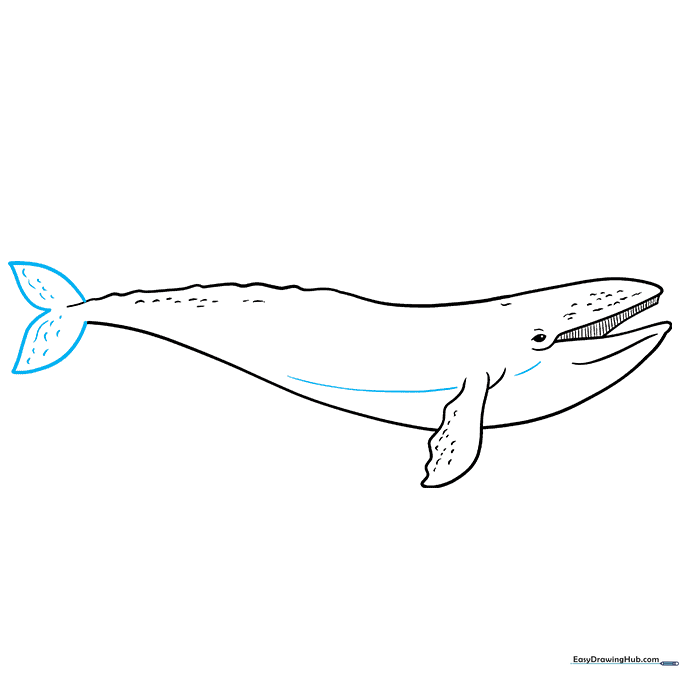
Draw the stomach line and finish the tail by connecting two curved points. Add small lines for texture. Teacher's Tip: Make the tail points sharp to create a nice contrast with the rounded body.
Step 6: Throat Texture
Add parallel curved lines along the throat area. Teacher's Tip: These lines represent the whale's baleen plates and throat grooves—keep them evenly spaced for a clean look.
Step 7: Belly Details
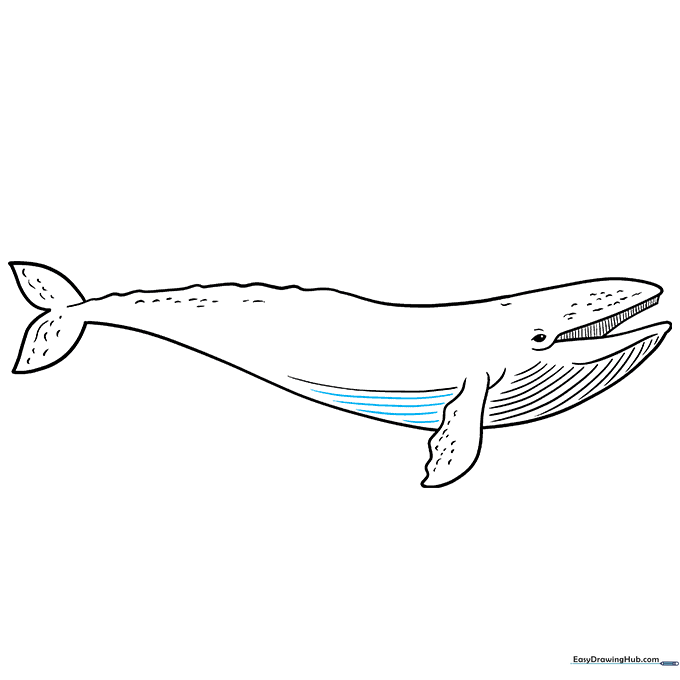
Continue the parallel lines along the belly to match the throat. Teacher's Tip: Follow the curve of the body so the lines look like they are wrapping around the whale.
Step 8: Adding Skin Patches
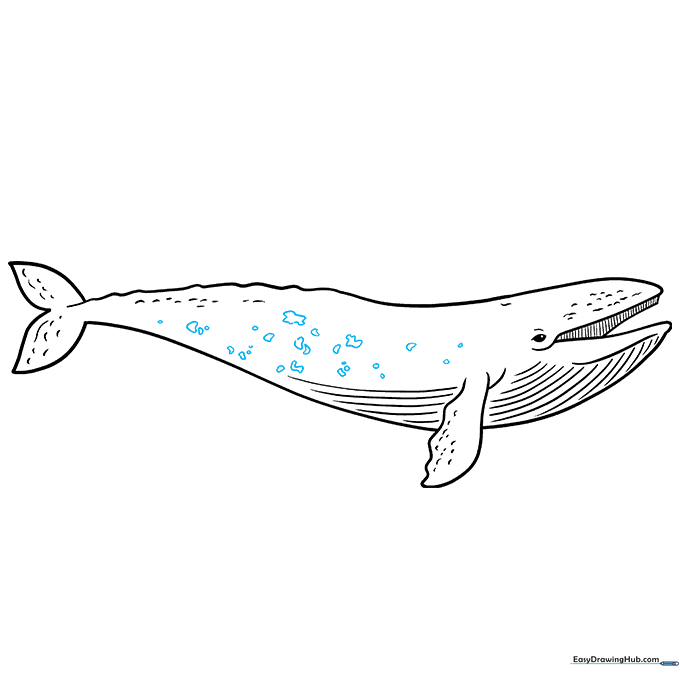
Draw small, irregular blotches across the skin. Teacher's Tip: Grey whales are known for their mottled appearance, so vary the size of your patches to make it look authentic.
Step 9: Finalizing Details
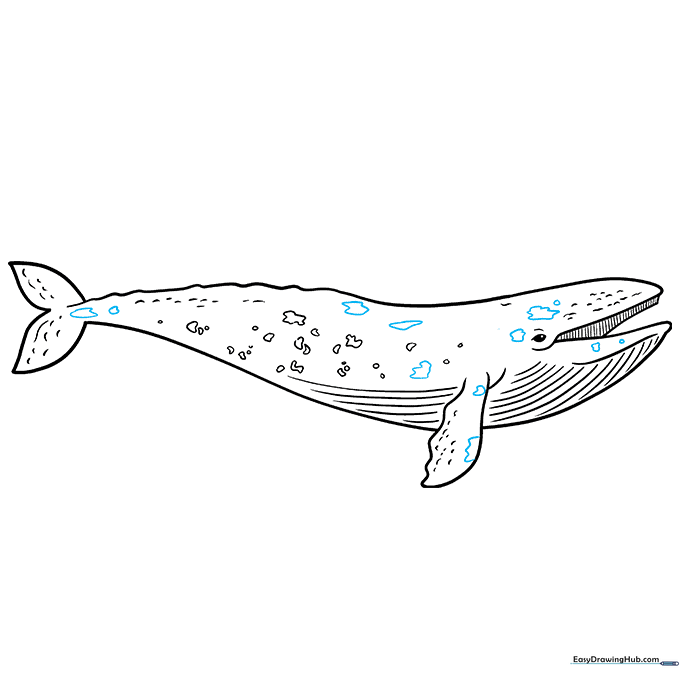
Add a few more patches on the head and tail to complete the look. Teacher's Tip: Step back and look at your drawing to ensure the patches are balanced across the whole body.
Step 10: Color Your Whale
Time to color! Use shades of grey, and add hints of brown or white for the patches. Teacher's Tip: Use a darker grey for the top of the whale and a lighter shade for the belly to create a sense of depth.
More Tutorials


