How to Draw a Giraffe Head: Easy 9-Step Guide for Kids
Ready to bring a safari friend to life? This tutorial is perfect for young artists ages 5+ to practice basic shapes and symmetry. All you need is a pencil, an eraser, and a piece of paper to start building your giraffe's expressive face.
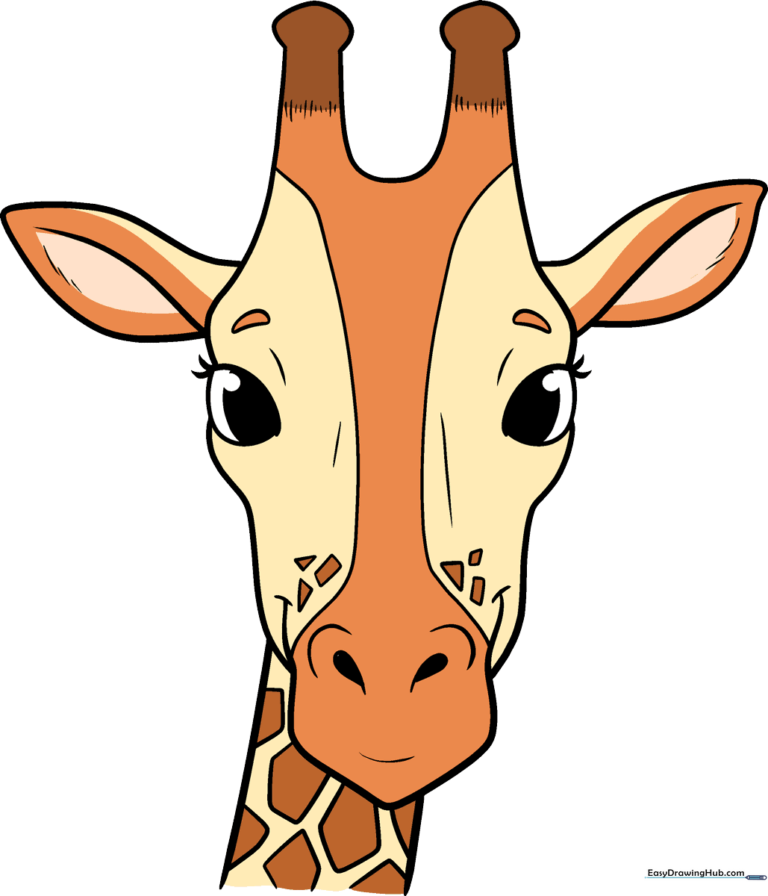
🎯 Final Result
Step-by-Step Instructions
Step 1: Sketching the Expressive Eyes
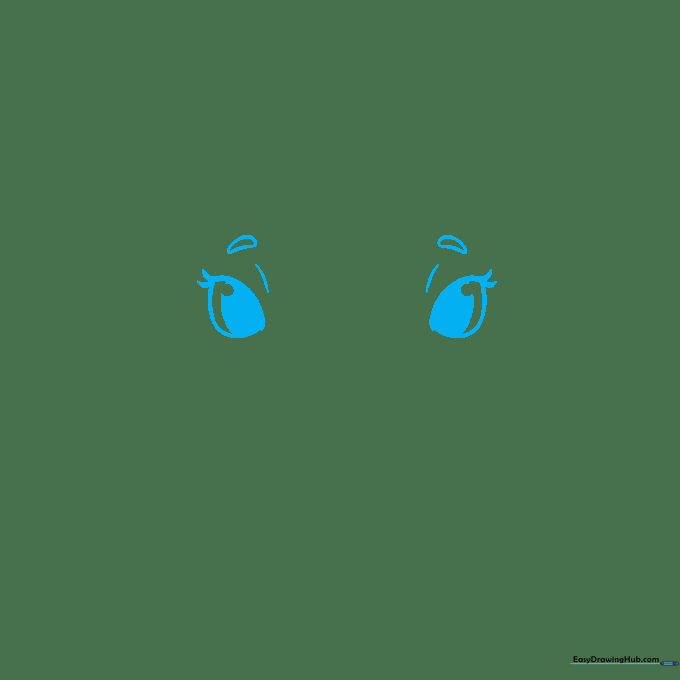
Draw two almond-shaped outlines for the eyes. Add a curved line inside each for the pupil, then a small circle for the highlight. Teacher's Tip: Keep your pencil pressure light so you can easily adjust the symmetry before committing to darker lines.
Step 2: Defining the Face Shape

Use long, sweeping curved lines extending downward from the eyes to create the cheeks. Tip: Try to make both sides mirror each other to give your giraffe a balanced, friendly look.
Step 3: Forming the Snout
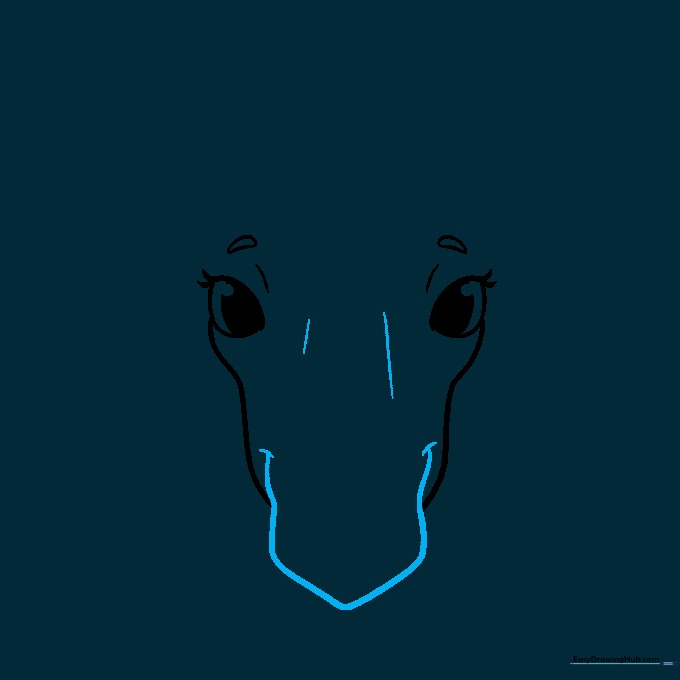
Draw a large, soft-edged curve across the bottom of the face to form the snout. Tip: Let the line overlap the cheeks slightly to make the nose look like it's popping forward in 3D.
Step 4: Adding Nostrils and Neck
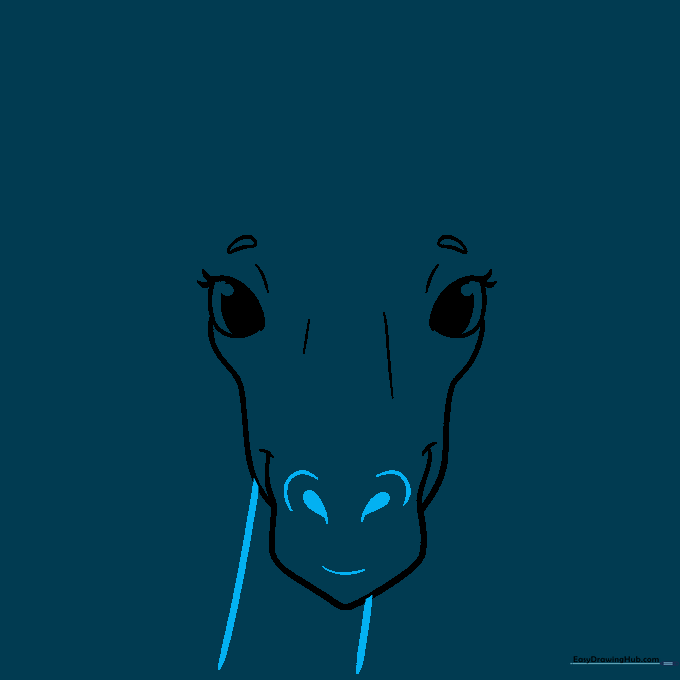
Add two teardrop shapes for nostrils and a curved line for the mouth. Then, draw two parallel lines downward to start the neck. Tip: Keep the neck lines wide to show the giraffe's strength.
Step 5: Sketching the Head Crown
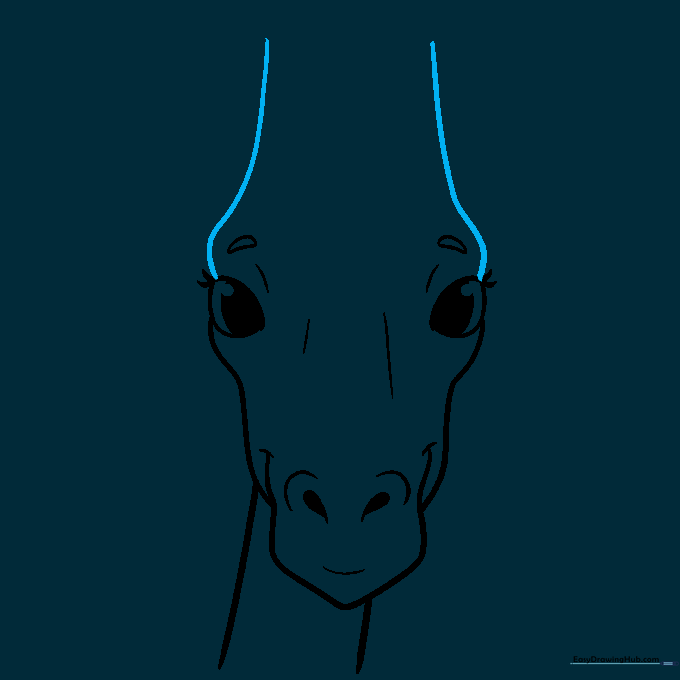
Extend curved lines upward from the eyes to form the top of the head and the base of the ossicones (horns). Tip: Think of these as two gentle arches meeting at the top.
Step 6: Adding the Horns
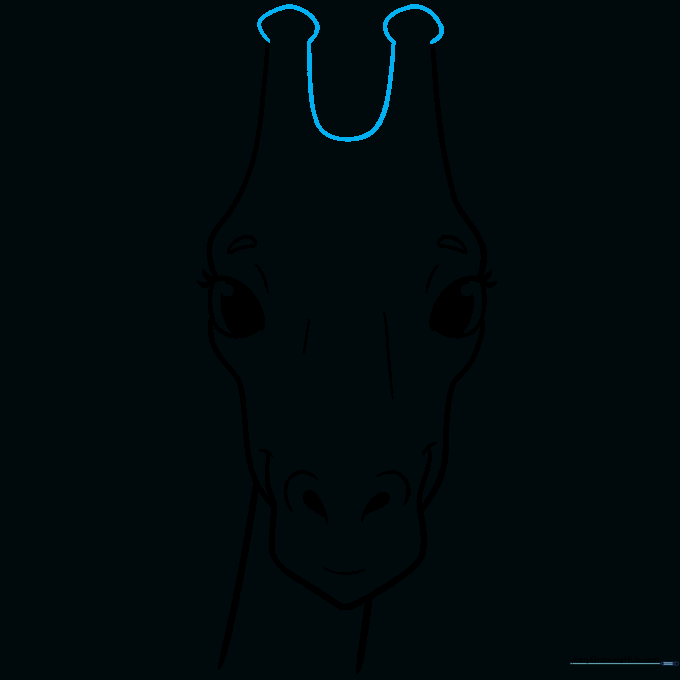
Draw a small circle at the top of each horn and connect them with a soft 'U' shape. Tip: These horns are called ossicones—they are a signature feature of every giraffe!
Step 7: Drawing the Ears
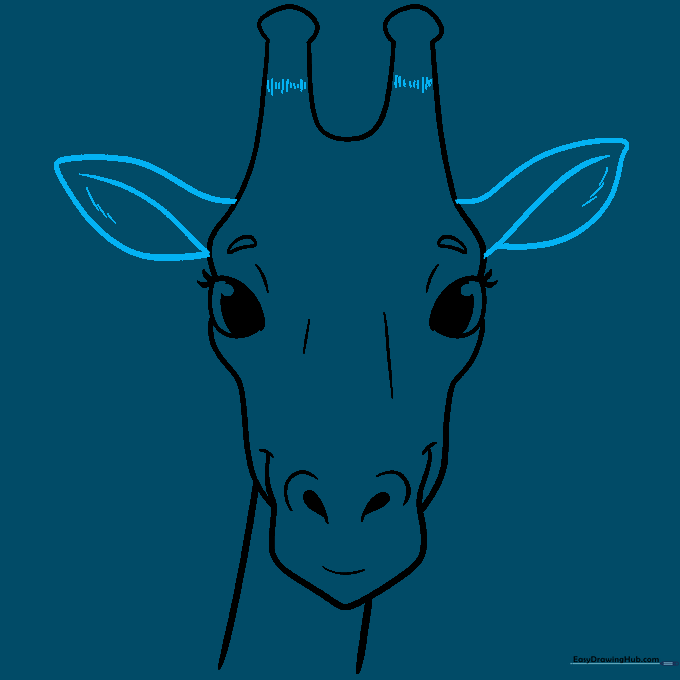
Extend two leaf-shaped lines from the sides of the head. Add a curved line inside each for depth. Tip: Use short, quick pencil strokes to add a bit of 'furry' texture to the edges.
Step 8: Adding Fur Patterns
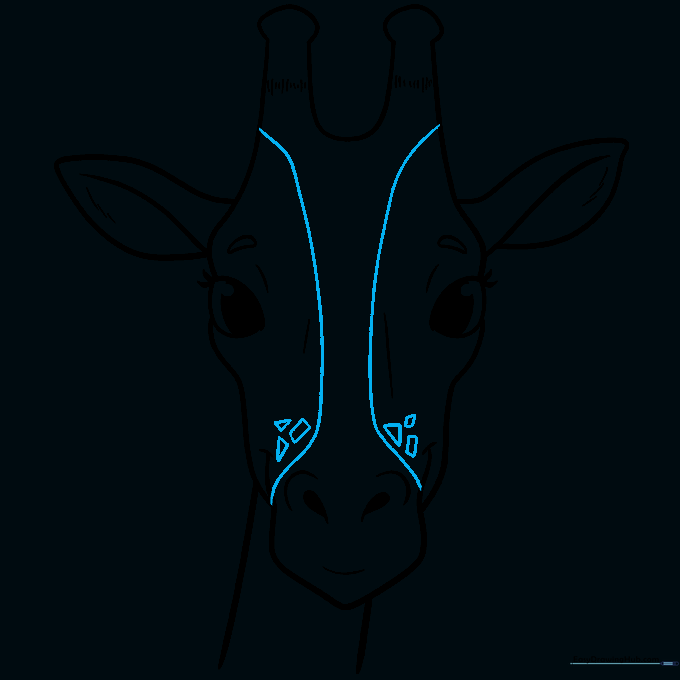
Draw irregular triangles and rectangles across the face to represent the giraffe's unique spots. Tip: Don't make them perfect! Giraffe spots are naturally messy and organic.
Step 9: Finalizing the Neck
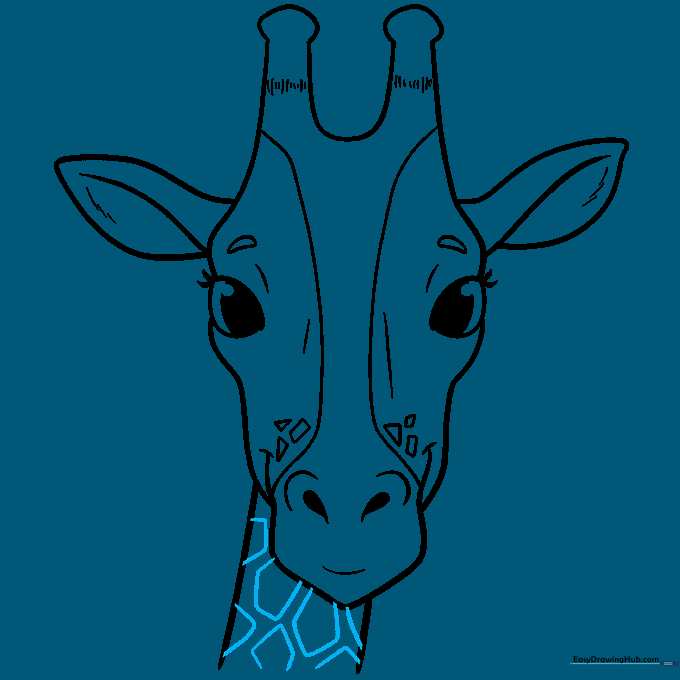
Complete your drawing by adding more spot patterns down the neck. Tip: Vary the size of the spots to make your drawing look more realistic and dynamic.
Step 10: Bring Your Giraffe to Life with Color
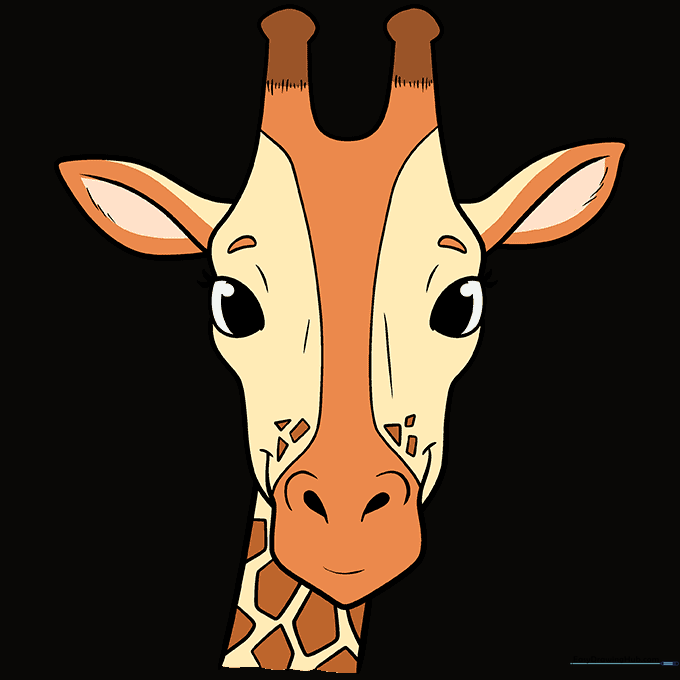
Time to color! Use warm yellows, tans, and browns. Tip: Use a darker brown for the spots and a lighter cream for the background to make the pattern pop.
More Tutorials


