How to Draw a Gila Monster: Easy 9-Step Guide for Kids
Ready to bring a desert reptile to life? This tutorial is perfect for young artists ages 6+ who want to practice drawing textures and organic shapes. Grab a pencil, an eraser, and some paper to start building your own Gila monster masterpiece.
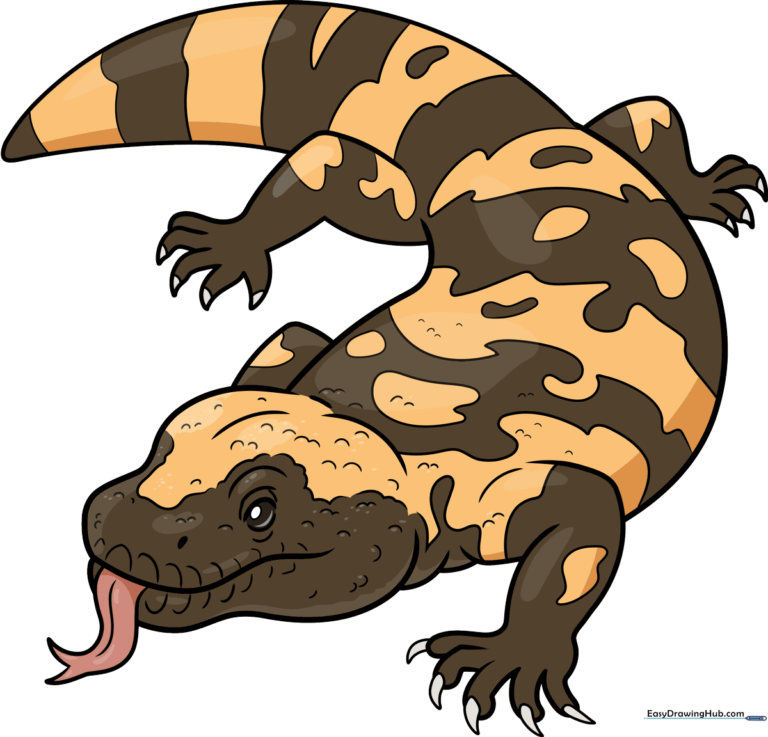
🎯 Final Result
Step-by-Step Instructions
Step 1: Sketching the Head
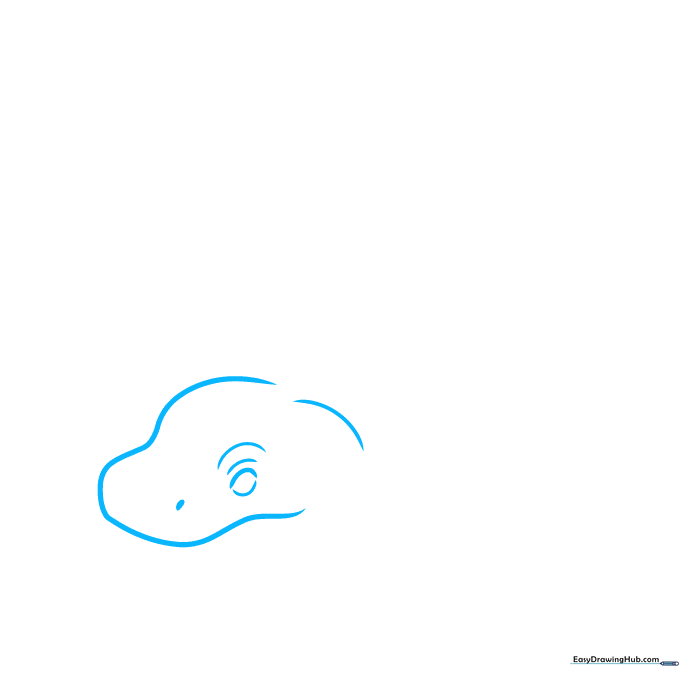
Draw a long, slightly curved line to form the top of the head, then add a shorter curve for the snout. Sketch a small oval for the eye and a tiny dot for the nostril. Tip: Keep the eye shape simple; it’s the anchor for your character's expression.
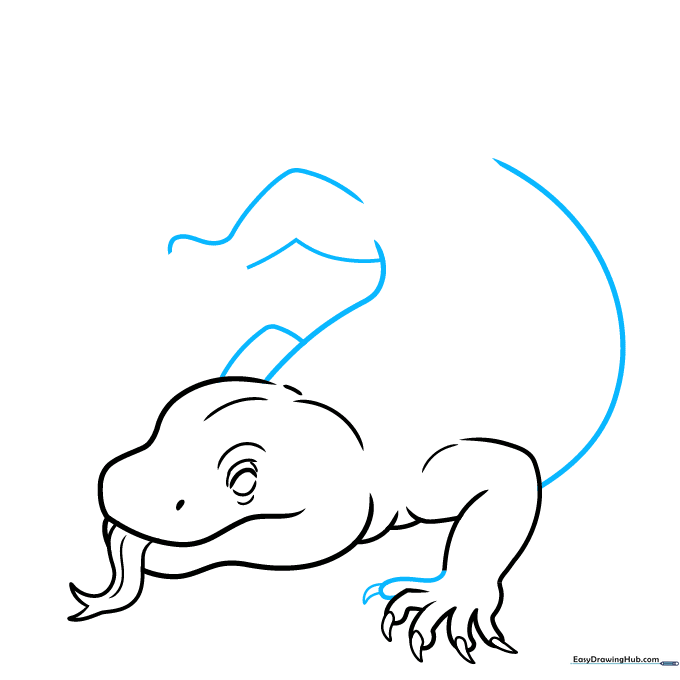
Step 2: The Tongue and Jaw
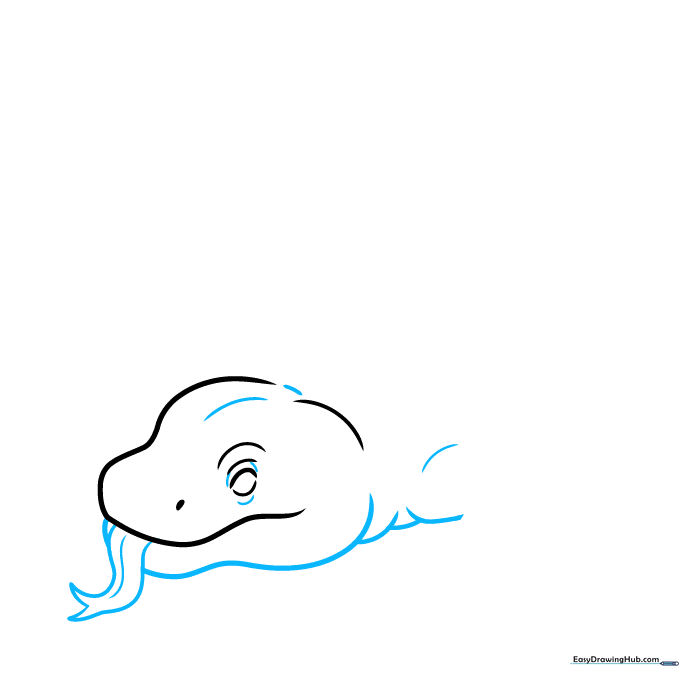
Extend two parallel lines from the snout and connect them with a 'V' to create a forked tongue. Sketch the lower jaw and neck using smooth, overlapping curves. Tip: Use a light touch here to ensure the jaw looks connected to the head naturally.
Step 3: Front Leg and Claws
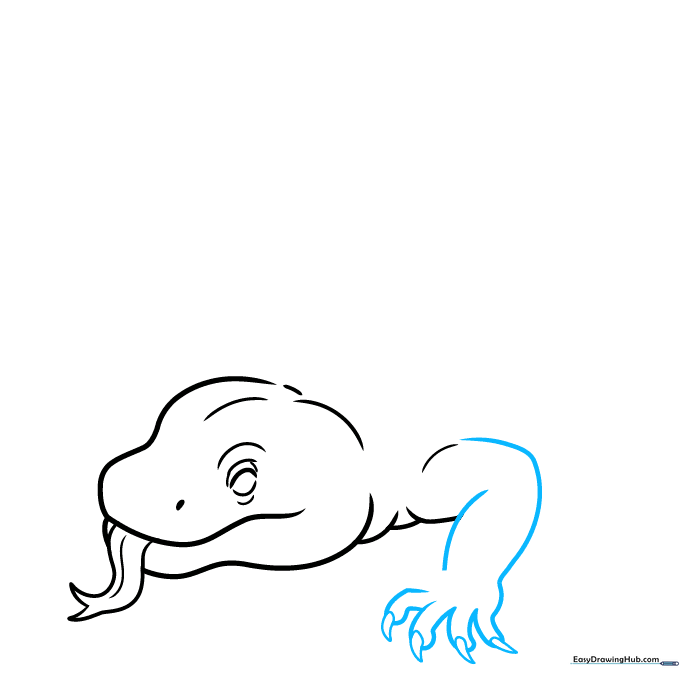
Draw the front leg using two curved lines that taper downward. Add small teardrop shapes at the end for the claws. Tip: Teardrop shapes are the easiest way to make claws look sharp and realistic for beginners.
Step 4: Body and Remaining Legs
Extend long, sweeping curves from the head and leg to form the back and belly. Add two more legs using the same technique as the first. Tip: Keep the body long and low to the ground to capture the Gila monster's heavy, lizard-like posture.
Step 5: Refining the Toes
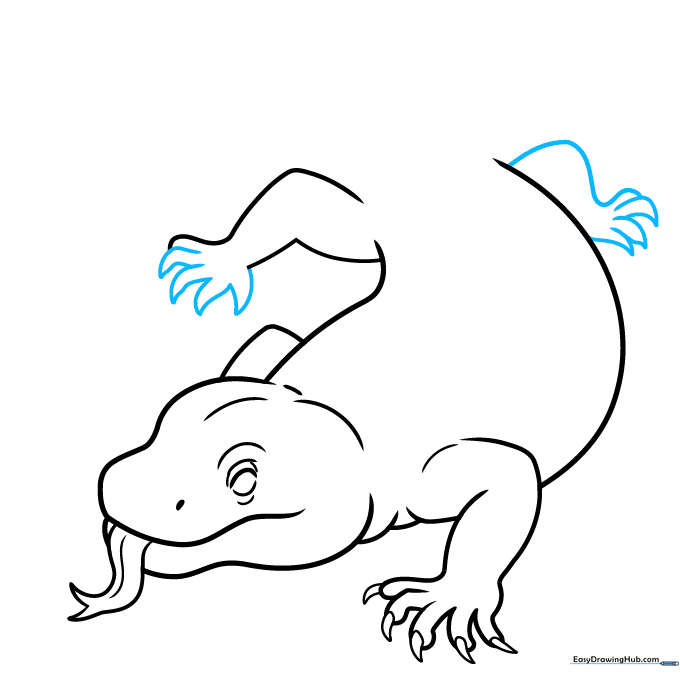
Add detail to the rear feet by drawing individual toes with pointed tips. Tip: Vary the length of the toes slightly to make the feet look more natural and less like perfect circles.
Step 6: The Tail and Patterning
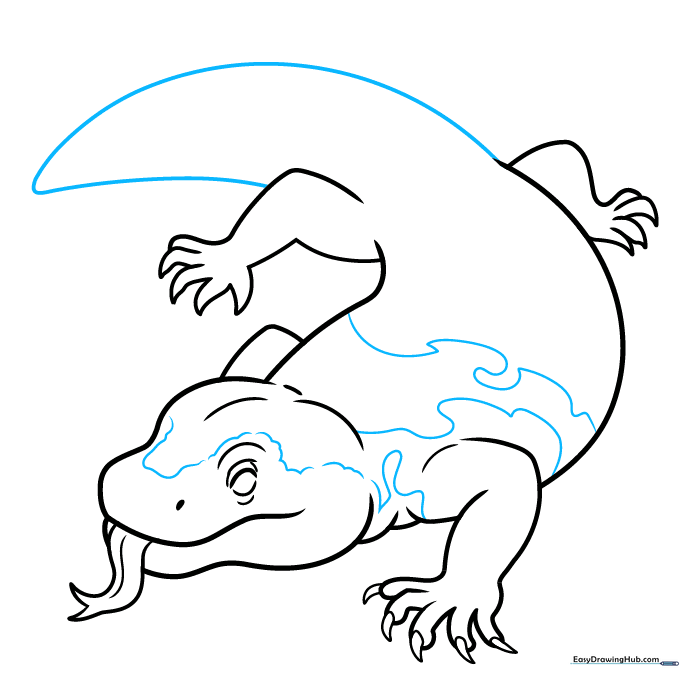
Draw a thick, tapered tail by looping a line back from the body. Start adding the signature mottled pattern using swirling, irregular shapes. Tip: Don't make the spots too perfect; Gila monsters have messy, beautiful patterns in nature.
Step 7: Adding Stripes
Add wavy lines across the body to create the Gila monster's characteristic fat stripes. Tip: Think of these as bands that wrap around the body, not just flat lines on top.
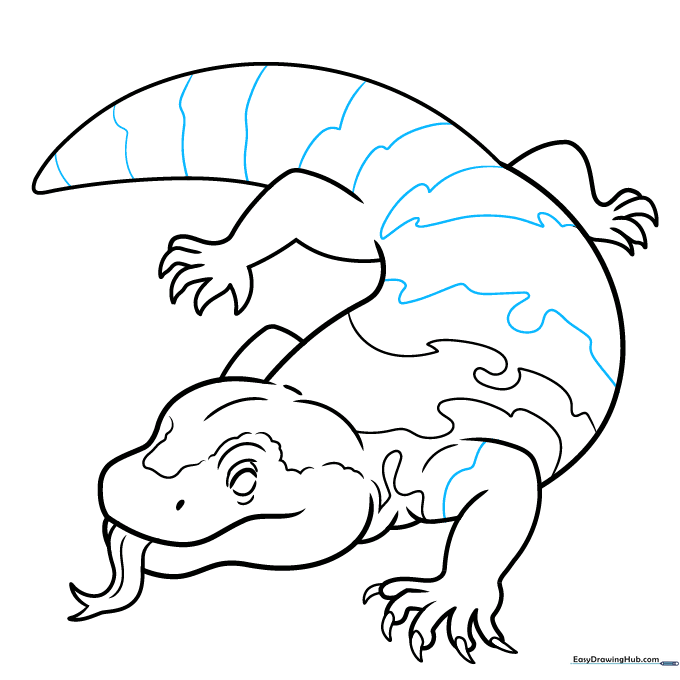
Step 8: Adding Texture Details
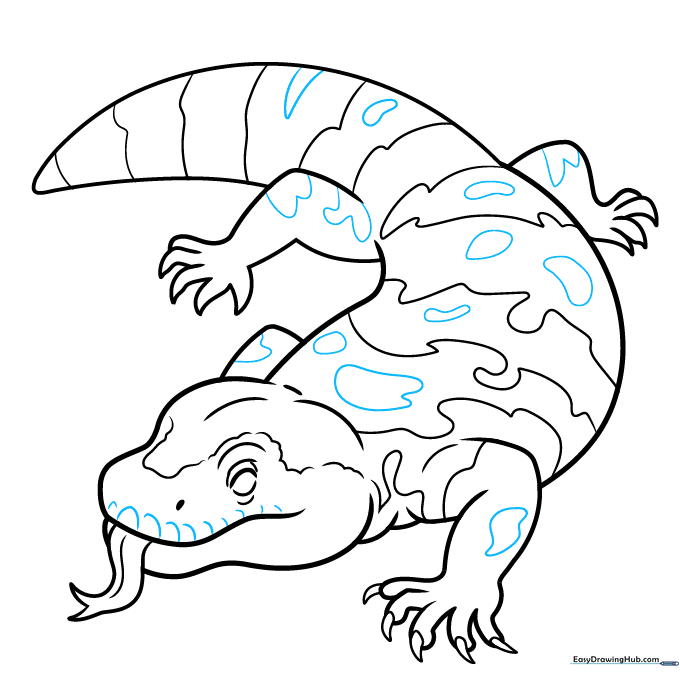
Fill in the spaces between stripes with irregular, rounded shapes. Add small curves to the upper lip to show texture. Tip: These small shapes represent the bumpy, beaded scales of the lizard.
Step 9: Final Scale Texture
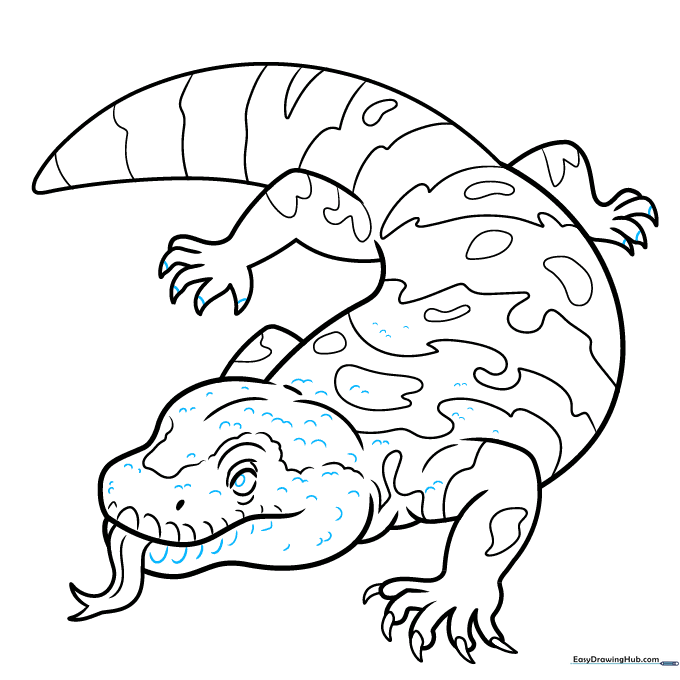
Finish the details by adding 'U' shaped lines along the body to mimic scales. Add a few more curves to the bottom lip. Tip: Focus on the edges of the body to make the lizard look three-dimensional.
Step 10: Bring it to Life with Color
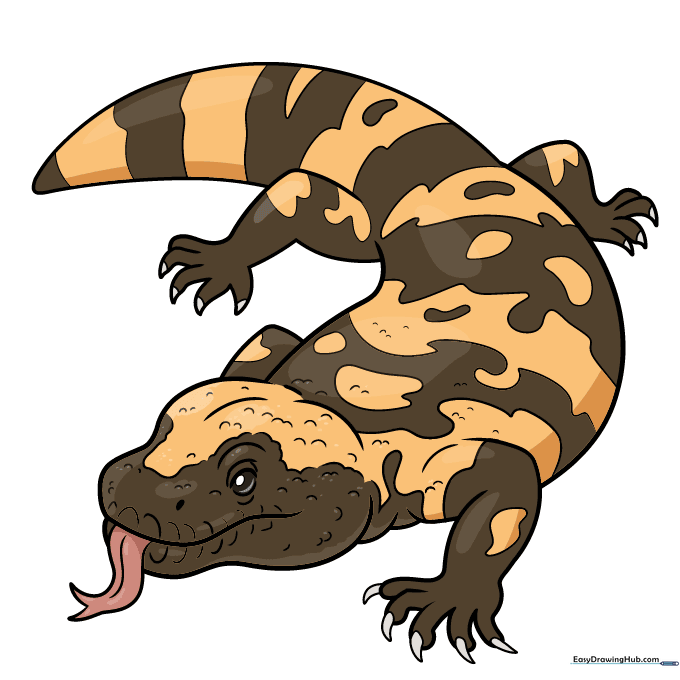
Time to color! Use black for the base and add yellow, orange, or pink blotches. Gila monsters are famous for their bold, warning colors. Tip: Use a light yellow base and layer orange on top to get that perfect desert-reptile glow.
More Tutorials


