How to Draw a Garden: Easy 9-Step Guide for Kids
Bring a sunny spring day to life on paper! This garden drawing tutorial is perfect for ages 5 and up, requiring only a pencil, paper, and your favorite markers or crayons. You will learn how to layer simple shapes to create a lush, imaginative landscape filled with flowers and a friendly butterfly.
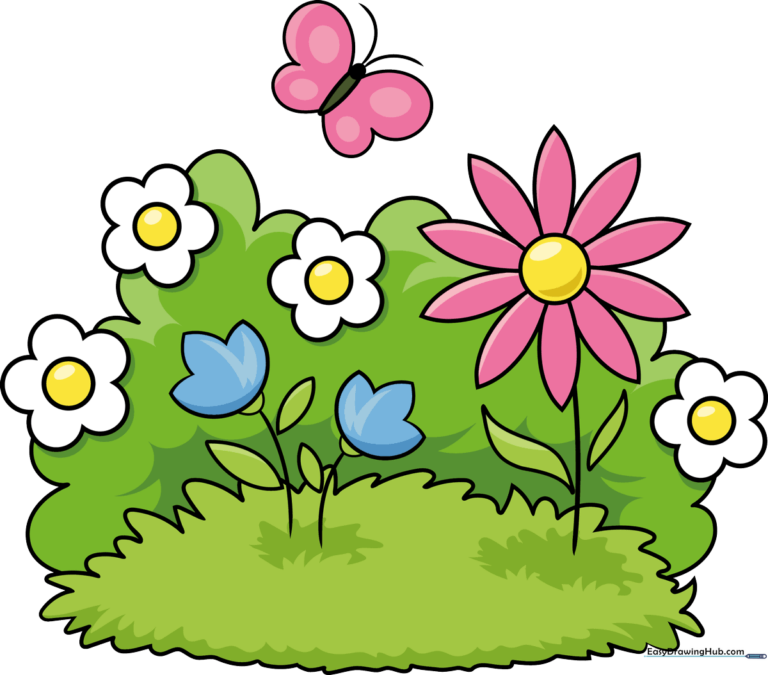
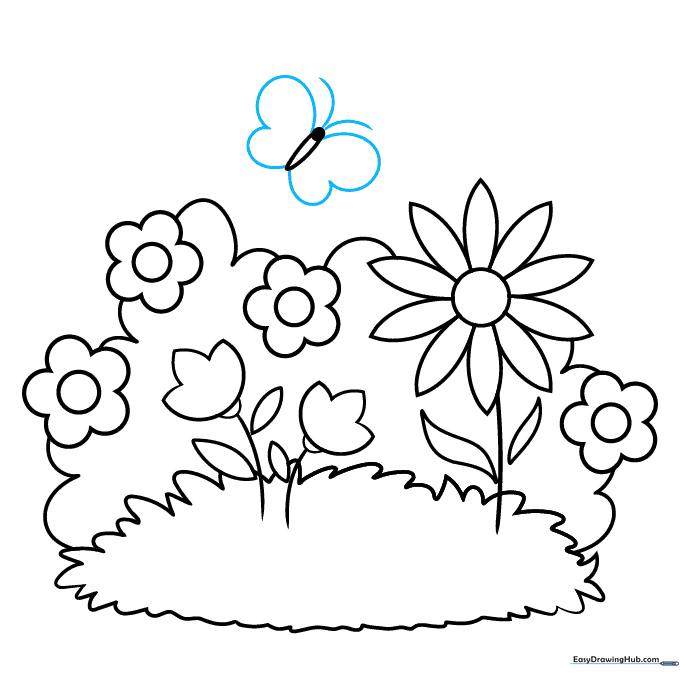
🎯 Final Result
Step-by-Step Instructions
Step 1: Sketching the Grassy Base
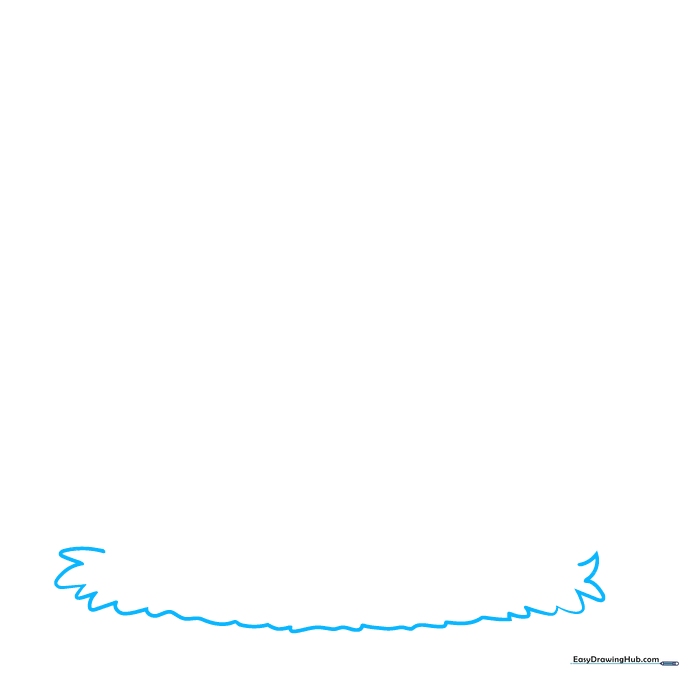
Start by drawing a patch of grass at the bottom of your page. Use a series of connected “U” shapes and gentle waves. Teacher's Tip: Keep your pencil pressure light so you can easily adjust the shape of your garden bed later.
Step 2: Defining the Garden Bed
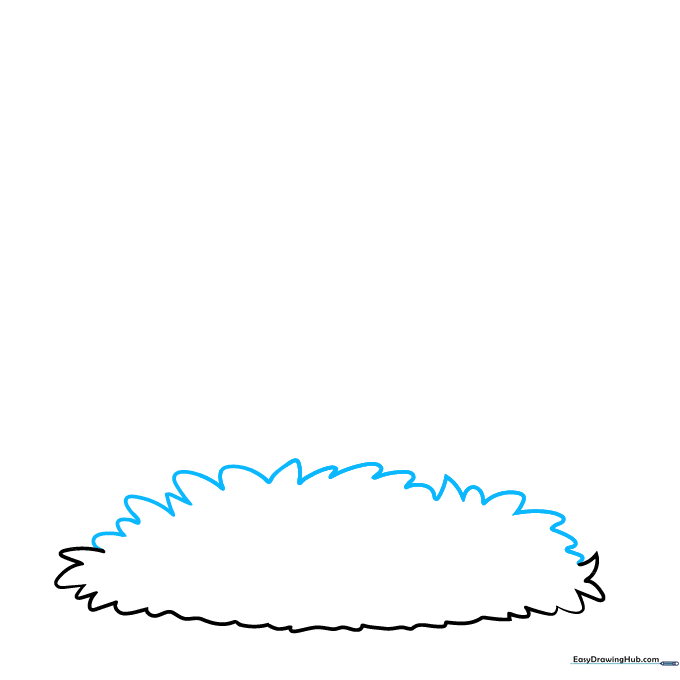
Continue the grassy knoll by adding more connected “U” shapes to enclose a shaggy, oval-like patch. Teacher's Tip: Vary the height of your 'U' shapes to make the grass look natural and wild rather than perfectly uniform.
Step 3: Planting Your First Tulip
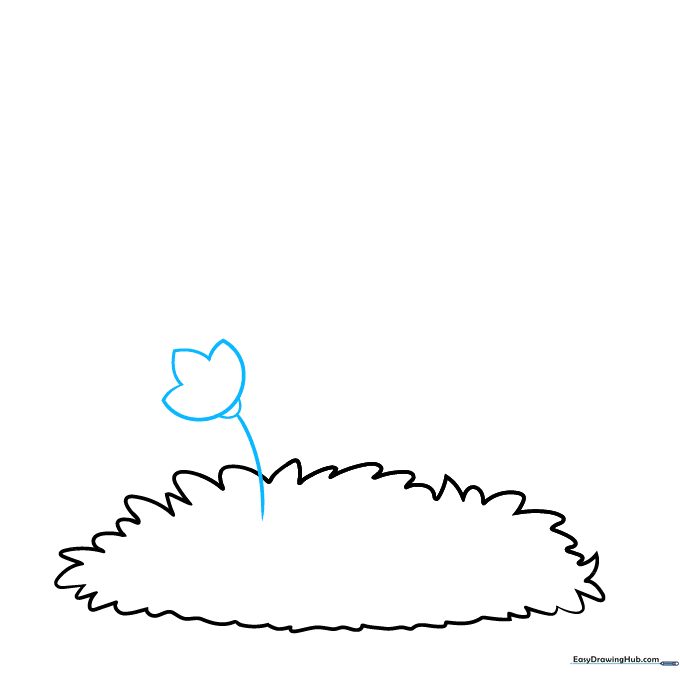
Draw a curved line upward from the grass for the stem. Add a large 'C' shape for the flower head, then connect it with a smaller 'C' and two 'V' shapes for the petals. Teacher's Tip: Tulips have a distinct cup shape; don't worry if your 'C' isn't perfect—nature is full of unique shapes!
Step 4: Adding Leaves and a Second Tulip
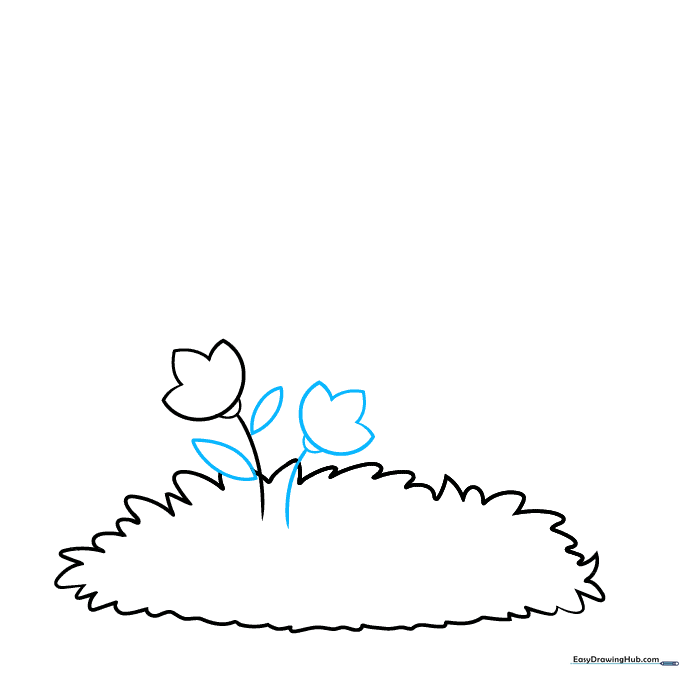
Add two pointed leaves to your first tulip stem. Then, repeat the process from Step 3 to draw a second tulip nearby. Teacher's Tip: Try drawing the second tulip at a slightly different height to create visual interest and depth in your garden.
Step 5: Starting the Daisy
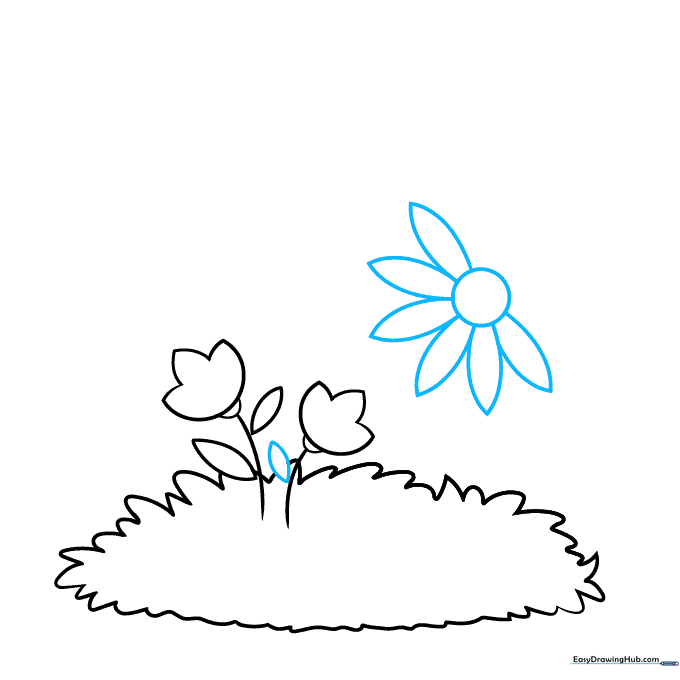
Draw a small leaf on your second tulip. Next, draw a circle for the center of a daisy and extend pairs of curved lines outward to form the petals. Teacher's Tip: Keep the daisy center small so you have plenty of room for long, graceful petals.
Step 6: Completing the Daisy Stem
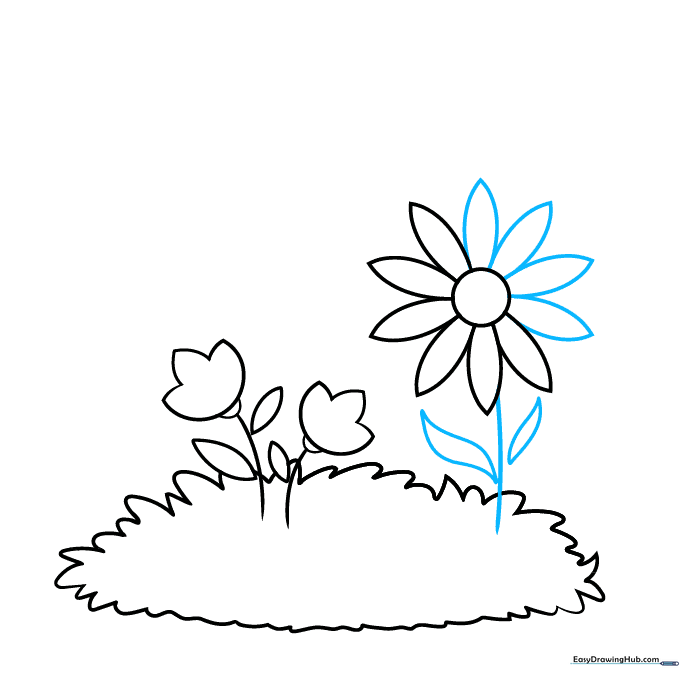
Finish the daisy petals and draw a curved stem connecting it to the grass. Add two pointed leaves along the stem. Teacher's Tip: Use a smooth, continuous motion for the stem to make it look like it's swaying in the breeze.
Step 7: Adding More Flowers
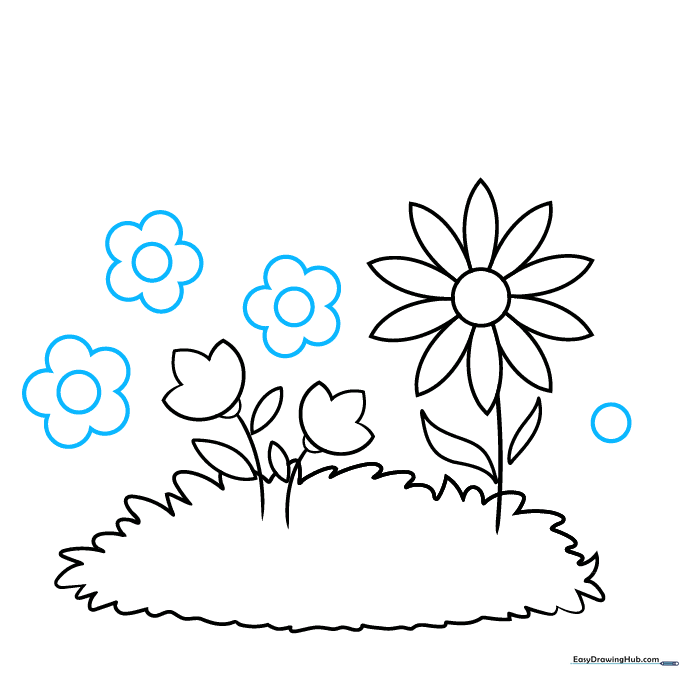
Fill your garden with more daisies! Draw small circles for centers and use 'U' shapes to create petals around them. Teacher's Tip: Grouping flowers of different sizes makes your garden look lush and professional.
Step 8: Adding Background Shrubbery and Butterfly

Add some rounded shrubbery behind your flowers using connected curved lines. Above the garden, draw a small circle and two curved lines for a butterfly body. Teacher's Tip: The butterfly adds a sense of movement—imagine where it might be flying!
Step 9: Final Touches
Draw the butterfly's antennae and heart-shaped wings to finish your scene. Teacher's Tip: Use a fine-liner or dark marker to trace your final lines before erasing your initial pencil sketches for a clean, polished look.
Step 10: Color Your Garden

Bring your garden to life with color! Use bright yellows for the daisy centers, vibrant reds or pinks for tulips, and your favorite colors for the butterfly wings. Teacher's Tip: Try using different shades of green for the grass and leaves to create a realistic, layered effect.
More Tutorials


